How to Refill Hot Water Heater Safely: Step-by-Step Guide for Homeowners
To safely refill your hot water heater, start by turning off the power or gas supply, then close all hot water taps. Don protective gear for safety. Ensure the drain valve is closed and the cold-water inlet is accessible. Open the cold water inlet slowly while keeping a hot faucet open to allow air to escape. Monitor for any leaks, sputtering, or pressure issues, and close the faucets once the water flow stabilizes. Only restore power or gas after the tank is completely full and vented. For thorough guidance, follow detailed procedures, checks, and troubleshooting tips.
Why and When You Need to Refill a Hot Water Heater
Common causes of low or empty hot water heater tanks include leaks, recent maintenance or repairs, and prolonged power or water outages.
Operating a heater without sufficient water can damage the tank, burn out heating elements or burners, and create safety hazards such as pressure buildup.
Visible signs that a unit needs refilling include sputtering taps, unusually hot or cold water, and audible banging or hissing from the tank.
Common causes of low or empty hot water heater tanks
A variety of mechanical issues and household events can leave a hot water heater partially drained or completely empty, creating a need for a controlled refill.
Common causes include leaks from fittings or tanks, pressure relief valve discharge, drain or purge for maintenance, cold-weather ruptures, and accidental shutoff during repairs.
Homeowners researching how to refill hot water heater should inspect valves, plumbing, and recent service activity.
Risks of operating a heater without enough water
Leaks, maintenance drains, or a drained tank after repairs can leave the burner or heating element exposed to air, creating conditions that damage the heater and pose safety hazards if the unit is energized.
Operating with insufficient water can cause overheating, warped tanks, cracked elements, failed thermostats, pressure buildup, and fire risk.
Premature component failure and costly repairs commonly result.
Signs your hot water heater needs refilling
How can one tell when a hot water heater needs refilling? Indicators include sputtering or uneven water flow, fluctuating or scalding temperatures, unusual noises (popping or banging), visible leaks near the tank base, and a tripped pressure relief valve.
Low water levels may cause frequent pilot outages or burner cycling. Regular inspections and monitoring prevent damage and maintain safe, efficient operation.
Safety Precautions Before Refilling
Before refilling, the preparer should assemble required tools and materials and don appropriate personal protective equipment and clothing.
Power and fuel sources must be safely shut off and the area ventilated while conducting gas leak checks.
If any electrical, gas, or structural issues are suspected, a qualified professional should be contacted rather than proceeding as a DIY project.
Tools and materials to have on hand
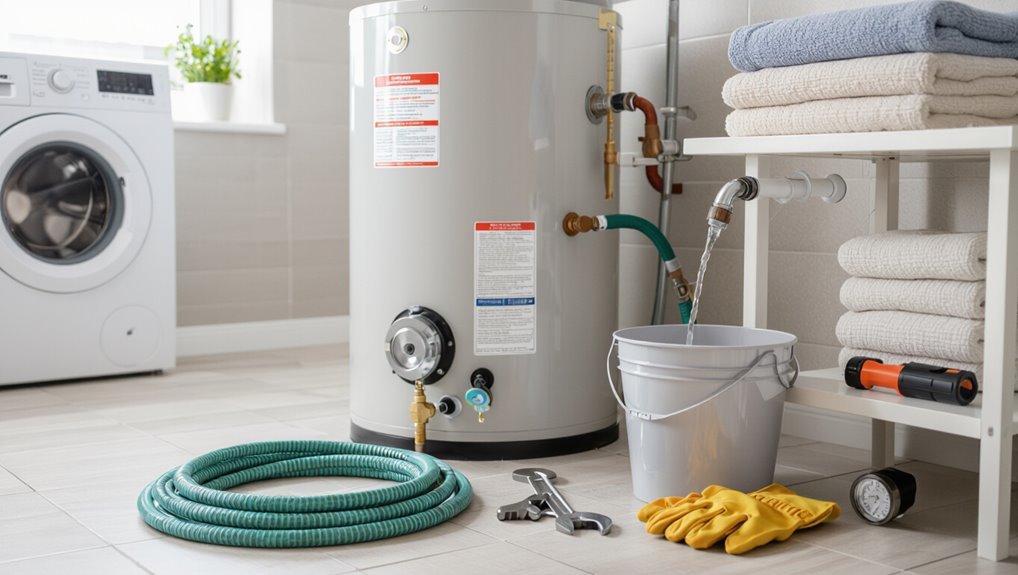
A small set of reliable tools and materials reduces risk and speeds the refill process: adjustable wrench, garden hose, bucket, Teflon tape, a screwdriver, and heat-resistant gloves, plus a flashlight and safety goggles.
The homeowner should verify valve compatibility, hose condition, and accessible drain points before starting.
- Replacement drain washer and valve adapter
- Pressure-rated hose with fittings
- Small water pump or siphon for tight drains
Personal protective equipment and safe clothing
Although the task may seem routine, wearing appropriate personal protective equipment and safe clothing is essential when refilling a hot water heater to prevent burns, chemical exposure, and slips.
Use heat-resistant gloves, safety goggles, long sleeves, and closed-toe, non-slip footwear. Avoid loose clothing or jewelry that could catch.
Guarantee garments are dry and chemical-resistant if using descaling agents or cleaners.
Shutting off power and fuel sources (electric, gas)
With protective gear in place, attention turns to isolating energy sources to eliminate the risk of electrocution, ignition, or scalding during refilling.
For electric heaters, switch off the dedicated breaker at the panel and confirm power is dead with a tester.
For gas units, turn the gas valve to OFF at the appliance or supply.
Tag switches and notify household members before proceeding.
Ventilation and gas leak checks
Proper ventilation and a thorough gas leak check are essential before refilling to prevent accumulation of combustible fumes and assure breathable air in the work area.
Open windows and vents, run exhaust fans, and ensure airflow.
Inspect fittings, valves, and flexible connectors for odor, hissing, or corrosion.
Use a gas detector or soapy water to spot leaks.
Evacuate and ventilate if a leak is found.
When to call a professional instead of DIY
Many situations call for a professional rather than a DIY approach when preparing to refill a hot water heater.
If corrosion, significant leaks, gas odor, electrical faults, damaged pressure relief valves, or unexplained pressure swings are present, a licensed plumber or HVAC technician should be contacted.
Complex installations, older units, or lack of proper tools and experience also justify professional service to guarantee safety and code compliance.
Preparing the Water Supply and Heater
Before refilling, the main water shutoff and the water heater’s inlet and outlet valves should be identified and labeled.
The pressure relief and drain valves require inspection for proper operation, and a visual check for leaks or corrosion around fittings and the tank should be performed.
Isolation valves must be closed fully and verified to prevent backflow or accidental pressurization during the refill.
Locating main water shutoff and heater inlet/outlet valves
Locating the main water shutoff and the heater’s inlet and outlet valves is the first practical step in preparing the water supply for a refill.
The homeowner should identify the house shutoff (usually near the meter, basement, or crawlspace) and trace cold-water feed to the heater.
Note valve types—gate, ball, or stop—confirm accessibility, and label positions before proceeding.
Inspecting pressure relief valve and drain valve
A careful inspection of the temperature and pressure (T&P) relief valve and the tank drain valve is essential to secure safe, controlled refilling.
Verify the T&P lever moves freely, confirm absence of obstructions at the discharge tube, and ascertain the valve seals properly.
Check the drain valve for tightness, smooth operation, and threaded connections; replace any components that leak or fail to function.
Checking for visible leaks and corrosion
Inspect the tank and its fittings for visible leaks and corrosion, focusing on seams, welded joints, pipe connections, the T&P discharge line, and the area around the drain valve; any dampness, rust staining, white mineral crust, or bubbling paint indicates deterioration that must be addressed before refilling.
Note pinhole leaks, crusted deposits, or flaking metal. Photograph findings, mark locations, and arrange repairs as needed.
How to close isolation valves properly
Shut the cold-water isolation valve feeding the heater and the hot-water shutoff (if present) to isolate the tank from the home’s plumbing before any work begins.
Confirm valves are fully closed by turning handle perpendicular to pipe or clockwise until resistance.
Drain a small tap downstream to verify isolation.
Tag or mark valves to prevent accidental opening.
Recheck before proceeding with draining or maintenance.
Step-by-Step Refill Procedure
The refill procedure begins by ensuring the heater’s power or fuel supply is turned off to prevent heating while the tank is empty.
Next, all hot water taps should be closed, the cold-water supply to the heater opened, and a nearby hot faucet cracked to vent trapped air.
The cold inlet is then opened slowly while monitoring flow and listening for air escaping until a steady stream of water indicates the tank is full.
Step 1 Confirm power/fuel is off
Begin by ensuring all electrical or fuel supplies to the water heater are deactivated before any water is added.
Verify the breaker is off for electric units or the gas valve is fully closed for gas models. Confirm pilot lights are extinguished and switches remain off.
Use a noncontact voltage tester or consult the appliance label if uncertain. Record the shutdown time before proceeding.
Step 2 Close hot water taps and open cold-water supply to heater
Close all hot-water taps throughout the building to prevent air pockets and backflow; this guarantees incoming cold water will fill the tank rather than circulate through fixtures.
Then locate and open the cold-water inlet valve to the heater slowly, monitoring pressure and supply lines for leaks.
Watch gauge readings until the tank reaches normal fill level, then secure the inlet valve in the open position.
Step 3 Open a hot water faucet to vent air
Open a nearby hot-water faucet to allow trapped air to escape as the tank fills.
The homeowner should choose a faucet on the same level as the heater, open it fully, and monitor sputtering or steady flow.
Persistent gurgling indicates remaining air; keep the faucet open until water runs smoothly.
Close only after confirming continuous, air-free flow.
Step 4 Slowly open the cold-water inlet to begin filling
Turn the cold-water inlet valve slowly to allow water to enter the tank at a controlled rate, preventing sudden pressure surges and disturbing sediment.
Observe the inlet for leaks and guarantee connections remain tight.
Reopen the valve incrementally until steady flow is achieved, avoiding fully rapid opening.
Maintain visual checks on piping and valves for several minutes to confirm stable filling.
Step 5 Monitor water flow and listen for air escaping
At least one person should remain near the heater while water enters to monitor flow and listen for air escaping. As the tank fills, steady streams at faucets and a consistent hiss from purge points indicate trapped air evacuating and the system pressurizing normally.
They should watch valves and connections for leaks, confirm pressure gauge behavior, and note any irregular noises or sputtering that could signal blockages or failing components.
Step 6 Close fixtures and verify tank is full (no sputtering)
Once steady flow and the sound of escaping air have subsided, attention shifts to closing fixtures and confirming the tank is completely filled.
Close each open faucet or hose sequentially, beginning nearest the heater. Observe remaining outlets for sputtering; a steady, air-free stream indicates fullness.
Check the water supply valve at the heater remains fully open and inspect fittings for leaks before proceeding.
Step 7 Re-enable power or gas and relight pilot if needed
Restore the water heater’s energy source only after confirming the tank is full and all valves are secure.
For electric units, switch the breaker on at the panel.
For gas models, turn the gas control to “on” and follow manufacturer steps to relight the pilot or use the ignition button.
Observe for normal operation, pilot stability, and any gas odor; shut off and call a professional if issues arise.
Verifying Proper Operation After Refill
After refilling, the technician verifies that temperature and pressure readings fall within the manufacturer’s specified range and records the values.
They test the temperature-pressure relief (TPR) valve for proper operation, then inspect all fittings and the tank for leaks or unusual noises.
Finally, the technician notes the recommended wait time before using hot water and advises the owner when normal use can resume.
Checking temperature and pressure readings
Begin by observing the temperature and pressure gauges to confirm the tank is within the manufacturer’s recommended range: temperature typically between 120–140°F (49–60°C) and pressure near the home’s normal water pressure (usually 40–60 psi for residential systems).
Note steady readings after refill, watching for gradual rises or drops.
Record values, compare to specifications, and schedule service if readings deviate or fluctuate unexpectedly.
Testing the temperature-pressure relief (TPR) valve
Inspect the temperature-pressure relief (TPR) valve to confirm it functions correctly following a refill.
With water supply on and tank pressurized, lift the valve lever briefly to allow discharge; expect a steady flow that stops when released.
Check for immediate reseating and no continuous leakage.
If the valve sticks, leaks, or fails to reseat, replace it before normal operation resumes.
Inspecting for leaks and unusual noises
Listen for hissing or clanking and scan all visible fittings, the tank base, valves, and nearby pipe joints for drips or moisture.
Note any wet spots, corrosion, or mineral deposits. Pay attention to intermittent noises indicating air pockets or loose components.
Tighten accessible connections, document persistent leaks, and shut off supply and call a professional if leaks continue or unusual sounds persist under normal pressure.
How long to wait before using hot water
After confirming there are no persistent leaks or abnormal noises, allow the tank to fully refill and the burner or element to reach operating temperature before drawing hot water.
Wait until the pilot or indicator shows normal operation and temperature gauge stabilizes. Typically this takes 30–60 minutes for a gas unit, 60–90 minutes for electric models, depending on capacity and recovery rate.
Troubleshooting Common Problems During Refill
Common issues that may arise during a refill include no water entering the tank, persistent air and sputtering, leaks that appear after refilling, and pressure-related problems affecting flow.
The causes and straightforward diagnostic steps for each scenario should be outlined so the reader can identify valve faults, trapped air, loose fittings, or supply pressure irregularities.
Recommended fixes range from checking isolation valves and aerating the line to tightening or replacing connections and adjusting supply pressure or using a pressure regulator.
No water entering the tank causes and fixes
Why is no water entering the tank when attempting a refill?
Common causes include closed supply valves, blocked inlet screens, frozen or kinked supply lines, and malfunctioning pressure-reducing or check valves.
Fixes: confirm city supply and open valves, clear debris from inlet filters, straighten thawed lines, replace defective valves, and inspect shutoff for corrosion.
Call a plumber if unresolved.
Continuous air and sputtering solutions
Once supply flow is confirmed, intermittent sputtering or continuous air in the refill indicates air entrainment or pressure issues rather than a simple blockage.
Inspect inlet valves and hose for loose connections, purge lines by opening nearby faucets, and partially close pressure-regulating valves to steady flow.
Replace damaged flexible connectors or faulty check valves.
If sputtering persists, consult a plumber to test system pressure and venting.
Leaks after refilling diagnostic steps
Any visible moisture after refilling warrants immediate attention because small drips can quickly become major leaks.
Inspect fittings, shutoff valve, pressure relief valve, and drain connection.
Tighten loose fittings, replace damaged washers, and verify valve seating.
If corrosion, wet insulation, or persistent seepage appears, isolate the unit and contact a qualified plumber to prevent water damage and unsafe pressure buildup.
Water pressure issues impacting refill
After addressing visible leaks, attention should turn to water pressure, since incorrect pressure can prevent proper refill or damage the tank.
Technicians should verify household supply pressure with a gauge, guarantee the shutoff valve is fully open, and inspect pressure-reducing valves or thermal expansion tanks.
High pressure necessitates reduction; low pressure requires supply troubleshooting.
Repeat checks during refill to confirm stable, safe pressure.
Maintenance Tips to Prevent Future Empty Tanks
A regular inspection schedule helps identify issues before they cause an empty tank.
Routine flushing to remove sediment, periodic replacement of worn valves and anode rods, and following winterization or vacation shutdown procedures each reduce failure risk.
Together these maintenance actions extend tank life and minimize the chance of running out of hot water.
Regular inspection schedule
When homeowners establish a consistent inspection schedule for their hot water heater, they markedly reduce the risk of unexpected empty tanks and costly failures.
Monthly visual checks, quarterly valve and pressure tests, and annual professional evaluations catch leaks, corrosion, and thermostat drift early. Clear records guide timely repairs and replacements.
- Monthly visual inspection checklist
- Quarterly functional tests
- Annual professional service and report
Flushing sediment and cleaning the tank
Flush the tank periodically to remove sediment that reduces capacity, lowers heating efficiency, and accelerates corrosion.
Drain a few gallons until runoff clears, or fully drain to flush with cold water. Use the drain valve and a hose directed to a safe area, reopening the cold inlet briefly to stir deposits.
Repeat until water runs clear, then refill and restore power or gas.
Replacing worn valves and anode rods
Inspecting and replacing worn valves and the sacrificial anode rod extends tank life and prevents sudden failures.
Homeowners should check temperature-pressure and drain valves for leaks or stiffness, replacing faulty parts promptly.
The anode rod should be examined biennially and replaced when heavily corroded to reduce internal rust.
Use manufacturer-approved replacements and tighten fittings to specified torques to guarantee reliable operation.
Winterization and vacation shutdown procedures
After servicing valves and anode rods, homeowners should prepare the water heater for extended inactivity to prevent freezing, corrosion, or unnoticed leaks.
Shut off power or gas, close cold-water supply, and drain to below the outlet to avoid freeze damage.
Inspect and insulate exposed pipes and the tank.
For vacations, set thermostat low and periodically check for moisture or pressure anomalies.
When to Replace the Hot Water Heater
Signs that replacement may be warranted include an aging unit, noticeable loss of efficiency, and recurrent problems requiring refills.
Evaluating repair costs against the price and expected lifespan of a new heater helps determine the most economical option.
When replacement is chosen, proper sizing and fuel type should be selected to match household demand and energy preferences.
Age, efficiency loss, and repeated refill problems
When a water heater reaches the end of its useful lifespan, performance declines and repairs become less effective; homeowners should consider replacement when the unit is more than 10–15 years old, shows measurable drops in efficiency, or requires frequent refilling to maintain pressure. Indicators include rising energy bills, uneven heating, corrosion, and persistent leaks signaling systemic failure.
| Age | Symptom | Action |
|---|---|---|
| 0–5 | Normal | Monitor |
| 6–10 | Minor issues | Service |
| 11–15 | Efficiency loss | Plan replacement |
| 15+ | Recurrent refills | Replace |
| Any | Rust/leaks | Inspect |
Cost vs. repair considerations
Evaluate repair costs against replacement price to determine the most economical course of action: if estimated repairs exceed roughly 50–60% of a new unit’s cost, or if ongoing fixes are likely, replacement typically yields better long-term value.
Consider warranty status, anticipated lifespan, and energy savings from newer models.
Factor in labor, parts availability, and potential for future failures when deciding to repair or replace.
Selecting a replacement: size and fuel type considerations
If repair is ruled out, selecting a replacement requires matching capacity and fuel type to household demand and infrastructure:
The homeowner assesses family size, peak usage, and recovery rate to choose tank or tankless capacity.
Fuel options—natural gas, electric, propane, or heat pump—are evaluated for availability, operating cost, and efficiency.
Local codes, venting, and installation complexity also guide the decision.
Quick Safety Checklist for Refilling a Hot Water Heater
Before opening the cold-water supply, confirm that power or gas to the heater is off, the drain valve is closed, and any pressure-relief valve has been properly positioned to prevent scalding or overpressure.
The homeowner should verify system isolation, inspect fittings for leaks, and guarantee proper ventilation before refilling.
- Check electrical/gas shutoff
- Inspect for corrosion or leaks
- Confirm pressure-relief routing
Conclusion
Refilling a hot water heater restores comfort and prevents damage when done cautiously. One adage, “haste makes waste,” underscores the need to follow safety checks, shutoffs, and slow-fill procedures to avoid leaks or pressure buildup. After completing the steps, the homeowner should confirm proper pressure, inspect for leaks, and test the heater’s operation. Regular maintenance and attention to warning signs will keep the system reliable and extend its service life.