How to Repair a Delta Tub Faucet: Step-by-Step Guide for Leaks, Drips, and No-Handle Issues
To repair a Delta tub faucet with leaks, drips, or handle issues, start by shutting off the water supply. Remove the handle and escutcheon to inspect the cartridge, O-rings, seats, and springs for damage or mineral buildup. Replace any worn parts, lubricate new components with silicone plumber’s grease, then reassemble carefully and test for leaks. For two-handle models, also check the bonnet nut and stem. Most simple repairs can be completed in under an hour; follow the detailed guide for step-by-step instructions and troubleshooting tips.
How to Fix a Leaking or Dripping Delta Tub Faucet Quickly
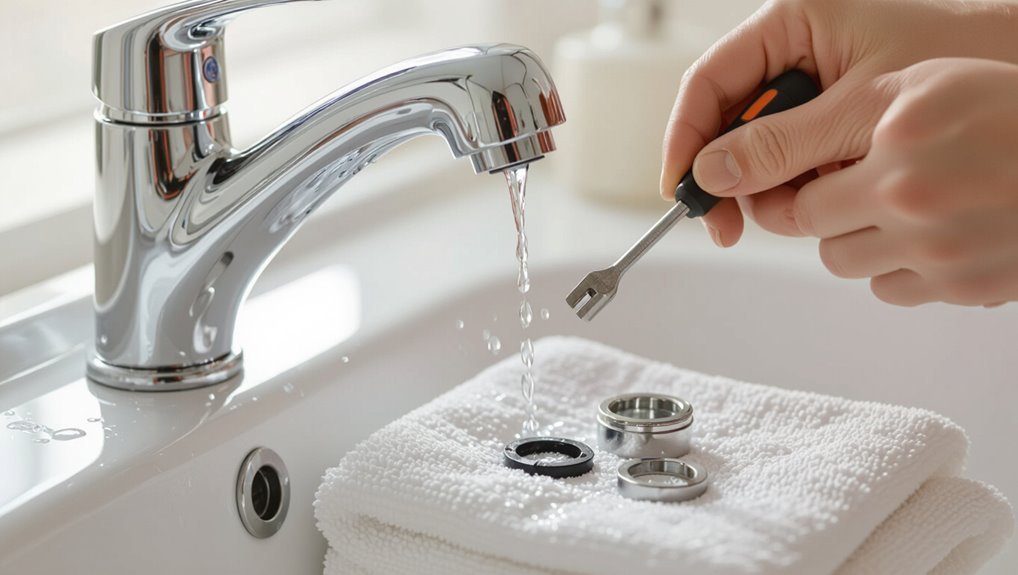
A leaking or dripping Delta tub faucet often presents as constant drips, reduced water pressure, or visible mineral buildup around the spout and handles.
The homeowner can handle straightforward tasks like replacing cartridges, O-rings, or seat washers, while complex issues—persistent leaks after parts replacement or damaged valve bodies—warrant a professional plumber.
Typical DIY repairs take 15–60 minutes and cost $10–50 in parts, whereas professional repairs usually require 1–2 hours and $100–300 depending on labor and parts.
Common signs that your Delta tub faucet needs repair
Dripping sounds, visible water pooling, and difficulty maintaining steady water temperature are clear indicators that a Delta tub faucet requires attention.
Other signs include reduced flow, squeaking or stiff handle movement, mineral buildup around spout, and sudden pressure changes.
Noticing these cues prompts inspection and informs how to repair a Delta tub faucet using seals, cartridges, or tightened connections to restore function.
When to call a professional vs. when to DIY
Many minor leaks can be resolved with basic tools and a replacement cartridge or O-ring, but more complex issues—such as persistent high-pressure leaks, damaged valve bodies, or leaks behind the wall—require a licensed plumber.
DIY is suitable for cartridge swaps, handle or aerator fixes, and simple seal replacements.
Call a professional for hidden leaks, corroded plumbing, compromised structural components, or uncertain diagnostics.
Estimated time and cost for typical repairs
Time and cost estimates for fixing a leaking Delta tub faucet vary by symptom and skill level: a simple cartridge or O-ring replacement typically takes 20–45 minutes and costs $15–$60 for parts (or $80–$200 including a service call).
More involved repairs—such as replacing a corroded valve body or addressing leaks behind the wall—can require several hours and $300–$1,200 or more when labor, parts, and potential drywall/plumbing repairs are included.
Typical DIY jobs save labor but require correct tools and confidence; professionals add warranty and diagnostic expertise.
Tools and Parts You’ll Need Before Starting
Before beginning repairs, the reader should gather an essential tools checklist—adjustable wrench, Allen keys, screwdrivers, needle-nose pliers, and plumber’s grease—to avoid interruptions.
They should also have Delta-specific replacement parts on hand, such as the correct cartridge model, O-rings, and seats and springs commonly used in Delta tubs.
Finally, identify the faucet model and cartridge by checking the underside of the handle or consulting Delta’s online parts lookup to guarantee proper matching.
Essential tools checklist
When preparing to repair a Delta tub faucet, gather the essential tools and replacement parts so the job proceeds without interruptions.
A concise checklist guarantees efficiency and avoids trips for missing items.
- Adjustable wrench and channel-lock pliers
- Phillips and flathead screwdrivers, hex/Allen keys
- Cartridge puller or needle-nose pliers
- Plumber’s grease, silicone, plumber’s tape, clean rag
Delta-specific replacement parts to look for (cartridge types, O-rings, seats and springs)
A quick inventory of Delta-specific replacement parts helps guarantee the repair proceeds smoothly: identify the faucet’s cartridge model (such as 1700, 1400, or R10000 series), the correct O-ring sizes, and whether the assembly uses separate seats and springs or an integrated valve kit.
Also stock common cartridge options, matched O-rings, seat-and-spring kits, retaining clips, and a tub spout O-ring when applicable.
How to identify your Delta faucet model and cartridge
Having identified the likely Delta parts to have on hand, the next step is to confirm the faucet model and cartridge so the correct tools and replacements are used.
Identification steps include examining visible markings, measuring cartridge dimensions, noting handle and escutcheon style, and photographing the assembly for reference.
- Locate stamped model numbers
- Remove handle to view cartridge
- Measure cartridge height/diameter
- Compare photos to Delta diagrams
Safety Precautions and Preparation Steps
Before beginning work on a Delta tub faucet, the homeowner should shut off the water supply and open the spout or a nearby valve to relieve built-up pressure.
Surfaces around the tub should be covered and fixtures masked to protect finishes from scratches and debris.
Small parts should be organized in labeled containers and reference photos taken to document assembly before disassembly.
How to shut off water and relieve pressure
Turn off the main water supply to the bathroom and confirm the valve is fully closed to prevent flow into the tub lines.
Open the tub spout and both hot and cold handles (or cartridge access) to drain residual water.
Close any isolated shutoffs if present.
Press the tub diverter to release trapped pressure.
Keep a bucket and towels ready for remaining drips.
Protecting the tub and surrounding finishes
A clean drop cloth or old towels should be spread over the tub and surrounding floor to catch tools, parts, and any water drip; non-slip mats or painter’s tape can secure coverings so they do not shift during work.
Fixtures and finishes should be buffered with cloth or foam; protect grout and caulk from scratches.
Use a small container to hold loose screws and prevent scratches to chrome.
Organizing parts and taking reference photos
With the work area protected, attention should shift to organizing removed components and documenting their arrangement with clear reference photos.
Parts are placed in labeled containers or on a segmented tray in disassembly order.
Photographs capture orientation, fastener locations, and seal positions from multiple angles.
Notes record part sizes and any damage. This preserves reassembly accuracy and speeds troubleshooting.
Step-by-Step Guide to Repair a Delta Single-Handle Tub Faucet
The following steps guide removal of the handle and escutcheon with care to prevent damage, inspection of internal parts for wear or mineral buildup, and replacement of the cartridge with clear removal and installation instructions.
It also covers replacing O-rings, seals, seats, and springs as needed.
The procedure concludes with reassembly and systematic testing for leaks.
Remove handle and escutcheon without causing damage
Begin by shutting off the water supply and relieving residual pressure; this prevents drips and makes handle removal cleaner and safer.
Use an appropriate screwdriver or hex wrench to remove the handle set screw, then lift straight off.
Loosen escutcheon screws or trim ring fasteners, gently pry escutcheon away from the wall using a plastic tool to avoid scratching, and set parts aside in order.
Inspecting internal components for wear or mineral buildup
Inspect the exposed valve body and cartridge area closely for signs of wear, mineral deposits, or corrosion that can impair performance.
Observe O-rings, seals, retaining clips, and screw threads for cracking, flattening, or pitting.
Note mineral crust around ports and inlet screens.
Document findings and photograph problem areas to determine whether cleaning, descaling, or part replacement is necessary before reassembly.
Replacing the cartridge: detailed removal and installation steps
Proceed to remove and replace the cartridge only after confirming the valve assembly is clean and shutoff valves are closed.
The technician follows precise steps to extract the retainer, lift the cartridge straight out, inspect the bore, and seat the new cartridge squarely.
Reassemble in reverse order, torque to spec, test for leaks, and restore water.
- Remove retainer
- Extract cartridge
- Inspect valve bore
- Seat new cartridge
Replacing O-rings, seals, seats, and springs
To replace the O-rings, seals, seats, and springs, the technician first guarantees the valve assembly is accessible and the water supply remains shut off.
Then, the technician gathers the correct replacement parts and basic tools (pick, snap-ring pliers, lubricant, and a soft cloth).
Old O-rings and seals are carefully removed, seats and springs extracted, contact surfaces cleaned, new components lubricated, and parts installed in correct orientation.
Reassembling the faucet and testing for leaks
Begin reassembly by confirming all replacement parts are correctly seated and lubricated.
Then reverse the disassembly steps while keeping components aligned and fasteners hand-tight until final adjustment.
Tighten screws and retaining nuts to manufacturer torque, reinstall trim and handle, restore water supply, and actuate valve.
Inspect for leaks at joints and cartridge seals, adjust tightness if needed, and verify smooth operation and drip-free performance.
Step-by-Step Guide to Repair a Two-Handle Delta Tub Faucet
The two-handle Delta tub faucet requires a methodical approach beginning with removal of the knobs and extraction of the valve stems for inspection.
Technicians should check valve seats and springs for wear, replacing any degraded parts to restore a proper seal.
Reassembly must include adjustments to balance hot and cold performance and verify smooth operation.
Removing knobs and valve stems
Start by confirming the water supply is shut off and the tub spout area is dry; this prevents leaks and gives clear access to the faucet.
Remove decorative caps, loosen set screws with the correct hex or flathead driver, then pull knobs straight off.
Unscrew bonnet nuts and extract valve stems using pliers or a stem puller, noting orientation and parts for reassembly.
Inspecting and replacing valve seats and springs
With knobs and valve stems removed and components laid out for reference, attention turns to the valve seats and springs, which commonly cause leaks or poor shutoff.
Inspect seats for pitting, grooves, or mineral buildup; check springs for corrosion or loss of tension.
Clean with vinegar or replace damaged seats and springs using OEM replacements, ensuring proper seating and aligned orientation before testing.
Reassembling and balancing hot/cold performance
Reassemble each valve assembly carefully, orienting seats, springs, stems, and cartridges exactly as removed to guarantee correct alignment and prevent leaks.
Tighten retaining nuts to manufacturer torque, reinstall handles and escutcheons, then restore water.
Test hot and cold separately, adjust cartridge positions or stop limits to equalize flow and temperature.
Finalize by checking for leaks and smooth lever operation before finishing.
Fixing a Faucet with No Handle or a Broken Handle
When a tub faucet lacks a handle or has a broken one, temporary fixes like slip-on adapters can restore basic function until a proper replacement is obtained.
Permanent repair typically involves replacing worn splines and tightening or swapping set screws to secure a new handle.
Final adjustments to stem alignment guarantee smooth operation and prevent premature wear.
Temporary handle fixes and using replacement handles
If a Delta tub faucet is missing its handle or the handle is cracked, a temporary fix can restore basic control until a proper replacement is obtained.
Use a rubber jar opener, pliers padded with tape, or a universal replacement knob slipped onto the valve stem to operate flow and temperature.
Secure loosely to avoid damaging the stem; replace with a proper handle promptly.
Replacing handle splines and set screws
After using a temporary grip to operate the valve, attention should turn to restoring a secure, long-term handle connection by replacing worn splines or a lost set screw.
Inspect handle and cartridge splines for wear, match replacement spline profile, press or tap new spline into the handle, align with cartridge, and install a correctly sized set screw tightened to manufacturer torque to prevent slipping.
Adjusting stem alignment for smooth operation
Begin by inspecting the cartridge stem for visible misalignment or wobble that could cause stiff or uneven rotation; a straight, centered stem is essential for smooth handle operation.
If misaligned, loosen retaining nuts or clips, gently realign the stem, then retighten to manufacturer torque.
Test rotation for smoothness, adjust shims or sleeves if needed, and reassemble, ensuring no binding or lateral play.
Addressing Specific Problems and Their Solutions
The guide next examines common symptom-specific issues and practical fixes.
It covers persistent dripping after cartridge replacement, reduced or uneven flow from the tub spout, temperature swings or sudden scalding, and concealed leaks behind the wall or at the spout connection.
Each problem is paired with targeted diagnostic steps and repair options.
Constant drip from spout despite new cartridge
If a Delta tub faucet continues to drip after installing a new cartridge, the leak usually stems from worn seals, a damaged valve seat, or improper installation rather than the cartridge itself.
Inspect and replace O-rings and seat seals, clean or resurface the valve seat, verify cartridge alignment and retaining clip, and guarantee debris-free ports.
Test under normal pressure and retighten connections as needed.
Low or uneven water pressure from tub spout
Troubleshooting low or uneven water pressure at a tub spout starts with isolating the source—whether it’s the spout, valves, supply lines, or incoming service pressure.
Inspect spout aerator or diverter for debris, test shutoff and cartridge flow, check supply line valves fully open, and measure pressure at other fixtures.
Replace clogged parts, clear mineral buildup, or call a plumber if mains pressure is inconsistent.
Water temperature imbalance or sudden scalding
After ruling out flow-related causes at the spout and valves, attention shifts to temperature control when users report uneven heat or sudden scalding from a Delta tub faucet.
Technicians inspect the cartridge, temperature limit stop, and check for worn thermoplastic or mixing components.
Replacing the cartridge or resetting/replacing the limiter typically restores balanced temperatures; confirm with gradual hot/cold testing.
Leaks behind the wall or at tub spout connection
Investigate leaks behind the wall or at the tub spout connection promptly, since concealed leaks can quickly cause drywall damage and mold. A technician isolates supply, inspects spout threads and escutcheon, and tests cartridge and pipe joints. Repair may require re-sealing, replacing the spout, or opening the wall for pipe repair; document findings and retest for watertightness.
| Issue | Cause | Fix |
|---|---|---|
| Spout drip | Worn O-ring | Replace O-ring |
| Behind-wall moisture | Loose joint | Open wall |
| Persistent leak | Corroded pipe | Replace section |
| Escutcheon gap | Poor seal | Re-caulk |
Cleaning, Maintenance, and Prevention Tips
Practical cleaning and lubrication techniques for removing mineral buildup and protecting moving parts can restore smooth operation and extend service life.
A simple routine maintenance schedule—periodic inspections, cartridge cleaning, and seal replacement—helps prevent common failures.
Regular water quality checks identify hard water issues and indicate when a water softener should be installed.
How to remove mineral buildup and lubricate moving parts
Minerals and grime commonly impede Delta tub faucet performance, so removing buildup and properly lubricating moving parts restores smooth operation and prevents leaks.
Flush waterlines, soak removable aerators and trim in white vinegar to dissolve deposits, and gently scrub with a soft brush. Rinse thoroughly, dry, then apply a silicone-based plumber’s grease to O-rings, cartridge seals, and slide stems for reliable, non-reactive lubrication.
Routine maintenance schedule for longevity
While regular attention prevents most faucet problems, a simple, scheduled maintenance routine guarantees consistent performance and extends service life.
Inspections and basic tasks at regular intervals prevent wear and detect issues early.
- Monthly: wipe surfaces, check for visible leaks
- Quarterly: exercise valves and handles
- Biannually: clean aerator and cartridge area
- Annually: inspect mounting and replace worn seals
Water quality checks and when to install a water softener
Beyond routine inspections and seal replacements, evaluating water quality becomes an important step in preventing faucet damage and buildup.
Tests for hardness, pH, iron, and sediment identify scaling and corrosion risks. If hardness exceeds local recommendations or frequent scale forms, installing a water softener or targeted filtration reduces mineral deposits, extends cartridge life, and improves valve performance—select systems sized for household flow and maintenance capacity.
When Replacement Is Better Than Repair
Clear signs that the valve body or internal assembly is cracked, corroded, or leaking persistently indicate replacement rather than repair.
Homeowners should weigh repair costs and labor against the price of a full Delta faucet replacement, including potential upgrades and long-term reliability.
When replacing, selecting a compatible Delta model or a preferred upgrade guarantees fit, function, and warranty coverage.
Signs that the valve body or assembly must be replaced
When does a Delta tub faucet’s valve assembly demand replacement rather than repair?
Severe corrosion, cracked or warped valve bodies, stripped internal threads, and extensive mineral buildup that resists cleaning indicate replacement.
Persistent leaks after cartridge or seal swaps, multiple failed repairs, damaged pressure-balancing components, or waterlogged, delaminated castings justify replacing the entire valve assembly to restore reliable function and safety.
Cost comparison: repair vs. full faucet replacement
Although a single part swap or cartridge replacement is often less expensive upfront, the total cost picture should weigh labor, parts, and the likelihood of recurring issues; when valve bodies are corroded, repair attempts can become a series of incremental expenses that exceed the price of a full faucet replacement.
| Repair | Replacement |
|---|---|
| Lower initial cost | Higher upfront cost |
| Possible repeat work | One-time investment |
| Parts vary widely | Warranty benefits |
Selecting a compatible Delta replacement or upgrade options
Many homeowners find that replacing a problematic Delta tub faucet is the most cost-effective route when corrosion, multiple failing components, or outdated valve standards make repairs unreliable.
When selecting a compatible Delta replacement, verify valve type (cartridge, ball, or pressure-balanced), rough‑in dimensions, and trim compatibility.
Consider upgrades—spot-resistant finishes, single‑handle thermostatic valves, or water‑saving aerators—to improve performance and longevity.
Troubleshooting Checklist and Quick Fixes
A concise, stepwise checklist helps identify whether the problem is a simple obstruction, worn cartridge, or supply issue.
The checklist guides the user through safe tests and measurements to pinpoint the fault.
Before any disassembly, the guide lists quick fixes—such as tightening fittings, cleaning aerators, and resetting the valve—that often restore function.
Stepwise checklist to diagnose and fix common issues
Begin with a concise, systematic checklist that guides diagnosis from the simplest to the more involved fixes: verify water supply and shutoff valves, inspect for visible leaks around the spout and handle, test cartridge function by observing irregular flow or difficulty turning the handle, check aerator and supply-line debris, and confirm proper seat and spring condition for single-handle models.
- Isolate leak location (spout, handle, or supply).
- Confirm shutoff and pressure.
- Inspect cartridge, seats, and springs.
- Note debris in aerator and lines.
Quick fixes you can try before disassembly
Try a few targeted checks before reaching for tools: verify the tub faucet’s shutoff valves are fully open and that water pressure is steady; inspect the spout and handle area for obvious drips or mineral buildup; run both hot and cold to note irregular flow or sputtering that indicates trapped air or debris; and briefly clean the aerator or screen if accessible.
Next, tighten visible fittings, cycle the handle repeatedly to reseat cartridges, and test with a bucket to isolate source.
Parts Diagram and Reference Resources
A labeled parts diagram clarifies the function and placement of key Delta tub faucet components such as cartridges, seats and springs, O-rings, and escutcheons.
Model-specific manuals and exploded diagrams are available from Delta’s official website and authorized parts retailers to guarantee correct identification.
Replacement parts can be ordered by model number through the manufacturer, plumbing supply stores, or verified online vendors.
Key Delta faucet parts explained with labels
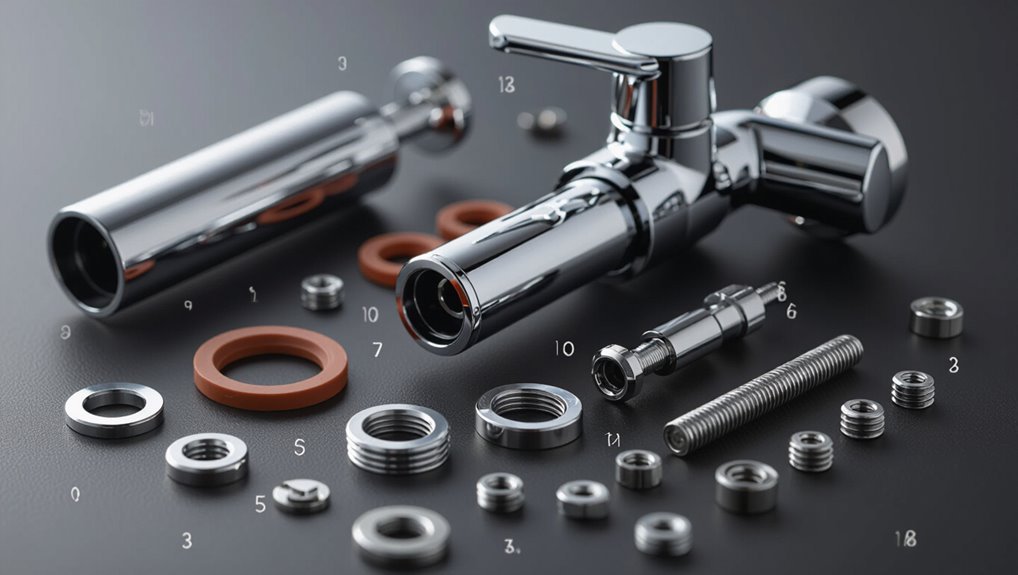
Clear, labeled diagrams are essential for identifying the main Delta faucet components—handle(s), cartridge, valve body, spout, aerator, escutcheon, O-rings, and mounting hardware—so readers can match parts to their model and order correct replacements.
Each label should show orientation and connection points: cartridge retention, spout O-rings, diverter position, mounting nut, and supply line interfaces.
Simple legend and scale aid identification.
Where to find model-specific manuals, diagrams, and replacement parts
After identifying parts from labeled diagrams, homeowners and technicians should consult model-specific resources to confirm fit and order replacements.
Reliable sources include manufacturer manuals, parts diagrams, and verified vendors.
Recommended references:
- Delta official support site for manuals and exploded diagrams
- Model number lookup guides and PDF downloads
- Authorized parts distributors and OEM cartridges
- Plumbing supply stores with cross-reference tools
Conclusion
A steady rhythm returns to the bathroom—metal cool under fingers, water moving where it should. With seals seated and cartridges eased like small, stubborn stones into place, the drip softens to nothing. Tools set down, surfaces bright as a paused tide, the faucet stands ready: a quiet sentinel that no longer wastes. Care taken now keeps future leaks at bay, each careful turn a small, sure promise of flow restored.