How to Measure PEX Pipe Size: A Step-by-Step Guide for Accurate Sizing
To accurately measure PEX pipe size, start by understanding that the size is a nominal label rather than an exact measurement. Follow these steps for precise sizing:
- Measure the Outside Diameter (OD): Use calipers to measure the OD of a straight, relaxed section of the pipe.
- Check Wall Thickness: Note the wall thickness for accurate sizing.
- Take Multiple Readings: Measure at different points to ensure consistency.
- Inspect Stamped Markings: Look for any size markings on the pipe itself.
- Confirm with Manufacturer: Cross-reference your measurements with manufacturer sizing charts or a reference fitting.
Finally, record your measurements and verify that they match the type of PEX and connection method you plan to use. This ensures compatibility and helps you avoid common sizing issues.
Understanding PEX Pipe Sizing Basics
PEX size refers to a nominal designation rather than the pipe’s exact outside or inside diameter, so measurements must distinguish between nominal and actual dimensions.
Common PEX sizes—such as 1/4″, 1/2″, 3/4″, and 1″ nominal—are used for applications ranging from appliance lines to whole-house plumbing and are identified by their designated use.
Variations in material type (PEX‑A, B, C) and wall specifications or SDR affect wall thickness and internal bore, which changes how the pipe should be measured and fitted.
What “PEX size” actually means (nominal vs. actual diameter)
Pipe size labeling can be misleading because the nominal size printed on fittings and tubing does not equal the material’s actual outside or inside diameter.
The term “PEX size” refers to a nominal designation tied to historical pipe standards, not exact measurements.
For accurate work, technicians learn how to measure PEX pipe size by measuring outside diameter and wall thickness, then matching fittings by system type.
Common PEX sizes and where they are used
After measuring outside diameter and wall thickness to determine the nominal designation, the next step is recognizing which sizes are commonly used and for what applications. Typical PEX sizes and uses are summarized below.
| Size (nominal) | Common use |
|---|---|
| 1/2″ | Branch lines, fixtures |
| 3/4″ | Main runs, multiple fixtures |
| 1″ | Longer runs, high demand systems |
| 1/4″ | Specialized, radiant tubing (rare) |
Materials and wall types that affect measurements (PEX-A, B, C; SDR)
Material composition and wall construction directly influence measured dimensions and the methods used to identify nominal size.
PEX-A, B, and C differ in flexibility and manufacturing, yielding slight wall thickness variances that affect OD/ID readings.
SDR ratings express diameter-to-wall ratio; higher SDR means thinner wall.
Accurate sizing requires noting PEX type and SDR, then measuring OD and calculating ID accordingly.
Quick Answer: How to Measure PEX Pipe Size Correctly
A simple method for DIYers is to measure the pipe’s outside diameter with calipers and confirm the size using the manufacturer’s markings or a sizing chart.
For quick jobs, estimating by commonly used sizes (1/2″, 3/4″) may suffice, but connectors and fittings must match the measured OD.
If the layout is hidden, involves multiple fittings, or concerns high-pressure or long runs, a professional should be consulted.
One-sentence summary for DIYers
For quick DIY measurements, measure the outside diameter (OD) of the PEX with calipers or a ruler.
Then identify whether the pipe is nominal 1/2″, 3/4″, or 1″ by comparing the OD to standard PEX OD charts or checking the stamped size or color coding on the pipe.
DIYers should record OD, wall thickness if possible, and matching fittings to guarantee correct connections.
When to call a professional
After DIYers measure OD and note wall thickness or markings, certain situations warrant calling a professional: when pipe runs are hidden in walls or slabs, fittings appear nonstandard or corroded, multiple pipe sizes are present, water pressure or flow issues exist, or local code compliance and permits are uncertain.
A qualified plumber can perform accurate identification, pressure testing, safe access, and guarantee compliant repairs or replacements.
Tools and Materials Needed to Measure PEX
Accurate PEX measurement requires a few basic tools and a couple of reference items.
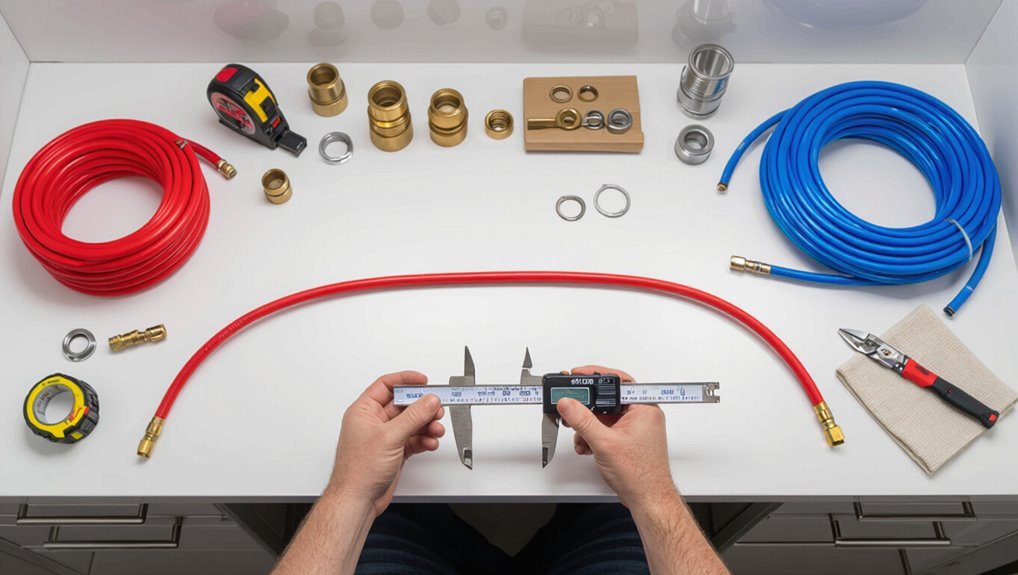
Essential measuring tools include a caliper for precise OD readings, a tape measure or ruler for length and approximate diameter checks, and an OD gauge when available.
A marker, a sharp knife to expose a clean cut, and a fitting or two for size comparison complete the kit.
Measuring tools: caliper, tape measure, ruler, OD gauge
Several basic tools cover the needs of most PEX sizing tasks: a caliper for precise outer diameter readings, a tape measure or ruler for longer runs and quick checks, and an OD gauge for fast verification against common PEX sizes.
The caliper provides accuracy to hundredths of an inch or millimeter. The tape/ruler handles length and spacing, and the OD gauge offers simple size matching.
Additional items: marker, knife, fittings for reference
Alongside measuring instruments, a few simple hand tools and reference fittings make the sizing process faster and more reliable.
A fine-tip marker marks cut points and measurement locations; a sharp knife or tubing cutter produces clean ends for accurate OD/ID checks.
Keeping common fittings—crimp, barb, push-fit—on hand helps confirm compatibility and sizing visually, avoiding mistakes during installation or replacement.
Step-by-Step Guide to Measuring PEX Pipe Size
The procedure begins with choosing a safe, accessible section of pipe to measure.
Next, the outside diameter (OD) should be measured precisely, followed by the inside diameter (ID) when possible and the wall thickness so the nominal size can be calculated.
Finally, those measurements are compared to standard PEX sizing charts to determine the correct pipe designation.
Step 1 Identify the pipe section to measure safely
Begin by locating a straight, accessible section of the PEX run that is free of fittings, valves, and sharp bends. The chosen segment should be long enough for tool placement and visible inspection.
Confirm the system is depressurized and cool before approaching. Clear surrounding insulation or clamps to expose the tubing.
Mark the segment to maintain measurement consistency and avoid interference during subsequent steps.
Step 2 Measure outside diameter (OD) accurately
A caliper or a reliable measuring tape should be used to record the pipe’s outside diameter (OD) at the marked, straight section; measurements must be taken perpendicular to the pipe axis and repeated in at least two places to confirm consistency.
Note and average readings if slight variance occurs.
Verify the pipe is clean, undented, and free of fittings or insulation that could alter the OD before recording.
Step 3 Measure inside diameter (ID) if possible
Measure the inside diameter (ID) next, since it confirms the pipe’s true size when wall thickness or manufacturer sizing conventions are unclear.
Using calipers, measure across the inner bore at several points to detect ovality. Record the smallest consistent value.
If calipers aren’t available, insert a matched gauge or mandrel to verify fit.
Note measurements and units for later comparison.
Step 4 Measure wall thickness and calculate nominal size
Wall thickness determines the pipe’s nominal size and pressure rating, so it must be measured accurately before converting ID to the standard designation.
Using calipers, measure wall thickness at several points and average results to account for variation.
Subtract twice the wall thickness from the outer diameter to verify ID, or add twice to ID to confirm outer diameter.
Record measurements for chart reference.
Step 5 Match measurements to standard PEX sizing charts
Once the inner and outer diameters and average wall thickness are confirmed, those figures should be compared directly against a standard PEX sizing chart to determine the pipe’s nominal designation and compatible fittings. The chart aligns measured OD and wall thickness to common nominal sizes, easing selection and replacement.
| Measured OD | Nominal Size |
|---|---|
| 0.875″ | 1/2″ PEX |
| 1.125″ | 3/4″ PEX |
| 1.375″ | 1″ PEX |
| 1.75″ | 1-1/4″ PEX |
Step 6 Confirm by checking fittings and markings on the pipe
Verify the sizing by fitting the pipe to known connectors and reading any stamped markings along its length.
The inspector checks compatibility with crimp, clamp, or push-fit fittings, noting inner diameter, nominal size, and wall type indicated on the pipe.
If fittings seat correctly and markings match the measured dimensions and chart references, the size is confirmed; otherwise remeasure and retest with alternate connectors.
How to Identify PEX Size Without Cutting the Pipe
Identification of PEX size without cutting can often be done by checking manufacturer stamps and color codes printed on the tubing.
Measurements of attached fittings, adapters, or the compression nut provide another non-destructive clue to diameter.
When stamps or fitting dimensions are unclear, a quick side-by-side comparison with known-size tubing will confirm the size.
Reading manufacturer stamps and color codes
Although PEX pipes come in various colors and are often stamped with size markings, those visual cues are the quickest noninvasive way to determine diameter without cutting.
Manufacturers typically print size (e.g., 1/2″, 3/4″), SDR or OD, and material type along the length.
Color coding often indicates designated use (red for hot, blue for cold) but not exact size; verify stamps for accuracy.
Measuring fittings, adapters, and compression nut sizes
Several simple measurements and visual checks allow one to determine the correct PEX fittings, adapters, and compression nut sizes without cutting the pipe.
Measure outer diameter of the pipe at the connection, thread diameter of adapters, and nut across-flats.
Note fitting type (crimp, clamp, expansion, compression) and wall thickness.
Confirm compatibility markings or manufacturer part numbers before selecting replacement parts.
Using comparison method with known-size tubing
After checking fittings and fittings dimensions, a quick way to verify PEX size without cutting the pipe is to compare it directly to a piece of tubing of known diameter.
The comparison method uses side-by-side alignment and visual match or caliper measurement. Known-size samples—copper, CPVC, or spare PEX—provide reliable reference.
Record matching circumference or outer diameter for accurate identification.
Converting Between PEX, Copper, and PVC Sizes
A simple nominal size conversion chart clarifies how PEX, copper, and PVC designations correspond by outside diameter and nominal bore.
Practical tips follow for choosing fittings and adapters that guarantee proper mating, pressure ratings, and installation methods.
Attention is given to common mismatches and recommended junction fittings to prevent leaks and flow restriction.
Nominal size conversion chart for PEX vs copper vs PVC
When comparing PEX, copper, and PVC, nominal pipe sizes can be misleading because each material uses different sizing conventions and wall thicknesses; a conversion chart clarifies which outside and inside diameters correspond across systems so fittings and flow calculations match. The chart below shows common equivalents (nominal, OD, ID):
| Material | Nominal | OD/ID (example) |
|---|---|---|
| PEX | 1/2″ | OD 5/8″ / ID ~1/2″ |
| Copper/PVC | 1/2″ | OD 5/8″ / ID ~0.545″ |
Practical tips for selecting compatible fittings and adapters
Having established how nominal sizes and actual diameters differ among PEX, copper, and PVC, selecting compatible fittings and adapters depends on recognizing those measurement discrepancies and the joining method each material requires.
Use coupling fittings rated for pressure and temperature, match OD-to-ID as specified, prefer manufacturer-approved adapters, verify connection types (crimp, expansion, solder, solvent weld), and avoid mixing metals without dielectric unions.
Common Measurement Problems and How to Avoid Them
Common measurement errors arise when flexible PEX is deformed or compressed during handling, which alters diameter readings.
Surface contaminants such as paint, insulation, or mineral scale can add apparent thickness and lead to oversize estimates.
Using the wrong tool or measuring at an inconsistent point (near fittings or bends) produces unreliable results.
Errors from flexible pipe deformation and compression
Flexible PEX tubing can distort under bending, clamping, or tool pressure, causing outer diameter and wall thickness readings to be misleading.
Measurements must be taken on straight, relaxed sections, avoiding kinks or compressed areas. Use gentle support blocks or mandrels to restore shape before measuring.
Calipers should contact undistorted surfaces; multiple readings verify consistency. Record location and condition for reliable comparison.
Problems from paint, insulation, or scale on pipe surface
Inspect the pipe surface before measuring: paint, insulation remnants, and mineral scale add layers that increase apparent diameter and obscure true wall edges.
Confirm coatings are removed where measurement is required—carefully scrape, sand, or clean with appropriate solvents—so calipers or tape read the actual pipe.
Note uneven deposits that create misleading contours; measure multiple clean points and average for reliable sizing.
Mistakes when using the wrong tool or measuring point
Once coatings and deposits are removed, the next frequent source of error is choosing the wrong tool or measurement point.
Technicians often use calipers on fittings, tape on irregular surfaces, or measure at bends, producing incorrect diameters.
Proper practice: use calibrated calipers on bare pipe mid-span, avoid fittings and compression zones, and verify with a gauge.
Consistent technique guarantees reliable sizing.
Special Situations and Advanced Considerations
Certain installations require additional attention, such as measuring bundled or insulated PEX runs where outer layers obscure diameter and effective flow.
High-temperature or high-pressure systems may need derating and verification of material limits before selecting size.
Pipes with unknown or faded markings should be measured directly and cross-checked against manufacturer specifications or test fittings.
Measuring bundled or insulated PEX runs
Measuring bundled or insulated PEX runs requires adapting standard measurement techniques to account for added layers and multiple tubes packed together. Accurate sizing prevents fitment errors and guarantees proper flow capacity.
Inspect bundle configuration, determine number and individual tube OD, then measure overall bundle diameter including insulation.
Calculate required fittings and clamp spacing, allow for insulation thickness when planning penetrations and routing to confirm clearance and secure connections.
High-temperature or pressurized systems and derating sizes
When bundled or insulated PEX runs are used in systems that operate at elevated temperatures or pressures, nominal tube size alone no longer guarantees performance or safety.
Designers must apply manufacturer derating tables and pressure–temperature ratings, reduce allowable working pressure accordingly, and consider larger diameters or alternate materials.
Verify system head loss, thermal expansion, and code-required safety margins to prevent failure and maintain flow.
When pipe has unknown or faded markings
How should a professional proceed if PEX markings are missing or illegible?
A technician measures outside diameter (OD) with calipers, compares to PEX OD charts to determine nominal size, and checks wall thickness for SDR or type.
Confirm material type by color, fittings, or melt test if necessary.
Document findings and, when uncertain, replace pipe or consult manufacturer for verification.
Tips for Buying Replacement PEX or Fittings
When purchasing replacement PEX or fittings, the reader should verify compatibility between pipe type, fitting style (crimp, clamp, or expansion) and the required expansion tools.
They should record pipe outer diameter, wall thickness, and any markings to present to a hardware store or plumber.
Finally, selecting fittings that meet recognized standards (ASTM, NSF) and choosing durable materials helps guarantee a reliable repair.
Verifying compatibility: fittings, expansion tools, crimp vs clamp
Before purchasing replacement PEX or fittings, confirm that the chosen components and tools share the same system type and connection method—PEX-A, PEX-B, or PEX-C—and the compatible joining style (crimp, clamp, or expansion).
Verify fitting material, ring or sleeve dimensions, and tool calibration. Match manufacturers’ specifications and approved fittings lists.
Using incompatible connectors or uncalibrated tools risks leaks, code violations, and premature failures.
How to document measurements for hardware store or plumber
After confirming system type and connection method, collectors of replacement parts should create a concise measurement record to present to a hardware store or plumber.
Include pipe outside diameter, wall thickness or nominal size, fitting style (crimp/clamp/expansion), material color and markings, measured length, and photos of ends and markings.
Note any visible damage and preferred quantity of fittings.
Selecting quality materials and matching standards (ASTM, NSF)
Because plumbing failures often stem from incompatible or substandard components, buyers should prioritize PEX and fittings that meet recognized industry standards such as ASTM and NSF.
Verify markings on product labels, request manufacturer documentation, and confirm compatibility between PEX type, fittings, and installation methods.
Choosing certified materials guarantees pressure, temperature, and health safety compliance, reduces leak risk, and simplifies inspections and warranty claims.
Quick Reference Charts and Printable Measuring Checklist
A concise set of printables helps technicians confirm PEX dimensions and needed fittings quickly on site.
A one-page measuring checklist paired with a standard-size quick-reference table reduces errors and speeds decisions.
These tools should be laminated or kept on a clipboard for durable field use.
- One-page measuring checklist for field use
- Standard size quick-reference table
- Durable, portable format (laminate/clipboard)
One-page measuring checklist for field use
Many technicians rely on a single, well-organized page of reference to speed accurate PEX sizing on site; this checklist combines quick reference charts for common diameters and fittings with a printable measuring checklist so that measurements, conversions, and notes are recorded consistently and legibly.
- Verify outside diameter, wall thickness, and color code.
- Record measurement method,工具, and units used.
- Note fittings type, crimp/crush method, and installation location.
Standard size quick-reference table
With the checklist completed, a compact standard size quick-reference table provides the at-a-glance data technicians need to confirm PEX dimensions and compatible fittings. A concise chart speeds decisions, reduces errors, and builds confidence on the jobsite.
| Size (IPS) | OD / Fitting |
|---|---|
| 1/2″ | 0.625 / 3/8″ |
| 3/4″ | 0.875 / 1/2″ |
| 1″ | 1.125 / 3/4″ |
Troubleshooting: What to Do If Sizes Don’t Match
If measured sizes do not match, the technician should first re-measure with a second tool to confirm the discrepancy.
If the mismatch persists, consider safe use of appropriate adapters and connection fittings rated for PEX to join differing sizes.
When fittings cannot guarantee a reliable, code-compliant connection, replacement of the mismatched pipe section is the correct course.
Using adapters and transition fittings safely
When PEX and other plumbing materials differ in diameter, connector fittings and adapters provide a secure pathway between mismatched pipes; selecting the correct type and size prevents leaks and maintains flow capacity.
The installer should choose compatible materials (copper, CPVC, brass), use listed connector fittings, follow manufacturer torque and crimping specs, deburr and clean ends, and pressure-test the joint before concealed installation.
Re-measuring and verifying with a second tool
Re-measure the pipe using a different tool to confirm the initial reading before making adjustments.
If readings differ, compare measurement points (outside diameter, wall, or nominal size) and verify tools are calibrated and correctly zeroed.
Record both values, note tool type, and retake measurements at multiple spots.
Use the consensus or the more precise instrument to proceed, documenting any discrepancies for future reference.
When replacement of the pipe section is the best option
Consider replacement of the PEX section when inconsistent measurements, physical damage, or incompatible fittings prevent a reliable repair or safe reconnection.
Replacement is recommended if wall collapse, severe abrasions, bulging, or corrosion at join points compromise seal integrity.
Cut back to sound pipe, confirm correct diameter and SDR, install matching fittings, pressure-test the new run, and document changes for future maintenance records.
Conclusion
Like a seasoned cartographer closing a map, the guide leaves the reader with clear lines and compass points for charting PEX sizing. Armed with simple tools and careful measurement, one avoids the shoals of ill-fitting fittings and wasted time. Practical knowledge becomes a steady lighthouse: precise outside diameter readings and identification tricks transform uncertainty into craft. In plumbing’s measured language, small inches translate into reliable flow, confidence, and projects completed well.