How to Replace Corroded Pipes: Step-by-Step DIY Guide for Safe, Long-Lasting Repairs
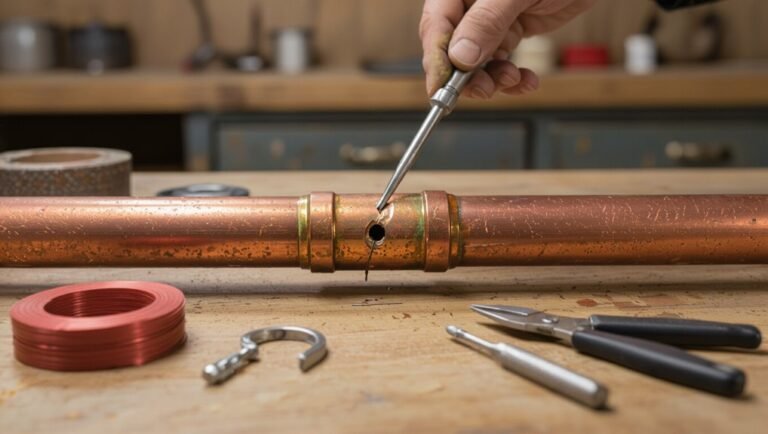
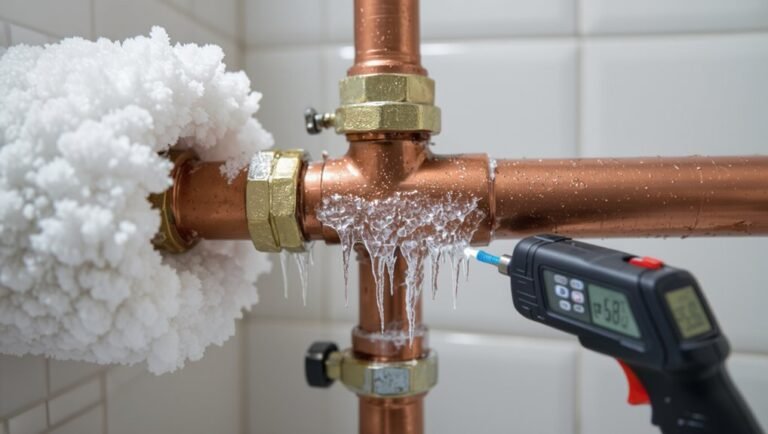
To replace corroded pipes effectively, start by confirming corrosion signs such as leaks, rust-colored water, reduced pressure, or visible pitting. First, shut off the water supply and drain the system. Wear appropriate personal protective equipment (PPE) and ensure you have the necessary permits.
Next, measure and cut out the corroded sections of pipe, deburr and clean the ends. Install a compatible replacement pipe using solder, crimp, or solvent-weld joints as needed. After installation, conduct a pressure test to check for leaks, then insulate and support the new pipe run. For detailed guidance on each step and material options, continue reading.
How to Tell If Your Pipes Are Corroded and Need Replacement
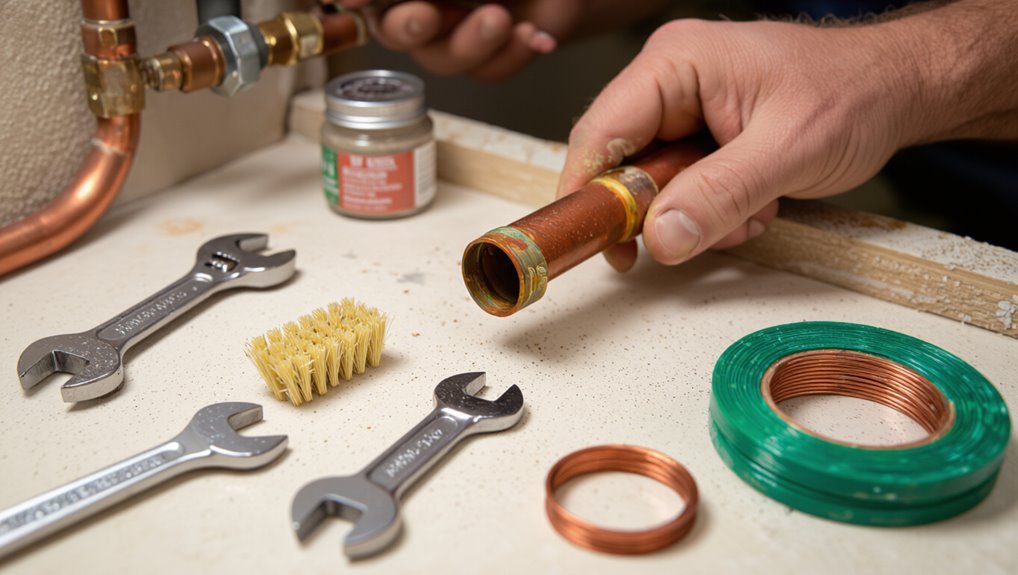
A homeowner can spot pipe corrosion by watching for leaks, rust-colored water or stains, reduced water pressure, and new banging or hissing sounds.
Attention should focus on vulnerable materials—galvanized steel and iron corrode most readily, copper can pit, while PVC does not rust—so both visible runs and concealed lines (behind walls or under floors) merit inspection using careful visual checks and noninvasive tools.
If signs are widespread, structural fittings are compromised, or the inspection is uncertain, a licensed plumber should be called; minor, accessible issues may be assessed by a competent DIYer.
Common signs of corrosion (leaks, discoloration, low pressure, noise)
When metal pipes begin to corrode, several clear indicators typically appear: visible leaks or damp spots, rust-colored water or staining, reduced water pressure, and unusual sounds like banging or hissing.
These signs help homeowners assess urgency and decide whether to consult a professional or follow guidance on how to replace corroded pipes for safe, durable repairs before failures escalate.
Types of pipes that corrode (galvanized steel, iron, copper, PVC vs. metal)
Although corrosion affects many materials differently, certain pipe types are far more prone to deterioration and failure.
Galvanized steel and cast iron rust internally, causing scale, leaks, and reduced flow.
Copper can suffer pitting and dezincification in aggressive water.
PVC and other plastics resist corrosion but can fail from UV, mechanical stress, or chemical attack.
Choice affects longevity and repair approach.
How to inspect visible and hidden pipes safely
Start by scanning exposed runs and accessible access points for visual cues of corrosion: flaking rust, greenish copper verdigris, white chalky deposits, pitting, or discoloration around joints and fittings.
Check for dampness, mineral streaks, bulging, or loose fittings.
Use a flashlight and mirror for concealed sections, probe gently for soft spots, and document findings with photos and notes for prioritized repairs.
When to call a professional vs. DIY assessment
How can a homeowner distinguish between a condition that merits a weekend DIY fix and one that requires a licensed plumber?
Visible minor surface rust, isolated pinholes, slow drip, and accessible sections often suit DIY repair.
Widespread pitting, multiple leaks, water discoloration, low pressure throughout the system, structural damage, or gas line involvement demand a licensed plumber for safety, permits, and lasting remediation.
Safety Precautions and Preparations Before Replacing Pipes
Before replacing corroded pipes, the technician reviews required personal protective equipment and establishes safe work practices to reduce injury risk.
They shut off the water, drain the system, and isolate or de-energize nearby electrical sources and other hazards.
Finally, they confirm permit requirements, applicable codes, and whether inspections are needed before and after the work.
Personal protective equipment and safe work practices
Proper personal protective equipment and disciplined work practices greatly reduce the risk of injury and contamination when replacing corroded pipes.
Workers should wear gloves, eye protection, a respirator for dust or fumes, and sturdy footwear. Use knee pads and hearing protection as needed.
Maintain good ventilation, keep a tidy work area, secure tools, and follow manufacturer instructions to prevent accidents and exposure.
How to shut off water and drain the system
Shut off the main water supply and confirm isolation by opening a nearby faucet to relieve pressure; then locate and close any individual branch valves serving the affected area.
Next, open low and high fixtures to fully drain lines, including outdoor spigots and tank valves.
Collect remaining water with buckets or towels, cap or plug open pipe ends, and verify dryness before cutting or removing corroded sections.
Managing electricity and nearby hazards
Assess electrical risks and eliminate nearby hazards before cutting or removing corroded pipe sections.
Identify energized circuits, shut power to affected areas, and use nonconductive tools.
Move flammable materials, clear work space, and provide adequate lighting.
Secure loose wiring and label shutoffs.
Wear insulated gloves and eye protection.
Keep a fire extinguisher nearby and a second person present for emergency assistance.
Permits, codes, and when inspections are required
After making the work area safe from electrical and fire hazards, attention turns to legal and regulatory requirements that govern pipe replacement.
Determine whether local codes or homeowner association rules require permits, use approved materials and methods, and mandate licensed contractors for certain trades.
Schedule required inspections—rough‑in and final—document approvals, and guarantee work meets code to avoid fines, insurance denials, or mandatory rework.
Tools and Materials Needed for Pipe Replacement
To replace corroded pipes effectively, the installer must assemble the right combination of tools and materials tailored to the pipe type and project scope.
Below are key categories to evaluate that will guide procurement and budgeting:
- Essential tools (wrenches, pipe cutters, soldering torch, pipe threader)
- Materials by pipe type (copper, PEX, CPVC, PVC, galvanized options)
- Sealants, fittings, connectors, and support materials
- Estimated costs and common retailers for purchase
Essential tools (wrenches, pipe cutters, soldering torch, pipe threader)
Gathering the right tools guarantees a safe, efficient pipe replacement and reduces the risk of mistakes.
Essential tools include adjustable and pipe wrenches for fittings, quality pipe cutters for clean cuts, a soldering torch with flux and lead-free solder for copper joints, and a pipe threader for threaded connections.
Additional useful items: deburring tool, tubing bender, Teflon tape, and safety gear.
Materials by pipe type (copper, PEX, CPVC, PVC, galvanized replacement options)
When selecting replacement materials, the choice should match the existing system, local code, and the job’s pressure and temperature requirements.
Copper offers durability and high-temperature tolerance; PEX provides flexibility and corrosion resistance; CPVC suits hot water with higher temperature ratings than PVC; PVC is for cold-water and drain lines.
Replacing galvanized requires compatible modern alternatives and consideration of dielectric separation where dissimilar metals meet.
Sealants, fittings, connectors, and support materials
Start by assembling the essential sealants, fittings, connectors, and supports specific to the chosen pipe material and the job’s pressure and temperature requirements.
Include thread sealant tape, pipe dope rated for potable water, compatible solder or solvent cement, compression and push-fit fittings, junction couplings, pipe straps, hangers, insulation, and vibration isolators.
Verify material compatibility and pressure ratings before installation.
Estimated costs and where to buy
After confirming compatible sealants, fittings, and supports, the next consideration is budget and sourcing: estimated costs vary by pipe material, system size, and regional supplier pricing.
Copper runs higher; PEX and PVC are economical. Typical DIY replacements range $50–$400 for materials.
Purchase from local plumbing supply stores, big-box retailers, or reputable online vendors. Compare warranties, return policies, and shipping times before buying.
Step-by-Step Guide to Replacing Corroded Pipes (Detailed DIY Process)
A concise, practical sequence guides the replacement of corroded pipe sections from planning through final testing.
Key steps include:
- Plan the replacement and map the pipe run
- Isolate and remove the corroded section safely
- Prepare pipe ends and fittings for connection
- Install new pipe (soldering copper, crimping PEX, solvent welding CPVC/PVC) and pressure test for leaks
The following instructions explain each step with safety notes and testing procedures.
Step 1 Plan the replacement and map the pipe run
Begin by surveying the existing plumbing layout and creating a clear, scaled sketch of the pipe run that notes pipe materials, diameters, fittings, shutoff locations, and any access points.
Identify corrosion extent, measure replacement lengths, and list required parts and tools.
Verify system pressure, note nearby electrical or structural obstructions, and plan temporary supports and routing for the new sections before starting work.
Step 2 Isolate and remove the corroded section safely
Turn off water to the affected circuit at the nearest shutoff and relieve pressure by opening a downstream fixture; confirm isolation with a pressure gauge or by checking that no water flows.
Wear safety glasses and gloves, drain remaining water, and mark cut locations.
Use appropriate cutters or saws, support adjacent piping, and remove the corroded section carefully to avoid disturbing joints, debris, or structural supports.
Step 3 Prepare pipe ends and fittings for connection
With the corroded section removed and the line depressurized, attention shifts to preparing the remaining pipe ends and any replacement fittings for a reliable joint.
Cut squarely, deburr and chamfer edges, then clean surfaces with appropriate cleaners (emery cloth, wire brush, or solvent wipes) depending on material.
Dry thoroughly, measure and mark insertion depth, and test-fit fittings to guarantee correct alignment before final joining.
Step 4 Install new pipe (methods for soldering copper, crimping PEX, solvent welding CPVC/PVC)
Install the replacement section using the technique appropriate to the material—soldering for copper, crimping for PEX, or solvent welding for CPVC/PVC—following manufacturer specifications and local code.
For copper, flux, heat evenly, apply solder to joint.
For PEX, push tubing fully into fitting, seat ring, compress with calibrated crimper.
For CPVC/PVC, apply primer, solvent cement, assemble quickly and align before set.
Step 5 Pressure test the repaired section and check for leaks
After completing the joint work, the repaired section should be pressure tested to confirm watertight integrity and proper seating of fittings.
Isolate the section, attach a pressure gauge and pump (air or water per code), pressurize to recommended psi, and monitor for drops.
Inspect all joints and fittings for visible leaks and listen for hissing.
Depressurize slowly and document results before restoring service.
Step 6 Restore system, insulate pipes, and finish exposed areas
Recommission the plumbing system by gradually restoring service, then insulate and repair any exposed surfaces to protect the new pipes and return the area to its original condition.
Open valves slowly, observe pressure and joints, and confirm no leaks.
Apply appropriate pipe insulation, secure with tape or clamps, restore wall or ceiling finishes, and document work for future maintenance and warranties.
Comparisons of Replacement Options
To compare replacement options, the article summarizes how copper, PEX, CPVC, PVC, and galvanized alternatives differ in longevity, cost, installation ease, and system suitability. The following table provides a concise side-by-side of key traits to guide selection. Readers are encouraged to match material properties to system needs and budget.
| Material | Longevity / Durability | Notes on Cost & Installation |
|---|---|---|
| Copper | High (50+ years) | More expensive, requires soldering or fittings, good for potable water |
| PEX | High (40+ years) | Moderate cost, flexible and easy to install, excellent for retrofits |
| CPVC | Moderate (25–40 years) | Lower cost than copper, glued joints, suitable for hot water |
| PVC | Moderate (20–40 years) | Low cost, solvent-welded, for cold-water or drain lines |
| Galvanized | Low (prone to corrosion) | Often least desirable for replacements due to rust and limited lifespan |
Copper vs. PEX vs. CPVC vs. PVC vs. Replacing with galvanized alternatives
Compare material options by weighing durability, cost, installation complexity, and susceptibility to corrosion or contamination.
Copper resists heat and pressure but corrodes in aggressive water.
PEX offers flexibility and fewer joints yet can’t handle UV and may leach chemicals.
CPVC tolerates hot water but is brittle with age.
PVC suits cold water and drainage only.
Replacing with galvanized alternatives reintroduces corrosion risks and heavier maintenance.
Longevity, cost, ease of installation, and suitability for different systems
Longevity, cost, installation difficulty, and system compatibility form the core criteria for selecting a replacement pipe material.
Copper lasts decades, resists heat, but costs more and requires soldering.
PEX is affordable, flexible, easy to install, suitable for most residential systems.
CPVC balances cost and heat resistance.
PVC is cheap for drains only.
Galvanized offers poor longevity and is generally discouraged.
Common Problems During Replacement and How to Fix Them
Common problems during pipe replacement include stuck fittings and seized pipe sections, which often require penetrating oil, heat, or cutting tools to free.
Soldering or adhesive failures and minor post-installation leaks can usually be corrected by reflowing joints, replacing faulty fittings, or tightening connections.
If a leak persists or worsens, the recommended course is to shut off the water, reassess the joint or pipe for structural failure, and consider section replacement or professional help.
Dealing with stuck fittings and seized pipes
When replacing corroded pipes, technicians often encounter fittings that refuse to budge or sections of pipe that are effectively fused by rust and mineral buildup.
Apply penetrating oil, allow soak time, then use correct-size wrenches with gradual, alternating force. Heat joints cautiously to expand metal if appropriate.
Cut out irreparable sections and replace fittings, ensuring new connections are supported and aligned to prevent stress.
Handling soldering or adhesive failures
Addressing soldering or adhesive failures requires diagnosing the failure mode quickly and choosing the correct remediation: inspect joints for cold solder, incomplete wetting, flux residue, or gaps in capillary action; for adhesives, look for improper surface prep, wrong adhesive type, or insufficient cure.
Rework solder by cleaning, reflowing with proper heat and fresh solder/flux.
For adhesives, remove failed bond, reprepare surfaces, select correct product, and follow full cure.
Fixes for minor leaks after installation
Diagnose minor leaks promptly by drying the area, observing the source, and testing joints under normal system pressure for brief periods; most small drips stem from loose fittings, imperfect seals, hairline cracks, or residual flux/cleaning agents that prevent proper adhesion.
Tighten fittings incrementally, replace worn washers or O-rings, clean and reapply sealant or tape, and replace tiny damaged sections with compression couplings for a reliable, neat repair.
What to do if the leak persists or worsens
If tightening fittings and swapping washers or short sections does not stop a leak—or if seepage increases after those repairs—the next steps focus on isolating the cause and preventing further damage.
Shut off water, dry the area, and inspect joints, solder, and pipe integrity. If corrosion, hairline cracks, or hidden joints are found, replace the full affected run.
Call a licensed plumber for complex or worsening leaks.
Preventing Future Corrosion and Extending Pipe Life
Preventing future corrosion and extending pipe life requires selecting corrosion-resistant materials and applying appropriate protective coatings.
Treatment of the water—including pH adjustment and use of sacrificial anodes where applicable—along with proper supports, insulation, and environmental controls, minimizes deterioration.
A routine maintenance schedule to inspect coatings, connections, and system conditions catches problems early and preserves service life.
Corrosion-resistant materials and protective coatings
Choosing corrosion-resistant materials and applying appropriate protective coatings are fundamental strategies for extending pipe service life and reducing maintenance costs.
Practical options include stainless steel, copper-nickel alloys, HDPE, and PVC for specific environments.
Epoxy linings, polyurethane paints, and powder coatings provide barrier protection.
Selection should match fluid type, temperature, mechanical wear, and budget, with surface preparation essential for coating adhesion and longevity.
Water treatment, pH adjustment, and sacrificial anodes
Several complementary strategies—water treatment, pH control, and sacrificial anodes—work together to minimize electrochemical attack and prolong pipe life.
Conditioning water reduces dissolved oxygen, chlorides, and hardness that accelerate corrosion.
pH adjustment stabilizes passive films on metal surfaces.
Sacrificial anodes (zinc, magnesium) provide a preferential corrosion target, protecting fittings and pipe bodies when properly sized and periodically inspected.
Proper support, insulation, and environmental controls
Support and isolation of piping systems reduce mechanical stress, limit moisture exposure, and stabilize temperatures—key factors that slow corrosion and extend service life.
Proper hangers, spacing, vibration pads, and dielectric unions prevent wear and galvanic action.
Insulation resists condensation and thermal cycling.
Environmental controls—ventilation, dehumidification, and drainage—keep surroundings dry and chemically benign, minimizing accelerated deterioration.
Routine maintenance schedule to detect issues early
Establishing a regular inspection and maintenance schedule enables early detection of corrosion indicators—such as pitting, discoloration, leaks, and loose supports—before they escalate into failures.
Inspectors should perform monthly visual checks, quarterly detailed inspections with measurements and coating assessment, and annual professional evaluations including pressure testing.
Record findings, prioritize repairs, replace compromised sections promptly, and adjust intervals based on environment and pipe material.
When to Hire a Professional and What to Expect
When corrosion affects main lines, building structure, or multiple units, a licensed plumber is typically required to guarantee code compliance and safety.
Homeowners should prepare specific questions about experience, permits, materials, and compare written estimates for scope, exclusions, and contingency costs.
Expect a clear timeline, written warranty details, and formal inspection or permit closeout as part of the professional process.
Complex scenarios that require licensed plumbers (main line, structural, multi-unit)
Although many corroded-pipe issues can be handled by a competent DIYer, certain situations clearly require a licensed plumber: suspected main sewer or water line failures, work that affects structural elements or load-bearing components, and plumbing in multi-unit buildings where code compliance and tenant safety are at stake.
Professionals assess risk, obtain permits, coordinate structural repairs, handle complex reroutes, and guarantee inspections and insurance documentation are completed.
Questions to ask contractors and how to evaluate estimates
How should a homeowner vet contractors and compare estimates to verify a fair, code-compliant repair?
Ask for license numbers, proof of insurance, references, and recent local job photos.
Request written, itemized estimates detailing materials, labor, permit fees, and scope.
Compare warranties, timelines, and change-order policies.
Verify code adherence by checking permits and asking which inspection authority will approve the work.
Typical timelines, warranties, and inspection processes
Why hire a pro rather than attempt a DIY fix?
Professionals provide accurate timelines—minor repairs hours, partial re-pipes a day, full replacements several days—accounting for drying and inspections.
Licensed contractors offer warranties on labor and materials; warranty terms and transferability vary.
Expect municipal or third‑party inspections, permit verification, pressure testing and written completion reports before final sign‑off and warranty activation.
Quick Troubleshooting Checklist and Emergency Steps
The section outlines immediate actions for major leaks or burst pipes, including shutoff procedures and temporary containment.
It provides a concise checklist to verify a DIY replacement was completed correctly and is watertight.
It also lists reliable sources for replacement parts, essential tools, and further instructional resources.
Immediate actions for major leaks or burst pipes
Act swiftly when a major leak or burst pipe occurs: shutting off the main water supply and cutting power to affected areas are the immediate priorities to prevent flooding and electrical hazards.
Then: contain water with buckets and towels, drain remaining lines, locate and mark the burst section, call a licensed plumber if needed, document damage for insurance, and ventilate and dry the area to reduce mold risk.
Short checklist to confirm a successful DIY replacement
Confirm successful DIY pipe replacement with a concise walkthrough:
Inspect all joints and fittings for visible leaks.
Verify valves operate smoothly and fully.
Restore water slowly while watching pressure and flow at multiple fixtures.
Check for dampness or drips after 15–30 minutes.
Guarantee no unusual noises or vibration occur.
Test hot-water circulation and drainage.
If issues arise, tighten fittings, reseat seals, or isolate affected sections and shut water off.
Resources for parts, tools, and further learning
Several concise resource types guide parts procurement, tool selection, and continued learning for DIY pipe replacement: local plumbing supply stores and manufacturer websites for matched fittings and certified parts; online marketplaces with user reviews for specialty items; rental centers for nondisposable tools like pipe threaders and press machines; and vetted tutorial sources—trade association guides, community college courses, and reputable how-to videos—for technique and safety refreshers.
- Parts: certified fittings, seals
- Tools: buy vs. rent decisions
- Learning: vetted courses, guides
- Emergency: quick shutoff, contact pros
Conclusion
Like a gardener tending an old orchard, the homeowner removes with care each blighted branch of piping, exposing roots that demand honest repair. Replacing corroded pipes becomes seasonal stewardship rather than a frantic harvest—methodical, safe, and informed. When tools and caution converge, the plumbing can be renewed to bear long seasons of reliable flow; yet knowing when to call a skilled arborist keeps the whole system resilient beyond a single repair.