
How to Fix Frozen Hot Water Pipes Fast: Step-by-Step Troubleshooting and Prevention
If your hot water pipe has frozen, act quickly to prevent further damage. First, shut off the water supply to the affected line and open nearby faucets to relieve pressure. Then, carefully apply heat with a hair dryer or space heater, while monitoring for any leaks. It’s essential to wear protective gear during this process. For stubborn frozen sections, consider using heat tape or insulating wraps. After thawing, check all joints and fittings for leaks, and use temporary clamps or epoxy for small leaks until a permanent repair can be made. Follow these steps for effective troubleshooting, repair options, and prevention methods.
What to do immediately when a hot water pipe is frozen
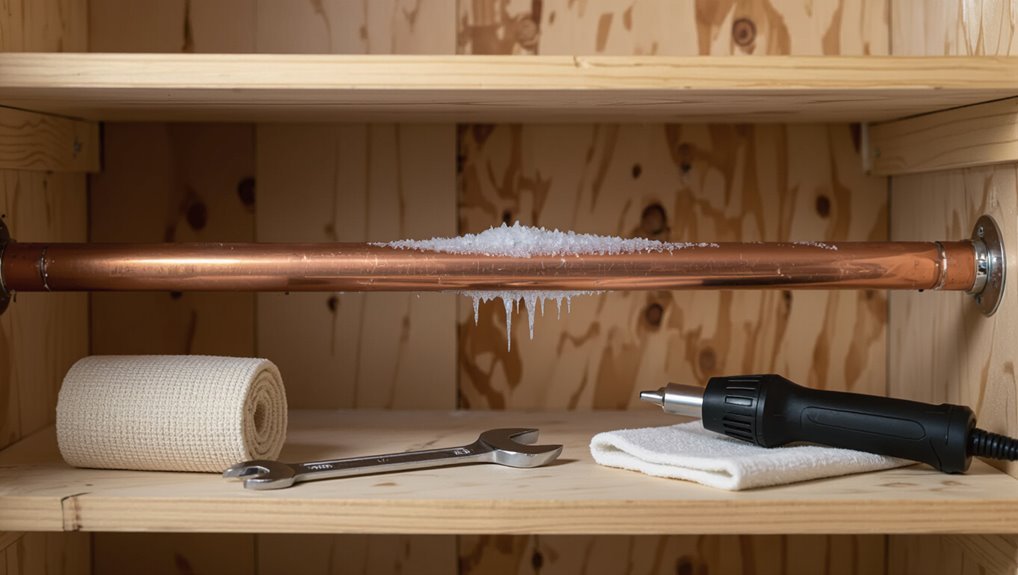
First, confirm a hot water pipe is frozen by checking for no flow at hot taps, cold or frost on exposed pipe sections, and unusual bulging or cracking sounds.
Before attempting any thawing, the person should shut off the water supply if a rupture is suspected, turn off electrical power near wet areas, and wear appropriate gloves and eye protection.
Keep a quick checklist of tools and materials—hair dryer or heat gun, pipe insulation or towels, a bucket, and a portable heater or space heater—and verify they are readily available.
How to confirm a hot water pipe is frozen (signs to check)
How can one tell if a hot water pipe is frozen? Indicators include no hot water at fixtures, sputtering or reduced flow, cold or frost-coated pipe surfaces, bulging pipe sections, and unusually low water pressure.
Listen for creaks or knocking near plumbing.
Confirm by checking exposed pipes in basements, crawlspaces, and exterior walls before following guidance on how to fix frozen hot water pipes.
Safety precautions before attempting any thawing
Before attempting to thaw a frozen hot water pipe, the homeowner should immediately shut off the water supply to the affected line (or the main shutoff if the individual valve is unknown) and open nearby faucets to relieve pressure and allow expanding ice to flow out as it melts.
Next, they should turn off electricity or gas to affected appliances, clear the area, wear protective gloves, and monitor for leaks.
Quick checklist: tools and materials to have on hand
After shutting off supply, opening faucets, and securing power sources, the homeowner should assemble a compact kit to act immediately when a hot water pipe is discovered frozen.
The kit minimizes damage and speeds thawing with safe, controllable tools and basic repair items.
- Hair dryer, electric space heater, or heat gun (with extension)
- Towels and a bucket
- Pipe insulation and heat tape
- Adjustable wrench and plumber’s tape
Step-by-step emergency thawing for frozen hot water pipes
The section outlines a clear emergency thawing sequence: shut off water and any gas or electric heat to the affected fixture, open faucets to relieve pressure, and apply safe heat sources such as a hair dryer, space heater, or heat lamp following manufacturer guidance.
It then covers using heat tape or insulating wraps on stubborn sections and monitoring progress closely.
Finally, it explains how to check for leaks as pipes warm and pressure returns.
Step 1 Turn off the water supply and gas/electric heating to the fixture
When a fixture shows signs of frozen pipes, the homeowner should immediately shut off the water supply to that section and disable any gas or electric heating tied to the fixture; this prevents pressure buildup and eliminates heat sources that could create unsafe conditions during thawing.
Confirm valves are fully closed and power is isolated at breakers or appliance switches before proceeding with safe thawing measures or calling a professional.
Step 2 Open faucets to relieve pressure and allow water to flow
Open the hot and cold faucets served by the frozen line to relieve trapped pressure and provide a clear flow path as ice melts.
Doing so prevents pipe bursts, indicates thaw progress by visible dripping, and helps move warm water toward the blockage.
Keep faucets partially open until full flow resumes, then inspect for leaks and restore normal supply only after confirming pipes are fully thawed.
Step 3 Apply safe, effective heat sources (space heater, hair dryer, heat lamp) and how to use each
Begin applying controlled heat to the frozen section using safe, portable sources—space heaters, hair dryers, or heat lamps—while maintaining a cautious distance and steady movement to prevent overheating any single spot.
Position a space heater nearby for ambient warmth, sweep a hair dryer along the pipe surface, or aim a heat lamp from several feet away.
Monitor temperature and never leave unattended.
Step 4 Use heat tape or insulating wraps for stubborn sections
Apply heat tape or insulating wraps to stubborn frozen sections as a targeted follow-up when portable heat hasn’t restored flow.
Select UL-listed self-regulating tape or fiberglass wraps with vapor barrier. Secure along pipe length, overlapping per manufacturer instructions, and plug tape into a GFCI outlet.
Insulation improves heat retention; monitor cord temperature and avoid direct contact with combustible materials while restoring circulation.
Step 5 Monitor thawing progress and how to check for leaks
Check the pipe and surrounding area frequently as thawing proceeds to confirm water flow is returning and to detect any leaks early.
Observe joints, fittings, and nearby walls for drips or moisture.
Run faucets to relieve pressure and verify hot water delivery.
If any leak is suspected, shut off the supply, dry the area, and document the location for repair or plumbing service.
Step 6 What to do if a pipe bursts during thawing
If a pipe bursts during thawing, act quickly to limit water damage and guarantee safety: shut off the main water supply, open nearby faucets to drain remaining water and relieve pressure, and turn off electrical circuits serving wet areas to prevent shock.
Contain leaks with buckets and towels, document damage, call a professional plumber, and contact insurance.
Avoid restoring water until repairs are complete.
Troubleshooting when thawing doesn’t work
If thawing fails, the next step is to assess whether the blockage is in an inaccessible location—such as a basement, crawlspace, or inside an interior wall—where heat cannot easily reach.
The homeowner must then weigh boosting home heat or localized warming against the risks and recognize when a professional plumber or contractor is required.
Meanwhile, simple temporary workarounds—like isolating the frozen line and using alternate faucets or a hot-water source—can restore limited service until repairs are made.
Identifying inaccessible or concealed frozen pipes (basement, crawlspace, interior walls)
How can a homeowner tell whether a stubborn cold spot means a concealed frozen pipe rather than a surface temperature drop?
Inspect for localized frost, bulging drywall, or patterns of cold along known pipe runs.
Tap for dull, solid sounds.
Check nearby fixtures for reduced flow.
Use a non-contact infrared thermometer or thermal camera to map temperatures.
Access crawlspaces or basements to trace insulated but chilled pipe sections.
When to increase heat vs. call a professional
When thawing attempts fail, the homeowner must quickly decide whether to raise ambient heat or call a professional based on clear signs: persistent cold or no water flow after several hours, visible pipe damage (cracks, bulging, or leaking), inability to access the frozen section safely, or any electrical hazards near the affected area all indicate professional intervention is needed.
Modestly increasing heat and monitoring may be appropriate for short-term, accessible freezes without structural damage, but escalation should occur promptly when risks to plumbing integrity, property, or personal safety appear.
Temporary workarounds to restore hot water while awaiting repair
Consider temporary measures that restore hot water service or bypass the frozen section without risking further damage; these stopgap solutions are meant only to provide limited function until professional repair can be completed.
Options include isolating and draining the frozen segment, opening adjacent valves to route hot water from an alternate loop, using secondary heaters at fixtures, and employing safe, localized thawing tools sparingly.
Repairing damage after a frozen pipe incident
After thawing, the homeowner should inspect exposed runs and fittings for splits, pinhole leaks, corrosion, and wet insulation to determine the extent of damage.
Small leaks can be managed temporarily with pipe clamps, epoxy putty, or rubber patched with hose clamps while planning a permanent fix.
Decisions about replacing a pipe section versus calling a professional depend on damage extent, pipe material, and access, with costs and timelines varying from a few hours and modest parts for simple repairs to a day or more and higher expense for extensive or concealed work.
How to find and assess pipe damage after thawing
Inspect the plumbing system methodically once ice has cleared, prioritizing visible joints, fittings, and areas where pipes traverse unheated spaces.
Check for cracks, bulges, pinholes, corrosion, and wet insulation.
Run water at each fixture to reveal leaks and monitor pressure drops.
Photograph damage, note pipe material and location, and determine if fittings, sections, or the main line require professional repair or replacement.
Temporary fixes for leaks (pipe clamps, epoxy putty, rubber and hose clamps)
Begin by stabilizing leaks with temporary methods that restore containment quickly while awaiting permanent repairs.
The homeowner assesses leak size and pressure, then applies an appropriate temporary fix to minimize water loss and damage.
- Pipe clamp: metal band and gasket for pinhole and small splits.
- Epoxy putty: molds and cures over cracks.
- Rubber with hose clamp: cushions irregular breaks.
- Wrap tape: high-pressure sealing for minor weeps.
When to replace a section of pipe vs. full professional repair
Once temporary measures have stopped the leak and limited water damage, the homeowner must decide whether repairing a short damaged segment or calling a professional for full replacement is appropriate.
Small, localized splits or pinholes in accessible lines can often be cut out and replaced with compatible fittings.
Extensive crushing, multiple leaks, corrosion, compromised joints, or hidden damage warrant licensed plumbing assessment and full-section replacement.
Cost considerations and typical repair timeframes
While repair scope depends on pipe material, access, and extent of damage, the main cost drivers are labor, parts, and any required drywall or flooring restoration. Typical minor repairs cost $150–$500 and take 1–3 hours; major restorations run $1,000–$5,000 and may need days.
| Repair type | Typical cost | Timeframe |
|---|---|---|
| Minor leak | $150–$500 | 1–3 hrs |
| Section replace | $300–$1,200 | 2–6 hrs |
| Major damage | $1k–$5k+ | 1–5 days |
Preventing hot water pipes from freezing in the future
To prevent future hot water pipe freezes, the article will outline practical measures including pipe insulation options and installation tips, selection and safe installation of heat tape or thermostatic cable, and methods to improve home heat distribution and seal air leaks.
It will also provide a seasonal plumbing maintenance checklist to keep protective measures effective. Readers will gain concise, actionable steps to reduce freeze risk and limit repair needs.
Insulation solutions: pipe insulation types and installation tips
Inspecting and selecting proper pipe insulation is the most effective long-term strategy for preventing hot water pipes from freezing.
Foam sleeves, fiberglass wrap, and rubber insulation each suit different temperatures and pipe locations.
Guarantee snug fits, seal seams with foil tape, and insulate elbows and joints.
Maintain minimum R-value for exposed runs, secure with zip ties, and avoid compressing insulation which reduces effectiveness.
Heat tape and thermostatic cable: selection and safe installation
Several practical options exist for keeping hot water pipes thawed and ice-free: electric heat tape and self-regulating thermostatic cable are the most common, each designed for specific pipe materials, lengths, and exposure conditions.
Select UL-listed products matched to pipe type and temperature range, follow manufacturer routing and spacing, secure with approved tape or clips, ground as required, and test operation before insulating.
Improving home heat distribution and sealing air leaks
After choosing and installing appropriate heat tape or thermostatic cable, attention should turn to the building envelope and HVAC distribution to reduce heat loss that forces pipes toward freezing.
Inspect and seal gaps around penetrations, add insulation to exterior walls and crawlspaces, balance registers to deliver warm air to vulnerable areas, and consider zoning or redirecting ductwork.
These measures maintain ambient pipe temperatures and prevent future freezes.
Seasonal plumbing maintenance checklist
A seasonal plumbing maintenance checklist helps homeowners systematically prevent hot water pipe freezes by prioritizing inspections, insulation, and routine adjustments before cold weather arrives.
It outlines tasks, timing, and responsibilities to reduce risk and repair costs.
- Inspect exposed pipes and joints.
- Add or replace insulation.
- Test and service water heater and valves.
- Seal and heat vulnerable spaces.
Special cases and targeted advice
The guide next addresses specific scenarios that require tailored steps and precautions.
Exterior hose bibs, outdoor and irrigation lines, and pipes in unheated spaces like garages, crawlspaces, and attics each present distinct freezing risks and repair approaches.
Additional attention is warranted for older homes with galvanized or lead piping and for multi-unit buildings where shared supply lines can propagate problems.
Exterior hose bibs, outdoor pipes and irrigation lines
Inspect exterior hose bibs, outdoor supply lines, and irrigation systems for freezing risk before attempting repairs, since these components have different vulnerabilities and thawing needs than interior plumbing.
Disconnect hoses, drain lines, and shut off isolated outdoor valves. Use gentle heat sources and open adjacent indoor valves to relieve pressure.
Replace damaged spigots, insulate exposed piping, and winterize irrigation systems to prevent recurrence.
Pipes in unheated rooms (garages, crawlspaces, attics)
Many unheated rooms—garages, crawlspaces, and attics—create concentrated risk for pipe freezing because they lack consistent ambient warmth and often contain exposed or poorly insulated piping.
Inspect for exposed runs, add foam insulation or heat tape rated for the location, seal drafts and access points, and maintain minimal thermostat heat or use thermostatically controlled space heaters.
Monitor and thaw carefully if freezing occurs.
Older homes with galvanized or lead piping: extra risks and considerations
Because older homes often contain galvanized or lead piping that corrodes, clogs, or becomes brittle over time, these systems present greater risk of rupture when frozen and require different handling than modern copper or PEX lines.
Homeowners should avoid high heat, open valves slowly to relieve pressure, inspect for pinholes or leaks, and contact a plumber for fragile, corroded runs or hazardous lead concerns.
Multi-unit buildings and shared supply line issues
In multi-unit buildings, frozen hot water issues often affect entire sections because supply lines and risers are shared.
Resolving a single unit’s problem may require coordination with building management or neighbors to shut down and thaw the common run safely.
Technicians should verify building-wide isolation points, prioritize central riser thawing, document affected units, schedule controlled heat application, and follow liability and permit requirements.
When to call a professional plumber or emergency services
Recognizing red flags—burst pipes, gas smell, or widespread flooding—signals the need for immediate professional or emergency response.
Homeowners should ask plumbers about licensing, experience with frozen-pipe thawing, estimated costs, and response time before hiring.
A professional thawing and repair service typically assesses damage, outlines repair or replacement options, and uses safe thawing methods while restoring water and testing for leaks.
Red flags that require immediate professional attention
When should a homeowner stop DIY efforts and call for help?
Immediate professional attention is required for visible burst pipes, uncontrollable leaks, gas odor, electrical sparks near plumbing, loss of water pressure throughout the home, sewage backup, or frozen pipes repeatedly failing despite warming attempts.
Also call if structural damage, extensive ice buildup, or inability to locate shutoff valves occurs.
Questions to ask a plumber before hiring
Who should a homeowner call and what should they ask first? A licensed plumber or emergency plumbing service; ask about availability, licensing, insurance, experience with frozen pipes, and estimated response time.
Also request a diagnosis fee, hourly rates, emergency surcharges, and whether permits are needed.
Confirm written estimates and warranty on repairs before hiring to avoid surprises and guarantee accountability.
What to expect from a professional thawing and repair service
Call a professional as soon as DIY thawing fails, visible pipe bulging appears, or significant water loss or freezing has affected more than a small section of the system.
A licensed plumber assesses damage, isolates and safely thaws pipes using heat or hot water circulation, checks for leaks, replaces or reinforces damaged sections, restores pressure, and documents repairs.
Emergency services handle major ruptures and flooding.
Helpful tools, products, and resources
This section lists recommended products for safely thawing and preventing frozen hot water pipes, such as pipe heaters, heat tape, and thermostatic pipe wraps.
It also points to trusted online resources and further reading from plumbing associations and government safety sites.
Readers are directed to compare product specifications and follow manufacturer guidance.
Recommended products for thawing and prevention
Several essential tools and products can make thawing frozen hot water pipes safer and more effective, while a few preventive items reduce future risk.
Professionals recommend targeted, safe options and preventive measures to minimize damage and recurrence.
- Electric pipe heating tape for controlled thawing
- Portable infrared heater for localized warming
- Insulating foam sleeves and pipe wrap
- Faucet leak detectors and smart thermostats for prevention
Further reading and trusted online resources
A concise list of authoritative sources helps homeowners find reliable guidance, tools, and products for thawing and preventing frozen hot water pipes.
Trusted sites, manufacturer manuals, and local utility advisories offer practical steps, safety notes, and product reviews. Curated resources reduce risk and save time.
- EPA, plumbing safety guidance
- Manufacturer installation manuals
- National Weather Service cold-weather tips
- Local utility/municipal advisories
Conclusion
When a hot water pipe freezes, decisive action and calm judgment minimize harm and restore service. Follow immediate safety steps, attempt controlled thawing, and inspect for damage; if problems persist, seek professional help. Repair and preventive measures reduce recurrence and costly surprises. Like a Victorian clockmaker suddenly asked to wield a smartphone, a homeowner combining old-fashioned caution with modern tools can reliably protect plumbing against winter’s bite and keep hot water flowing.
