
How to Paint a Round Table: Step-by-Step Guide for a Smooth, Durable Finish
To successfully paint a round table for a smooth and durable finish, follow these essential steps: first, clean and repair the table, addressing any dents or loose joints. Next, sand the surface, including edges and legs, to ensure proper adhesion. Select an appropriate primer based on the material and potential stain risk, applying it in thin, overlapping coats with light sanding in between. Use quality brushes or rollers for the best results, adhering to recommended dry times. Finally, seal your work with polyurethane or polycrylic for added durability. For detailed techniques and troubleshooting tips, continue reading.
What to Expect When Painting a Round Table
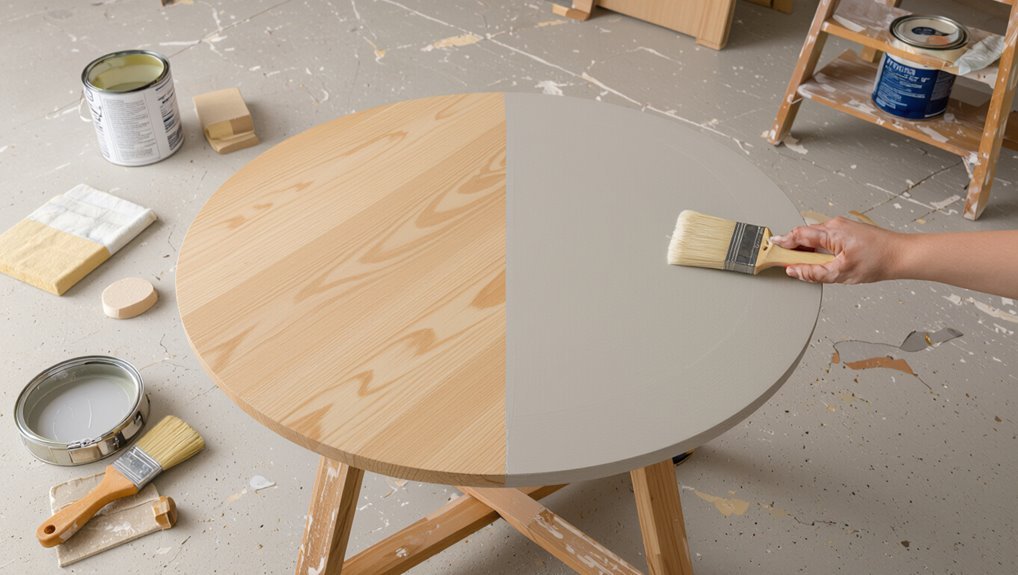
The section outlines the typical sequence for painting a round table, from cleaning and sanding through priming, painting, and sealing.
It also summarizes expected time, material costs, and the overall difficulty for a homeowner project.
Readers are given a concise sense of preparation and commitment before starting.
Overview of the process from prep to finish
Begin by evaluating the table’s condition, workspace, and desired outcome to establish a clear, step-by-step plan for the job.
The overview covers cleaning, sanding, priming, painting, and sealing. It outlines tool selection, surface preparation, paint type, application techniques, drying times, and light sanding between coats.
Safety, dust control, and final inspection guarantee a smooth, durable finish when learning how to paint a round table.
Typical time, cost, and difficulty level
Although overall time and cost vary with size and condition, painting a typical round table usually requires a single afternoon to a weekend and modest expense for materials.
Difficulty is low to moderate: basic sanding, priming, and two coats of paint require minimal skills and common tools. Allow for drying and curing times.
Budget $20–$100 depending on paint quality and hardware needs.
Materials and Tools You’ll Need
A clear list of supplies helps guarantee a smooth paint job on a round table, from choosing durable paint types and finishes to selecting the right application method.
Essential tools include brushes, rollers, or spray equipment, plus sanding and cleaning materials and basic safety gear.
Optional items for specialty effects—chalk paint, glaze, and stencils—can be added depending on the desired look.
Paint types and finishes suitable for tables
Selecting the right paint and finish determines a table’s durability, appearance, and maintenance needs.
Water-based acrylics dry fast, resist yellowing, and clean easily; oil-based enamels offer tougher, smoother surfaces for heavy use.
Chalk and milk paints suit matte, vintage looks but require protective topcoats.
For durability, choose a high-quality polyurethane or water-based varnish in satin or semi-gloss.
Brushes, rollers, and spray equipment options
After choosing paint and finish, attention turns to the application tools that determine texture, coverage, and speed.
Natural-bristle brushes suit oil-based paints; synthetic brushes suit water-based. Foam rollers minimize texture on flat surfaces. Short-nap rollers work for table tops; microfiber for smoothness.
HVLP sprayers deliver fine, even coats for professional results but require masking and practice.
Select tools by paint type and desired surface.
Sanding, cleaning, and safety supplies
Before any paint touches the table, the surface must be properly prepared with the right sanding, cleaning, and safety supplies to confirm adhesion and a smooth finish.
Gather sandpaper (80–220 grit), sanding block or orbital sander, tack cloth, degreasing cleaner, rags, putty and scraper for repairs, respirator or mask, safety goggles, and nitrile gloves to guarantee effective surface prep and personal protection.
Optional supplies for specialty effects (chalk paint, glaze, stencils)
For specialty finishes, assemble a concise kit of optional supplies tailored to the chosen effect:
- chalk paint or mineral paint for matte, velvety bases;
- clear and tinted glazes for depth and antiquing;
- foam brushes and high-density foam rollers for smooth laydown;
- artist brushes and stippling brushes for detail work;
- adhesive stencils or vinyl templates for repeatable patterns;
- painter’s tape and low-lint tack cloths for crisp edges;
- fine-grit sandpaper or sanding pads for light distressing;
- clear waxes and soft cotton rags or wax brushes for protective finishes;
- and small disposable containers and stir sticks to mix and thin products as needed.
Choosing the Right Paint and Finish
The discussion turns to paint and finish choices suited for tabletops, comparing durable formulations such as alkyd, acrylic, and enamel.
It then contrasts surface sheens—matte, satin, semi-gloss, and gloss—with their respective appearance and wear characteristics.
Finally, it reviews protective topcoats and sealers like polyurethane, polycrylic, and wax to recommend appropriate long-term protection.
Durable paint options for tabletops (alkyd, acrylic, enamel)
When durability is a priority for a tabletop, choosing between alkyd, acrylic, and enamel paints requires weighing their hardness, flexibility, and cure characteristics.
Alkyd offers hard, oil-based toughness.
Acrylic provides flexible, fast-drying resilience.
Enamel (often a finish rather than a specific base) delivers a hard, glossy surface ideal for heavy use.
Sealers and proper curing enhance longevity; application method matters.
Pros and cons of matte, satin, semi-gloss, and gloss finishes
Selecting a paint sheen for a tabletop influences appearance, durability, and maintenance as much as the type of paint chosen. Matte hides imperfections but resists cleaning; satin balances sheen and wipeability; semi-gloss offers durability and light reflection; gloss maximizes toughness and shine but highlights flaws. Choose based on usage and desired look.
| Sheen | Pros | Cons |
|---|---|---|
| Matte | Hides flaws | Harder to clean |
| Satin | Versatile | Moderate sheen |
| Semi-gloss | Durable | Shows imperfections |
| Gloss | Tough, shiny | Highlights flaws |
Best sealers and topcoats for protection (polyurethane, polycrylic, wax)
Sealers and topcoats protect paint and define a tabletop’s look and longevity.
Polyurethane offers the hardest, most durable finish for heavy use; oil-based versions amber slightly, water-based stay clear.
Polycrylic is clear, low-odor, and resists scratches for lighter traffic.
Paste wax adds warmth and subtle sheen but requires regular reapplication and offers minimal protection compared with films.
Preparing the Round Table Surface
Before painting, the surface must be thoroughly cleaned and degreased, and any existing paint or varnish removed using methods appropriate for the finish and condition.
Attention should be paid to sanding round edges and legs, repairing dents, cracks, and loose joints so the tabletop is structurally sound.
Finally, the need for primer and the correct type—stain-blocking, bonding, or oil- vs. water-based—should be determined based on the wood and chosen topcoat.
How to clean and degrease the tabletop
Cleaning and degreasing the tabletop guarantees paint adhesion and a smooth finish.
The surface should be wiped with a microfiber cloth, then cleaned with a mild degreaser or trisodium phosphate solution, following product instructions.
Rinse thoroughly with clean water and dry completely.
For greasy spots, repeat cleaning or use a citrus-based cleaner.
Verify no residue remains before sanding or priming.
Removing old paint or varnish safely
Strip or abrade the existing finish to reveal bare wood or a stable substrate, using methods chosen for the table’s age, material, and condition.
Work in a ventilated area, wear gloves, eye protection, and an appropriate respirator.
Use chemical strippers compatible with the finish or a heat gun for stubborn coatings, removing residue with scrapers and brushes.
Dispose of waste per local regulations.
Sanding techniques for round edges and legs
Once the old finish is removed and the surface is bare or stable, attention turns to sanding round edges and legs to create smooth, even profiles ready for primer or stain.
Use flexible sanding pads or folded coarse-to-fine grit sandpaper, follow contours with light, even pressure, and rotate the piece when possible.
Finish with 220–320 grit for a uniform tooth, removing dust between steps.
Repairing dents, cracks, and loose joints
Assess the tabletop and legs for dents, hairline cracks, and wobbling joints before proceeding, because addressing structural and surface flaws guarantees a durable, professional finish.
Fill dents and shallow gouges with wood filler, sanding smooth when cured. Inject thin cracks with glue, clamp until set.
Tighten or re-glue loose joints, replace damaged screws or dowels, and remove excess adhesive before final sanding.
When to use primer and which type to choose
After structural repairs and sanding are complete, deciding whether to prime depends on the tabletop’s material, existing finish, and the paint type planned.
Use oil-based primer for bare wood or tannin-rich species; bonding or shellac-based primers for glossy or stained surfaces; stain-blocking primer for bleed-through risk; and latex primers for previously painted, non-porous surfaces.
Match primer to topcoat for adhesion and durability.
Layout and Masking for a Round Shape
Before any paint is applied, the craftsman marks the table’s center and measures outward to lay out even patterns or segments.
Careful taping follows, conforming to the curved edge and shielding the underside and legs from overspray or drips.
Special attention is given to masking and working around the base and pedestals to guarantee clean lines and protected hardware.
Marking center and measuring for even patterns
How does one pinpoint the geometric center of a round table and translate that point into accurate measurements for an even pattern?
One locates opposite edge points, draws two crossing diameters, and marks their intersection. From that center, measure radii to desired pattern boundaries.
Divide the circumference using a protractor or marked strip for equal segments, and transfer those marks outward to guide stencils or layout lines.
Taping curved edges and protecting underside and legs
Where should the tape meet the curve so the paint line stays true? The tape should follow the tabletop edge closely, eased into curves without gaps.
Mask the underside with paper or plastic, securing with low-tack tape to avoid finish damage.
Wrap or cover legs individually, anchoring protective sheeting at joints.
Remove tape after paint becomes tacky to prevent peeling.
Working around table base and pedestals
With the edge taped and undersides protected, attention shifts to the table base and pedestal layout to guarantee clean lines around curved supports.
Measure radii and mark paint boundaries with pencil. Apply low-tack painter’s tape in short sections to follow contours, overlapping slightly at joints.
Use masking film for larger areas. Remove tape when paint is tacky, not fully cured, to avoid peeling.
Step-by-Step Painting Process
The author outlines a clear sequence for painting the round table, beginning with primer application techniques that guarantee even coverage and recommending sanding between coats for a flawless surface.
Practical methods for brushing or spraying tabletops and strategies for painting rounded edges without drips are presented next.
The section closes with guidance on layering colors, blending decorative finishes, and managing drying times for multi-coat effects.
Applying primer: tips for even coverage
Several light, overlapping passes secure primer lays down evenly without drips or thick spots.
A high-quality brush or foam roller suited to primer type assures consistent texture. Maintain wet edges, apply thin coats, and watch for runs.
Use a steady, moderate pace and inspect under good light to catch missed areas. Allow recommended flash time before continuing with subsequent treatment.
Sanding between coats for a smooth finish
Begin by allowing the primer or paint to cure fully to the manufacturer’s recommended time before any abrasion.
Lightly sand with fine-grit paper (220–320) to remove dust nibs and raise sheen for adhesion. Wipe surfaces with a tack cloth to remove particles.
Repeat sanding between each thin coat, inspect for imperfections, and avoid aggressive sanding that will expose underlying layers.
Best application methods for tabletop surfaces
After sanding between coats and removing all dust, attention shifts to paint application techniques that produce an even, durable tabletop finish.
Use a high-quality synthetic brush for water-based paints or a natural-bristle brush for oil-based, applying thin, consistent strokes along the grain.
Rollers with fine-nap covers work for larger tops.
Maintain wet edges, allow proper drying, and lightly sand between coats for adhesion.
How to paint rounded edges without drips
Tackling rounded edges requires controlled brushwork and the right paint consistency to prevent runs.
Use a small, angled brush, load it sparingly, and work in short strokes following the curve.
Keep the paint thin enough to flow but not drip. Wipe excess on the rim, maintain a steady hand, and inspect for drips before allowing the first coat to set.
Applying multiple color layers or decorative techniques
Layering multiple colors or adding decorative finishes requires planning and measured application so each coat bonds and dries evenly.
Start by mapping the sequence of colors, deciding where base, mid, and highlight tones will sit, and noting areas that need masking or additional sealing.
Apply thin, even coats, sanding lightly between layers. Use appropriate primers or glazes for translucency, and seal with a compatible protective topcoat.
Decorative Techniques and Design Ideas
The article now moves to decorative techniques and design ideas for round tables, presenting options from simple solid color, two-tone, and distressed finishes to patterned treatments.
Practical methods such as stenciling, stripes, and geometric layouts are considered alongside surface effects like faux woodgrain and glazing.
It also outlines ways to incorporate inlays, decoupage, or resin accents to personalize pieces.
Solid color, two-tone, and distressed finishes
Explore three versatile finishing approaches—solid color, two-tone, and distressed—that suit a wide range of stylistic goals and skill levels.
Each method balances simplicity and character: solid for uniform coverage, two-tone to highlight edges or legs, distressed for aged charm.
Consider color contrast, surface prep, and protective topcoats to guarantee durability.
- Solid: clean, modern appeal
- Two-tone: accent and depth
- Distressed: controlled wear
- Durability: seal and protect
Stenciling, stripes, and geometric patterns for round tables
When combined with careful placement and scale, stenciling, stripes, and geometric motifs transform a round table into a focal point without overpowering a room.
Selecting paint contrast, repeating patterns, and centering motifs enhances symmetry.
Use low-tack stencils, crisp tape for stripes, and measure radii for concentric designs.
Seal with a durable topcoat to protect detail and guarantee longevity while preserving sharp lines.
Faux woodgrain and glazing techniques
Bring depth and warmth to a round table by using faux woodgrain and glazing techniques that mimic natural timber without sanding or staining.
Apply base coat, then drag a graining tool or comb through a slightly thinned top color to create veins.
Layer translucent glazes, wiping and blending for subtle variation.
Seal with satin or matte varnish to protect the effect.
Adding inlays, decoupage, or resin accents
Several decorative options—thin wood or metal inlays, printed decoupage motifs, and clear or colored resin accents—can elevate a round table from functional to focal.
Careful planning guarantees pattern placement, depth, and curing. Inlays require routed channels and adhesive; decoupage needs sealed, smooth surfaces and multiple varnish layers; resin demands level work, bubble control, and adequate ventilation for a lasting, professional finish.
Drying, Curing, and Applying Protective Topcoats
Timing between coats is critical: allow the manufacturer-recommended drying times and a light sanding between layers to guarantee proper adhesion.
For clear finishes, apply polyurethane or water-based polycrylic with a high-quality foam or synthetic brush (or a lint-free pad) in long, even strokes and thin coats to minimize brush marks.
Once the finish has fully cured, consider paste wax for a soft sheen or oil finishes for depth, applying sparingly and buffing to the desired luster.
Recommended drying times between coats
Proper drying between coats guarantees each layer bonds and cures as planned, reducing the risk of tackiness, brush marks, or adhesion failure.
Allow water-based paints one to two hours between light coats and 24 hours before topcoat; oil-based require 6–8 hours between coats and 48 hours before sealing.
Adjust for humidity and temperature: longer in cool, humid conditions. Test tack before proceeding.
How to apply polyurethane or polycrylic without brush marks
After verifying each paint layer is fully dry and tack-free, attention turns to applying the protective finish without leaving brush marks.
Use high-quality synthetic brush or foam applicator, thin even coats, and maintain a wet edge.
Sand lightly with fine grit between coats, remove dust, and apply 2–3 coats.
Avoid overbrushing; let each coat level and dry per manufacturer instructions.
When and how to use paste wax or oil finishes
Several finishes—paste wax and oil-based options—offer differing protection and appearance, so choosing between them depends on desired sheen, durability, and maintenance.
Paste wax seals painted surfaces lightly, applied thinly with a cloth after full cure, buffed to sheen.
Oil finishes penetrate and cure slowly, requiring multiple thin coats and adequate ventilation; both need curing time before regular use.
Troubleshooting Common Problems
Common finish problems are addressed next, starting with how to remove brush marks, pop bubbles, and smooth drips without damaging the surrounding paint.
The guide then explains methods to improve adhesion when paint refuses to stick, including surface prep and appropriate primers.
Finally, it covers repairing nicks and chips after the topcoat, with touch-up techniques that restore a uniform appearance.
Fixing brush marks, bubbles, and drips
When brush marks, bubbles, or drips appear on a freshly painted round table, they can usually be corrected without stripping the entire finish.
Diagnosing the cause—overworking the paint, using the wrong brush, applying paint too thickly, or painting in unsuitable conditions—guides the appropriate fix.
Lightly sand imperfections when dry, remove dust, thin or adjust technique, apply a thin touch-up coat, and polish for a uniform surface.
Dealing with paint that won’t adhere
If sanding and thin touch-up coats corrected surface blemishes but paint still lifts or flakes on a round table, the problem is likely poor adhesion rather than finish defects.
Investigate contamination, incompatible primer or paint, or inadequate surface profile. Remove failing paint, degrease, scuff with fine grit, apply appropriate primer and allow full cure between coats.
Test adhesion before completing the project.
Repairing nicks and chips after finishing
Address minor nicks and chips promptly to prevent moisture ingress and further finish deterioration.
Inspect surface, sand edges lightly, and clean debris.
Apply matching wood filler or epoxy, overfill slightly, then sand smooth when cured.
Re-prime exposed areas, feather paint into surrounding finish, and apply thin topcoat layers.
Allow proper drying between coats and buff lightly to blend sheen for a seamless repair.
Caring for and Maintaining a Painted Round Table
Routine care extends the life of a painted round table by following gentle cleaning methods and avoiding harsh chemicals that can strip the finish.
Protection from heat, water, and scratches—using trivets, coasters, and soft placemats—prevents common surface damage.
Small chips or wear can be addressed with spot touch-ups, while widespread deterioration calls for sanding and refinishing to restore the table.
Cleaning instructions to preserve the finish
Begin by removing loose debris with a soft-bristle brush or microfiber cloth to prevent scratches; this initial step protects the painted surface before any liquid cleaning is applied.
Use a mild dish soap diluted in warm water and a soft cloth, wiping gently. Rinse with a damp cloth and dry immediately.
Avoid abrasive cleaners, wax buildup, and prolonged moisture to maintain sheen and durability.
How to prevent heat, water, and scratch damage
After cleaning, protecting the painted surface from heat, water, and scratches preserves both appearance and longevity.
Use coasters, trivets, and placemats for hot dishes and moisture. Wipe spills promptly with a soft cloth and mild cleaner.
Add felt pads under objects and chair legs. Avoid dragging items across the tabletop and limit direct sunlight exposure to reduce finish degradation.
When and how to touch up or refinish
Over time, small chips, scuffs, and areas of wear will appear on a painted round table. Knowing when to touch up versus when to refinish prevents wasted effort and uneven results.
Assess damage: isolated chips or light scratches suit spot repairs with matching paint and light sanding.
Extensive peeling, color fade, or widespread wear requires stripping, full-surface sanding, primer, and repainting for durability.
Cost-Saving Tips and Time-Saving Shortcuts
Selecting durable, affordable supplies and knowing when to hire help versus DIY can greatly reduce project costs.
Guidance on comparing product value, spotting tasks best left to professionals, and streamlining an efficient workflow for painting multiple tables will follow.
Practical tips focus on maximizing results while minimizing time and expense.
Choosing supplies for best value
Budget-conscious painters can maximize results by prioritizing a few high-impact supplies: a quality primer, a durable brush or foam roller, good painter’s tape, and sandpaper in medium and fine grits.
Shop generic-brand primers and paint at reputable stores, buy multi-pack sandpaper, and choose a washable brush for reuse.
Compare coverage per dollar and avoid unnecessary specialty finishes for routine table projects.
When to DIY versus hiring a professional
Decide based on skill, time, and the table’s condition: a simple sanding-and-paint project suits a confident DIYer with a few hours and basic tools, while extensive repairs, complex finishes, or tight deadlines justify hiring a professional.
Cost-saving DIY makes sense for straightforward refurbs; hire pros to guarantee structural fixes, specialty techniques, warranty-backed results, or when avoiding costly mistakes and wasted materials.
Efficient workflow for painting multiple tables
Group similar tables by size, surface type, and required repairs to streamline setup, supplies, and steps so multiple pieces move through each stage—sanding, priming, painting, and finishing—in organized batches; this reduces setup time, minimizes wasted materials, and makes it easier to standardize drying and curing schedules for greater efficiency.
Schedule tasks, prep stations, and tool kits; use quick-dry products, consistent techniques, and labeled staging to cut costs and time.
Safety and Environmental Considerations
The author outlines essential safety measures such as ensuring adequate ventilation, using appropriate respirators, and following guidelines for safe disposal of paints and solvents.
Attention is given to choosing low-VOC and other eco-friendly product options to reduce health risks and environmental impact.
Readers are encouraged to prioritize protective equipment and proper waste handling when planning the project.
Ventilation, respirators, and safe disposal of materials
Proper ventilation and appropriate respiratory protection are essential before starting any painting project, especially indoors, because solvents and paint particulates can accumulate to harmful levels.
Guarantee work areas have continuous fresh-air flow through windows, doors, or mechanical exhaust and that occupants are kept out until fumes dissipate.
Use NIOSH-approved respirators for vapors/particles as needed, store solvents securely, and dispose of rags, paint cans, and thinners per local hazardous-waste regulations.
Low-VOC and eco-friendly product options
Choosing low-VOC and eco-friendly paints minimizes indoor air contamination and reduces long-term environmental impact without sacrificing finish quality.
The guide recommends water-based acrylics, zero-VOC primers, and plant-derived sealers. Look for third-party certifications (Green Seal, GREENGUARD).
Use low-odor solvents and recycled-content sandpaper. Proper labeling and small-sample testing guarantee compatibility and durability for a safe, sustainable tabletop finish.
Visual Examples and Project Plans
The article presents a clear step-by-step project timeline for painting a standard round table, outlining preparation, priming, painting, and drying stages with estimated times.
It also suggests specific before-and-after photo ideas to document progress and highlight finishing choices.
Readers are encouraged to use the timeline and photo examples to plan and visualize their own projects.
Step-by-step project timeline for a standard round table
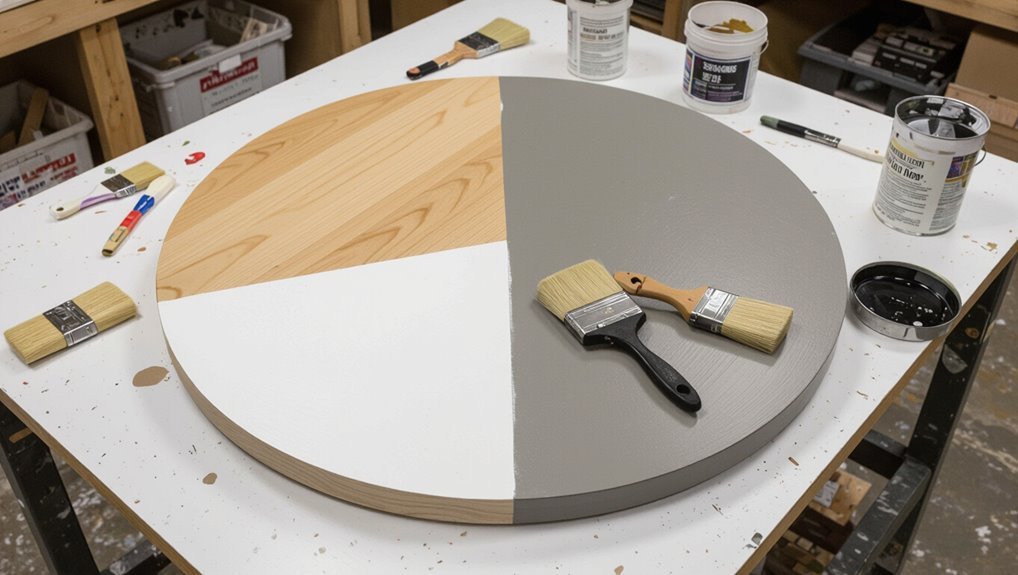
A clear, practical timeline breaks the round table painting project into sequential phases—prep, repair, priming, painting, and finishing—so each step’s duration, required materials, and expected outcomes are defined up front.
Day 1: sand, clean, mask (2–4 hours).
Day 2: fill and cure (overnight).
Day 3: prime (2–3 hours, dry).
Day 4: paint coats (2 coats, 4–6 hours).
Day 5: seal and cure.
Before-and-after photo ideas and inspiration
After outlining a clear timeline, attention shifts to visual storytelling that shows the table’s journey from worn to renewed.
Images should document stages, lighting, and styling to communicate technique and result.
- Close-ups of damage, primer, and brushwork
- Full-frame before and after with consistent angles
- Step-by-step collage highlighting tools used
- Styled final shot in planned room setting
Conclusion
A finished round table, once sanded, sealed, and painted, stands as both humble servant and revealed centerpiece. Practical steps—cleaning, priming, brushing, and curing—meet quiet artistry: satin sheen beside weathered grain, durable coat against afternoon clink of cups. The guide’s measured techniques offer reassurance and freedom, transforming routine maintenance into deliberate craft. In that contrast—utility matched with aesthetic care—the table becomes proof that thoughtful work yields enduring beauty.

