How to Install a Water Heater Tank: Step-by-Step DIY Guide for Safe, Efficient Setup
To install a water heater tank safely and efficiently, start by selecting the right type and size for your home, ensuring you meet fuel and venting requirements, and securing any necessary permits. Begin the installation by shutting off the water and power or gas supply. Drain and disconnect the old unit, then place the new tank on a level surface, securing it with seismic straps. Next, install the temperature and pressure relief (T&P) valve, along with the appropriate fittings and dielectric unions. Connect the venting or electrical components, and thoroughly check for leaks and proper operation. Always adhere to local codes and manufacturer instructions to ensure safety. For detailed procedures and checks, refer to additional guidance.
What a Water Heater Tank Is and Which Type to Choose
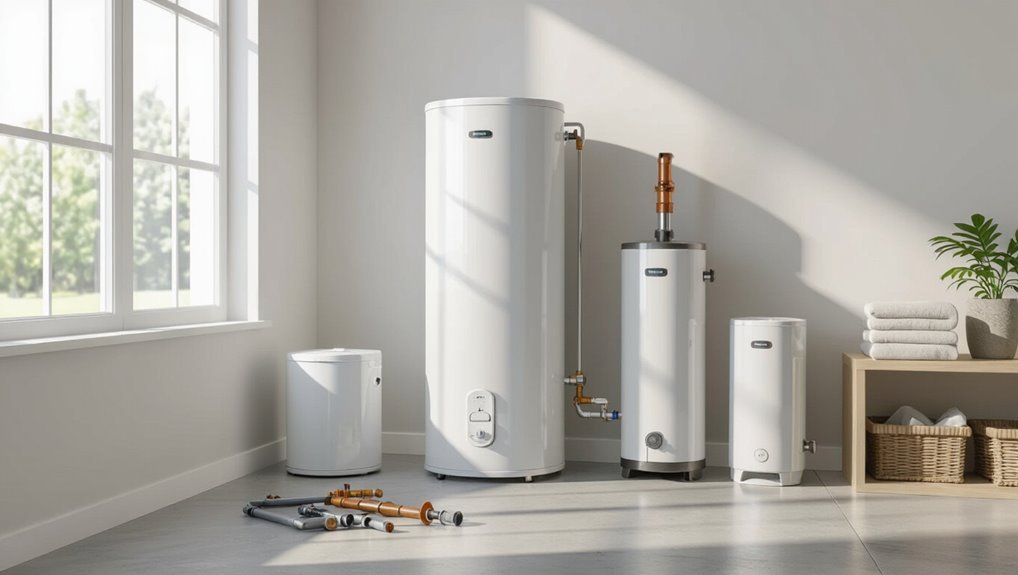
A water heater tank overview contrasts storage, tankless, and hybrid systems by explaining their operation, typical sizes, capacities, and recovery rates.
It also summarizes fuel options—electric, natural gas, propane, and solar—and how fuel choice affects efficiency and installation.
Guidance on selecting the right capacity for a household ties system type, family size, and peak demand together.
Differences Between Storage Tank, Tankless, and Hybrid Systems
Choosing the right water heating system depends on household size, usage patterns, available space, and budget.
Storage tanks store heated water for immediate use; tankless units heat on demand, saving space and energy but requiring higher install costs and flow limitations.
Hybrid heat pump models balance efficiency and recovery.
Consider maintenance, installation complexity, and references on how to install water heater tank when choosing.
Common Sizes, Capacities, and Recovery Rates
Tank capacity, recovery rate, and peak-hour demand are the primary metrics that determine whether a water heater will meet a household’s needs.
Typical residential tank sizes range from 20 to 80 gallons; common choices are 30, 40, and 50 gallons.
Recovery rate (gallons per hour) indicates how quickly hot water is replenished.
Match size and recovery to household occupancy and peak usage.
Fuel Types: Electric vs Gas vs Propane vs Solar
Several fuel options—electric, natural gas, propane, and solar—offer distinct trade-offs in cost, installation complexity, efficiency, and suitability for different homes.
Electric units are simple, safe, and lower upfront cost but higher operating expense.
Gas and propane deliver faster recovery and lower energy bills but require venting and fuel lines.
Solar reduces operating costs yet needs space, backup, and higher installation investment.
How to Pick the Right Capacity for Your Household
How much hot water a household needs depends on family size, peak usage patterns, and appliance efficiency; selecting the right tank capacity balances those factors to guarantee adequate supply without wasted energy.
Estimate peak hour demand, add simultaneous-use allowances (showers, dishwasher, laundry), and consider recovery rate.
Match tank size to calculated gallons-per-minute need, account for future changes, and choose energy-efficient models to reduce operating costs.
Safety Requirements, Codes, and Permits Before Installation
Before installing a water heater tank, the installer must verify local building codes and obtain any required permits using a checklist specific to the jurisdiction.
Critical safety items include required clearances, proper ventilation and combustion air for gas units, correct electrical circuit sizing for electric units, and secure seismic strapping where applicable.
Additionally, the installer must guarantee correct placement of the temperature and pressure relief valve and compliance with expansion tank requirements.
Local building codes and permit checklist
A quick review of local building codes and required permits is essential before replacing or installing a water heater.
The installer should verify permit submission, inspection scheduling, approved appliance types, seismic strapping, discharge piping, pressure-relief valve requirements, electrical or gas connection rules, and fuel-specific regulations.
Maintain copies of permits, inspection reports, and manufacturer specifications for compliance and future reference.
Required clearances, ventilation, and combustion air (gas units)
Clearances, ventilation, and combustion air requirements guarantee safe operation of gas water heaters by preventing overheating, allowing proper draft, and supplying sufficient oxygen for combustion.
Installers must follow manufacturer and code minimum clearances around the tank, maintain unobstructed flue and vent paths, and provide required combustion and dilution air (direct or via ducting).
Verify local code for room volume, louvers, and mechanical ventilation specifications.
Electrical requirements and circuit sizing (electric units)
When installing an electric water heater, proper electrical requirements and circuit sizing must be determined to guarantee safe, code-compliant operation; this includes selecting the correct breaker type and amperage, appropriate wire gauge and routing, and a dedicated circuit to handle the heater’s continuous load.
The installer must calculate load (nameplate amps × demand factor), use correct conductor insulation, install a properly rated disconnect, and follow local code and permit requirements.
Seismic straps, pressure relief valve placement, and expansion tank rules
Although local codes vary, proper seismic strapping, correct placement of the temperature and pressure relief (T&P) valve, and installation of an expansion tank are essential safety measures that prevent water damage, scalding, and structural hazards.
Seismic straps must anchor per code. The T&P valve discharge must drain to a visible safe location with correct slope. Expansion tanks require proper sizing and isolation to control thermal pressure.
Tools, Materials, and Preparations You’ll Need
Before beginning the installation, the installer should confirm they have the essential tools and a complete list of replacement parts and materials.
The work area must be prepared with a proper drain pan, adequate floor support, and clear access for removal and future maintenance.
The installer must also know how to safely shut off water, gas, and electricity and verify utilities are isolated before proceeding.
Essential tools list
A clear inventory of tools and materials guarantees the water heater installation proceeds safely and efficiently.
The installer should gather essential hand and power tools, safety gear, and basic plumbing and electrical items before beginning.
Typical essentials include:
- Adjustable wrench and pipe wrench
- Phillips and flat screwdrivers
- Pipe cutter and tubing bender
- Voltage tester and multimeter
- Drill with bits and basin wrench
Materials and replacement parts checklist
Materials and replacement parts are just as important as tools for a successful water heater installation; having the correct fittings, safety devices, and spare components on hand prevents delays and reduces the risk of leaks or electrical faults.
Essential items include:
- Temperature and pressure relief valve (T&P)
- Flexible connectors and shutoff valves
- Dielectric unions
- Pipe insulation and fittings
- Replacement anode rod and gasket
Site preparation: drain pan, floor support, and access considerations
Having the correct replacement parts on hand makes it possible to focus next on where the heater will sit and how it will be protected.
A corrosion-resistant drain pan sized to catch leaks should be installed with a routed drain line.
Verify floor load capacity and levelness; reinforce or add a platform if needed.
Maintain clear access for maintenance, ventilation, and code-required clearances.
How to shut off utilities safely (water, gas, electricity)
Begin by identifying and labeling the shutoff points for water, gas, and electricity so each can be isolated quickly.
Gather a basin and towels, a pipe wrench or adjustable wrench, screwdriver set, flashlight, non-contact voltage tester, gas leak detector solution or soapy water, and appropriate personal protective equipment (gloves and safety glasses) before proceeding.
Turn off cold-water supply, close gas valve, and switch off breaker; verify no power or leaks.
Step-by-Step Removal of an Old Water Heater
The section outlines the safe, sequential removal of an old water heater, beginning with properly draining the tank and disposing of the water.
It covers disconnecting gas or electrical supplies, detaching plumbing and venting components, and extracting the unit.
Final steps address site cleanup and preparation for the new installation.
Draining the tank safely and disposing of old water
Before disconnecting any lines, the technician guarantees the gas or power supply is fully shut off and the water supply valve is closed; this prevents pressure or energy hazards while draining.
They attach a hose to the drain valve, direct discharge to a safe drain or outside, open a hot tap to vent, monitor sediment and temperature, and collect or neutralize contaminated water per local disposal regulations.
Disconnecting gas or electrical supply
With the tank emptied and discharge handled, attention shifts to isolating energy sources: gas or electrical.
For gas units, shut main gas valve, cap gas line, and disconnect flex connector; verify no smell and use soapy water to check for leaks.
For electric models, turn off circuit at breaker, lockout/tagout if possible, and disconnect supply wires at the junction box, noting wire locations.
Removing plumbing connections and venting components
Disconnecting the plumbing and venting components requires methodical work to prevent leaks and preserve parts for reuse. The technician drains residual water, then isolates and labels cold and hot supply lines.
Flexible connectors, unions, and dielectric fittings are loosened with appropriate wrenches. The draft hood, vent pipe sections, and hearth connectors are unfastened, capped, and set aside for inspection or replacement.
Extracting the old unit and site cleanup
Lift the drained tank clear of its stand or straps using proper lifting techniques and an assistant or dolly to prevent injury and damage.
Position the unit onto a protective surface, then transport it to disposal per local regulations.
Inspect the footprint for leaks, debris, and damaged fittings.
Clean and dry the area, remove corrosion, and note necessary repairs or adjustments before installing the new water heater.
Step-by-Step Installation of a New Water Heater Tank
The installer positions the new tank, secures seismic straps, and aligns connections for the cold inlet, hot outlet, and unions.
They fit the temperature-and-pressure relief valve with its discharge piping, add an expansion tank and check valve if required, and complete the water line hookups.
For gas models, the technician finishes the gas connection and venting according to code before testing the system.
Positioning the new unit and mounting seismic straps
Position the new water heater on a level, stable surface clear of combustible materials and with adequate clearance for service access.
Then verify that the chosen location aligns with local codes and venting requirements.
Center the tank on a drip pan if required.
Measure and mark strap locations at manufacturer-recommended heights.
Anchor straps to structural framing, tighten securely without deforming the tank, and confirm restraint effectiveness.
Connecting water lines: supply, cold inlet, hot outlet, and unions
Begin by shutting off the main water supply and draining the old heater to prevent pressure or leaks.
Then confirm both inlet and outlet shutoffs are closed before touching any fittings.
Connect the cold supply to the marked inlet and the hot to the outlet using appropriate fittings or flex lines.
Install unions for future service, tighten to manufacturer torque, and check for leaks at all joints.
Installing temperature and pressure (T&P) relief valve and discharge piping
When installing the temperature-and-pressure (T&P) relief valve and its discharge piping, make certain the valve is rated for the heater’s maximum temperature and pressure and that all connections are clean and properly threaded.
Install the valve into the designated outlet, use appropriate pipe sealant, orient discharge piping downward, terminate within six inches of the floor or to a drain, and avoid valves or taps on the discharge line.
Installing expansion tank and check valve if required
After the T&P relief valve and discharge piping are secure and oriented properly, attention turns to installing an expansion tank and check valve if local codes or a closed plumbing system require them.
Mount the expansion tank near the cold-water inlet, support it to prevent stress, and connect with appropriate fittings.
Install a backflow or check valve per code, then pressurize and test for leaks and proper operation.
Gas hookup and venting installation (for gas units)
For gas-fired water heaters, the gas hookup and venting are critical for safe operation and must be completed before restoring fuel service.
A qualified installer verifies gas line size, pressure, threaded or flare fittings, and installs a new shutoff valve and flexible connector.
Venting must use proper metal pipe, maintain slope, supports, clearances, and terminate per code to guarantee combustion products exhaust safely outdoors.
Electrical hookup and grounding (for electric units)
Gas-fired units require careful attention to fuel and venting before service is restored; electric models, by contrast, demand proper wiring and grounding to guarantee safe, reliable operation.
Install a dedicated circuit sized per heater nameplate, use correct gauge cable, secure connections in a junction box, and attach a bonding jumper to the grounding screw or rod.
Verify continuity and test GFCI where required.
Filling the tank, bleeding air, and checking for leaks
Begin by shutting off the water supply to the house.
Then open a hot-water faucet at the highest point in the system to allow air to escape as the tank fills.
Slowly open the cold-water inlet to the heater, watching for steady water flow from the open faucet.
Inspect all connections, valves, and the pressure-relief fitting for drips; tighten or re-seat fittings if any leakage appears.
Initial startup: lighting pilot or energizing element and setting thermostat
Light the pilot or energize the heating element only after confirming the tank is full, all valves are secure, and electrical or gas supplies are properly connected.
Follow manufacturer lighting or activation steps, observe ignition and flame quality, and verify no odor or sparking.
Set the thermostat to the recommended temperature (typically 120°F/49°C), monitor system for proper operation, and recheck for leaks or abnormal noises.
Testing, Commissioning, and Final Safety Checks
The installer performs systematic leak tests on plumbing, gas lines, and electrical connections to confirm integrity before commissioning.
For gas units, vent draft and combustion safety are verified and thermostat settings and temperature limits are checked to guarantee safe operation.
Finally, the installer completes permit inspections and documents all test results and adjustments for the record.
Leak test procedures for plumbing, gas, and electrical
After installation, perform systematic leak tests on plumbing, gas, and electrical systems to verify integrity and safety before commissioning.
For plumbing, pressurize the cold-water supply, inspect fittings, valves, relief valve, and tank for drops over 15–30 minutes.
For gas, apply approved soapy solution to joints; watch for persistent bubbles.
For electrical, confirm connections are tight, insulation intact, and no arcing under powered detection.
Verifying vent draft and combustion safety (gas)
Begin verification of vent draft and combustion safety by confirming that combustion gases are being properly exhausted and makeup air is adequate for safe operation.
Inspect flue connections, caps, and clearances.
Perform a draft test with a smoke pencil or manometer at appliance draft hood.
Verify no backdrafting during blower or wind conditions.
Check carbon monoxide levels and guarantee vent sizing meets code.
Checking thermostat settings and temperature limits
Before energizing the unit, confirm thermostat settings and high-limit controls to assure water temperature stays within safe and code-compliant limits.
Verify thermostat setpoint (typically 120°F/49°C unless local code dictates otherwise), test the high-limit cutoff, and adjust dual-element controls if present.
Record settings, assure temperature relief valve compatibility, and recheck after initial heat-up to prevent scalding and overheating hazards.
How to complete permit inspection and documentation
One set of final tasks completes the permit inspection and documentation phase: perform systematic testing, commissioning, and safety verifications to demonstrate compliance with code and the permit conditions.
Record pressure, temperature, leak checks, relief valve operation, and electrical or gas conformance.
Complete required forms, attach photos and test logs, schedule inspector visit, correct any deficiencies, obtain final approval and retain copies for records.
Common Problems During Installation and How to Fix Them
Common installation issues include no hot water or slow recovery, persistent leaks at fittings and valves, and gas pilot or ignition failures.
Electric units may trip breakers or suffer heating element faults, and many tanks exhibit poor water pressure or noisy operation.
Each problem has identifiable causes and straightforward corrective steps that installers should follow.
No hot water or insufficient recovery
If a newly installed water heater delivers no hot water or recovers too slowly, troubleshooting should focus on three areas: fuel or power supply, thermostat and control settings, and appliance sizing or installation errors.
Verify electrical breakers, gas supply, pilot/ignition.
Check thermostat setpoint, dip switches, and control faults.
Confirm tank capacity and recovery rate match household demand and that inlet/outlet plumbing is correctly configured.
Persistent leaks at fittings and valve connections
Inspecting fittings and valves early is essential when persistent leaks appear after a water heater installation.
Tighten connections with appropriate tools, avoiding overtightening. Replace damaged washers, compression rings, or faulty valves. Use approved thread sealant or plumber’s tape on threaded joints.
After repairs, pressurize the system and monitor for slow drips. If leaks continue, shut off water and consult a licensed plumber.
Pilot won’t stay lit or ignition failures (gas)
After addressing leaks at fittings and valves, attention shifts to gas ignition problems that prevent the pilot from staying lit.
Check gas supply, shutoff valve position, and odorless line integrity.
Clean or replace thermocouple, pilot orifice, and igniter assembly.
Verify proper air supply and correct gas pressure.
If instability persists, consult a qualified gas technician to avoid carbon monoxide or fire hazards.
Tripping breakers or heating element issues (electric)
Diagnose electrical faults promptly when an electric water heater trips breakers or shows heating-element problems, as these issues can indicate shorts, element failure, or incorrect wiring.
Isolate power, test breakers and ground-fault devices, and inspect wiring connections for loose or damaged conductors.
Use a multimeter to check element continuity and resistance; replace defective elements and tighten or rewire connections per code.
Test operation.
Poor water pressure or noisy tank operation
Address low water pressure and loud tank noises promptly to prevent ongoing performance issues and potential damage.
Inspect inlet screens, shutoff valve, and supply lines for obstruction or partial closure.
Flush the tank to remove sediment that causes rumbling and overheating.
Check pressure-reducing valves and aerators.
Verify proper expansion tank and secure loose piping or mounting straps to eliminate vibration and noise.
Maintenance Tips to Maximize Efficiency and Lifespan
Routine maintenance preserves performance and extends a water heater’s life.
Recommended tasks include periodic draining to remove sediment, inspecting and replacing the anode rod as needed, adding insulation and pipe wrap, and setting the thermostat for energy efficiency.
Clear criteria for when to call a professional—persistent leaks, loss of heating, or failed components—should also be established.
Regular draining and sediment flushing schedule
Flush the tank and drain it on a regular schedule to remove sediment that reduces heating efficiency and accelerates corrosion.
Monthly flushing is recommended for high-sediment areas; otherwise, perform a full drain and rinse every six months.
Use the drain valve to expel debris until clear water flows.
Record dates and observations to adjust frequency based on water quality and heater performance.
Anode rod inspection and replacement guidance
After sediment removal and regular draining, attention should turn to the anode rod, the sacrificial metal component that protects the tank from corrosion.
Inspect annually by loosening the hex head and withdrawing the rod; replace if heavily corroded, coated, or reduced to less than 1/2 inch diameter.
Use proper replacement type (magnesium, aluminum, or zinc) and guarantee tight sealing to prevent leaks.
Insulation, pipe wrap, and energy-saving thermostat settings
Several straightforward upgrades—tank insulation, insulating hot-water pipes, and setting an energy-saving thermostat—can greatly reduce heat loss and lower operating costs.
Wrap the tank with an appropriate insulating blanket, avoid covering controls or vents, and insulate exposed hot-water lines with foam sleeves.
Set the thermostat to 120°F (49°C) or a lower vacation setting to save energy while preventing scald risk and mineral buildup.
When to call a professional for repairs or replacement
Insulating the tank and pipes and setting the thermostat can greatly reduce wear and energy use.
However, homeowners should recognize when problems exceed DIY fixes and call a professional. Signs include persistent leaks, rusty or discolored water, no hot water, unusual noises, faulty pressure relief valves, or visible corrosion.
Older units near expected end-of-life warrant assessment for safe replacement by a licensed technician.
Cost Estimate, Timeframe, and When to Hire a Pro
A concise cost estimate for a DIY water heater installation typically lists the tank, fittings, venting, electrical or gas hookups, and miscellaneous supplies to total a few hundred to over a thousand dollars depending on model and complexity.
Most competent DIY installs take a full day to a weekend, while jobs involving gas lines, structural changes, or complex venting often require a licensed plumber or contractor.
Homeowners should also check warranty terms and local codes, since some manufacturers void warranties or require certified installation for coverage.
Typical DIY cost breakdown and material costs
Budgeting for a water heater replacement requires listing expected material costs, estimating labor time, and knowing which tasks push the job beyond typical DIY scope. Typical DIY material costs: tank $300–$900, fittings $30–$100, venting $50–$200, insulation $20–$60. Hire a pro for gas line modifications, complex venting, or code-required permits.
| Item | Typical Cost |
|---|---|
| Tank | $300–$900 |
| Fittings | $30–$100 |
| Venting | $50–$200 |
| Insulation | $20–$60 |
Average time required for DIY installation
Most DIY installations take between 4 and 8 hours from start to finish for an experienced homeowner with basic plumbing and electrical skills.
Typical tasks—draining, disconnecting, positioning, connecting water and power, venting, and testing—fit this window.
Beginners should allow a full day.
Additional time may be needed for inspections, permits, complex piping, or unexpected complications; plan accordingly to avoid rushing.
Situations that require professional plumbers or licensed contractors
Call a licensed plumber or contractor when local codes, safety risks, or technical complexity exceed typical DIY scope.
Hire a pro for gas line work, major electrical hookups, seismic or venting upgrades, tank relocations, or permits.
Expect professional cost estimates and faster timelines—often a few hours to a day.
Engage licensed help if uncertainty or potential liability exists; safety and code compliance justify the expense.
Warranty considerations and manufacturer requirements
When manufacturers set warranty terms, they often tie coverage to proper installation, certified installers, and adherence to local codes.
Homeowners should review requirements before starting work; failure to follow specified procedures—such as using a licensed plumber for gas connections or submitting permit documentation—can void warranties and transfer repair costs to the owner.
Verify serial numbers, retain receipts, document permits, and consider professionals for complex installs.
Useful Checklists and Quick Reference Guides
The article presents three concise aids to streamline installation and care: a pre-installation readiness checklist, a startup and first-week monitoring checklist, and a long-term maintenance calendar.
Each tool lists essential tasks and timing to reduce errors and extend tank life. Readers are encouraged to consult and keep these guides accessible during installation and afterward.
Pre-installation readiness checklist
A concise pre-installation readiness checklist guarantees all required parts, tools, and site conditions are confirmed before work begins.
It assures safety, compliance, and smooth installation.
Key items include:
- Verify tank size, type, and manufacturer instructions
- Confirm gas/electric supply compatibility and shutoffs
- Gather fittings, valves, insulation, and tools
- Assure proper venting and clearances
- Prepare floor support and drip pan
Startup and first-week monitoring checklist
After completing the pre-installation checklist and energizing the system, initial startup and the first-week monitoring guarantee the water heater performs safely and as planned.
A concise checklist for the first week includes:
- Verify no leaks at fittings and drain valve
- Confirm thermostat setpoint and recovery
- Observe pilot/ignition cycles (gas) or element operation (electric)
- Record daily temperature and pressure
- Check for unusual noises or odors
Long-term maintenance calendar
Many homeowners benefit from a simple, recurring maintenance calendar that outlines monthly, quarterly, and annual tasks to preserve water heater efficiency and safety.
A clear schedule reduces failures and extends service life. Suggested checklist:
- Monthly: check for leaks and temperature setting.
- Quarterly: inspect pressure relief valve.
- Semiannual: flush sediment.
- Annual: inspect anode rod and connections.
- Every 3–5 years: professional inspection.
Conclusion
In the end, one imagines the noble water heater as both humble servant and domestic tyrant: replace it correctly, and it grudgingly provides hot showers; replace it sloppily, and it stages a flood with tragicomic timing. Following codes, safety steps, and sensible tools guarantees neither plumber’s poetry nor insurance melodrama. The diligent DIYer will enjoy warmth, efficiency, and fewer surprises—until the next appliance demands a ceremonial, slightly anxious replacement.