
How to Lower Shower Heads: Step-by-Step Guide for Any Bathroom Type
To lower a shower head effectively, begin by identifying its mount type—wall, adjustable arm, slide-bar, or ceiling rain. Follow these steps: first, shut off the water supply and protect any finishes in the area. For wall-mounted heads, loosen the existing arm, replace it with a shorter riser or angle it down, apply Teflon tape to the threads, and retighten. For adjustable arms and ball joints, simply loosen, reposition, and secure them. Slide-bar handsets can be adjusted by moving them along the bracket. Finally, test for leaks and ensure everything is stable. For more detailed instructions, parts, costs, and troubleshooting tips, continue reading.
How to Lower a Shower Head Quickly and Safely
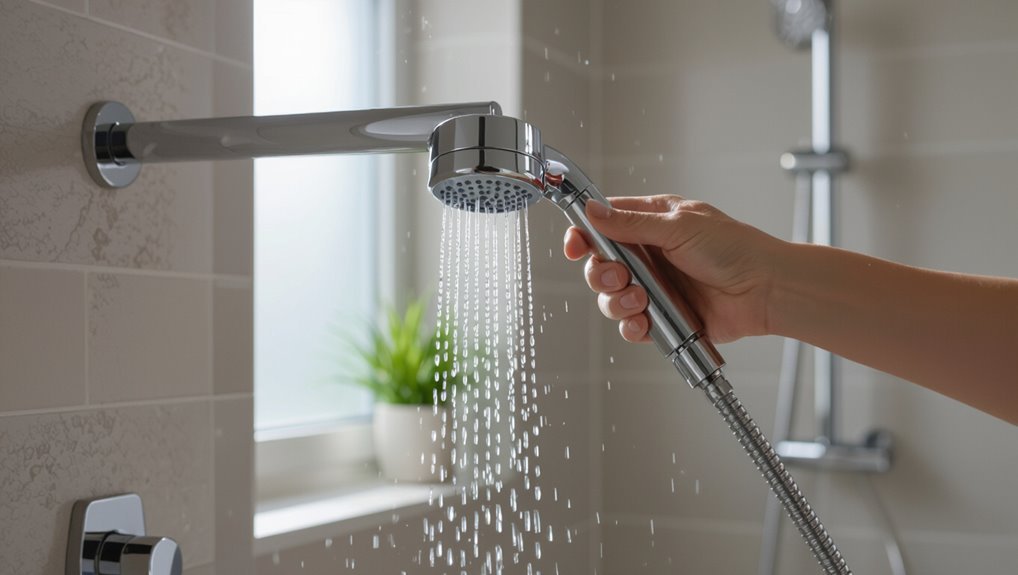
Lowering a shower head is often needed to improve accessibility, control spray direction, or accommodate users of different heights.
Necessary tools and materials typically include an adjustable wrench, plumber’s tape, replacement fittings if required, and a towel to protect finishes.
Before starting, the person should shut off the water supply, clear the work area, and wear eye protection to prevent injury or water damage.
When and why you might need to lower a shower head
When a shower head sits too high for regular use—or sprays at an awkward angle causing water to miss the bather—adjustment becomes more than a convenience and can improve safety, comfort, and water efficiency.
Homeowners seek how to lower shower heads when ceilings are low, users are shorter, mobility aids are added, or to reduce splashing and conserve water.
Proper positioning enhances accessibility and enjoyment.
Tools and materials you may need
A few basic tools and materials are typically sufficient for lowering a shower head quickly and safely. Necessary items vary by mount and finish; common choices include replacement arm or adapter, plumber’s tape, and a wrench or adjustable pliers.
- Adjustable wrench or pliers
- Plumber’s (Teflon) tape
- Replacement arm/adapter or mounting hardware
Safety precautions before starting
After gathering tools such as an adjustable wrench, plumber’s tape, and a replacement arm, the next step is to verify safety measures before beginning work.
Confirm water supply is shut off, electricity near the shower is deactivated, and adequate lighting and ventilation are available.
Use protective gloves and eye protection, secure a stable step stool, and keep a bucket and towels ready for residual water.
Determine Your Shower Type and Mounting Style
First, the homeowner identifies whether the shower head is a fixed wall-mounted fixture or attached via an adjustable arm or ball joint.
Next, sliding-bar setups with handhelds are noted separately from ceiling-mounted rain or overhead units.
Recognizing the mounting style guides the appropriate lowering method and required tools.
Fixed wall-mounted shower heads
Several common fixed wall-mounted shower head setups exist, each defined by how the arm connects to the plumbing and the wall.
Standard threaded arms screw into a short supply nipple; concealed supply elbows sit behind escutcheons; rigid drop-rod assemblies mount to brackets.
Identifying whether the arm is exposed, recessed, or integrated determines removal method, tool choice, and whether wall access or escutcheon removal is required.
Adjustable arm or ball-joint shower heads
When the fixed arm or concealed elbow is replaced by an adjustable arm or ball-joint head, the connection and removal steps change because the joint adds moving parts and often different fasteners.
Inspect for locking collars, set screws, or threaded adapters. Note swivel direction limits and hidden set screws under caps.
Use appropriate wrenches, support the joint to avoid torque on plumbing, and preserve seals and washers.
Slide-bar and handheld shower systems
If a slide-bar or handheld system is present, identify whether the handset mounts to a fixed riser, an adjustable slide bar, or a wall bracket and note how the bar or bracket is fastened—through-wall screws into studs, surface-mounted anchors, or adhesive/plaster anchors—because removal and lowering depend on the mounting style, plumbing proximity, and whether the handset uses a diverter, integrated hose, or concealed supply.
Determine if lowering requires relocating anchor points, rerouting hose length, or adjusting the diverter, and document access to behind-wall fittings before planning.
Ceiling-mounted and rain shower heads
Ceiling-mounted and rain shower heads differ from slide-bar and handheld systems in mounting, piping access, and lowering methods: these fixtures are typically fixed to a vertical riser, ceiling-mounted arm, or recessed canopy and may connect to supply via exposed piping, a stub-up from the ceiling, or concealed in-ceiling plumbing.
Lowering requires evaluating canopy access, cutting ceiling drywall for in-ceiling plumbing, or replacing the riser with a shorter arm.
Prepare the Shower for Adjustment
Before any hardware is loosened, the homeowner shuts off the water supply and opens a nearby faucet to relieve residual pressure.
Surfaces and fixtures are protected with towels or painter’s tape and a clear workspace is established to catch tools and parts.
A quick inspection of visible fittings, connections, and access panels confirms what tools or access modifications will be needed.
Turn off water supply and relieve pressure
Shut off the shower’s water supply at the nearest valve and confirm the line is closed to prevent accidental flow during adjustments.
Open the shower valve to drain residual water from the riser and head.
Close any secondary shutoffs if present.
Wrap a towel around fittings to catch drips and inspect for leaks before loosening connections.
Proceed only when pressure is fully relieved.
Protect finishes and prepare workspace
With water pressure relieved and fittings inspected, attention turns to protecting finishes and laying out a tidy workspace.
Apply soft cloths or painter’s tape to prevent scratches. Clear the area of toiletries and rugs to avoid damage.
Arrange tools and a bucket within reach to catch drips.
- Cover surfaces
- Remove items
- Organize tools and bucket
Inspect fittings, connections, and plumbing access
Inspect the shower’s fittings, connections, and access points methodically to confirm what adjustments are possible and what tools will be needed.
Examine visible risers, arm threads, escutcheon plates, and valve access panels. Note pipe type (copper, CPVC, galvanized), thread sizes, and presence of unions or slip joints.
Identify obstacles like tile, grab bars, or concealed access that affect lowering options.
Step-by-Step: Lowering Common Shower Head Types
The following section outlines concise procedures for lowering typical shower head configurations encountered in homes.
It covers fixed wall-mounted units, adjustable arm or ball-joint heads, slide-bar or handheld systems, and ceiling-mounted rain fixtures.
Each entry explains the specific tools and steps required to achieve a lower spray height safely.
Lowering a fixed wall-mounted shower head
Lowering a fixed wall-mounted shower head typically involves loosening its attachment at the shower arm, repositioning the head lower on the arm or replacing the arm with a shorter one, and then resealing the connection to prevent leaks.
- Remove head or arm carefully, protecting finishes.
- Measure and select a shorter arm or reposition.
- Apply thread sealant, tighten, test for leaks.
Lowering an adjustable arm or ball-joint shower head
For adjustable-arm or ball-joint shower heads, the process differs from swapping a fixed arm: instead of replacing piping, it usually requires loosening the joint, shortening the arm extension or sliding the head along the arm, and then securing the mechanism to hold the new angle.
- Loosen clamp or collar.
- Adjust arm length or slide head.
- Tighten and test for leaks and stability.
Lowering a slide-bar or handheld system
Adjusting a slide-bar or handheld shower system requires releasing the bracket or slider, repositioning the handset to the desired height, and then locking the mechanism to secure it. This preserves the system’s flexibility while ensuring a stable, leak-free setup.
- Release clamp or loosen screw.
- Slide handset to target position.
- Tighten lock, test hold and water flow.
Lowering a ceiling-mounted or rain shower head
Begin by turning off the water and protecting the floor beneath the fixture with a towel or drop cloth to catch drips.
For ceiling or rain heads, assess mounting type and ceiling access. Use scaffolding or ladder for safety.
- Detach trim plate and unscrew head or arm.
- Lower assembly via extension or relocate support bracket.
- Reconnect, seal threads, test for leaks.
When You Need to Replace Parts Instead of Lowering
If the shower arm, flange, or exposed pipe shows corrosion, leaking, stripped threads, or persistent wobble, replacement may be required rather than lowering.
The discussion will cover how to select a compatible replacement arm or riser by matching thread size, length, finish, and mounting type.
It will also outline basic removal and installation steps, including shutting off water, using proper tools, applying plumber’s tape, and testing for leaks.
Signs the arm, flange, or pipe needs replacement
When a shower arm, flange, or the connecting pipe shows persistent leaks, visible corrosion, or misalignment that cannot be corrected by simple adjustments, replacement is required rather than lowering the fixture.
Additional signs include cracked or warped flange covers, stripped threads, mineral buildup inside joints, wobbling under normal use, and recurring water stains or mold on the wall—indicators of compromised integrity needing new parts.
Choosing the right replacement arm or riser
Having identified that the shower arm, flange, or pipe must be replaced rather than lowered, the next step is selecting a replacement arm or riser that matches the existing plumbing and desired functionality.
Measure thread type and size (NPT, BSP), pipe material, wall thickness, and reach.
Choose appropriate finish, swivel or fixed design, and flow-compatible diameter.
Verify mounting clearance and code compatibility before purchase.
Basic instructions for replacing a shower arm or riser
Begin by shutting off the water supply and protecting the shower area with towels or a drop cloth to catch debris and prevent scratches.
Remove the old showerhead and unscrew the arm or riser with an adjustable wrench, using tape to protect finishes.
Clean threads, apply plumber’s tape, install the new arm, tighten securely, reattach the head, restore water, and test for leaks and alignment.
Adjusting Height Without Major Plumbing Work
Simple hardware options can lower a shower head without cutting into plumbing, such as short extension arms or adjustable brackets that reposition the fixture.
Installing a slide bar or converting to a handheld unit provides adjustable height and greater flexibility.
Renters can use temporary fixes—tension-mounted bars or clamp-on adapters—that require no permanent changes.
Using extension arms or adjustable brackets
Using an extension arm or an adjustable bracket allows homeowners to lower a shower head without altering plumbing lines, offering a practical solution for taller users or elderly residents.
These devices attach to existing fittings, reducing height by several inches to a foot. Installation requires basic tools, thread tape, and secure mounting.
They preserve water pressure and can be removed or adjusted as needs change.
Installing a slide bar or handheld conversion kit
For homeowners seeking even greater adjustability than an extension arm or bracket provides, a slide bar or handheld conversion kit offers a practical, non-invasive way to lower and reposition the shower head.
Slide bars mount vertically, allowing height and angle adjustments; handheld kits attach to existing plumbing with a diverter valve.
Installation requires basic tools, measuring, secure mounting, and checking for leaks.
Quick temporary solutions for renters
Renters often need temporary, non‑invasive ways to lower a shower head without altering plumbing or risking the security deposit.
Practical, reversible options include simple adapters and repositioning techniques:
- Install a tension-mounted slide bar or caddy with a handheld holder.
- Use a universal shower arm elbow or extensor to angle downward.
- Attach a hose-and-handheld conversion for adjustable reach and height.
Common Problems and How to Fix Them
After lowering a shower head, common issues can include leaks at fittings, stiff or stuck connections that resist adjustment, and reduced water pressure from kinks or partial blockages.
Practical fixes range from tightening or resealing joints and using penetrating oil and proper leverage on stuck fittings to flushing lines or checking aerators for flow problems.
When access requires removing tile or ceiling panels, careful cutting, proper backing support, and sealing or patching techniques help prevent future damage.
Leaks after adjustment and how to stop them
Unexpected leaks commonly emerge after lowering a shower head, often due to disturbed seals, misaligned fittings, or worn valves.
Inspect connections, tighten fittings cautiously, and replace damaged washers or O-rings. Apply plumber’s tape to threaded joints and guarantee pipes seat evenly.
Test at full pressure to confirm repair. If leaks persist, consider replacing the diverter or consulting a licensed plumber for valve issues.
Stiff or stuck fittings loosening techniques
Stubborn fittings often resist adjustment after lowering a shower head because mineral buildup, corrosion, or paint and plumber’s putty bind metal parts together.
Apply penetrating oil, let it sit, then try gentle back-and-forth motion with an adjustable wrench and cloth to protect finishes.
Use heat cautiously to expand metal if needed.
For seized threads, consider replacing the fitting to avoid damage.
Low water pressure after repositioning and troubleshooting
Check for pressure loss immediately after repositioning, since lowered shower heads commonly reveal or create flow restrictions that weren’t apparent before.
Inspect aerators, flow restrictors, and flexible hose kinks.
Flush supply lines and remove debris from the elbow and head.
Confirm valve fully open and check home pressure at other fixtures.
If persistent, test with a temporary standard-height head to isolate the issue.
Tile or ceiling access issues and repair prevention
Lowering a shower head often requires accessing the tile or ceiling cavity, and limited access can complicate repairs or cause damage if not planned properly.
Inspect hidden framing, locate studs and pipes, and use proper cutting tools.
Create removable access panels where feasible, seal edges with waterproof caulk, and document plumbing locations.
Hire a pro for complex tile or structural repairs to prevent leaks and costly mistakes.
Tools, Parts, and Cost Estimates
A brief inventory of typical parts—shower arm extenders, adjustable brackets, replacement flanges, and basic sealant—helps readers prepare for the job.
Estimated costs vary widely: DIY solutions often run $10–$75 in parts, while hiring a plumber can add $100–$300 or more for labor and service fees.
Guidance is provided on signs that professional help is warranted, such as complex piping, persistent leaks, or code-related issues.
Typical parts inventory
Typical projects require a compact set of tools and replacement parts that balance cost with durability. A basic inventory includes adjustable wrench, Teflon tape, replacement shower arm, flange, slip joint pliers, and silicone sealant. Parts chosen should match finish and pipe size. Keep extras for threads and seals to prevent rework.
| Item | Purpose |
|---|---|
| Adjustable wrench | Remove/install fittings |
| Teflon tape | Seal threads |
| Shower arm & flange | Lowering/extension |
| Sealant & washers | Prevent leaks |
Cost ranges for DIY vs. professional service
Several common variables determine whether a DIY lowering job will cost tens of dollars or a pro service will run into the hundreds: tools on hand, parts required, labor complexity, and regional rates.
DIY typically costs $10–$80 for basic fittings, adapters, sealant and a wrench.
Professional service ranges $120–$400+, reflecting labor, travel, permits, and possible fixture replacement.
When to call a plumber
Cost comparisons help decide whether to tackle lowering a shower head or hire help, but certain situations make calling a plumber the better choice.
Hire a pro when plumbing is inaccessible, pipes are galvanized or corroded, hidden wall or ceiling work is required, water pressure issues emerge, or permits are needed.
Expect higher labor and parts costs but reduced risk and warranty-backed results.
Maintenance and Best Practices After Lowering
After lowering the shower head, the homeowner should check seals and re-tighten connections to prevent leaks.
Regular cleaning and occasional lubrication of swivel joints will help prevent mineral buildup and preserve smooth movement.
A simple inspection schedule—monthly visual checks and a more thorough review every six months—keeps the installation reliable.
Checking seals and re-tightening connections
Inspecting seals and fittings immediately following a lowering project prevents leaks and preserves fixture function.
The installer checks thread tape, compressed washers, and O-rings for proper seating, replaces damaged components, and applies plumber’s tape where needed.
All joints are hand-tightened then finished with a wrench to specified torque.
A brief pressure test confirms no drips before final wall finishes are restored.
Preventing mineral buildup and maintaining swivel joints
Prevent mineral buildup by establishing a simple routine of periodic cleaning and lubrication for the lowered showerhead and its swivel joints.
Hard-water deposits should be dissolved, seals checked, and moving parts freed.
Recommended actions:
- Soak removable heads in vinegar solution to dissolve scale.
- Apply silicone grease sparingly to swivel O-rings.
- Rinse, reassemble, and test for smooth rotation and leak-free operation.
Recommended inspection schedule
Maintaining clean heads and lubricated swivel joints sets the stage for a simple, regular inspection routine to guarantee long-term performance of a lowered showerhead.
Inspect monthly for leaks, mineral buildup, and secure fittings.
Perform a deeper quarterly check: remove and descale the head, test spray pattern, tighten mounts, and re-lubricate swivel.
Annually confirm valve integrity and water pressure consistency.
Real-World Scenarios and Case Examples
The section presents practical examples of lowering shower heads to meet accessibility and ADA requirements, including clear measurements and mounting options.
It then outlines adjustments suited to children or shared bathrooms to balance comfort and safety.
Finally, it examines solutions for high-ceiling bathrooms such as adjustable arms, extension poles, and ceiling-mounted drop fixtures.
Lowering for accessibility and ADA considerations
When accessibility demands require a lower shower head, designers and installers must balance user reach, spray performance, and ADA guidelines to guarantee safe, dignified use for people with mobility limitations.
Practical measures include mounting heights per ADA (typically 48 inches maximum for controls), using adjustable slide bars, handheld showerheads with adequate hose length, anti-scald valves, and clear transfer space to accommodate mobility aids.
Adjusting for children or shared bathrooms
Accessibility-driven adjustments often overlap with needs in family or multi-user bathrooms, but tailoring shower height specifically for children or shared households requires different practical trade-offs.
Families may install adjustable slide bars, handheld wands with docked heights, or dual heads to serve both adults and kids.
Durable, easy-to-clean fittings and clear user signage reduce misuse and simplify routine height changes without structural alteration.
Solutions for high-ceiling bathrooms
Because high-ceiling bathrooms present unique reach and spray-angle challenges, practical solutions focus on altering fixture placement or adding adaptive components rather than lowering structural ceilings.
Install adjustable-height shower arms, wall-mounted slide bars with handhelds, or ceiling-mounted extensions with articulated joints.
Select pressure-balanced valves and angled showerheads to optimize spray.
Consider professional mounting for stability and water-seal integrity in retrofits or exposed piping.
Troubleshooting Quick Reference
A concise table of common symptoms, likely causes, and immediate fixes helps readers identify and resolve issues when lowering a shower head.
Typical entries include stuck fittings (mineral buildup), misaligned brackets (loose screws), and low clearance (wrong mount), each paired with a quick corrective step.
This reference focuses on actionable remedies that can be attempted before calling a professional.
Symptoms, likely causes, and immediate fixes
Several common symptoms can indicate why a shower head sits too high or functions poorly: difficulty reaching the spray, uneven water flow, wobbling, leaking at the joint, or a stuck riser arm. The table below pairs symptoms with likely causes and immediate fixes.
| Symptom | Cause/fix |
|---|---|
| Hard to reach | Adjust arm length; lower bracket |
| Uneven flow | Clogged nozzle; clean or replace |
| Wobble | Loose fittings; tighten |
| Leak | Washer/pipe seal; replace tape |
| Stuck arm | Corrosion; lubricate or replace |
Conclusion
Beneath the steady spray, the lowered shower head sits like a tamed fountain, closer to the body and kinder to the neck. The room breathes easier: fewer awkward reaches, simpler repairs, and a small cascade of saved time each morning. With the right tools and a calm hand, adjustments become routine maintenance rather than intimidating projects. Familiar fixtures regain usefulness, and the daily ritual is quietly transformed into something more comfortable and satisfying.
