How to Rebuild a Water Pump: Step-by-Step Guide for DIY Repairs
How to Rebuild a Water Pump: Step-by-Step Guide for DIY Repairs
Rebuilding a water pump is a manageable DIY task if the damage is localized and replacement parts are available. Begin by diagnosing the issue and documenting the locations of hoses and bolts. Safely remove the pump, then proceed to disassemble and clean it. Measure the shafts and bearings, and replace any worn seals, bearings, and the impeller as necessary. When reassembling, ensure you use the correct gaskets and adhere to the specified torque settings. Finally, test the pump for any leaks and proper flow. Regular maintenance will help prevent future issues. For detailed procedures and troubleshooting, follow the additional steps outlined in this guide.
What a Water Pump Is and When Rebuilding Is Appropriate
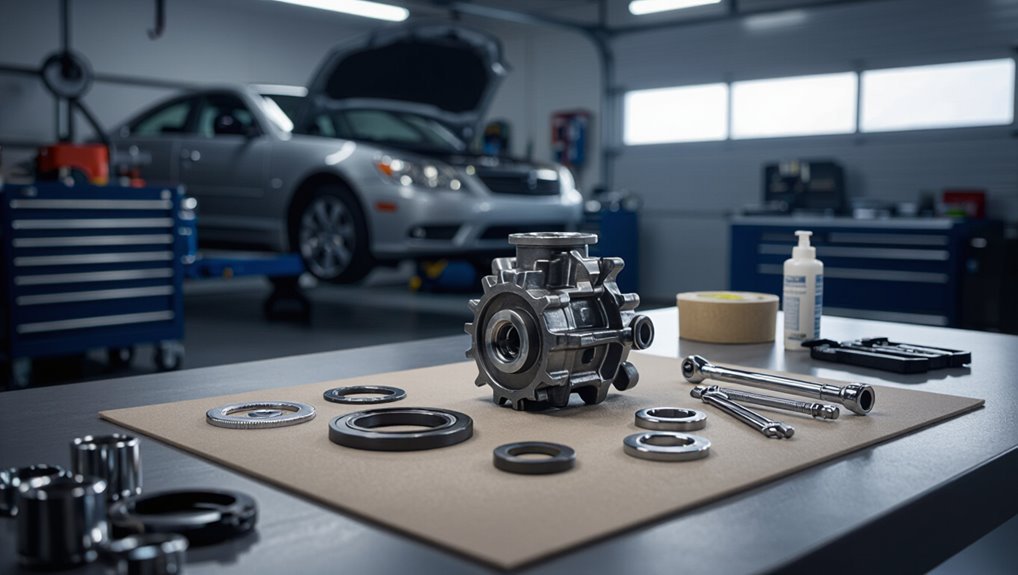
A water pump circulates coolant or water using impeller-driven or centrifugal designs in both automotive and household systems.
Observable issues such as leaks, noisy bearings, reduced flow, or visible corrosion help determine whether rebuilding is a viable option versus full replacement.
Rebuilding can restore function and save cost if wear is localized and parts are available, but it may be limited by extensive corrosion, unavailable components, or critical internal damage.
Purpose and common designs of automotive and household water pumps
Water pumps circulate coolant or water through systems to transfer heat, maintain pressure, and guarantee continuous flow for engines, heating systems, and household fixtures.
Common automotive types include centrifugal impeller pumps driven by belts or electric motors; household units range from submersible to inline centrifugal designs.
Understanding construction, seals, bearings, and mounting helps determine procedures and parts when learning how to rebuild a water pump.
Signs a pump needs rebuilding versus replacement
Understanding a pump’s construction and common failure points helps identify whether repair is practical or replacement is wiser. Observable signs favoring rebuild include minor leaks, worn seals, noisy bearings, localized corrosion, or reduced flow with intact casing and impeller.
Replacement is advisable for cracked housings, extensive shaft damage, severe cavitation erosion, undocumented capacity loss, or when repair costs approach new-unit price.
Benefits and limitations of rebuilding a pump
Although rebuilds restore function and extend service life at lower cost than replacement, they are best suited to pumps with salvageable cores, intact casings, and failure modes confined to wear parts like seals, bearings, and impellers.
Benefits include cost savings, shorter downtime, and retained original fitment.
Limitations involve undetected internal damage, reduced lifespan versus new units, potential warranty loss, and time-consuming diagnostics.
Tools, Materials, and Workspace Preparation
Before beginning a water pump rebuild, the technician assembles an essential tools checklist to guarantee each step can be completed without interruption.
They also confirm availability of replacement parts and seal kits matched to the pump model.
Finally, appropriate safety equipment is gathered and a clean, well-lit workspace is arranged to minimize hazards and contamination.
Essential tools checklist
A concise, well-organized set of tools and materials makes rebuilding a water pump faster and reduces the risk of damage or error; at minimum this should include a socket set with metric and SAE sizes, screwdrivers, pliers, torque wrench, gasket scraper, seal puller, a micrometer or caliper, appropriate replacement seals and gaskets, compatible lubricants, threadlocker, and a clean workbench with bright lighting and trays for small parts.
- Socket set, torque wrench, micrometer/caliper
- Screwdrivers, pliers, seal puller, gasket scraper
- Clean workbench, trays, good lighting
- Lubricants, threadlocker, safety gear
Replacement parts and seal kits to source
When sourcing replacement parts and seal kits, prioritize exact-fit components specified for the pump model to guarantee proper tolerances and longevity.
Inspect part numbers, materials, and shaft fits; prefer OEM or high-quality aftermarket kits. Order spares for wear items to avoid repeat disassembly.
- Impeller (correct diameter/profile)
- Mechanical seal kit (matching shaft size)
- Gaskets and O-rings
- Bearings and retaining hardware
Safety equipment and recommended workspace setup
Several essential items and a well-organized work area reduce risk and streamline the pump rebuild: safety glasses, nitrile gloves, steel-toe shoes, hearing protection, and a respirator for chemical exposure.
A sturdy bench with vice, non-slip mat, bright task lighting, and good ventilation is recommended.
Keep tools organized, corrosive fluids contained, a fire extinguisher nearby, and a first-aid kit accessible.
Pre-Rebuild Diagnosis and Documentation
Before disassembly, the technician inspects the pump both on-vehicle and off-vehicle to note external leaks, shaft play, and visible impeller damage.
Simple tests for coolant leakage, bearing noise by hand-rotating the shaft, and impeller condition are performed and recorded.
Photographs and labeled notes document assembly orientation, hose connections, and bolt locations to guarantee accurate reassembly.
How to inspect the pump on-vehicle and off-vehicle
Begin the inspection by documenting the pump’s service history, visible condition, and any reported symptoms; this establishes a baseline for comparisons and informs whether on-vehicle testing or removal is required.
Visually inspect external housing, pulley alignment, belt condition, and coolant traces on-vehicle. Off-vehicle, check mating surfaces, gasket seats, shaft play, and corrosion.
Photograph findings and record measurements for rebuild reference.
Testing for leaks, bearing noise, and impeller damage
A systematic pre-rebuild diagnosis focuses on confirming leaks, evaluating bearing noise, and inspecting the impeller for wear or damage to determine serviceability and parts required for repair.
Pressure-test seals and housing with regulated fluid to locate weeps.
Spin shaft to detect roughness, play, or grinding indicative of bearing failure.
Examine impeller blades for erosion, cracks, or distortion; measure tolerance against specifications.
How to document assembly orientation and hose/bolt locations
With leaks, bearing condition, and impeller integrity confirmed, attention shifts to recording how the pump and its connections are assembled so reassembly replicates factory fit and function.
Photos, labels, and notes capture orientation, hose routing, and bolt lengths. Use consistent markings and a diagram to avoid guesswork.
- Photograph all faces and connections
- Label hoses and clamps
- Note bolt sizes/locations
- Sketch routing and orientation
Step-by-Step Disassembly
The procedure begins with safe removal of the pump from the engine or plumbing, isolating fittings and supporting the unit to prevent strain.
Fluids are drained and containment measures are used to avoid contamination while work proceeds.
Components are then separated in order—housing, impeller, bearing assembly—using common fastener types and proven techniques for freeing seized parts.
Removing the pump from the system (engine or plumbing)
Begin by isolating the system and documenting connections: note hose locations, belt routing, and electrical or sensor plugs to guarantee accurate reassembly.
Support the pump, loosen mounting fasteners, and remove belts or couplings.
Detach hoses and wiring labeled earlier.
Extract the unit carefully to avoid damaging mating surfaces or nearby components.
Place removed hardware in organized, labeled containers for reinstallation.
Draining fluids and preventing contamination
Before disassembly proceeds, all fluids must be drained and containment measures put in place to prevent spills and contamination.
The technician isolates system pressure, opens drain points, and collects coolant or water in labeled, sealable containers.
Absorbent pads and drip trays protect surfaces. Used fluids are transferred to approved disposal containers.
Work area is cleaned and ventilated before further disassembly steps begin.
Stepwise separation of housing, impeller, and bearing assembly
Loosen fasteners and remove external fittings to expose the pump housing, working methodically from accessible to internal components so parts remain organized and contamination is minimized.
Separate housing halves evenly, note gasket placement, and lift the impeller straight off the shaft to avoid blade damage.
Withdraw the bearing assembly with appropriate pullers, support shafts to prevent bending, and bag small parts labeled for reassembly.
Common fasteners and tricks for seized parts
Identify common fasteners—hex bolts, Phillips and slotted screws, allen (hex) socket screws, circlips, and press-fit retaining rings—and inspect their heads and access clearances before attempting removal.
Use correct-size sockets, drivers, and circlip pliers. For seized parts apply penetrating oil, heat (carefully), or gentle impact with a slide hammer or gear puller.
Protect mating surfaces, document orientation, and replace damaged fasteners and retaining elements.
Cleaning and Detailed Inspection of Components
The cleaning and inspection phase separates serviceable parts from those requiring replacement by applying appropriate methods for metal and plastic components, such as solvent baths and soft-bristle brushing.
Measurements of bearings, shafts, and seals are taken with micrometers, calipers, and feeler gauges and compared against manufacturer wear limits and tolerances.
Parts showing scores, excessive runout, corrosion beyond surface pitting, or dimensions outside spec should be replaced, while undamaged items within tolerance may be reused.
Cleaning methods for metal and plastic parts
Begin by separating metal and plastic components onto clean, labeled work surfaces to prevent cross-contamination. Each material type requires different solvents and handling to avoid damage.
Metal parts benefit from degreasing with solvent, soft-bristle brushing, and light rust removal with fine abrasives or chemical rust removers.
Plastic parts require mild detergent, non-abrasive brushes, and isopropyl alcohol for residue; dry thoroughly before inspection.
How to measure wear limits on bearings, shafts, and seals
After cleaning, attention shifts from surface appearance to quantitative assessment of components to determine serviceability.
Inspect bearings for play and noise; use calipers to measure inner/outer race diameters and compare to manufacturer tolerances.
Measure shaft runout and diameter with micrometer; check keyways for wear.
Examine seals for lip deformation and thickness loss.
Record measurements; flag any exceeding specified wear limits.
When to replace vs. reuse parts
When should a part be replaced rather than reused?
The technician inspects components after cleaning: bearing play beyond spec, shaft scoring, warped impellers, cracked housings, or seals hardened and leaking mandate replacement.
Reuse is acceptable for parts within tolerance, corrosion-free, and undamaged.
Consider cost, availability, and long-term reliability; replace inexpensive wear items and any part compromising pump integrity.
Replacing Bearings, Seals, and Impeller
Next, attention turns to removing and installing parts that directly affect pump reliability: bearings, seals, and the impeller.
Proper tools and fixtures are required to press and seat new bearings without damaging races, and mechanical seals and O-rings must be installed with correct orientation and lubrication to guarantee a leak-free fit.
Finally, the impeller should be inspected for wear and either balanced or replaced to restore smooth operation and prevent vibration.
Pressing and seating new bearings safely
Begin by aligning the pump housing, shaft, and bearing assembly on a clean, stable work surface to guarantee accurate pressing and prevent misalignment.
Use a press or appropriate-sized socket to apply even, axial force to the outer race only.
Protect surfaces with soft jaws, lubricate bearing bores lightly, verify full seating by measuring runout, and avoid hammering or side loads that damage bearings.
Installing mechanical seals and O-rings correctly
Install mechanical seals and O-rings with care to guarantee a leak-free assembly: clean all mating surfaces, inspect seals and grooves for damage, and lightly coat elastomers with compatible lubricant to prevent twisting during insertion.
Align seal faces squarely, press evenly without contaminating sealing surfaces, replace any distorted components, and verify proper seating.
Reassemble housings using correct torques and retorque after brief operation.
Balancing or replacing the impeller
Carefully assess the impeller for wear, damage, or imbalance before deciding whether to rebalance or replace it.
If minor eccentricity exists, perform dynamic or static balancing using proper equipment or weights.
Severe corrosion, blade cracking, or dimensional loss mandates replacement with an OEM-equivalent part.
Confirm correct orientation, clearance, and secure fastening; verify smooth rotation and no vibration before reassembly.
Reassembly and Torque/Seal Procedures
Reassembly requires the correct gasket, sealant, and torque specifications for each fastener to guarantee a reliable seal.
Components must be installed in the proper sequence with attention to alignment, and the shaft should be checked for play before final tightening.
A rotation test verifies smooth operation and confirms that seals and bearings are correctly seated.
Correct gasket, sealant, and torque specifications
Select the proper gasket material, the manufacturer-approved sealant, and the correct bolt torque before beginning reassembly to secure a leak-free, long-lasting water pump installation.
Reference the vehicle or pump service manual for material type (rubber, composite, metal), approved sealants (RTV, anaerobic), and specific torque values and patterns.
Use a calibrated torque wrench and replace fasteners if specified to guarantee reliable sealing and clamping.
Reassembling in the proper sequence to avoid leaks
Begin by laying out components and fasteners in the exact order they will be installed. Then follow the manufacturer’s sequence and torque pattern to guarantee uniform clamping and proper gasket compression.
Assemble seals, bearings, and housing halves steadily, using specified lubricants and new gaskets. Tighten fasteners in staged increments to final torque.
Inspect mating faces and verify seal squareness before final torquing to prevent leaks.
Alignment, shaft play checks, and rotation test
After components are staged and fasteners hand‑started in the prescribed sequence, attention shifts to alignment, shaft play checks, and a rotation test to confirm leak‑free sealing and smooth operation.
Confirm impeller concentricity, verify housing mating surfaces sit flush, and torque bolts to spec.
Check radial and axial shaft play within tolerances, spin by hand for smooth, binding‑free rotation, and inspect seals for weepage during a pressure or bench test.
Reinstallation and System Integration
The pump is carefully positioned and secured back into the engine or plumbing, observing alignment and mounting torque specifications.
Belts, hoses, and drive components are reattached and adjusted to the correct tension and routing.
Fluids are refilled and the system is bled according to procedure to remove air and guarantee proper circulation.
Safely reinstalling the pump into the engine or plumbing
Carefully align the rebuilt water pump with the engine or plumbing flange, ensuring mating surfaces are clean and fasteners, gaskets, and seals match the original specifications; proper seating and torque sequence are essential to prevent leaks and premature failure.
Hand-start bolts, then tighten in the recommended pattern to specified torque.
Verify shaft rotation free, refill and bleed system, inspect for leaks before normal operation.
Reattaching belts, hoses, and drive components
Reconnect belts, hoses, and drive components in the reverse order of removal, ensuring each part matches its original routing and orientation.
Verify belt tension and alignment, using manufacturer specifications and a tension gauge if available.
Inspect hose clamps, replace degraded clamps, and confirm flexible lines seat fully.
Reinstall pulleys, idlers, and tensioners, torquing fasteners to spec and checking free spin before proceeding.
Refilling fluids and bleed procedures to prevent airlocks
Once cooling-system components are secured, refill the system with the specified coolant mixture and follow a controlled bleeding sequence to expel trapped air.
Open bleed valves or use the radiator cap method while running the engine at idle until the thermostat opens.
Top off the reservoir, inspect for leaks, monitor temperature and coolant level during the test drive, and recheck for air pockets and proper heater operation.
Testing After Rebuild
After reassembly, the pump should undergo initial bench tests and careful leak checks to confirm seal integrity.
Once installed, on-system testing must verify temperature control, pressure stability, and adequate flow under normal operating conditions.
During the first hours of operation, monitor for gradual leaks, unusual temperature or pressure trends, noise, and vibration that indicate emerging problems.
Initial bench tests and leak checks
Begin by mounting the rebuilt pump on a stable test fixture and preparing a controlled fluid supply to verify operation and seal integrity.
The technician performs short, low-pressure runs, inspects for visible leaks, and notes unusual noises.
Record observations and tighten fittings incrementally. If leaks persist, disassemble to reassess seals and mating surfaces.
- Low-pressure run
- Visual leak inspection
- Listen for anomalies
- Log and adjust
On-system testing: temperature, pressure, and flow verification
With the pump reinstalled and system connections restored, the technician proceeds to on-system testing to verify temperature, pressure, and flow under real operating conditions.
The technician warms the system, records inlet/outlet temperatures, monitors static and dynamic pressures with gauges, and measures flow rate.
Data are compared to specifications; anomalies prompt adjustment, retesting, or targeted inspection before returning the system to service.
What to monitor during the first hours of operation
During the initial hours of operation following a rebuild, the technician closely monitors temperature, pressure, flow, and noise to confirm the pump and system stabilize within specification.
He logs vibration, seal leakage, amperage draw, and coolant consistency, watching for trends indicating binding, cavitation, or electrical issues.
Immediate corrective actions are predefined; sustained deviations trigger shutdown and inspection to prevent damage and confirm reliability.
Troubleshooting Common Post-Rebuild Problems
After testing, attention shifts to common post-rebuild problems that can undermine pump performance.
The guide outlines how to isolate persistent leaks, identify sources of noise, vibration, and imbalance, and apply fixes.
It also provides a concise diagnostic checklist for reduced flow or overheating.
Persistent leaks and how to isolate causes
Diagnose persistent leaks methodically by isolating potential sources and testing each in turn; this prevents chasing symptoms instead of the root cause.
Inspect seals, gaskets, and mating surfaces for damage or improper seating.
Pressure-test the housing and connections separately.
Verify O-ring size, torque specs, and sealant compatibility.
Check for hairline cracks, corroded fittings, or warped covers.
Replace or refit components until leakage stops.
Noisy operation, vibration, and imbalance solutions
Address noisy operation, vibration, and imbalance by methodically identifying mechanical and hydraulic sources and eliminating them one at a time.
Inspect bearings, shaft runout, impeller clearance and keying; replace worn bearings or misaligned shafts.
Check for trapped air, cavitation signs, and loose mounting or coupling hardware.
Balance impellers if damaged and verify gasket compression.
Retest at operational speed, noting residual vibration for further adjustment.
Reduced flow or overheating: diagnostic checklist
Once mechanical and hydraulic noise sources have been resolved, attention shifts to reduced flow or overheating, which often indicate restrictions, clearance issues, or improper assembly.
A concise diagnostic checklist helps isolate causes and verify assembly tolerances, cooling passages, and impeller condition.
- Inspect inlet/outlet for debris or collapsed hoses
- Verify impeller clearance and wear
- Check seal and gasket alignment
- Confirm correct impeller rotation and belt tension
Maintenance Tips to Prolong Pump Life
A clear maintenance routine helps extend a rebuilt water pump’s service life, with scheduled inspections focused on leaks, unusual noises, vibration, and bearing play.
Regular fluid checks, correct coolant mix, and proper belt/drive tension and alignment are essential to prevent premature wear.
When recurring failures, diminished flow, or frequent repairs occur, evaluation for an upgraded or replacement pump is warranted.
Routine inspection schedule and signs to watch for
Regular, scheduled inspections are essential to detect wear early and prevent pump failure; a practical cadence is monthly visual checks, quarterly operational assessments, and annual thorough overhauls.
Inspect seals, housings, and fasteners for leaks, corrosion, or cracks. Listen for unusual noises, note vibration or temperature rises, and track flow and pressure deviations.
Document findings and schedule repairs before minor issues escalate.
Fluid and belt/drive maintenance best practices
Many pumps rely on properly maintained fluids and drive components to achieve design life and prevent premature failure.
Regularly check fluid level, clarity, and contamination; replace coolant or hydraulic fluid per manufacturer intervals.
Inspect belts, pulleys, and couplings for wear, proper tension, and alignment.
Lubricate bearings with specified grease, torque fasteners correctly, and document maintenance to detect trends and prevent issues.
When to consider an upgraded or replacement pump
When routine fluid care and drive-component upkeep no longer prevent recurring leaks, loss of capacity, or repeated bearing failures, it becomes necessary to evaluate whether an upgraded or replacement pump will better meet system demands.
Assess age, cumulative repairs, material corrosion, and performance margins; compare OEM versus upgraded models for flow, pressure, and durability.
Replace when downtime cost and failure risk exceed rebuild benefits.
Cost, Time Estimates, and When to Seek Professional Help
Typical parts for a water pump rebuild commonly range from modest DIY kit prices to higher-cost bearings and seals.
Labor can add considerably if professional service is used.
DIY rebuild times vary by skill level—novices may need several hours to a full day, experienced hobbyists a few hours, and professionals often complete the job much faster.
Professional service is recommended for complex damage, lack of proper tools or experience, or when downtime and reliability are critical.
Typical parts and labor cost ranges
A range of factors — vehicle make and model, pump type, and whether related components (timing belt, seals, bearings) require replacement — determine parts and labor costs for rebuilding a water pump. Typical parts range from budget to OEM; labor varies by complexity and shop rates. Consider contingency for machining or unexpected failures.
| Item | Typical Cost |
|---|---|
| Parts (budget) | $30–$75 |
| Parts (OEM) | $100–$300 |
| Labor | $150–$500 |
| Misc/contingency | $20–$150 |
Estimated time for DIY rebuilds by skill level
How long a DIY water‑pump rebuild takes depends largely on the individual’s mechanical skill, available tools, and the vehicle’s complexity.
Novices should expect 4–8 hours including research and cleanup.
Intermediate DIYers typically finish in 2–4 hours.
Experienced technicians often complete rebuilds in 1–2 hours.
Extra time may be needed for seized fasteners, cleaning, or ordering replacement seals and bearings.
Scenarios where professional service is recommended
When repair time, tools, or confidence fall short of the estimates above, professional service should be considered.
Professionals provide diagnostics, warranty-backed parts, and labor for complex seals, corroded housings, or hidden engine damage. Expect labor plus parts costs and a shorter turnaround versus prolonged DIY attempts.
Seek service when safety, precise tolerances, or emissions compliance are at risk, or when specialized equipment is required.
Quick Reference: Step-by-Step Rebuild Checklist
Begin with a clear plan: list required tools, replacement parts, and safety gear, then confirm the vehicle is cooled and battery disconnected.
The technician follows a concise checklist to remove the belt, drain coolant, unbolt the pump, inspect mating surfaces, replace seals, and reassemble with torque specs and fresh coolant.
- Remove belt and drain coolant
- Unbolt and extract pump
- Clean and inspect surfaces
- Install seal, torque, refill
Conclusion
Like a watchmaker returning gears to rhythm, the restorer completes the pump’s quiet revival. Careful diagnosis, methodical disassembly, and exacting reassembly transform worn parts into renewed service. The guide’s steps, like a practiced map, lead past common faults to lasting maintenance, reminding readers that patient craft and modest tools restore flow. When limits are reached, seeking a seasoned hand preserves both engine and peace of mind.