
How to Replace a Septic Drain Field: Step-by-Step Guide, Costs, and Permits
Replacing a septic drain field requires a systematic approach, beginning with diagnosing the system’s failure and conducting inspections and soil tests. Before proceeding, obtain necessary permits and approvals based on local codes. You can choose from various designs, including gravity trenches, pressure distribution systems, mounds, or alternative aerobic systems. Installation involves excavation, laying pipes or chambers according to engineering plans, careful backfilling, grading, and passing inspections. Costs can vary significantly depending on soil conditions, system type, and site accessibility, with options for financing or grants often available. For detailed steps, costs, and permitting guidance, continue reading.
What Replacing a Septic Drain Field Involves and When It’s Necessary
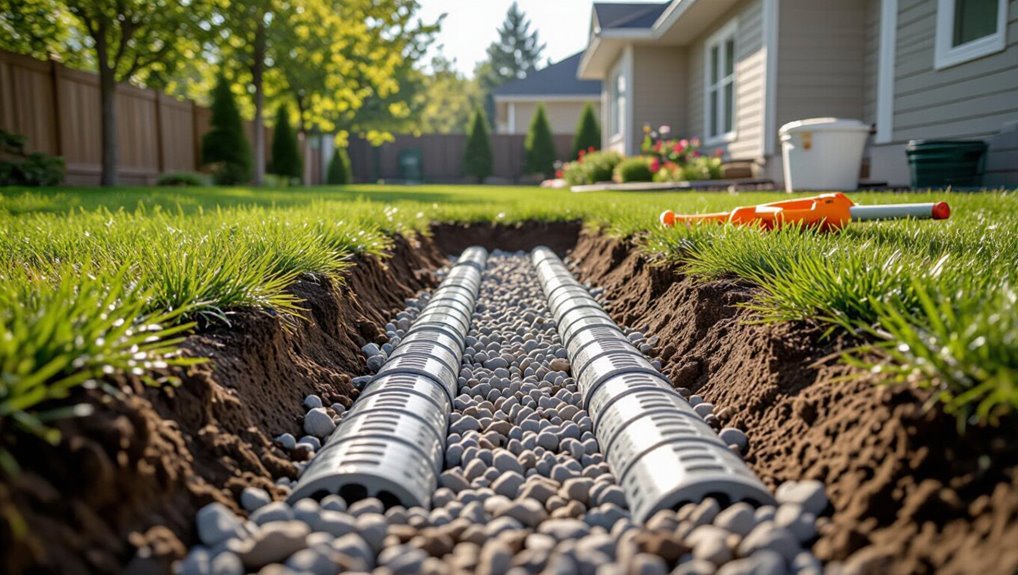
A failing drain field often shows standing wastewater, slow drains, foul odors, or unusually lush patches of grass above the field.
Common causes include hydraulic overload, soil compaction or saturation, root intrusion, bacterial imbalance from harsh chemicals, and age-related decline.
Typical lifespan ranges from 15 to 40 years depending on system type, soil conditions, and maintenance.
Signs your drain field is failing
Slowly worsening lawn sogginess, persistent sewage odors, and recurring backups are common indicators that a drain field is failing.
Additional signs include unusually lush grass patches, slow draining sinks, and wet areas despite no rain.
Homeowners researching how to replace septic drain field should monitor these symptoms, document occurrences, and contact a professional for inspection and permit guidance before replacement becomes urgent.
Common causes of drain field failure
Understandable causes of drain field failure fall into three main categories: hydraulic overload, physical damage, and biological clogging.
Hydraulic overload occurs from excessive water use or faulty plumbing.
Physical damage stems from soil compaction, heavy vehicles, or root intrusion.
Biological clogging results when solids or grease reach the field, forming biomats that prevent proper effluent percolation and oxygen transfer.
How long a drain field typically lasts
Longevity depends on design, use, and maintenance: most conventional septic drain fields last 20 to 40 years under proper conditions, while poor maintenance, overloaded systems, or physical damage can reduce that span to a few years.
Replacement timing hinges on performance indicators—slow drains, surface pooling, odors, or failed percolation tests.
Regular inspections, pumping, and water-use management extend service life and defer replacement.
Assessing the Site Before Replacement
Before replacing a drain field, the site must be evaluated through a full inspection of the tank and system to identify failure points and confirm diagnosis.
Soil testing and percolation tests determine whether the ground can properly absorb effluent, while utility markers and property lines are located to avoid conflicts.
The inspector should also weigh which tasks are suitable for a homeowner and when a licensed professional is required for accurate testing and permitting.
Inspecting the tank and system diagnosis
Begin by conducting a systematic inspection of the septic tank and nearby components to document condition, locate access points, and identify obvious failures such as leaks, root intrusion, or structural damage.
Record sludge and scum levels, check baffles and risers for deterioration, test inlet/outlet flow, and inspect distribution box, pipes, and pump (if present).
Note odors, standing water, and evidence of backups.
Soil testing and percolation (perc) tests
Evaluating soil suitability through testing and percolation (perc) tests establishes whether the site can support a replacement drain field and determines the appropriate system design.
Technicians probe soil texture, depth to seasonal high water table, permeability, and infiltration rates via standardized perc tests.
Results guide trench sizing, absorption area, and alternative system needs; documentation supports permit applications and guarantees long‑term performance and regulatory compliance.
Locating utilities and property lines
When preparing the replacement drain field, a thorough survey to locate underground utilities and confirm property boundaries is essential to prevent damage, guarantee compliance with setback requirements, and avoid legal disputes.
Mark utility lines, easements, and edge-of-right‑of‑way clearly. Review recorded plats, use utility locators, and obtain clearance from utility companies.
Verify setback dimensions and note any encroachments before excavation begins.
When to call a professional vs. DIY assessment
Who should assess the site first — the homeowner or a licensed professional — depends on complexity, risk, and local regulations.
Homeowners can perform basic inspections: visible surfacing, soak tests, and reviewing permits.
Call a professional when odors, backups, unclear utility locations, steep terrain, high water table, or required septic permits exist.
Professionals provide accurate evaluations, soil tests, and regulatory compliance.
Permits, Codes, and Regulations
Before any construction begins, the homeowner must identify and obtain the typical permits required by the local health department or building authority, including septic replacement and soil evaluation permits.
Local codes dictate setbacks, system specifications, required inspections and timelines, and may impose environmental restrictions tied to watersheds or protected areas.
Knowing how to apply for permits, schedule inspections, and comply with watershed or conservation rules prevents delays and guarantees legal installation.
Typical permits required and how to obtain them
Permits and inspections are fundamental steps in replacing a septic drain field because local health departments and building authorities regulate site evaluation, system design, installation, and final approval to protect public health and groundwater.
Typically required permits include septic system replacement, soil evaluation, and construction permits.
Applicants submit plans, pay fees, schedule inspections, and obtain final approval; requirements vary by jurisdiction.
Local code considerations and setbacks
After securing required permits and scheduling inspections, attention shifts to local codes and setback requirements that dictate where a replacement drain field may be located.
Jurisdictional rules set minimum distances from wells, property lines, buildings, watercourses, and utilities. Soil type, slope, and floodplain restrictions also influence siting.
Compliance prevents fines, guarantees public health, and avoids costly rework or permit denial.
Required inspections and timelines
Several inspections typically punctuate a drain field replacement project, each with a prescribed timeline and specific checklist to verify compliance with health and building codes.
Initial soil and site review, pre-installation trench and material inspection, and final system acceptance are common. Inspectors confirm elevations, pipe slopes, aggregate, separation distances, and proper backfill.
Timelines vary by jurisdiction but often require prompt scheduling at each stage.
Environmental restrictions and watershed concerns
Inspections that verify site conditions and construction details often trigger a parallel review of environmental restrictions and watershed protections that govern drain field work.
Authorities evaluate proximity to streams, lakes, wetlands, and recharge zones, enforce setbacks, limit discharge rates, and require erosion controls.
Mitigation, monitoring, and permit conditions aim to prevent contamination, protect habitat, and guarantee compliance with watershed management plans and state water quality standards.
Choosing the Right Replacement Type
The homeowner should consider several replacement options, including conventional gravity-fed drain fields, pressure distribution systems, mound systems, and other alternative technologies.
Each option differs in installation cost, suitability for soil and site conditions, and required footprint. A clear comparison of these factors helps determine the most appropriate system for the property.
Conventional gravity-fed drain fields
Consider a conventional gravity-fed drain field when the site’s topography, soil permeability, and groundwater separation allow effluent to move downhill by gravity into a network of perforated pipes and gravel trenches.
This system is simple, low-maintenance, and cost-effective where slopes permit. It requires adequate soil absorption, proper setback distances, and permits.
Unsuitable for flat, high water table, or poorly draining soils.
Pressure distribution systems
Evaluate pressure distribution systems when site conditions—such as limited slope, uneven soil percolation, or shallow groundwater—make gravity-only drain fields impractical.
These systems use a pump and timed dosing to evenly distribute effluent through smaller-diameter pressure lines, improving treatment and preventing localized overloading.
Consider installation complexity, power reliability, maintenance needs, and permit requirements when selecting this replacement option.
Mound systems and alternative systems
Explore mound and alternative systems when on-site constraints—shallow soil, high groundwater, or poor percolation—preclude conventional drain fields.
Mound systems build engineered fill and sand layers to provide treatment and dispersal above limiting conditions.
Alternative technologies (e.g., aerobic treatment units, sand filters, evapotranspiration) offer enhanced treatment or reduced footprint.
Selection depends on site assessment, local code, and long-term maintenance obligations.
Comparison of system types by cost, suitability, and footprint
Choosing the right replacement system requires weighing upfront installation cost, ongoing operation and maintenance expenses, site suitability, and the physical footprint each option demands. Systems vary: conventional trenches are low-cost but need space; mound systems suit high groundwater; aerobic systems perform in tight sites but cost more. Compare realistically.
| System | Cost | Footprint |
|---|---|---|
| Conventional trench | Low | Large |
| Mound | Medium | Moderate |
| Aerobic treatment | High | Small |
Step-by-Step Replacement Process
The replacement process begins with preparing the site and mobilizing equipment, followed by careful excavation and removal of the existing system components.
Once the old materials are cleared, soil is prepared and graded to required specifications before installing pipes, chambers, or leach lines.
The work finishes with backfilling, compaction, and final grading to restore proper drainage and surface contours.
Preparing the site and mobilizing equipment
Begin by marking and securing the work area to prevent accidental access and to establish clear boundaries for excavation and equipment placement.
Confirm utility locations with utility companies, obtain required permits, and notify neighbors if necessary.
Stage materials, replacement components, and erosion control supplies.
Mobilize machinery and verify operator certifications, fuel, and safety gear.
Establish site access routes and sediment controls before work begins.
Excavation and removal of old system components
With site controls, permits, and equipment in place, excavation can proceed under a controlled plan that minimizes disturbance and preserves usable soil and components.
Operators expose distribution box, laterals, and failing aggregate, documenting conditions. Contaminated or collapsed materials are segregated and staged for disposal. Salvageable pipe and fittings are cleaned and stored.
Excavation limits respect utility markings and permit requirements.
Soil preparation and grading
Prepare the soil surface by removing debris, leveling high spots, and loosening compacted areas to create a uniform base for the new drain field.
Next, confirm proper slope away from structures, typically 1% to 2%, and regrade as needed.
Compact perimeter soils lightly to prevent erosion, install erosion control measures, and verify final elevations meet engineered plans and local permit requirements before proceeding.
Installing pipes, chambers, or leach lines
After final grading and erosion controls are verified, installation of the drain field components proceeds according to the engineered plan.
Technicians lay perforated pipes or modular chambers on prepared bedding, maintain specified slopes, and connect to the distribution box.
Leach lines are spaced per design, capped and tested for alignment and flow.
All connections are watertight and conform to permit requirements before inspection.
Backfilling, compaction, and final grading
Begin backfilling by placing clean, suitable fill in uniform lifts around pipes, chambers, or leach lines to protect the system and restore site grade.
Compact each lift to specified density, avoiding damage to components. Monitor elevations frequently, maintain drainage slopes toward approved outlets, and remove debris.
Final grading should eliminate low spots, align with permit requirements, and prepare the surface for subsequent revegetation.
Re-establishing surface vegetation and erosion control
Restore the surface by establishing vegetation and erosion controls that stabilize soil, prevent runoff, and protect the newly graded drain field.
Seed with appropriate turf or native grasses, apply straw mulch, and use erosion control blankets on slopes.
Install silt fences or wattles where needed, maintain temporary irrigation until roots establish, and monitor for washouts.
Repair disturbed areas promptly to guarantee long-term stability.
Materials, Equipment, and Typical Labor Tasks
The section outlines the specific materials and replacement parts typically required for a drain field, such as pipe, gravel, distribution boxes, and replacement chambers.
It also covers the heavy equipment and hand tools commonly used, including excavators, compactors, saws, and trenching tools.
Finally, it summarizes contractor roles and sequential labor tasks from site preparation and excavation to installation, backfill, and testing.
List of required materials and parts
Several essential materials, tools, and labor tasks are required to replace a septic drain field, including replacement pipe and distribution boxes, appropriate gravel or sand backfill, geotextile fabric, septic-safe fittings and risers, excavation equipment (excavator, backhoe, shovels), compaction tools, safety gear (gloves, masks, eye protection), soils testing and inspection services, and skilled labor for excavation, pipe layout, grading, and system testing.
- Perforated drainpipe and distribution box
- Clean aggregate and geotextile fabric
- Risers, fittings, and inspection ports
- Site testing, permit fees, and certified installer labor
Heavy equipment and tools commonly used
Excavators, skid steers, and compact backhoes are the backbone of drain field replacement, providing the power and precision needed for trenching, soil removal, and grading while minimizing manual labor.
Complementary tools include laser levels, plate compactors, and pipe fusion equipment. Safety gear and utility locators protect crews and sites.
- Excavator with grading bucket
- Skid steer loader
- Plate compactor
- Utility locator and ground-penetrating radar
Roles and labor steps contractors perform
Contractors coordinate site assessment, permitting, materials procurement, heavy-equipment operation, trenching, bed construction, pipe and chamber installation, backfilling, and final grading while assigning clear responsibilities to foremen, equipment operators, laborers, and a certified septic system technician.
Teams follow safety protocols, verify material specs (pipe, aggregate, geotextile), execute excavation, inspect elevations and slopes, install and pressure-test lines, backfill in lifts, and restore surface drainage.
Cost Breakdown and Financing Options
Estimated replacement costs vary widely by system type and property size, from a few thousand dollars for simple gravity systems to tens of thousands for advanced or large-site installations.
Itemized expenses typically include permits, site testing, labor, and materials, while factors such as poor soils, difficult access, or required remediation can greatly raise the price.
Financing options, potential grants, and insurance coverages should be explored early to manage upfront costs and unexpected overruns.
Typical cost ranges by system type and property size
Costs for replacing a septic drain field vary widely depending on system type and property size, typically ranging from several thousand dollars for basic pipe-and-gravity systems to tens of thousands for engineered or mound systems on large or challenging lots.
Smaller properties with easy access and good soil see lower totals; properties with poor soil, steep grades, or space limits incur higher expenses and more complex solutions.
Itemized cost components (permits, testing, labor, materials)
A complete replacement breaks down into several discrete line items—permit fees and required soil or percolation testing, excavation and disposal, material costs for pipes, stone, and distribution boxes (or engineered components for mound systems), and labor for installation and any site restoration—each of which can vary considerably by jurisdiction, soil conditions, and system complexity.
Additional line items include septic tank inspection, testing, equipment rental, and waste hauling or recycling.
Factors that increase costs (soil issues, access, remediation)
Unforeseen site conditions and logistical challenges can drive replacement expenses well beyond baseline estimates.
Poor soil percolation requires engineered systems or expanded trenches, increasing materials and labor.
Restricted access or long haul distances raise excavation and equipment costs.
Contamination, root intrusion, or buried utilities necessitate remediation, permits, and specialist crews.
Unplanned testing, backfill, and landscape restoration further inflate total project cost.
Financing, grants, and insurance possibilities
Explore financing, grants, and insurance options early to prevent a septic drain field replacement from becoming an unmanageable expense.
Homeowners should investigate low-interest loans, local or state grant programs for failing systems, and USDA or HUD assistance where eligible.
Review homeowner insurance for accidental coverage and consult lenders about home equity or specialty septic loans.
Document permits and estimates for applications.
Timeline Expectations and Project Scheduling
Typical replacement projects range from a few days for simple repairs to several weeks for full-field replacements, depending on site complexity and permitting.
Weather, seasonal ground conditions, and the timing of required inspections can extend schedules and should be checked before work begins.
Property owners should plan for restricted yard access, temporary wastewater management, and possible driveway or landscaping interruptions during the project.
Average project duration by complexity
Project duration for replacing a septic drain field varies widely with system complexity, site conditions, permitting, and weather, ranging from a few days for minor repairs to several weeks for full replacements.
Simple trench repairs: 1–3 days.
Partial field replacements: 3–7 days.
Full system replacement with new piping and soil work: 2–4 weeks.
Complex access or remediation can extend timelines.
Weather, seasonality, and inspection scheduling impacts
Because weather and seasonal cycles directly affect site access, soil conditions, and regulatory calendars, scheduling a drain-field replacement requires built-in flexibility for delays and timing adjustments.
Contractors and homeowners should plan around freeze/thaw, heavy rains, and saturated ground that impede excavation.
Permit inspections often follow limited municipal schedules; booking inspections early and allowing contingency days minimizes idle time and rescheduling costs.
How to plan around disruptions to property use
Weather- and inspection-related delays directly influence how long a property will be disrupted during a drain-field replacement, so stakeholders should set realistic timeline expectations before work begins.
Project managers should map a buffer for weather, permit approvals, and unexpected soil issues; schedule high-impact tasks midweek; notify occupants of access limits; arrange alternative sanitation and vehicle parking; and confirm milestones with contractors.
Risks, Common Problems, and How to Avoid Them
Common installation mistakes—incorrect pipe slope, improper gravel layering, and uneven trenching—can lead to poor drainage, clogging, or premature failure.
Ensuring consistent soil contact and uniform distribution across the field is essential to maintain treatment capacity and prevent localized saturation.
Careful staging, limiting heavy equipment on prepared trenches, and protecting soil structure during construction reduce compaction and the risk of system damage.
Common installation mistakes and their consequences
Installers who shortcut excavation, pipe alignment, or soil testing risk premature system failure and costly repairs.
Incorrect slope, poor joint sealing, compacted replacement soil, and inadequate bedding cause clogging, uneven flow, backups, and soil saturation.
Using wrong materials or ignoring inspection requirements voids warranties and permits.
Proper sequencing, qualified crews, and adherence to plans prevent operational failures and regulatory penalties.
Ensuring proper soil contact and distribution uniformity
Guarantee even soil contact and uniform effluent distribution to maintain treatment efficiency and prevent localized overloading.
Inspect pipe bedding, stone fill, and trench grade to avoid gaps or voids.
Use level manifolds, properly spaced laterals, and flow-equalizing devices.
Test distribution with measured dosing.
Monitor for wet spots, odors, or vegetation changes and correct imbalance promptly to reduce failure risk.
How to prevent compaction and system damage during construction
Prevent compaction and mechanical damage by restricting heavy equipment, staging materials, and excessive foot traffic on areas designated for the drain field.
Soil structure, aggregate bedding, and pipe integrity can be compromised by even short-term loading, leading to reduced infiltration, crushed laterals, and premature failure.
Install temporary mats, delineate no-go zones, route traffic away, use lightweight tools, and schedule inspections to verify uncompacted bedding and intact pipes before backfill.
Hiring the Right Contractor
Selecting a qualified contractor requires asking targeted questions about experience, timelines, materials, and cleanup procedures.
The homeowner should verify licenses, insurance coverage, and recent references before awarding the job.
Contracts must be reviewed for clear scopes of work, warranty terms, and procedures for change orders to avoid disputes.
Questions to ask prospective contractors
How should a homeowner evaluate contractors for a septic drain field replacement?
Ask about specific drain-field experience, proposed system types, timeline, project management, subcontractors, excavation methods, soil testing involvement, permit handling, warranty terms, change-order policies, and payment schedule.
Request a detailed written estimate and timeline.
Inquire how the contractor will minimize yard disruption and restore landscaping after completion.
Verifying licenses, insurance, and references
After confirming experience, system preferences, timelines, and restoration plans, the homeowner should verify the contractor’s credentials before signing any agreement.
Confirm valid state or local septic contractor licenses, current general liability and workers’ compensation insurance, and bonding where required.
Request recent project references, contact them about quality, timeliness, and cleanup, and check online reviews and complaint histories with licensing boards.
Understanding contracts, warranties, and change orders
A clear, written contract is essential before work begins, specifying scope, materials, schedule, payment terms, and who bears permitting and restoration responsibilities.
Warranties should detail coverage duration, exclusions, and remedy processes.
Change orders must be written, priced, and signed before implementation to avoid disputes.
Retain copies of all documents, require lien releases upon payment, and confirm warranty transferability if ownership changes.
Post-Installation Care and Maintenance
After installation, the system is started and inspected to verify proper flow, component connections, and permit compliance.
A routine maintenance plan — including scheduled septic tank pumping, periodic inspections, and careful landscaping and load management over the new drain field — preserves performance and prevents soil compaction.
Homeowners should monitor for signs of recurrence such as slow drains, odors, soggy patches, or sewage backups and follow prescribed troubleshooting and contractor-contact steps when problems appear.
Initial system startup and final inspections
Begin by verifying that all components operate as designed and that the drain field area is secure and accessible. This initial system startup confirms hydraulic function, checks for leaks, and establishes baseline performance before the site is closed.
Record flow rates, inspect distribution boxes, test alarm systems, and confirm proper grading and compaction.
Obtain required final inspections and signoffs from local authorities before restoring surface landscaping.
Routine maintenance schedule and septic tank pumping
With final inspections complete and the drain field restored, regular upkeep becomes the responsibility that preserves system performance and protects the site.
Owners should schedule septic tank pumping every 3–5 years, depending on household size and tank capacity.
Annual inspections verify alarms, baffles, and effluent levels.
Keep records of service dates, hauler receipts, and inspection reports to support warranties and permit compliance.
Landscaping and load management to protect the new drain field
Protect the drain field by limiting surface loads, controlling vegetation, and directing runoff away from the soil treatment area.
Use shallow-rooted grasses and native groundcovers; avoid trees, impermeable paving, and heavy equipment traffic.
Grade surrounding landscape to shed stormwater toward gutters or swales.
Install fencing or signage to prevent vehicle access.
Maintain mulch and erosion controls to preserve soil porosity and system function.
Signs of recurring problems and troubleshooting steps
After landscaping and load-management measures are in place, ongoing monitoring helps catch recurring drain field issues early.
Indicators include slow drains, sewage odors, soggy or discolored ground, and unusually lush vegetation.
Troubleshooting entails inspecting distribution boxes, checking tank levels, avoiding heavy water use, and scheduling professional dye tests and camera inspections.
Prompt repairs and adjusted waste habits prevent further failure.
Cost-Saving Tips and Alternatives
Before committing to a full replacement, the author notes that targeted repairs or remediation can often restore function at a fraction of the cost.
Using lower-cost materials selectively and phasing work over time are presented as practical ways to manage upfront expenses.
The piece also highlights efficiency upgrades—such as improved distribution devices or effluent filters—that may raise initial costs but lower lifecycle expenses.
When repair or targeted remediation may be sufficient
When localized problems such as clogged lateral lines, damaged distribution boxes, or surface ponding stem from identifiable causes rather than widespread soil failure, targeted repairs or remediation often suffice and cost far less than full drain-field replacement.
Assessment by a qualified inspector can identify repairs: jetting, spot trenching, distribution-box replacement, soil aeration, or installing effluent filters.
These measures restore function quickly when contamination and compaction are limited.
Low-cost materials and phased replacement strategies
Several practical strategies can reduce drain-field replacement costs without compromising long-term performance.
Homeowners may opt for recycled aggregate, durable PVC piping, or gravelless chamber systems to lower material expenses.
Phased replacement—repairing segments sequentially rather than full excavation—spreads labor and permit costs over time.
Local code compliance, contractor consultation, and careful site staging guarantee savings without risking system integrity.
Long-term efficiency upgrades that reduce lifecycle costs
Upgrade planning focuses on measures that lower operating and replacement costs over the drain field’s lifetime by improving treatment efficiency, reducing hydraulic load, and extending component durability.
Recommended upgrades include higher-efficiency pretreatment (advanced septic tanks, textile filters), low-flow fixtures and graywater diversion, optimized distribution (pressure dosing, surge tanks), durable piping and aggregate, and regular monitoring with remote sensors.
These reduce failures, maintenance frequency, and replacement scope.
Real-World Examples and Typical Scenarios
The article presents compact case studies illustrating a full replacement on a rural property and a restricted-lot installation requiring a mound system.
It then outlines a practical decision flow to determine when repair is sufficient versus when complete replacement is necessary.
These examples and the decision framework provide concrete comparisons for typical scenarios homeowners may encounter.
Case study: full replacement on a rural property
A rural homeowner commissioned a full septic drain field replacement after persistent backups, saturated soil, and a failed percolation test rendered the original system unsalvageable.
Contractors excavated, removed old pipes and stone, and installed a new gravity-fed trench system sized for household demand.
Permits, soil reports, and a final inspection confirmed compliance; project timeline totaled three weeks with predictable weather and accessible equipment.
Case study: restricted lot requiring a mound system
Following the full-field replacement, attention turns to properties where space or soil conditions prevent conventional trenches and a mound system becomes necessary.
A suburban homeowner on a small, sandy lot installed an engineered mound to meet setbacks and percolation limits.
Design included imported fill, pressurized distribution, and inspection risers.
Permitting required site evaluation, contractor certification, and staged construction to protect neighboring drainage.
Decision flow: choosing repair vs. full replacement
When should a homeowner opt for targeted repairs instead of a full-field replacement? A decision depends on soil condition, extent of failure, aging components, budget, and permit constraints. Examples: small localized clogging or pipe damage suits repair; widespread biomat or collapsing laterals needs replacement. Practical scenarios guide cost-benefit and timelines; consult inspectors for definitive choices.
| Situation | Emotion | Outcome |
|---|---|---|
| Local clog | Frustration | Repair |
| Aging lines | Worry | Evaluate |
| Collapsed field | Alarm | Replace |
| Permit limits | Resignation | Alternative |
Conclusion
Replacing a failing septic drain field is not merely a repair but a renewal of household health and landscape significance; like stitches mending a worn fabric, a properly chosen and installed system restores function and peace of mind. Attention to site assessment, permitting, contractor choice, and ongoing maintenance guarantees longevity and avoids costly repeats. With careful planning and adherence to codes, homeowners can turn a disruptive necessity into a lasting investment.
