How to Insulate Ductwork in Basement: Step-by-Step Guide for Energy Savings and Preventing Condensation
To insulate ductwork in your basement effectively, start by sealing any leaks with mastic or foil tape. This reduces heat loss and prevents condensation. Next, measure your duct runs and select the appropriate insulation: use fiberglass wrap for cost efficiency or closed-cell foam for better moisture resistance and higher R-value. Cut the insulation to fit your ducts and secure it with foil tape or staples while ensuring vapor barriers are intact. Regularly inspect the insulation every 6–12 months for any signs of damage or mold. Follow this step-by-step guide for detailed methods, material options, and cost estimates.
Why Insulating Basement Ductwork Matters for Energy Savings and Moisture Control
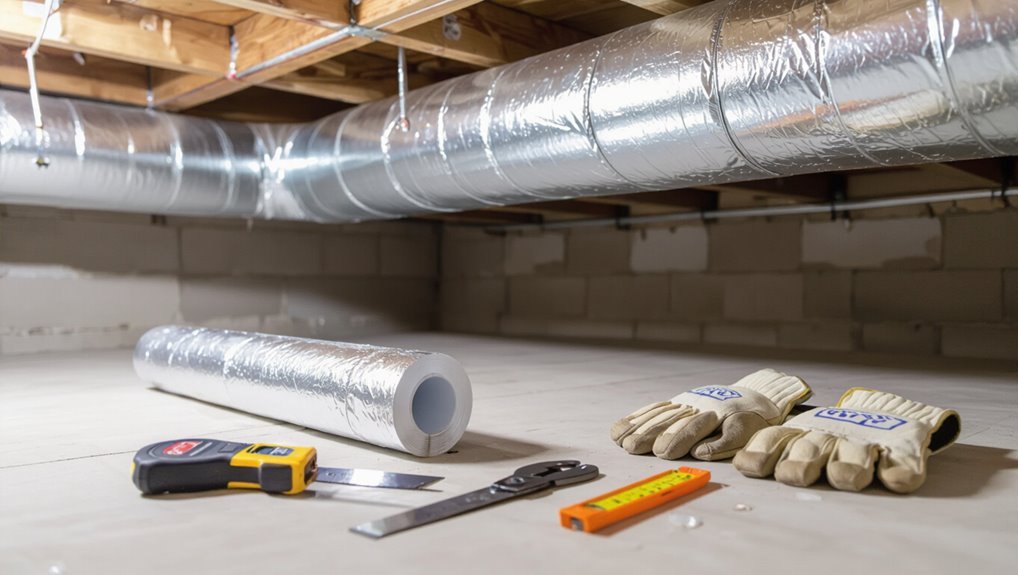
Insulating basement ductwork reduces conductive heat transfer, keeping conditioned air at the proposed temperature and lowering heating and cooling costs.
Proper insulation and sealing also limit surface cooling of ducts, preventing condensation that can lead to mold growth and degraded indoor air quality.
Costs are typically recouped fastest in uninsulated or leaky systems and in climates with large temperature differences, making insulation most cost-effective when ducts run through unconditioned basements or attics.
How duct insulation reduces energy loss and lowers heating/cooling bills
A well-sealed layer of insulation around basement ductwork greatly cuts thermal transfer, keeping conditioned air at targeted temperatures as it travels through unheated spaces.
Properly executed how to insulate ductwork in basement reduces heat gain in summer and heat loss in winter, lowering HVAC runtime.
Reduced energy waste decreases utility bills, improves system efficiency, and extends equipment lifespan through fewer temperature-driven cycles.
How insulation prevents condensation, mold, and air quality issues
Because basement air is often cooler and more humid than conditioned air inside ducts, uninsulated ductwork creates surfaces where warm, moist air can condense.
This moisture then promotes mold growth, corrodes metal, and degrades indoor air quality by circulating spores and volatile byproducts throughout the home.
Insulation keeps duct surfaces above dew point, preventing condensation, inhibiting microbial growth, reducing corrosion, and limiting pollutant spread.
When insulating ductwork is most cost-effective (payback overview)
Cost-effectiveness of insulating basement ductwork hinges on factors like local energy prices, the percentage of ductwork located in unconditioned space, existing duct leakage, and the home’s heating and cooling load.
When a significant portion of the system runs through a cold, humid basement, payback from reduced energy bills and avoided moisture damage is typically fastest.
Short payback occurs with high energy costs, leaky ducts, and extensive exposed runs.
Types of Ducts and Insulation Materials
Basement ductwork can include flexible ducts, sheet-metal runs, larger trunk lines, and return pathways, each presenting different sealing and insulation challenges.
Common insulation choices—fiberglass wrap, foil-faced foam, and closed-cell spray foam—vary in thermal resistance, moisture resistance, and ease of installation.
Recommended R-values for insulated basement ducts depend on climate zone, typically ranging from R-4 to R-8 for temperate to cold regions.
Common duct types found in basements (flex, metal, trunk, return)
Ductwork in basements typically includes several common types—flexible (flex) ducts, sheet-metal ducts, larger trunk lines, and dedicated return ducts—each with distinct shapes, materials, and performance characteristics that affect insulation choices.
Flex ducts are lightweight, compressible, and prone to kinks; sheet-metal offers rigidity and low leakage; trunk lines carry high volumes; return ducts collect air.
Identification guides installation planning.
Insulation material options and properties
The section compares common insulation choices for basement ductwork, including fiberglass duct wrap with its varying R-values and optional vapor barriers, foam board and rigid panels, closed-cell spray foam, and reflective foil-faced insulation.
Each material offers different thermal resistance, moisture control, and installation complexity that affect performance on metal, flexible, or rectangular ducts.
Guidance on matching material properties to duct type and basement conditions follows.
Fiberglass duct wrap (R-values, vapor barrier)
Fiberglass duct wrap offers a common, cost-effective way to insulate HVAC pipes and rectangular runs in basements, combining thermal resistance with sound dampening.
Available in various thicknesses, typical R-values range from about R-3 to R-8 depending on thickness and density.
Many products include a foil or kraft-faced vapor barrier to control condensation; proper sealing at seams and joints is essential for effectiveness and moisture control.
Foam board and rigid insulation
Several common foam board and rigid insulation types—polyisocyanurate, extruded polystyrene (XPS), and expanded polystyrene (EPS)—are used to insulate basement HVAC runs and service ducts.
Polyiso offers high R-value per inch and facer options; XPS resists moisture and handles compression; EPS is cost-effective but lower R-value.
Panels are cut, fitted, taped, and sealed at seams to limit thermal bridging and air leakage.
Closed-cell spray foam
Apply closed-cell spray foam to ductwork when a high-performance, air- and moisture-resistant barrier is required: this rigid, dense foam bonds directly to metal and rigid ducts, providing thermal insulation (high R-value per inch), an effective air seal, and added structural support.
It resists vapor transmission, reduces condensation and noise, conforms to irregular shapes, and offers long-term durability, though professional application and proper curing are essential.
Reflective foil-faced insulation
Reflective foil-faced insulation combines a thin layer of metalized foil bonded to foam or kraft-faced substrates to reflect radiant heat and provide a moisture-resistant barrier for basement ductwork.
It reduces heat gain or loss, resists condensation when installed with sealed seams, and suits metal and flex ducts.
Installation requires careful taping, overlapping, and protection from tears; R-values are modest but effective against radiant transfer.
Recommended R-values for basement ductwork by climate zone
Recommended R-values for basement ductwork vary with climate zone because heat loss and gain through ducts change dramatically between cold and warm regions. Guidance: colder zones need higher R-values to prevent heat loss and condensation; warmer zones focus on cooling efficiency and moisture control. Select insulation matching local code and HVAC specifications.
| Zone | Suggested R-value |
|---|---|
| Cold | R-8 to R-12 |
| Mixed | R-6 to R-8 |
| Warm | R-4 to R-6 |
Tools, Materials, and Safety Gear You Need
The section outlines the specific tools and materials required for insulating basement ductwork, including tape, insulation wrap, fasteners, and cutting tools.
It also specifies necessary personal protective equipment such as gloves, eye protection, and a respirator.
Ventilation precautions for working in confined basement spaces are addressed to minimize dust and chemical exposure.
List of required tools and materials
A clear inventory of tools, materials, and safety gear sets the stage for efficient and safe basement ductwork insulation.
Essential items include measured insulation, sealant, and fastening supplies.
Typical checklist:
- Rigid/flexible insulation rolls, foil tape, mastic.
- Scissors/utility knife, measuring tape, marker.
- Metal snips, duct straps, adhesive-backed vapor barrier.
Personal protective equipment and ventilation precautions
Wear appropriate personal protective equipment and secure adequate ventilation before handling insulation to minimize inhalation, skin contact, and eye irritation.
Respirators, gloves, goggles, and long sleeves protect against fibers; local exhaust or fans reduce dust and fumes.
Ensure exits remain clear and monitor air quality.
- Use NIOSH-rated respirator.
- Wear chemical-resistant gloves.
- Provide continuous ventilation.
Preparing Ducts Before Insulation
Before adding insulation, the ducts should be inspected for leaks, rust, and physical damage and any compromised sections documented.
Joints and seams need to be sealed with the appropriate material—mastic for permanent seals or foil tape for flexible connections—after cleaning and thoroughly drying the surfaces to prevent trapped moisture.
Finally, measure and map each run to plan insulation lengths and any special fittings before beginning installation.
Inspecting ducts for leaks, rust, and damage
Begin by conducting a systematic visual and tactile inspection of all accessible duct runs to identify leaks, corrosion, punctures, crushed sections, and loose joints.
Note rusted areas, oil or dust streaks indicating airflow escape, and soft spots suggesting structural weakness.
Record locations and severity, photograph damage, and list sections needing repair or replacement before insulation to guarantee effective sealing and long-term performance.
Sealing joints and seams (mastic vs. foil tape)
Seal all joints and seams thoroughly to prevent conditioned air loss and moisture intrusion before applying insulation.
Use water-based mastic with embedded mesh for long-lasting, flexible seals on gaps and irregular seams; allow full cure.
Foil-backed HVAC tape suits smooth, clean surfaces and quick repairs but can fail over time.
Prioritize airtightness, compatibility with insulation, and manufacturer recommendations when choosing sealant.
Cleaning and drying ducts to prevent trapped moisture
Thoroughly cleaning and drying ductwork eliminates dust, debris, and residual moisture that would otherwise become trapped beneath insulation and foster mold, corrosion, or reduced airflow.
Technicians vacuum interior surfaces, remove loose particles, and use antimicrobial wipes where needed. Allow ducts to air-dry or accelerate with low-heat fans.
Confirm dryness with a moisture meter before applying insulation to verify long-term performance and indoor air quality.
Planning insulation layout and measuring runs
Before insulation is applied, a clear layout and accurate measurements of each duct run guarantee the material fits correctly and thermal performance is maintained.
The inspector maps main trunks, branches, fittings, and offsets, noting lengths, diameters, and access points.
Allowances for seams, overlaps, and vapor barriers are calculated.
A labeled diagram and material list minimize waste and streamline installation.
Step-by-Step Guide to Insulating Basement Ductwork
The following steps outline a practical sequence for insulating basement ductwork, beginning with accurate measurement and cutting of insulation to size.
Techniques for applying insulation to straight metal and flexible runs are described, followed by methods for wrapping elbows, changes, and branch connections.
The guide concludes with instructions for securing seams, taping fasteners, and reinspecting seals and support penetrations.
Step 1 Measure and cut insulation to fit
Measure each duct section carefully and transfer those dimensions to the insulation material, allowing for end overlaps and any bends or fittings.
Use a tape measure, mark cut lines, and account for insulation thickness. Cut with a utility knife or insulation shears on a stable surface.
Label pieces for each run and keep small templates for irregular shapes to guarantee accurate, snug fits before installation.
Step 2 Install insulation on straight runs (metal and flex techniques)
With the pieces cut and labeled, installation on straight duct runs proceeds by matching each insulation segment to its corresponding metal or flex section and orienting the vapor barrier outward.
For rectangular and round metal ducts, wrap and seal seams with foil tape.
For flexible duct, stretch insulation evenly along length, smooth wrinkles, and secure with zip ties or tape at 12–18 inch intervals to maintain continuous coverage.
Step 3 Insulate elbows, transitions, and branch connections
Begin by tackling each elbow, shift, and branch individually, since these fittings concentrate heat loss and require tailored cuts and fastening to maintain continuous insulation and an intact vapor barrier.
Measure each fitting, cut preformed elbow sections or wrap flexible insulation snugly, compressing at bends.
Overlap material at junctions, fit insulation around takeoffs, and guarantee thickness matches adjacent runs for uniform thermal performance.
Step 4 Secure seams, tape, and fasten insulation properly
After fitting insulation around elbows, shifts, and takeoffs, attention turns to securing all seams and fasteners to create an uninterrupted thermal and vapor barrier.
Seams are overlapped and taped with HVAC foil or acrylic cloth tape; staples or zip ties hold insulation snugly without compression.
Seal foil joints with mastic where tape may fail.
Confirm edges are smooth and continuous for peak performance.
Step 5 Reinspect and seal penetrations and supports
Inspect the entire duct run for every penetration and support point to guarantee air, moisture, and thermal barriers remain continuous.
Identify gaps around hangers, joist penetrations, and pipe collars. Seal gaps with appropriate mastic or foam, then cover with vapor-resistant tape or flashing.
Refasten insulation at supports to prevent sagging. Document repairs and schedule periodic reinspections to maintain performance.
Step 6 Insulating returns and access panels without blocking airflow
Carefully insulate return ducts and access panels so thermal and vapor barriers are continuous without obstructing airflow or access for maintenance.
Use thin, high-R flexible insulation around collars and inside plenums, securing with mechanical fasteners and foil tape.
Leave required clearances at grilles and filters, install removable insulated access covers with gasketed edges, and verify no compression or gaps that reduce performance.
Special Situations and Advanced Techniques
The section addresses how insulation choices differ between unconditioned and conditioned basements and the trade-offs those environments create.
It also covers techniques for low-clearance, cramped, or irregular duct runs and how to combine thermal insulation with soundproofing.
Guidance is provided on when spray foam or full encapsulation are appropriate and what risks or benefits to expect.
Insulating ducts in unconditioned vs. conditioned basements
Because the thermal and moisture dynamics differ markedly between unconditioned and conditioned basements, duct insulation strategies must be chosen to match each environment’s pressure, temperature, and humidity conditions.
In unconditioned spaces, prioritize vapor-retarder insulation and thicker R-values to prevent condensation and heat loss.
In conditioned basements, focus on sealing joints and using moderate insulation to maintain balanced temperatures and avoid trapping moisture within assemblies.
Handling low-clearance, cramped, or irregular duct layouts
Navigate tight, low-clearance, or irregular duct runs by prioritizing flexible, low-profile insulation and attachment methods that conform to constrained spaces without compromising performance.
Use tape-sealed foil-faced batts, split-foam sections, or wrap-around closed-cell elastomeric rubber where bends and offsets occur. Fasten with stainless steel zip ties, adhesive, or mechanical clips.
Maintain continuous vapor barrier, trim excess, and seal seams to prevent condensation and heat loss.
Integrating insulation with soundproofing needs
Basement homeowners’ comfort often depends on balancing thermal insulation with noise control, so ductwork treatments should address both heat transfer and airborne structure-borne sound without adding bulk that conflicts with clearance or airflow.
Use thin, dense acoustic wraps or mass-loaded vinyl combined with standard fiberglass or foil-faced insulation.
Decouple duct mountings, seal joints, and isolate vibration at fans to reduce transmitted noise while preserving R-value.
When to use spray foam or encapsulation
When is spray foam or full encapsulation the right choice for ductwork?
In basements with severe air leaks, irregular shapes, or persistent condensation, spray foam or encapsulation provides superior air sealing and vapor control.
Use when mechanical access for conventional wraps is limited, when pests or mold require durable barrier protection, or when maximizing thermal performance and minimizing leak-related energy loss is a priority.
Common Mistakes and How to Avoid Them
Common mistakes during basement duct insulation include choosing too-low R-values, skimping on insulation thickness, and failing to fully seal joints and seams.
Using materials without a vapor barrier in damp basements and covering dampers, filters, or service panels further compromises system performance and maintenance.
Addressing these issues up front prevents energy loss, moisture problems, and access difficulties.
Underinsulating and wrong R-value choices
If duct insulation is too thin or the chosen R-value is inadequate for the climate and application, heat loss, condensation, and energy waste will persist despite the effort to cover the ducts.
Assess local code recommendations and seasonal temperature swings, select manufacturer-specified R-values, and match thickness to pipe size.
Verify continuous coverage and upgrade insulation where calculations show unacceptable thermal transfer.
Poor sealing practices that lead to persistent leaks
Neglecting proper sealing techniques leaves duct systems vulnerable to persistent leaks that undermine insulation efforts and raise energy costs.
Common poor practices include relying solely on standard tapes, leaving joints uneven, and failing to prep surfaces.
Proper avoidance uses mastic or HVAC foil tape, tight-fitting connections, fasteners where needed, and pressure testing.
Regular inspections guarantee long-term airtightness and maintained insulation performance.
Using non-vapor-barrier materials in high-humidity basements
Many basements experience elevated humidity levels that make choosing insulation materials with a proper vapor barrier essential; using non-vapor-barrier products in such environments invites condensation, mold growth, and insulation degradation.
Install vapor-barrier-faced insulation or add a compatible vapor retarder, seal seams and terminations, and guarantee proper ventilation.
Regularly inspect for dampness and replace compromised insulation promptly to prevent performance loss and health risks.
Blocking access to dampers, filters, or service panels
Proper moisture control is only part of effective basement ductwork insulation; equally important is preserving access to dampers, filters, and service panels.
Blocking them with insulation or sealant prevents maintenance, restricts airflow adjustments, and risks damage during repairs.
Leave clear service gaps, label access points, and use removable insulation sections or access panels to guarantee safe, routine inspection and troubleshooting without rework.
Maintenance, Inspection, and Long-Term Performance
Regular inspections of insulated basement ducts every 6–12 months help identify tears, compression, or degraded materials before they worsen.
Damaged or waterlogged insulation should be repaired or replaced promptly, with attention to seals and fasteners, while any signs of condensation, mold, or reduced airflow warrant immediate remediation.
Maintaining a routine of checks and timely fixes preserves insulation performance and prevents energy loss and indoor air quality issues.
How often to inspect insulated ducts and what to look for
How often should insulated ducts be inspected to maintain performance and prevent problems?
Inspections are recommended biannually, ideally before heating and cooling seasons.
Check for moisture, mold, loose or torn insulation, compressed areas, gaps at seams, taped joints failing, and rodent or insect damage.
Verify duct supports and insulation continuity around fittings.
Document condition and note areas needing future repair or monitoring.
Repairing damaged insulation and replacing degraded materials
Following the inspection guidelines and documentation, attention turns to repairing damaged insulation and replacing materials that no longer perform.
Damaged sections are removed, surfaces cleaned and dried, and equivalent R‑value insulation installed with proper vapor barrier overlaps and sealed seams.
Tape, mastic, and mechanical fasteners secure joints.
Compromised insulation from pests, water, or compression is replaced promptly to restore thermal continuity and durability.
Monitoring for condensation, mold, and reduced airflow
Inspect for condensation, mold, and reduced airflow at scheduled intervals to guarantee duct insulation continues to perform as planned.
Technicians should check seams, joints, and insulation surface for dampness or discoloration; probe for musty odors.
Measure airflow and static pressure to detect restrictions from collapsed or saturated insulation.
Remediate mold with proper cleaning and replace compromised insulation promptly to restore thermal and air-handling efficiency.
Cost, Energy Savings Estimates, and When to Hire a Pro
Typical DIY materials for basement duct insulation often cost under $100, while professional installation can range from a few hundred to over a thousand dollars depending on scope.
Reasonable energy savings examples show reduced heat loss and cooling load with payback periods commonly between 1–5 years depending on climate, system efficiency, and duct condition.
If ducts are damaged, poorly accessible, or the system shows persistent performance issues, a licensed HVAC professional should be contacted.
Typical DIY costs vs. professional installation costs
Costs for insulating basement ductwork vary widely depending on materials, labor, and project complexity; a homeowner can expect to spend roughly $0.50–$3 per linear foot for DIY supplies versus $3–$12 per linear foot for professional installation. Decision factors include time, access, skill, and warranty needs. Table summarizes typical choices and pros.
| Option | Typical Cost/ft | Notes |
|---|---|---|
| DIY batt/foil | $0.50–$2 | Economical, requires skill |
| DIY foam | $1–$3 | Better sealing, moderate effort |
| Pro install | $3–$12 | Includes labor, warranty |
Estimated energy savings and payback period examples
After weighing DIY versus professional pricing and labor, homeowners often want concrete numbers showing how insulation affects bills and how long payback takes.
Typical attic basement duct insulation reduces heating/cooling losses 5–15%, trimming annual energy costs $50–$200 depending on system size and climate.
At $100–$600 installed, payback commonly occurs within 1–6 years.
Consider professional help for complex layouts.
Signs you should call an HVAC professional
When should a homeowner call an HVAC professional about basement duct insulation?
A professional is advised if ducts are severely damaged, inaccessible, leaking, or connected to complex systems.
Call also when insulation choices affect moisture control, local code compliance, or safety (combustion appliances nearby).
Expect costs for inspection and labor; professionals can provide precise energy-savings estimates and guarantee long-term performance and warranty compliance.
Quick Checklist for a Successful Duct Insulation Project
A concise checklist helps guarantee each step of a basement duct insulation project is completed efficiently and correctly.
- Inspect ducts for leaks, damage, and moisture; measure lengths and required materials.
- Select appropriate insulation (R-value, vapor barrier) and gather tools: tape, fasteners, sealant.
- Clean, seal joints, apply insulation tightly, secure edges, and verify coverage and condensation prevention.
Conclusion
The homeowner thought freezing utility bills and sweaty carpets were destiny, until a roll of insulation and a sensible plan intervened. Insulating basement ducts proves that small, deliberate changes can outwit leaks, condensation, and wasted comfort. With basic tools and modest effort, sensible people rescue energy and sanity from drafts and drips. It’s almost comedic that such quiet, inexpensive work can so thoroughly undo months of invisible, expensive neglect.