How to Drain a Water Heater With No Floor Drain: Step-by-Step Guide for Safe, Mess-Free Draining
To drain a water heater without a floor drain, first turn off the power or gas and the cold-water supply. Then, relieve tank pressure by running a hot faucet. Attach a garden hose to the tank drain and direct it outside, or use a submersible pump or buckets for quicker, mess-free removal. Protect your floors, wear personal protective equipment (PPE), and keep an eye on the flow and temperature to avoid scalding. Follow the step-by-step guide below for setup, troubleshooting, and disposal tips.
What You Need to Know Before Draining a Water Heater Without a Floor Drain
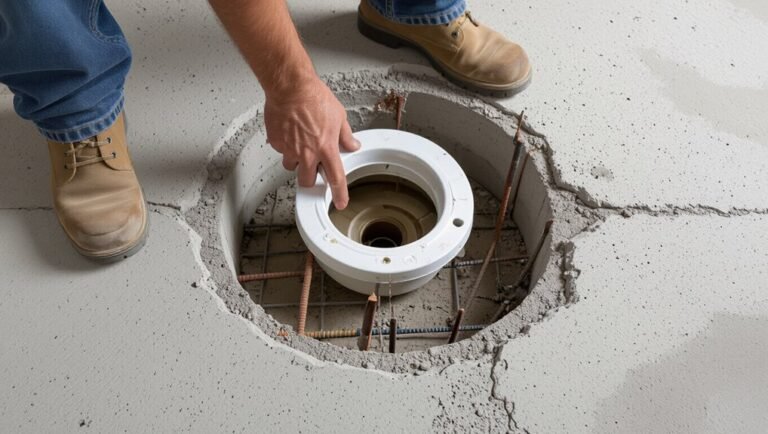
Many older homes and retrofit installations lack a floor drain, which creates challenges for directing discharge, preventing water damage, and managing sediment removal.
Readers should review basic safety precautions and PPE, confirm whether the unit is gas or electric to follow proper shutdown procedures, and plan for potential hazards like scalding and electrical exposure.
A clear checklist of tools and materials—hoses, fittings, a pump or bucket, wrenches, and towels—helps guarantee the job proceeds without unexpected delays.
Why you might not have a floor drain and common challenges
Why might a home lack a floor drain, and what practical problems does that absence create when draining a water heater?
Older construction, basement layouts, or local codes often omit drains.
Without one, draining risks water damage, limited routing options, and mess management challenges.
Planning how to drain a water heater with no floor drain requires containment, hoses, pumps, and clear discharge paths to protect finishes and utilities.
Safety precautions and personal protective equipment
Before any work begins, establish clear safety measures: shut off power or gas to the heater, allow the tank to cool, and wear appropriate personal protective equipment—gloves, eye protection, and waterproof boots—to prevent burns, chemical exposure, and slip hazards when draining without a floor drain.
Confirm ventilation, keep a fire extinguisher nearby, use a thermostat lockout if present, and have absorbent materials and a buddy for safety.
How to determine if your heater is gas or electric
How can one quickly tell whether a water heater is gas or electric: by inspecting the power source, venting, and access panels.
Gas heaters have a flue or vent pipe and a gas supply line with a shutoff valve; they also feature a pilot light access or burner compartment.
Electric units lack vents and have one or more electrical conduits or a junction box on the tank.
Tools and materials checklist
A concise inventory of tools and materials guarantees the draining process goes smoothly when a floor drain is not available.
Gather essential safety gear, hose and valves, and waste containment before starting. Verify compatibility with the heater type and local disposal rules.
- Garden hose, bucket, and submersible pump
- Adjustable wrench, hose bib adapter, and pliers
- Gloves, eye protection, and absorbent pads
Quick Overview: Safe, Mess-Free Method Summary
An experienced DIYer can follow a concise sequence: shut off power and water, attach a garden hose to the drain valve, route the hose to a safe discharge location, open a hot-water tap, then open the drain valve and monitor sediment flushing.
The whole procedure typically takes 30–60 minutes depending on tank size and sediment level.
Skill level is moderate—basic plumbing comfort and standard tools are required.
One-paragraph step summary for experienced DIYers
Before starting, shut off the water supply and power (electric: turn off the breaker; gas: set pilot/thermostat to vacation or off).
Attach a garden hose to the drain valve, run it to a safe discharge point or pump to a sink, open a hot faucet to vent, open the drain valve and anode/pressure relief if needed, flush until clear.
Close valves, refill and restore power.
Estimated time and difficulty
Most homeowners can complete a standard water-heater drain and flush in about 30–60 minutes, with experienced DIYers often finishing nearer the half-hour mark.
Expect an hour or more if the tank is large, heavily scaled, or fittings are corroded.
Difficulty rates as moderate: basic plumbing skills, common tools, and cautious handling of hot water suffice.
Call a pro for leaks, heavy corrosion, or unclear connections.
Preparing the Area and Unit
Before any draining begins, power and fuel to the heater are shut off—switching off the breaker for electric units or closing the gas valve and pilot for gas models—and the cold-water supply to the tank is located and turned off.
The pressure is then relieved and the water temperature checked to prevent scalding, and nearby flooring and belongings are protected with towels or a drip pan.
These steps guarantee a safe, controlled start to the draining process.
Turning off power and fuel supply (electric and gas procedures)
One clear step remains before any draining work begins: disconnect power and fuel to the water heater to eliminate electrocution, fire, and gas-leak risks.
For electric units, switch off the dedicated breaker and verify de-energized with a voltage tester.
For gas models, set the gas valve to OFF and extinguish pilot flames per manufacturer instructions.
Confirm isolation before proceeding.
Locating and turning off the cold-water supply
With power and fuel confirmed off, attention shifts to the cold-water supply valve that feeds the heater.
Locate the incoming pipe at tank top; the shutoff is typically a gate or ball valve. Turn it clockwise firmly to close.
Confirm flow stops by opening a nearby cold tap.
If valve is stuck, use pliers or shut the main house supply.
Relieving pressure and checking temperature
Begin by relieving pressure in the tank to prevent scalding and reduce the risk of a sudden spray when draining.
Open a hot-water faucet nearby until flow slows, then carefully lift the T&P valve lever to release trapped pressure.
Check water temperature at the faucet; if hotter than 120°F (49°C), allow cooling before proceeding.
Confirm pressure is minimized before attaching hoses.
Protecting flooring and nearby belongings
After pressure has been relieved and water temperature confirmed safe, attention should turn to protecting floors and nearby belongings before any draining begins.
Clear the area, move valuables away, and create a waterproof barrier. Use absorbent pads and towels to catch splashes. Secure cords and electronics at a distance.
- Lay heavy-duty plastic sheeting
- Place towels or absorbent mats
- Elevate or remove nearby items
Primary Drain Options When There Is No Floor Drain
When a water heater must be drained without a floor drain, several practical options exist to move the discharge safely.
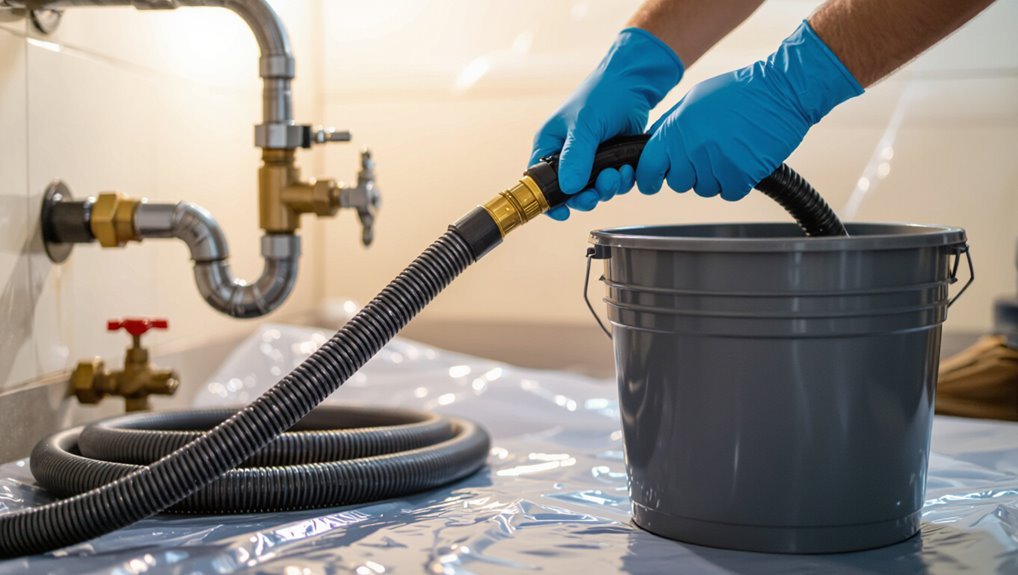
Common approaches include attaching a garden hose to route water outdoors, using a utility or submersible pump (some with auto-shutoff), or relying on gravity to fill buckets or containers.
For tight indoor spaces, a temporary condensate pump can provide an effective short-term solution.
Using a garden hose to direct water outdoors
Attach a standard garden hose to the water heater’s drain valve and route the other end to a suitable outdoor discharge point, ensuring the path avoids foundations, landscaping, and public walkways.
Open the valve slowly to control flow, monitor for leaks at the connection, and keep the hose secured and downhill.
Observe local regulations about hot water discharge and stop when sediment appears to prevent clogging.
Pumping water with a utility/trash pump
Use a submersible utility or trash pump to move water from the heater to an appropriate discharge point when no floor drain is available.
A pump speeds emptying, especially for basements. Connect a reinforced hose to the pump, insert suction into the tank or attach to the drain valve, power the unit, and monitor flow.
Observe local discharge rules and prevent backflow or overflow during operation.
Gravity draining into buckets or containers
If a pump is unavailable or impractical, gravity draining into buckets or other containers offers a simple, low-cost alternative for emptying a water heater where no floor drain exists.
Position a hose from the drain valve to a stable container placed below the tank outlet. Open the valve slowly, monitor fill levels, and transfer or dispose of collected water regularly to prevent overflow and spills.
Using a submersible pump with auto-shutoff
A submersible pump with an automatic shutoff offers a fast, hands-off method for evacuating a water heater when no floor drain is available.
The pump is placed in a bucket or tray collecting hot water; a garden hose directs discharge to a safe location.
Automatic shutoff prevents dry running once the tank empties.
Guarantee electrical safety and use a GFCI-protected outlet.
Temporary indoor drainage with a condensate pump
When a submersible pump is impractical or unavailable, a condensate pump offers an indoors-only solution for channeling hot water into existing plumbing or a utility sink.
It requires a secure hose connection, a suitable receiving drain above floor level, and adherence to pump temperature limits. Users should install a thermal protection device, monitor for leaks, and empty or disable the pump once draining completes.
Step-by-Step: Draining a Water Heater Using a Garden Hose
To drain a water heater with a garden hose, the operator first secures the hose to the drain valve and routes the other end to a safe outdoor discharge point.
Once positioned, the drain valve is opened and the flow is regulated while sediment is flushed—using the cold-water feed briefly if flow slows or flushing is required.
After draining and flushing, the valve is closed, the hose removed, and the tank is refilled following proper venting procedures.
Attaching the hose to the drain valve securely
Secure the garden hose to the water heater’s drain valve by slipping the hose’s female coupling over the valve nipple and tightening the coupling firmly by hand.
Then, give it an extra quarter-turn with pliers if needed to prevent leaks.
Verify a snug fit, inspect the valve and hose for cracks, engage any built-in hose clamp or add one, and hand-check for wobble before opening the valve.
Routing the hose safely to an outdoor discharge point
Several simple precautions guarantee the hose runs safely from the heater to an outdoor discharge:
choose a clear, downhill path that avoids steps, walkways, and electrical equipment; uncoil the hose fully to prevent kinks; and position the outlet away from foundations, landscaping, and adjacent properties to prevent water damage.
Secure the hose along its route with temporary stakes or clips, keep it visible to prevent tripping, and slope the end to avoid backflow.
Opening the drain valve and controlling flow
Open the drain valve slowly and observe the initial flow to guarantee the hose connection holds and water clears the line.
The operator then adjusts the valve to achieve a steady, controllable stream, avoiding bursts that dislodge debris or stress fittings.
Monitor pressure and hose for leaks; partially close the valve if flow is too fast.
Maintain safe distance and wear protection.
Flushing sediment and when to use the cold-water feed
Begin by running the drain until water flows clear to remove loose sediment from the tank; this may take several minutes and should be done with the hose outlet directed to a safe drain area.
If heavy buildup persists, briefly open the cold-water feed to stir and flush remaining sediment, then close it and continue draining.
Repeat until discharge is visibly clean.
Closing procedures and refilling the tank
After the discharge runs clear and any remaining sediment has been flushed, attention shifts to closing the drain and refilling the tank.
The drain valve is closed, the garden hose is removed and capped, and the cold-water supply is slowly reopened.
Air vents or a hot faucet are left open until steady water flow indicates the tank is full.
Finally, restore power or gas per safety protocol.
Step-by-Step: Draining a Water Heater Using a Pump
For draining a water heater with a pump, the technician first chooses a pump and hose fittings rated for the tank’s volume and discharge distance.
The setup includes arranging an indoor-to-outdoor transfer, priming the pump, and operating it while watching for leaks and backflow.
After the tank is empty, the operator shuts down the pump, flushes and cleans fittings, and stores equipment properly.
Selecting the right pump and hose fittings
Choosing the correct pump and hose fittings guarantees efficient, mess-free removal of sediment and water from the tank. The decision hinges on tank size, drain valve type, distance to a suitable discharge point, and whether the pump must overcome head pressure.
Select a submersible or utility pump with sufficient flow and head rating. Match hose diameter to the drain valve, and use threaded/adaptor fittings and clamps rated for hot water.
Setting up a pump for indoor-to-outdoor transfer
With the pump and hose fittings selected to match the tank size and discharge needs, the next task is arranging the equipment for an indoor-to-outdoor transfer so wastewater is routed safely and efficiently away from the building.
Position the pump on a stable, level surface near the heater, run discharge hose through a window or door with a weatherproof seal, and secure all connections and strainers.
Priming and operating the pump safely
Begin by verifying the pump is properly primed to prevent airlocks and assure immediate, steady flow; this typically means filling the pump casing and suction hose with water and confirming all inlet valves are open.
Then, start the pump at low speed, observe suction, gradually increase to recommended rate, confirm electrical connections are dry and grounded, and stop immediately if unusual noise or vibration occurs.
Monitoring for leaks and preventing backflow
After the pump is running reliably, attention turns to detecting any leaks and ensuring water does not flow back into the heater or supply lines.
Inspect fittings, hoses, and valves for drips; tighten or replace faulty connectors.
Install or verify a functioning check valve on the discharge line.
Monitor the pump pressure and surrounding area continuously, pausing work immediately if seepage or reverse flow appears.
Shutting down, cleaning, and storing equipment
Power down the pump and close all supply and discharge valves to isolate the system before disconnecting any hoses or fittings.
Flush residual water into a bucket, drain hoses fully, and wipe connections dry.
Inspect for damage, remove sediment, and lubricate seals if applicable.
Coil hoses neatly, store pump and accessories in a dry, ventilated area, and document maintenance performed.
Draining into Buckets: When and How to Use Containers
When a pump is unavailable, draining into containers requires planning: estimate the tank volume to determine bucket count and capacity.
The technician should use secure connections and proper lifting posture or a siphon to transfer hot water without spills.
A rotating system of filling, cooling, and disposing batches into an appropriate drain or outdoor area keeps the process efficient and safe.
Calculating number and size of buckets needed
Draining a water heater into buckets requires calculating both the total volume to be removed and the practical size and number of containers to handle it safely and efficiently.
Determine the tank capacity (gallons), decide how much will be emptied, then divide by chosen bucket capacity (e.g., 5‑gal).
Allow spare capacity for sloshing and safe lifting; round up to whole buckets and label for reuse.
Safe manual transfer techniques to avoid spills
After determining bucket count and size, attention shifts to techniques that minimize splashes and mishandling during manual transfer.
Use a sturdy funnel and closed-top buckets where possible, tilt slowly to control flow, and keep a steady hand near the spigot.
Wear heat-resistant gloves and eye protection.
Position absorbent pads under drip points and maintain clear pathways to prevent trips and sudden jolts.
Efficient bucket rotation and disposal of hot water
Begin by organizing a rotation system so buckets are filled, transported, and replaced in a steady loop to keep hot-water removal continuous and safe.
Assign one person to fill and cap, another to carry to an approved disposal point, and a third to rinse and return empties.
Use heat-resistant gloves, sturdy lids, and clearly labeled containers.
Dispose water per local regulations, avoiding drains that could be damaged.
Dealing with Sediment, Rust, and Clogs
Heavy sediment and rust can slow or block drainage, often indicated by discolored water, gurgling, or very slow flow.
The text will outline methods to loosen and flush deposits, safely clear a clogged drain valve, and assess when a damaged valve requires replacement.
Practical tips focus on simple tools and safety steps to restore proper draining without causing damage.
Signs of heavy sediment and how it affects draining
Sediment accumulation in a water heater often announces itself through distinct signs—gurgling or rumbling noises during heating, reduced hot water flow, and cloudy or discolored water at the tap—each indicating that mineral deposits, rust, or debris are interfering with normal operation and complicating draining.
Heavy buildup shortens recovery time, clogs the drain valve, causes uneven heating and scalding risk, and increases corrosion and leakage potential.
Techniques for loosening and flushing sediment
Given the signs of buildup—noise, poor flow, discoloration—addressing compacted deposits requires targeted methods to break up and evacuate material without damaging the tank.
Recommended techniques include gentle agitation via cold-water inlet pulses, short bursts of compressed air into the drain hose (with caution), and repeated flush-and-fill cycles to suspend and carry sediment out.
Use magnetized filters if available.
How to clear a clogged drain valve safely
Begin by turning off power and closing the cold-water supply.
Then attach a hose and open the drain valve to assess flow and debris. If the valve is sluggish, techniques like gentle backflushing, short compressed-air bursts into the hose, or using a long, flexible plumbing snake can dislodge clogs while minimizing risk to the valve and tank.
Flush until clear, monitoring for leaks and sediment.
When to replace a damaged drain valve
Inspect the drain valve closely for persistent leaks, visible corrosion, cracked plastic, or recurring clogs that resist safe clearing methods; these signs indicate the valve no longer provides a reliable seal or flow path and should be replaced to prevent water damage and continued maintenance issues.
Replacement is warranted when cleaning fails, flow remains restricted, or the valve leaks under minimal pressure; use appropriate materials and shut off water first.
Restarting and Testing the Water Heater After Draining
After draining, the water heater must be refilled slowly with the cold-water supply until all air is expelled to prevent dry-firing and element damage.
Once the tank is full and faucets show steady water flow, power or gas can be restored and the pilot light relit according to the manufacturer’s instructions.
Finally, the unit should be inspected for leaks, monitored for normal heating, and documented with any follow-up maintenance tasks and scheduling.
Proper refilling steps to avoid dry-fire
Several concise steps guarantee the tank is refilled safely and the burner or element does not fire dry.
Close drain, open cold-water supply slowly, and allow air to escape via an open hot faucet.
Watch for steady water flow without sputtering; when full, close the faucet.
Verify tank inlet pressure normal and check for leaks.
Confirm no unusual noises before restoring power or gas.
Restoring power or gas and pilot light relighting
Restore power or gas only after confirming the tank is full, all valves are properly seated, and there are no leaks; this prevents dry-firing and reduces the risk of damage.
For electric units, switch the breaker on.
For gas units, follow manufacturer pilot relight instructions: set control to pilot, depress and ignite, hold until thermocouple senses flame, then return to normal setting.
Observe ignition behavior briefly.
Checking for leaks and confirming correct operation
Inspect the tank and connections visually and by feel to verify there are no drips, loose fittings, or wet insulation before declaring the system operational.
Open a nearby hot faucet to purge air, watch for steady flow and consistent temperature.
Recheck pressure relief valve, drain valve, supply lines and fittings for seepage.
Confirm pilot or power restores normal heating without unusual noises or odors.
Post-drain maintenance tasks and schedule
Having confirmed there are no leaks and that heating functions returned to normal, proceed with restarting and testing procedures to verify long-term reliability.
Restore power or gas per manufacturer instructions, refill tank to safe level, and purge air at a hot faucet.
Monitor pressure, temperature, and T&P valve function.
Schedule sediment checks every 6–12 months, inspect anode annually, and document maintenance dates.
Common Mistakes and How to Avoid Them
Common mistakes during water heater draining include actions that can cause flooding or water damage, such as failing to shut off supply lines or not ensuring a clear drainage path.
Safety lapses that risk scalding or fire—like not cooling the tank first or mishandling electrical/gas connections—are common and preventable.
Tasks that exceed basic skill or involve corrosion, leaks, or complex gas connections should prompt hiring a qualified professional.
Errors that cause flooding or water damage
Mistakes during water heater draining—such as failing to shut off the supply valve, not relieving tank pressure, or disconnecting hoses improperly—are frequent causes of flooding and water damage.
Additional errors include using undersized hoses, ignoring loose fittings, overfilling buckets, and leaving valves open.
Inspect connections, secure hose routing to a safe drain point, and test a brief flow before full drainage to prevent leaks.
Safety mistakes that risk scalding or fire
Several routine missteps during water heater draining can expose people to scalding or create fire hazards if ignored.
Common errors include failing to turn off the power or gas, opening hot water taps without caution, and draining near flammable materials.
Always shut off electricity/gas, let water cool, use insulated gloves, route hot discharge safely, and keep combustibles distant to prevent burns or ignition.
When DIY is not appropriate and professional help is needed
When should a homeowner call a professional instead of attempting to drain a water heater themselves?
If leaks, corroded tanks, gas-line issues, electrical faults, unclear piping, or lack of shutoff control are present, a licensed plumber or HVAC technician is required.
Professionals prevent structural damage, carbon monoxide risk, improper reconnection, and voided warranties.
Err on the side of expert assessment for uncertain situations.
Comparing Drain Methods: Speed, Cost, and Mess
Although each draining technique removes water from a heater, they differ markedly in speed, cost, and how much cleanup they require; gravity draining is slow but cheap and low-mess, using a hose to a drain, while pump-assisted and wet-vacuum methods are faster at higher expense and with greater potential for splashes and sediment spread.
| Method | Speed | Mess |
|---|---|---|
| Gravity hose | Slow | Low |
| Pump-assisted | Fast | Moderate |
| Wet-vacuum | Fastest | High |
Troubleshooting Guide for Problems During Draining
When draining a water heater, common issues include no flow when the valve is opened, slow or intermittent draining, leaks at the drain valve or fittings, and pump failure or hose kinks.
The guide identifies likely causes—blocked valves, closed or insufficiently open hot water supply/air inlet, sediment buildup, loose connections, and damaged or pinched hoses—and outlines checks to isolate each problem.
It also recommends simple corrective actions and when to stop and call a professional.
No water flows when valve is opened
Inspecting a dry drain valve is the first step when no water flows after opening it.
Confirm the cold-water supply is on and the water heater shutoff is open.
Check for trapped air by opening a hot faucet.
If still dry, the valve may be clogged, corroded, or closed internally; replace the valve or attach a hose to the T&P outlet and consult a plumber if unsure.
Slow draining or intermittent flow
If the drain produces only a slow trickle or stalls intermittently after confirming the valve and supply status, the issue usually lies with partial blockages, airlocks, or buildup inside the tank or plumbing.
Recommend attaching a hose, flushing briefly with tank water turned off to loosen sediment, using a longer hose or siphon to relieve airlocks, and gently agitating the tank inlet with a plumber’s snake.
Leaks at the drain valve or fittings
Address leaks at the drain valve or its fittings promptly, as even small drips can escalate into significant water loss or damage during a drain procedure.
Inspect connections, tighten compression nuts or replace worn washers. If the valve body is corroded or cracked, shut off water and install a new valve.
Use thread sealant or plumber’s tape on fittings and retest for leaks before continuing.
Pump failure or hose kinks
Following resolution of valve or fitting leaks, attention should turn to the equipment that moves the water: pump malfunction and hose kinks are common causes of slow or halted drainage.
Inspect the pump for power, priming, and impeller blockage; listen for unusual noise.
Straighten or replace crushed hoses, clear sediment clogs, and test flow incrementally.
Replace faulty pumps promptly to prevent overflow or prolonged downtime.
Environmental and Local Disposal Considerations
The author notes that drained hot water and sediment must be discharged only to approved locations, such as sanitary sewers or designated outdoor drainage areas, in accordance with local ordinances.
They emphasize that water contaminated with chemicals, heavy metals, or biological waste requires special handling and may need containment, testing, or disposal through licensed services.
Guidance also covers eco-friendly options for disposing or recycling replaced components and collected sediments to minimize environmental impact.
Where to legally discharge hot water and sediment
Many municipalities regulate where hot water and sediment from a drained water heater may be discharged to protect waterways, prevent plumbing damage, and comply with wastewater treatment rules.
Homeowners should direct cooled, clean water to sanitary drains or septic-safe areas and collect sediment for solid-waste disposal per local rules.
Storm drains, streets, and natural waterways are typically prohibited; verify municipal codes before draining.
Handling contaminated water and local regulations
Address potential contamination before draining by identifying sources such as rust, heavy metals, biocides, or chemical residues that can render heater discharge hazardous.
Once contaminants are suspected, the water and sediment should be treated, contained, or disposed of according to local hazardous-waste and wastewater regulations rather than sent to storm sewers or septic fields.
Verify municipal guidance, contact waste authorities for approved disposal, and document compliance.
Eco-friendly disposal of replaced parts and sediments
Proper disposal of replaced components and sediment minimizes environmental harm and often falls under specific municipal or hazardous-waste rules; consequently, homeowners should segregate metal parts, plastic fittings, and potentially contaminated sludge for appropriate recycling, hazardous-waste collection, or licensed disposal.
Verify local guidelines, label containers, and avoid sewer or yard disposal. Use certified recyclers or hazardous-waste events to prevent contamination and legal violations.
Recommended Products and Accessories
A concise selection of tools and accessories can simplify draining and maintaining a water heater while reducing mess and wear. The following items address common needs: reliable drain valves, portable pumps and hoses, and protective mats with funnels and fittings.
Recommendations prioritize durability, compatibility, and ease of installation.
- High-quality drain valves and compatible replacement options
- Recommended pumps and flexible hoses suitable for home use
- Protective spill mats, funnels, and durable fittings
Best drain valves and replacement options
Choosing the right drain valve and knowing suitable replacement options can prevent leaks, speed maintenance, and extend a water heater’s service life.
Brass ball valves offer durability and full flow; plastic petcock valves are affordable but less robust.
Look for 3/4″ NPT compatibility, stainless fittings, and freeze-resistant designs.
Quick-connect adapters and replacement kits simplify swaps without tank removal.
Recommended pumps and hoses for home use
After selecting a reliable drain valve, attention turns to pumps and hoses that make draining faster, cleaner, and safer.
Suitable options include a submersible utility pump (1/4–1/3 HP) for rapid flow, a compact transfer pump for tight access, and reinforced, heat-resistant garden hoses or braided discharge hoses with appropriate fittings.
Choose durable, rated equipment and a GFCI-protected extension cord.
Protective mats, funnels, and fittings
Lay down a durable, absorbent mat beneath the water heater to protect floors from drips and accidental spills while funnels and fittings channel flow into drains or containers.
Use heat-resistant, non-slip mats, wide-mouth funnels for faster transfer, and tapered rubber fittings to adapt hose sizes.
Quick-connect clamps and hose adapters prevent leaks; keep a spare gasket and a compact wet-vac for final cleanup.
When to Call a Professional Plumber
If visible rust, continuous dripping, or pooling indicates a major tank failure or leak, a professional plumber should be contacted.
Units with complex installations or those located in tight, inaccessible spaces also warrant professional service to avoid damage.
Homeowners should expect estimates for labor and parts and ask about diagnosis fees, warranty coverage, and projected repair versus replacement costs.
Signs of major tank failure or leak
When visible signs such as large puddles beneath the unit, rusty water coming from taps, a bulging or severely corroded tank, or persistent, loud rumbling noises occur, they indicate a likely major tank failure or active leak that requires immediate professional attention.
These problems often mean the tank’s structural integrity or internal components have failed and are not safely or effectively repaired with DIY methods.
A plumber should inspect promptly to prevent flooding, contamination, or catastrophic rupture.
Complex installations or inaccessible units
After signs of major tank failure or an active leak are identified, attention should turn to situations where the heater itself is difficult or hazardous to access or has nonstandard components that exceed typical DIY scope.
A professional plumber is advised for cramped basements, attic or roof installations, gas appliance complexities, corrosion-obscured fittings, inaccessible shutoffs, or integrated systems (boiler combos, recirculation loops) requiring specialized tools and permits.
Expected costs and what to ask a plumber
How much will a professional plumber charge to drain, repair, or replace a water heater depends on the job’s complexity, location, and whether parts or permits are required.
Typical service calls range from modest flat fees for simple draining to several hundred dollars for repairs and $800–$3,000+ for replacement.
Ask for written estimates, itemized parts and labor, warranty details, permit handling, and cleanup responsibility.
Conclusion
Like a river redirected around a stone, draining a water heater without a floor drain becomes a small, controlled reroute of household flow. The careful placement of hoses, catch basins, and patience stand in for permanent channels, turning potential chaos into order. With good preparation and respect for local disposal rules, the task becomes less a battle and more a practiced choreography—one that signals readiness to maintain the home’s quiet, reliable heartbeat.