How to Clean Sediment Out of a Well: Step-by-Step Guide to Clear Water Safely
To effectively clean sediment out of a well, start by shutting off the power and wearing appropriate personal protective equipment (PPE). Test the water for quality, then proceed to flush the well by pumping and cycling. Use methods like surging or backwashing to dislodge the sediment and pump out the turbid water to settling tanks or filters. Regularly monitor the turbidity levels and safeguard your equipment with sediment traps. If issues persist or there are structural concerns, consult a licensed professional for assistance. This guide provides detailed steps and essential precautions for a successful cleanup.
Why Well Water Gets Sediment and When to Act

Sediment in wells commonly originates from sand, silt, rust from corroded casing or pipes, and loose gravel entering the intake.
Observable signs include cloudy or discolored water, a gritty texture, reduced flow or pressure, and accelerated pump wear.
If left untreated, sediment can damage equipment and pose indirect health risks by harboring bacteria or reducing the effectiveness of disinfection.
Common sources of sediment in wells (sand, silt, rust, gravel)
Because groundwater moves through varied subsurface materials, particles such as sand, silt, rust, and small gravel commonly enter a well when those materials are disturbed or when protective components degrade.
Common sources include naturally eroding aquifer sands, fine silt from surface infiltration, corroded casing or pump parts producing rust flakes, and loose gravel from poorly sealed boreholes.
Learn how to clean sediment out of a well.
Signs your well has a sediment problem (cloudy water, gritty feel, reduced flow, pump wear)
When should a homeowner suspect a sediment issue in their well?
Visible cloudiness, particles that settle in a glass, or a sandy, gritty sensation when running water indicate sediment.
Other signs include sudden drops in flow, frequent pump cycling, unusual noises from the pump, and accelerated wear on fixtures.
Note patterns after heavy rains or maintenance.
Prompt inspection and filtration assessment are advised.
Health and equipment risks from untreated sediment
Noticing cloudy water or a sandy feel should prompt consideration of more than just aesthetics; untreated particles in a well can pose both health risks and mechanical harm.
Contaminants and biofilms adhere to sediments, increasing gastrointestinal and opportunistic infection risk. Abrasive particles accelerate pump, pipe, and appliance wear, clog filters, and reduce efficiency.
Prompt assessment and sediment control protect health, extend equipment life, and lower repair costs.
Immediate Safety Precautions Before Cleaning
Before any sediment removal begins, workers should don appropriate personal protective equipment and handle tools and chemicals with care.
Electrical power to pumps and related equipment must be shut off and the well system isolated to prevent accidental energization or cross-connections.
Prior to disturbing the well, water should be tested for contamination to determine hazard controls and whether professional remediation is required.
Personal protective equipment and safe handling
Any person preparing to clean sediment from a well should don appropriate personal protective equipment and follow strict handling procedures to prevent injury and contamination.
Recommended gear includes chemical-resistant gloves, eye protection, a face mask or respirator rated for dust and fumes, steel-toe boots, and protective clothing.
Tools and containers must be handled securely, contaminated PPE disposed of safely, and handwashing performed after removal.
Shutting off power and isolating the well system
Shut off all electrical power to the well system and isolate its components to eliminate shock and mechanical hazards before beginning sediment removal.
Lock out and tag breakers, disconnect the pump control, and close valves to prevent unintended flow.
Verify power absence with a tester.
Confirm the pressure tank and any automated controls are secured or bypassed so equipment cannot start during cleaning.
Water testing for contamination before disturbance
Because disturbing sediment can release bacteria, chemicals, and particulates into the water, testing for contamination is essential before any cleaning begins.
A certified lab should analyze turbidity, coliforms, nitrates, heavy metals, and volatile organics.
Collect samples following protocol, document results, and wait for clearance or remediation guidance.
If contaminants exceed limits, postpone cleaning and consult a licensed water specialist.
Tools and Materials You’ll Need
A clear list of tools and materials helps determine what a homeowner can tackle and what requires professional help.
Basic items like wrenches, buckets and hoses are often sufficient for simple flushing, while well-specific equipment — submersible pumps, drop pipes, sediment filters and surge blocks — is needed for more thorough cleaning.
The section will also note optional professional tools (air compressors, well development pumps, chlorination supplies) and weigh cost and rental versus purchase decisions.
Basic homeowner toolkit (wrenches, buckets, hoses)
Several basic tools make routine sediment removal feasible for most homeowners: adjustable wrenches, durable buckets, and flexible hoses for flushing and draining.
Also useful are slip-joint pliers, screwdrivers, and utility gloves for grip and protection. A torque-limited wrench avoids overtightening fittings.
Clear, labeled containers collect sampled water. A flashlight and spare fittings complete a minimal, practical kit for basic well maintenance tasks.
Well-specific equipment (submersible pump, drop pipe, sediment filter, surge block)
Moving beyond common hand tools, the next set of supplies targets the well itself: a submersible pump to lift water, a correctly sized drop pipe to connect pump to surface plumbing, a sediment filter to trap particulates, and a surge block to reduce sudden pressure changes.
Select corrosion-resistant materials sized to well diameter and flow rate, guarantee secure fittings, and carry spare seals and clamps for quick replacements.
Optional professional tools (air compressor, well development pump, chlorination supplies)
For deeper or persistent sediment problems, professional-grade tools can speed flushing, dislodge compacted fines, and sanitize the well more effectively than basic hand equipment.
An air compressor with diffuser fittings agitates packed gravel; a well development pump provides high-flow surging to remove fines; and chlorination supplies (bleach, feed hose, test kit) permit controlled disinfection and verification of residual chlorine levels before restoring service.
Cost and rental vs. purchase considerations
Budget considerations play a central role when deciding whether to rent or buy well maintenance tools. Occasional users often save money by renting specialty equipment like air compressors, development pumps, or chlorination rigs.
On the other hand, homeowners facing recurring sediment issues may justify the upfront cost of purchasing durable items such as submersible pumps, hoses, and test kits.
- Calculate frequency of use and break-even.
- Compare rental rates, deposits, and transport.
- Factor maintenance, warranty, and resale value.
Step-by-Step Guide to Removing Sediment from a Well
The procedure begins with a visual and functional inspection of the wellhead and pressure tank to identify issues before work starts.
Next, the well is drawn down and flushed—using surface pump methods for shallow wells and alternating pump-and-gravity techniques for deep wells—followed by backwashing and surge-block maneuvers to free fine particles.
Sediment-laden water is then pumped out and disposed of appropriately while intermittent testing of water clarity and turbidity confirms progress.
Step 1 Inspect the wellhead and pressure tank
Begin by visually and physically evaluating the wellhead and pressure tank to identify obvious damage, leaks, or loose fittings that could introduce sediment or affect system pressure.
Check seals, vent screens, pipe joints, and electrical conduit for corrosion or gaps.
Note pressure gauge readings and listen for abnormal noises.
Record findings and secure any minor fittings; schedule professional repair for substantive damage.
Step 2 Draw down and flush the well using the pump (method for shallow vs deep wells)
Lowering and cycling the pump to draw down and flush the well clears suspended sediment by forcing water and particulates upward through the casing and outflow lines.
For shallow wells, run the pump until turbidity drops; for deep wells, cycle pump and allow recovery between runs to mobilize deeper sediment.
Monitor discharge clarity and protect downstream fixtures.
Stop when water runs clear and levels stabilize.
Step 3 Backwashing and surge block technique to dislodge fine particles
Execute a targeted backwash and surge-block routine to dislodge fine particles clinging to the well screen and casing walls.
The technician reverses flow briefly, then applies repeated surge-block actions using a clean, noncorrosive tool to create pressure pulses. This mobilizes compacted silt without damaging equipment.
Monitor turbidity and repeat until particle suspension decreases, preparing the well for subsequent removal steps.
Step 4 Pumping out sediment-laden water and proper disposal
After dislodging fine particles, the technician pumps out the sediment-laden water in controlled stages to prevent re-deposition and to limit turbidity spikes. Flow rates and pump placement are adjusted so suspended solids are drawn from the screen and casing and transported to the surface for collection.
Collected water is routed to settling tanks or filtration units. Concentrated sludge is dewatered and disposed per local regulations to avoid contamination.
Step 5 Re-testing water clarity and turbidity during the process
How frequently should clarity and turbidity be measured as flushing and pumping continue?
Measurements should occur at regular intervals—initially every 10–15 minutes during aggressive flushing, then every 30–60 minutes as readings stabilize.
Use a turbidity meter or certified field kit, record values, and note visual clarity.
Stop or adjust pumping when turbidity reaches baseline or acceptable local standards to confirm effective sediment removal.
Step 6 Shock chlorination after cleaning (when and how to disinfect)
Begin shock chlorination once flushing has lowered turbidity to acceptable levels and visible sediment is cleared, ensuring the disinfectant will contact the well casing, pump, and water column.
Calculate required chlorine dose (usually 50–200 ppm), add measured bleach safely, circulate to disinfect all components, let sit the prescribed contact time (typically 12–24 hours), then purge until chlorine is undetectable before retesting.
Step 7 Restoring system and monitoring initial recovery
Reassemble the well components and restore flow while observing key indicators of recovery: reconnect the pump and controls per manufacturer instructions, replace any removed casing caps or filters, and slowly reintroduce normal flow to minimize disturbance.
Monitor turbidity, pressure, and discharge rate for stabilization. Inspect for leaks, unusual noises, or pressure drops.
Log readings over 24–72 hours and resume routine use only after consistent clear water and normal performance.
When to Use Filters, Softeners, and Sediment Traps
Selection of filtration equipment depends on sediment size and system needs, with spin‑down, cartridge, and multimedia filters each offering distinct retention capacities and flow characteristics.
Decisions about pre‑filtration versus point‑of‑use placement affect overall protection and service life of downstream appliances.
Regular maintenance schedules, including cartridge changes and backwashing intervals, are essential to preserve performance and prevent clogging.
Types of sediment filters and how to choose (spin-down, cartridge, multimedia)
Choosing the right sediment filter depends on particle size, flow rate, maintenance willingness, and the specific contaminants present in the well water.
Spin-down filters capture large particles and require periodic flushing; cartridge filters offer finer micron ratings but need regular replacement.
Multimedia filters combine layers for varied particle sizes and longer life.
Select based on measured sediment size, household demand, budget, and maintenance capacity.
Pre-filtration vs point-of-use filtration setup
Deciding whether to place sediment control at the wellhead (pre-filtration) or at individual taps (point-of-use) depends on water quality, household needs, and equipment goals: pre-filtration protects plumbing and softeners; point-of-use targets specific fixtures. Choose based on sediment load, budget, and desired protection.
| Pre-filtration | Point-of-use |
|---|---|
| Whole-system protection | Targeted filtration |
| Higher upfront cost | Lower per-fixture cost |
| Protects appliances | Saves water/feed |
| Coarse sediment removal | Fine polishing |
| Ideal for high load | Ideal for isolated issues |
Maintenance schedule for filters and backwashing systems
After establishing whether sediment control will be installed at the wellhead or at individual taps, attention turns to ongoing maintenance: filters, softeners, and sediment traps require regular checks and service to maintain performance and protect downstream equipment.
Inspect weekly initially, then monthly; replace cartridges per manufacturer or when pressure drops; backwash multi-media filters weekly to monthly; service softeners quarterly and schedule annual professional inspections.
Troubleshooting Persistent Sediment Problems
Persistent sediment after cleaning often points to problems with the well screen, casing, or the surrounding aquifer and warrants focused inspection.
Rapid recurrence of particles can signal formation collapse, fine sand migration, or improper sealing and should prompt specific diagnostic steps.
Visible damage, unusual pump noise, declining yield, or sudden changes in water clarity indicate the pump or casing may require repair or replacement.
Identifying well screen, casing, or aquifer issues
A careful inspection of the well’s screen, casing, and surrounding aquifer is the next step when routine cleaning fails to stop sediment from entering the water supply.
The inspector notes screen perforation damage, corrosion, slot clogging, casing breaches, and signs of surrounding collapse or sand intrusion.
Documented findings guide targeted repairs, screen replacement, gravel packing, or professional hydrofracturing recommendations.
When sediment returns quickly: causes and next steps
If sediment returns soon after cleaning or repairs, the cause is likely ongoing mechanical or hydrogeological activity rather than a one-time blockage.
Possible causes include aquifer disturbance, loose formation material, pump-induced scouring, or failing seals allowing fines ingress.
Recommended next steps: monitor turbidity trends, perform targeted video inspection, adjust pumping rates, add filtration, and consult a hydrogeologist before further invasive work.
Signs that the pump or well casing needs repair or replacement
Several clear indicators can point to a failing pump or compromised well casing when sediment problems continue despite cleaning.
Persistent grinding noises, reduced flow or pressure, and sudden surges of gritty water suggest pump wear or damaged seals.
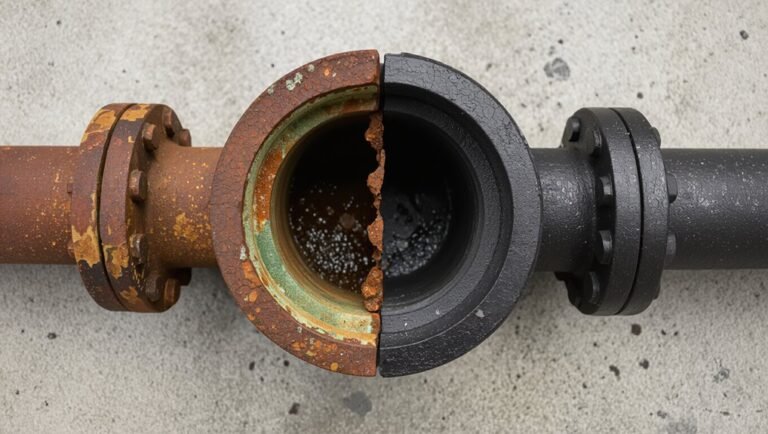
Visible corrosion, cracks near the casing collar, and repeated clogging of filters or screens indicate structural breach.
Professional inspection and timely replacement prevent contamination and system failure.
When to Hire a Professional
When sediment persists despite basic cleaning or when signs point to structural or aquifer issues, a well contractor or hydrogeologist should be consulted.
Professionals typically offer services such as well redevelopment, camera or video inspection, and targeted repairs, and they will provide estimates and written scope of work.
Homeowners should expect to pay variable fees depending on the service and should verify licenses, references, and insurance before hiring.
Complex problems requiring well contractors or hydrogeologists
Recognize that some sediment issues stem from structural or hydrogeologic causes beyond routine homeowner remedies and therefore require a licensed well contractor or hydrogeologist to diagnose and repair.
Complex signs include persistent turbidity after flushing, collapsing casing, unusual sediment composition, declining yield, or contamination risks.
Professionals evaluate aquifer conditions, structural integrity, and provide targeted interventions that guarantee long-term safety and regulatory compliance.
What to expect from a professional service (well redevelopment, camera inspection, video)
If sediment problems persist or appear tied to well structure or aquifer conditions, a professional service typically begins with a diagnostic assessment followed by targeted interventions such as well redevelopment and video inspection.
Technicians may perform pump tests, downhole camera surveys, and disinfection. Redevelopment—airlifting, surging, or jetting—clears fines and restores yield.
A post-service report documents findings, repairs, and recommended monitoring.
Typical costs and how to choose a qualified well service
Three main cost components typically determine a professional well service bill: diagnostics (camera inspection, pump testing), remediation (redevelopment, repairs, disinfection), and labor/equipment mobilization.
Typical totals range from a few hundred for basic flushing to several thousand for pump replacement or deep redevelopment.
Choose licensed, insured contractors with references, local experience, written estimates, clear warranties, and adherence to state well codes and water testing standards.
Preventing Sediment Reoccurrence
Preventing sediment from returning requires a proactive, ongoing approach focused on maintenance, pump operation, and site management.
A routine well checklist — including periodic inspections, sediment checks, and filter changes — helps detect issues early.
Proper pump drawdown settings and landscaping to control surface runoff reduce the chance of new sediment entering the well.
Routine well maintenance checklist
Because regular checks catch small issues before they become sediment problems, a concise routine maintenance checklist helps guarantee well longevity and water clarity.
Inspect seals and caps for damage, check pressure tank condition, and test for turbidity regularly.
Promptly address contamination sources and schedule professional inspections annually.
- Inspect seals and caps
- Check pressure tank and plumbing
- Test turbidity and schedule inspections
Proper pump operation and drawdown management
Maintain steady, appropriate pump cycles and control drawdown to minimize disturbance of settled particles in the well bore.
Operators should adjust run times and recovery intervals to avoid rapid water level drops that resuspend sediment.
Use variable-speed drives or cycle timers where possible, monitor well recovery rates, and document settings.
Consistent, measured pumping preserves clear water and reduces need for frequent sediment removal.
Landscaping and erosion control to reduce surface sediment entry
After stabilizing pump operation and drawdown to limit disturbance of settled particles, attention should shift to the wellhead surroundings to keep surface sediment from entering the system.
Grade surrounding terrain away from the casing, install gravel-filled drainage swales, vegetate with deep-rooted native plants, and add erosion-control matting on exposed slopes.
Regular inspections and maintenance prevent gullies and reduce recontamination risk.
Monitoring and Long-Term Water Quality Management
Routine testing every 3–12 months for turbidity, total coliforms/E. coli, iron, and manganese is recommended to track well water quality trends.
Detailed records of test results, pump servicing, and any changes in taste, odor, or appearance help identify problems between cleanings.
Consider upgrades such as sediment filters, chlorination systems, or a pressure tank replacement to improve clarity and long-term system resilience.
Recommended testing frequency and parameters (turbidity, bacteria, iron, manganese)
Because sediment-related contaminants can change with seasons, well construction, and nearby activities, owners should establish a regular testing schedule focused on turbidity, bacterial contamination, and common dissolved minerals like iron and manganese.
Quarterly testing is typical; increase to monthly after disturbances or cleaning.
Measure turbidity, total coliform/E. coli, and dissolved iron and manganese; use certified labs and keep follow-up testing after any treatment or remediation.
Record-keeping and signs to watch for between cleanings
When monitoring a well between cleanings, owners should keep concise, dated records of tests, maintenance actions, and any unusual observations to track trends and support timely interventions.
Entries should note turbidity spikes, odors, discoloration, pressure drops, pump cycling changes, and sediment accumulation.
Regular review highlights gradual deterioration or recurring issues, prompting targeted troubleshooting or professional inspection before water quality declines further.
Upgrades to improve long-term clarity and system resilience
Keeping clear, dated records of tests and observations helps identify persistent problems that warrant system upgrades to preserve long-term clarity and resilience.
Recommended upgrades include sediment or multimedia filters, pressure tanks, UV or chlorination for microbial control, and automatic backwash systems.
Wellhead sealing, gravel pack rehabilitation, and routine water-quality monitoring sensors increase reliability.
Professional assessment guarantees appropriate selection and installation.
Quick Reference: Step Checklist for Homeowners
A concise checklist helps homeowners remove sediment from a well safely and efficiently. It summarizes essential actions, tools, and safety checks before, during, and after cleaning.
- Inspect and shut off power, note pressure readings, gather filter/cleaning tools, and wear PPE.
- Flush system methodically, collect sediment, monitor turbidity until clear.
- Sanitize, restore power, check pump operation, and document maintenance dates.
Conclusion
After following practical steps to clear a well, the homeowner celebrates crystal clarity—until a fresh cloud of sediment reminds them that water has its own agenda. Ironically, the very act of fixing reveals the system’s personality: stubborn, cyclical, and indifferent to human schedules. So while tools, filters, and routines offer reprieve, the responsible observer accepts that maintenance is perpetual choreography with nature, not a one-time victory, and plans accordingly.