How to Install an Overflow Drain in a Tub: Step-by-Step DIY Guide
To install an overflow drain in your tub, start by gathering necessary tools like wrenches, screwdrivers, gaskets, plumber’s putty, and sealant. First, turn off the water supply and clear access to the drain area. Remove the trim and old assembly, then detach the linkage or pop-up mechanism. Clean any old gasket material, dry-fit the new housing, apply sealant, and securely tighten it to the tailpiece. After installation, test for leaks and proper function, making any necessary adjustments or seal replacements. If you encounter issues, the guide also includes troubleshooting tips and advice on when to hire a professional.
What an Overflow Drain Is and Why It Matters
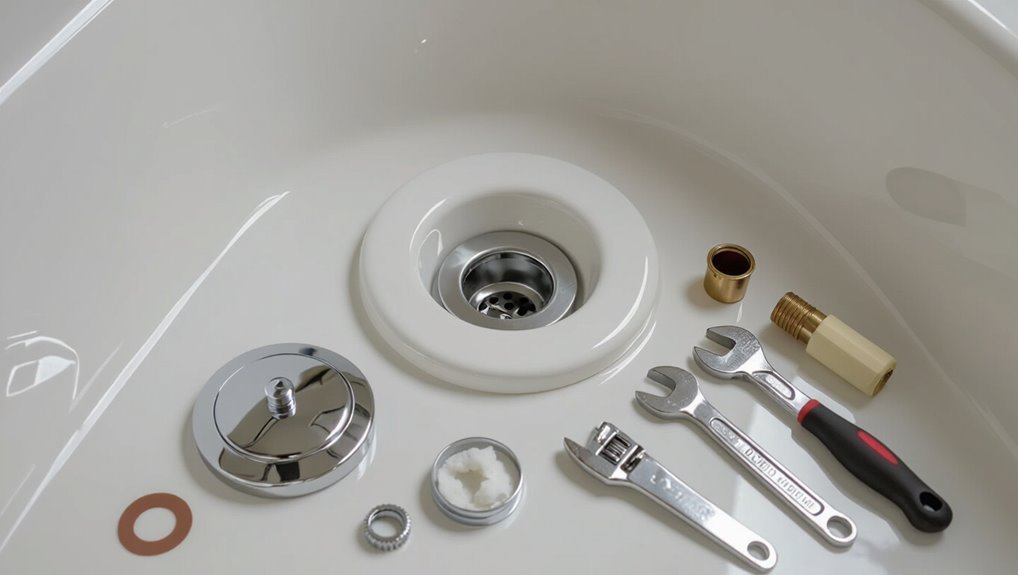
An overflow drain is a safety feature that prevents water from spilling over the tub edge by providing a secondary exit for excess water.
It comes in several common types and designs—such as wall-mounted openings with internal tubes, cable-operated units, and decorative plate covers—each affecting installation and maintenance requirements.
The presence and proper function of an overflow drain influence both tub performance (drainage speed, filling control) and safety (flood prevention and pressure relief).
Purpose of an overflow drain in a tub
Serving as a critical safety and plumbing component, the overflow drain prevents a bathtub from overfilling by redirecting excess water into the drain system before it reaches the tub’s rim.
It protects against flooding, reduces water damage risk, and maintains proper plumbing venting.
Understanding this purpose is essential when learning how to install overflow drain in tub to guarantee correct placement and reliable operation.
Common overflow drain types and designs
Overflow assemblies come in several common types and designs, each suited to different tub styles and user needs. Choices affect installation complexity and aesthetics.
Typical options include:
- Traditional wall-mounted overflow plate with built-in stopper.
- Pop-up overflow with linkage and visible cap.
- Cable-operated overflow connected to a deck-mounted knob.
- Concealed or modern trimless overflow with minimalist faceplate.
How an overflow drain affects tub performance and safety
Prevents accidental flooding and regulates water level, the overflow drain is a small but essential component that diverts excess water from the tub to the waste line once the basin reaches a preset height.
It preserves fixture integrity, reduces water damage risk, and helps maintain consistent fill depth.
Proper installation and sealing guarantee effective performance, prevent leaks, and comply with safety and plumbing standards.
Tools, Materials, and Preparations
Before beginning the installation, the required tools and materials should be identified and gathered, including any replacement parts specific to the tub.
Guidance on selecting the correct overflow assembly for the tub’s model and finish will guarantee proper fit and function.
Basic safety precautions and workspace preparation, such as turning off water supply and protecting surfaces, should be completed beforehand.
Required tools
Several basic hand tools and a few specialty items are required to install an overflow drain in a tub.
A compact, practical kit speeds the job and minimizes damage; tools focus on access, sealing, and gentle removal of old components.
- Adjustable wrench and pliers
- Screwdrivers (flat and Phillips)
- Basin wrench or small socket set
- Utility knife and caulk tool
Required materials and replacement parts
Alongside the hand tools listed previously, a concise set of materials and replacement parts is needed to complete an overflow drain installation properly.
Seal integrity, corrosion resistance, and fit drive item selection. Typical required items include:
- Rubber gasket and neoprene sealing washer set
- Brass or stainless overflow flange and cover plate
- Locknut and threaded tailpiece
- Plumber’s putty and silicone sealant (tube)
How to choose the correct overflow assembly for your tub
When selecting an overflow assembly for a tub, the installer should match the assembly’s diameter, thread type, and material to the existing plumbing and tub configuration to secure a watertight, corrosion-resistant fit.
Verify tub wall thickness, opening shape, and mounting style (recessed or surface). Confirm compatibility with trim and drain linkage, choose brass or stainless for longevity, and ascertain included gaskets and fasteners match specifications.
Safety precautions and workspace preparation
Before beginning work, the installer should assess hazards and prepare the workspace to prevent injury, water damage, and tool-related accidents.
Gather safety gear (gloves, eye protection, knee pads), shut off water, and clear the area.
Protect floors with drop cloths, position adequate lighting, ventilate if using solvents, and organize tools and parts within reach.
Verify stable ladder or step stool.
Inspecting Your Tub and Existing Plumbing Before Installation
Before beginning work, the installer locates the overflow housing and traces its connection points to the tub and drain assembly.
A careful inspection looks for corrosion, physical damage, or signs of hidden leaks around fittings and behind access panels.
Finally, the technician measures and records relevant dimensions and thread types to guarantee replacement parts will fit correctly.
Identifying the overflow housing and connection points
A careful inspection of the tub’s interior and surrounding plumbing reveals the overflow housing and its connection points: the oval or circular opening near the tub rim, the faceplate or cover, the inner overflow tube, and the clamp or screw fittings that secure it to the drain assembly.
Note the tube routing, attachment method, and any access panels or trim that must be removed for installation.
Checking for corrosion, damage, or hidden leaks
With the overflow housing identified and attachment points exposed, the next step is to inspect those components and surrounding plumbing for corrosion, physical damage, or signs of hidden leaks.
Check for pitting, rust flakes, warped metal, loose or missing fasteners, damp insulation, mineral deposits, and water stains.
Press fittings gently to detect play; note any areas needing repair or replacement before proceeding.
Measuring and documenting dimensions and thread types
Several precise measurements and a clear record of thread types are essential for a correct overflow drain installation.
The inspector measures hole diameter, flange spacing, and depth from rim to overflow opening. Thread profile, pitch, and diameter of existing fittings are noted and photographed.
All dimensions and part numbers are logged for parts matching. Accurate records prevent leaks and guarantee proper seal and alignment.
Step-by-Step Installation: Removing the Old Overflow Drain
Before beginning, the water supply should be turned off and the work area cleared to prevent spills and allow unobstructed access.
The procedure differs slightly depending on whether the overflow is reached from inside the bathroom or via an access panel behind the wall; in either case start by removing the trim, escutcheon plate, and cover assembly.
Once exposed, detach the internal linkage or pop-up mechanism, extract the old overflow housing, and thoroughly clean the mating surfaces before installing the replacement.
Turning off water and clearing the area
Shut off the bathroom’s main water supply or the house valve to prevent any accidental flow, then open a nearby faucet to relieve pressure and drain residual water from the lines.
Clear the work area: remove toiletries, mats, and loose items.
Lay down towels and a small bucket to catch drips.
Guarantee adequate lighting and unobstructed access to the tub surround.
Accessing the overflow from the bathroom side vs. access panel
Choose the access method that matches the tub’s construction and the home’s layout: some tubs allow the overflow to be reached directly from inside the bathroom by removing the trim plate and unscrewing the overflow flange.
Others require opening an access panel on the adjacent wall or ceiling to reach the overflow nut and tailpiece from behind.
Select the easier, safest route; confirm lighting, tools, and a bucket for residual water are ready.
Removing trim, escutcheon plate, and cover assembly
With the access route determined—either from the bathroom side after removing the trim plate or through an external access panel—the installer proceeds to remove the visible trim, escutcheon plate, and cover assembly.
Fasteners are inspected, screws or clips are carefully loosened, and components are set aside in order. Seals and visible gaskets are noted for replacement; damaged pieces are discarded and photographed for reference.
Detaching internal linkage or pop-up mechanism
Begin by inspecting the exposed overflow cavity to identify the type of internal linkage or pop-up assembly—pivot rod, cable, or lift-and-turn.
Then note its attachment points and how the visible components operate.
Disconnect retaining clip or set screw, withdraw pivot rod or cable sleeve, and unthread lift-and-turn spindle.
Retain small parts in a container for reference and avoid twisting plastic housings to prevent damage.
Extracting the old overflow housing and cleaning the mating surfaces
Loosen any remaining fasteners around the overflow opening and gently push the housing inward to free it from the tub wall.
Once the exterior trim and internal linkage are clear, reach behind the housing and pull it straight out, taking care not to gouge the flange.
Remove old gasket material with a plastic scraper, clean surfaces with solvent, inspect for corrosion, and dry thoroughly before fitting the new housing.
Step-by-Step Installation: Installing the New Overflow Drain
The installer begins by dry-fitting the new components to confirm proper alignment before applying the appropriate sealant, gasket, or plumber’s putty.
Once sealed, the overflow housing is inserted and tightened to the tub while internal linkage or the pop-up assembly is reconnected and tested for smooth operation.
Finally, the trim plate and exterior fasteners are installed and secured to complete the assembly.
Dry-fitting the new parts and verifying alignment
Dry-fit each component without sealant to confirm fit and alignment before final assembly.
Place the overflow plate, gasket, and tailpiece in position, hand-threading fasteners gently.
Check that the tailpiece seats squarely in the drain outlet and that the faceplate sits flush against the tub.
Verify screw holes align and that the assembly clears surrounding fixtures and access panels before disassembly.
Applying sealant, gaskets, or plumber’s putty correctly
With alignment verified and parts temporarily assembled, attention turns to creating a watertight seal between the overflow faceplate, gasket, and tailpiece.
The installer chooses the appropriate gasket or plumber’s putty for the material, applies a thin, even bead, and seats the faceplate.
Excess putty is removed, and silicone sealant is smoothed around edges.
Allow manufacturer-recommended cure time before testing.
Inserting and tightening the overflow housing to the tub
Begin by orienting the overflow housing to the tub opening, ensuring the gasket or sealant remains properly seated and the faceplate alignment is maintained; then insert the housing straight into the aperture until the flange sits flush against the tub wall.
While supporting the housing, thread the retaining nut or clamp from behind, tightening evenly to compress the seal without distorting the gasket.
Confirm flush seating and moderate torque.
Reconnecting internal linkage or pop-up assembly
Reattach the internal linkage or pop-up assembly by aligning the pivot rod or cable with the overflow housing’s connection point and seating any retaining clips or gaskets precisely.
Confirm the pivot rod inserts fully and the clip engages, or thread the cable into its socket until movement is smooth.
Test operation several times, adjusting linkage length or clip position so the stopper seals reliably without binding.
Installing trim plate and securing exterior components
Install the trim plate and secure exterior components by positioning the plate over the overflow opening, aligning the screw holes, and tightening the fasteners evenly to avoid distortion.
Verify gasket sits flat to prevent leaks. Install decorative escutcheon if provided.
Tighten screws until snug; avoid overtightening plastic. Confirm trim is flush and the overflow lever or cap operates smoothly without binding before concluding this step.
Reattaching access panel and restoring surrounding finishes
After confirming the overflow assembly is leak-free and the trim sits flush, the access panel is secured back into place and surrounding finishes are restored.
Fasteners are tightened, insulation or vapor barrier is repositioned, and drywall or panel edges are patched as needed.
Caulk or sealant is applied neatly around the panel perimeter.
Final cleanup removes debris and verifies aesthetic alignment with surrounding surfaces.
Connecting to Drain and Testing for Leaks
The installer reconnects the overflow assembly to the drain tailpiece or trap, ensuring slip nuts and gaskets seat properly.
They then perform pressure and leak-testing—either by filling the tub to the overflow or using a low-pressure air test—to confirm watertight connections.
If a leak appears, the technician tightens or re-seats fittings, replaces damaged gaskets, and retests until no leakage is detected.
Reconnecting the overflow to the drain tailpiece or trap
Reconnect the overflow assembly to the drain tailpiece or trap by aligning the overflow tube with the tailpiece inlet, seating the rubber gasket or O‑ring, and tightening the securing nut or clamp to create a watertight joint.
Confirm proper alignment to prevent strain, trim tubing if needed, and hand‑tighten before final snug with tools.
Reinstall cover plate and verify clearance for stopper operation.
Pressure and leak-testing methods
With the overflow and tailpiece secured, testing for pressure integrity and leaks confirms the joint holds under normal and stressed conditions.
The installer fills the tub to various levels, observes connections, and applies brief pressure pulses.
Use towels to spot seepage and a dry paper around joints for micro-leak detection.
Record any drip timing and location for troubleshooting.
- Full-fill soak test
- Partial-fill pulse
- Visual towel check
- Paper micro-detection
What to do if you find a leak
Act promptly when a leak is found: isolate the source, stop any ongoing water flow, and prepare basic tools and absorbent materials.
Inspect joints, gaskets, and seals for visible damage. Tighten fittings incrementally and replace compromised washers or sealant.
Retest under low pressure, then full pressure. If leakage persists, document location, shut off water, and consult a professional plumber to prevent structural or mold damage.
Common Problems and How to Fix Them
Common issues after installing an overflow drain include stripped threads or a damaged housing, persistent leaks at the gasket or joint, and a misaligned pop-up mechanism that impedes drainage.
Corrosion and hard-to-reach connections can further complicate repairs and require alternative approaches.
The following section outlines typical causes and practical fixes for each problem.
Stripped threads or damaged housing
Stripped threads or a cracked housing can prevent a tub overflow from sealing or securing properly, leading to leaks and continued wear.
If threads are damaged, replace the overflow flange or use a thread repair insert compatible with plumbing materials.
For cracked housings, replace the entire overflow assembly or surrounding trim to restore structural integrity.
Test fit and secure before finishing.
Persistent leaks at the gasket or joint
Persistent leaks at the gasket or joint often result from degraded seals, improper installation, or incompatible materials, allowing water to bypass the overflow assembly and drip into the wall or floor cavity.
To fix, drain and remove the overflow plate, inspect and replace brittle gaskets with correct-size rubber or neoprene seals, apply plumber’s grease, guarantee even compression, and retighten fasteners without overtightening.
Misaligned pop-up mechanism or drainage issues
Resolve issues with a misaligned pop-up or slow drainage by first identifying whether the problem originates at the stopper linkage, the drain body, or a blockage.
Inspect linkage for bends, loose pivot nuts, or improper attachment; adjust or replace the connecting rod and clevis.
Remove and clean the stopper and drain to clear hair and debris.
Test operation and repeat adjustments until smooth, watertight function is restored.
Corrosion or inaccessible connections
Corrosion and hard-to-reach connections are common obstacles when installing or repairing an overflow drain, often caused by mineral buildup, dissimilar metals, or years of moisture exposure.
Remove covers, apply penetrating oil, and use long-reach or flexible tools to access fasteners.
Replace corroded fittings with compatible materials (stainless or plastic) and use plumbers’ tape and sealant to guarantee leak-free, serviceable joints.
Time, Cost, and When to Call a Professional
A straightforward overflow drain replacement typically takes a few hours for a DIYer with moderate skill, while more complex repairs can occupy a day or more.
Parts and labor usually range from modest DIY expenses for replacement kits to several hundred dollars if a plumber is hired or if access requires cutting into walls.
A licensed plumber should be called for persistent leaks, damaged or corroded piping, unclear access, or when local codes and warranties require professional work.
Typical project timeline and difficulty level
Typical bathtubs require a handful of hours for an overflow drain installation, though actual time depends on access, tub type, and whether the old assembly must be removed or the finish patched. A straightforward replacement with easy under-tub access can be completed in 1–3 hours, while installations requiring wall removal, custom fittings, or curing time for sealants and repairs can extend to a full day or more.
Skill level ranges from basic DIY to advanced; novices can handle straightforward swaps, while complex routing, corrosion, or hidden damage merits professional assessment.
Estimated parts and labor costs
Budgeting for an overflow drain installation depends on parts, labor rates, and job complexity. Typical parts range $20–$150; DIY saves labor but requires time and tools. Professional rates vary by region; estimate 1–3 hours for straightforward installs. Consider permit or repair costs if corrosion or access issues appear.
| Item | DIY Cost | Pro Cost |
|---|---|---|
| Parts | $20–$150 | $20–$150 |
| Labor | $0 | $80–$300 |
| Time | 1–4 hrs | 1–3 hrs |
Signs that you should hire a licensed plumber
When should a licensed plumber be called for an overflow drain installation?
Complex repairs, persistent leaks, corroded or inaccessible piping, or broken tub shells require professional attention.
If local codes or permits apply, hiring a licensed plumber guarantees compliance.
When time constraints, lack of proper tools, or uncertainty about sealing and pressure testing exist, a professional prevents costly mistakes and water damage.
Maintenance Tips to Keep an Overflow Drain Working
A simple routine inspection checklist helps identify loose fittings, seal deterioration, and early signs of corrosion around the overflow assembly.
Regular cleaning to remove hair and soap scum and the use of strainers or gentle enzymatic cleaners can prevent clogs.
Seasonal checks and periodic resealing of gaskets prolong function and reduce the need for major repairs.
Routine inspection checklist
Because an overflow drain prevents water damage only when functioning properly, a concise routine inspection checklist helps guarantee early detection of common problems.
Inspect visible seal for cracks or soft spots. Verify trim and plate are secure. Confirm no persistent moisture or mold nearby. Test overflow opening for unobstructed flow.
- Check seal integrity
- Tightness of hardware
- Surrounding moisture signs
- Flow clearance
Cleaning and preventing clogs
Maintain regular cleaning and simple preventative measures to keep the overflow drain clear and functional.
Flush the channel periodically with hot water and a mild detergent, remove visible debris and hair with a grabber or tweezers, and use a soft brush for the faceplate and threads.
Avoid pouring grease or large solids down the tub.
Install a hair strainer to reduce future blockages.
Seasonal or long-term maintenance recommendations
After routine cleaning and simple prevention steps, seasonal and long-term checks keep the overflow drain functioning reliably.
Inspect seals and trim for leaks, tighten or replace fasteners, and test overflow operation by filling slightly above the overflow.
Flush with vinegar solution annually, clear any accumulated debris, and monitor for corrosion.
Schedule professional inspection every few years if signs of persistent leakage or poor drainage appear.
Variations and Special Cases
Different tub materials and configurations require specific overflow approaches, including tailored attachments for acrylic, cast-iron, and fiberglass shells.
Replacement procedures for integral or nonstandard overflows often involve specialized seals, adapters, or cutting and patching techniques.
ADA-compliant and safety-focused overflow options prioritize accessible operation and scald prevention, and should be chosen to meet code and user needs.
Installing overflow drains in acrylic, cast-iron, and fiberglass tubs
Tackle overflow installation with attention to material-specific requirements: acrylic tubs need gentle clamping and soft gaskets to prevent cracking.
Cast-iron tubs require heavier-duty seals and corrosion-resistant hardware, and fiberglass tubs demand backing support to avoid flexing around the drain.
Use compatible sealants, properly sized fasteners, and torque limits for each material.
Test for watertightness and adjust mounting to prevent stress or leaks.
Replacing integral tub overflows or nonstandard assemblies
When confronting integral overflows or nonstandard assemblies, the technician must first identify how the original overflow is bonded or molded into the tub and whether the replacement will match that configuration.
Removal may require cutting, heat, or solvent techniques; structural repairs to the flange or surrounding material are often necessary.
Custom adapters, epoxy bonding, or manufacturer-specific parts guarantee watertight restoration and proper alignment with existing drain plumbing.
ADA-compliant and safety-focused overflow options
Why prioritize ADA-compliant and safety-focused overflow options? Accessible overflow designs reduce injury risk and meet regulatory requirements.
The guide notes low-profile, lever-activated, and integral grab-compatible models, plus anti-scald and tamper-resistant features.
Installers should verify clearances, operability from seated positions, and compatible drain assemblies.
Document model certifications and test function after installation to guarantee compliance and user safety.
Quick Troubleshooting Flowchart
A concise troubleshooting flowchart guides users through steps to resolve common overflow drain failures.
It lists symptom-based checkpoints — such as leaks, slow drainage, or misalignment — and directs to specific corrective actions.
The chart prioritizes safety checks, sealing inspections, and reinstall or replace decisions for efficient resolution.
Steps to follow for common failure scenarios
Begin by identifying the symptom—slow drainage, persistent leak, gurgling, or no flow—and match it to the appropriate branch of the troubleshooting flowchart.
Then follow targeted steps: inspect visible seals, check for clogs, test venting, and verify connections.
Typical actions proceed from least invasive to replacement, documenting findings and retesting after each intervention.
- Inspect seals
- Clear clogs
- Test venting
- Tighten/replace fittings
Conclusion
To sum up, the overflow drain is the tub’s unsung hero, preventing catastrophic flooding with quiet efficiency. Proper selection, careful measurement, and patient installation guarantee reliable performance. Routine checks and simple maintenance extend its lifespan and avert common issues. For complex fittings, corroded parts, or uncertain plumbing layouts, a licensed plumber should be engaged. With attention and care, this small component delivers enormous peace of mind—truly a tiny hero against watery disaster.