How to Remove Blue Stains From Toilet Seat: Simple Steps That Work Fast
To effectively remove blue stains from your toilet seat, start by identifying the source, often from cleaners or in-tank tablets. Begin with warm soapy water and a gentle scrub. If stains persist, try soaking with white vinegar or a baking-soda paste. For tougher stains, use hydrogen peroxide or oxygen bleach, following the product instructions. Reserve stronger options like chlorine bleach and melamine sponges for last. Always remember to ventilate, wear gloves, and rinse and dry the area thoroughly afterward. For detailed methods and replacement tips, continue reading.
What Causes Blue Stains on Toilet Seats
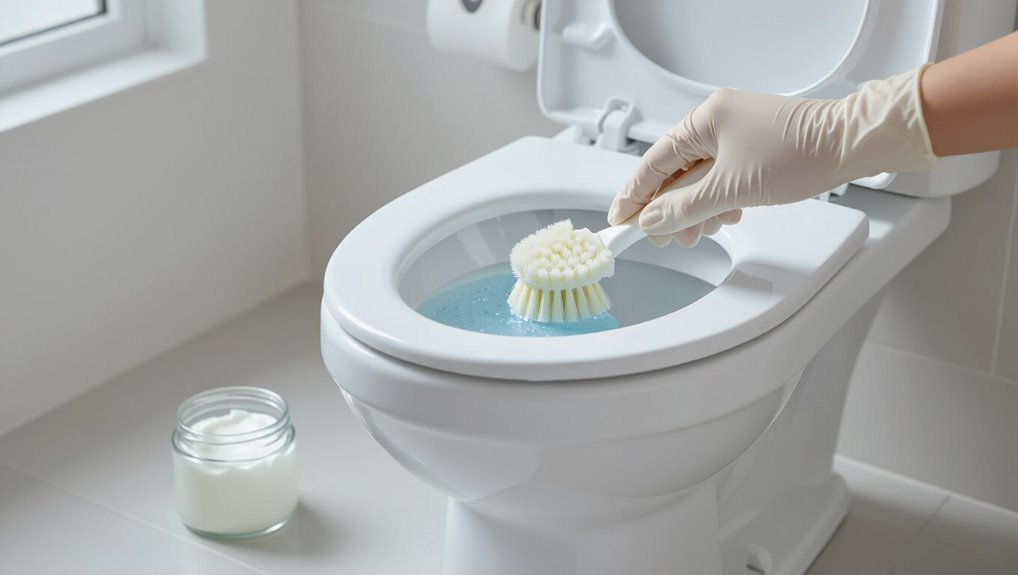
Blue stains on toilet seats commonly originate from chemical residues such as certain cleaners, toilet bowl tablets, and rust inhibitors that react with seat surfaces.
They can also result from mineral and metal interactions—copper, iron, or specific water chemistry may produce blue or bluish-green deposits.
Biological growth and mold, plus the seat material (plastic, vinyl, enamel-coated surfaces), influence how noticeable and persistent these stains become.
Common chemical causes (cleaners, toilet bowl tablets, rust inhibitors)
Chemical reactions between household products and toilet materials often produce the vivid blue stains that appear on seats.
Strong cleaners, toilet bowl tablets, and rust inhibitors can leave blue residues or react with plastic finishes.
Readers seeking how to remove blue stains from toilet seat should first identify product sources, discontinue offending chemicals, and use appropriate mild cleaners or targeted stain removers to prevent recurrence.
Mineral and metal reactions (copper, iron, water chemistry)
When minerals and metals in water interact with porcelain, plastic, or metal fixtures, they can leave blue-green discoloration on toilet seats and surrounding surfaces.
Dissolved copper or brass corrosion, iron oxidation with specific water pH, and mineral-rich hard water deposit copper or carbonate complexes that oxidize into blue stains.
Treatment targets mineral buildup, corrosion sources, and water chemistry adjustments.
Biological and mold explanations
Aside from mineral and metal reactions, biological growths can also produce blue-green staining on toilet seats.
Algae, cyanobacteria and some pigmented molds thrive in damp, low-light conditions and form slimy films. Organic residues like soap scum and body oils feed them.
Poor ventilation, infrequent cleaning, and persistent moisture encourage buildup; targeted cleaning and drying interrupt colonization and remove stains.
How surface material of the seat affects staining (plastic, vinyl, enamel-coated)
Because different seat materials vary in porosity, surface energy, and coating integrity, they influence both the likelihood of blue staining and the ease of removal.
Plastic seats resist absorption but develop micro-scratches that trap pigments.
Vinyl flexes, allowing dyes to embed in seams and textured surfaces.
Enamel-coated wood or metal offers a smoother, less porous barrier but chips expose substrate, increasing staining risk and cleanup difficulty.
Quick Safety and Preparation Steps Before Cleaning
Before beginning, make certain the bathroom is well ventilated and wear gloves and eye protection to limit exposure to fumes and splashes.
A small patch test of any cleaner on an inconspicuous area of the seat helps confirm it won’t damage the finish.
Gather needed supplies—soft cloths, nonabrasive sponge, appropriate cleaner, and a bucket—so the task proceeds efficiently.
Ventilation and protective gear to use
How should the area be prepared for safe cleaning? Open windows and run an exhaust fan to disperse fumes; maintain steady airflow.
Wear nitrile gloves, eye protection, and a mask rated for chemical vapors if using strong cleaners.
Remove pets and children from the bathroom.
Lay down absorbent towels to catch drips.
Keep cleaning products closed until use and nearby for quick access.
Testing cleaning products on an inconspicuous area
Test a cleaner on an inconspicuous spot—such as under the seat hinge or inside the tank rim—to confirm it won’t discolor, etch, or damage the finish.
Apply a small amount, wait the recommended dwell time, then rinse and inspect. If no adverse effects appear after several minutes, proceed.
If fading, clouding, or softening occurs, discard that product and choose a milder alternative.
Tools and supplies to have on hand
Gather basic protective gear and a small selection of cleaning tools to guarantee the job is safe and efficient.
The person should prepare items for stain removal and surface protection, prioritizing nonabrasive options and ventilation.
Essential supplies include:
- Gloves, safety glasses, microfiber cloths
- Mild cleaner, diluted bleach or vinegar, soft sponge
- Bucket, spray bottle, old toothbrush
Immediate Fast Methods to Remove Fresh Blue Stains
For fresh blue stains, simple, fast interventions can often restore the seat without harsh chemicals.
Options include rinsing with water and mild soap for surface marks, a quick white vinegar soak to lift pigments, a baking soda paste for gentle abrasion, or isopropyl alcohol when the stain appears dye-based.
Each method should be chosen based on stain type and material compatibility.
Rinsing and mild soap technique (when to use)
When a blue stain appears fresh and the surface is intact, rinsing with warm water and a mild liquid soap is the quickest, least abrasive remedy; it loosens pigments and dissolves light residues without risking discoloration or finish damage.
Use a soft cloth or sponge, gently work the area, rinse thoroughly, and dry.
Reserve stronger cleaners only if residue persists after this safe first step.
White vinegar soak for quick lift
Soak a paper towel or soft cloth in undiluted white vinegar and press it against the fresh blue stain, allowing the acetic acid to break down pigments and dissolve residues within 10–15 minutes.
After soaking, gently wipe the area with the cloth, rinse with warm water, and dry to check results, repeating once if necessary.
The method is fast, nonabrasive, and safe for most plastic or porcelain seats.
Baking soda paste for gentle abrasion
If the vinegar soak lifts most of the pigment but some residue remains, a baking soda paste provides a mild abrasive follow-up that won’t damage plastic or porcelain.
Mix baking soda with water to a spreadable paste, apply to stains, let sit five to ten minutes, then scrub gently with a soft cloth or sponge.
Rinse thoroughly and repeat if necessary.
Isopropyl alcohol for dye-based stains
Apply isopropyl alcohol to tackle fresh, dye-based blue stains quickly and safely.
Dampen a clean cloth or cotton pad with 70% alcohol, blot the stained area, and avoid scrubbing to prevent spreading.
Let it sit for a minute, then wipe with a damp cloth. Repeat if necessary.
Rinse the seat, dry thoroughly, and ventilate the bathroom during use.
Stronger Methods for Stubborn or Old Blue Stains
For older or stubborn blue stains, stronger chemical and mechanical options are needed.
Recommended approaches include controlled hydrogen peroxide applications with proper dwell times, choosing between oxygen bleach and chlorine bleach based on material and stain chemistry, selecting commercial stain removers and descalers with appropriate active ingredients, and using a melamine sponge carefully to avoid surface damage.
Safety precautions and compatibility with the toilet seat material should guide every choice.
Hydrogen peroxide application and dwell times
When dealing with stubborn or aged blue stains, hydrogen peroxide offers a controlled, non-chlorine oxidizing option that can break down dye and organic residues without discoloring most plastic toilet seats.
Apply 3% hydrogen peroxide directly, let it dwell 15–30 minutes, agitate with a soft brush, then rinse.
Repeat once if needed. Test in an inconspicuous area first.
Oxygen bleach vs. chlorine bleach: when to use each
Hydrogen peroxide is a mild oxidizer suitable for many dye-based blue stains, but more stubborn or long-set discoloration may require stronger chemistry. Oxygen bleach (percarbonate) lifts organic dyes gently; chlorine bleach (sodium hypochlorite) whitens faster but risks plastic damage and fumes. Choose oxygen for painted or aged seats, chlorine for durable, uncoated surfaces with ventilation and short contact.
| Type | Notes |
|---|---|
| Oxygen | Gentle, safer |
| Chlorine | Strong, risky |
| Use | Match material and ventilation |
Commercial stain removers and descalers (what to look for)
Commercial stain removers and descalers offer concentrated formulations designed to tackle mineral buildup, dye transfer, and rust-like blue deposits that household cleaners may not remove.
Look for products labeled for hard water, limescale, or rust, containing acidic agents (muriatic alternatives, sulfamic or citric acid) or chelators.
Prefer low-fume, surface-safe formulas, follow temperature and dwell-time guidance, and check compatibility with seat materials.
Using a melamine sponge safely
Reach for a melamine sponge only after softer methods have failed, since its micro-abrasive structure can remove stubborn blue stains effectively but may dull or abrade delicate finishes.
Wear gloves, test an inconspicuous spot, and use light, controlled pressure. Rinse frequently to remove residue and inspect progress.
Stop if surface shows wear; consider professional restoration or replacing the seat for persistent or heavily damaged areas.
Step-by-Step Cleaning Plans by Stain Type
The article now presents four concise cleaning plans tailored to common blue-stain origins.
Plan A addresses light blue discoloration from household cleaners.
Plan B targets deep blue-green stains caused by metal reactions.
Plan C covers moldy or biological blue-green growth.
Plan D offers safe techniques for soft or porous seats (vinyl/plastic).
Each plan provides step-by-step actions and precaution notes specific to the stain type.
Plan A: Light blue discoloration from cleaners
Begin by identifying whether the blue tint originates from toilet bowl cleaners or dye-based rim blocks; once confirmed, remove any rim block and ventilate the area.
Apply a mild, nonabrasive cleaner or diluted vinegar to a soft cloth and gently wipe stains. Rinse thoroughly with water and dry.
Repeat once if residue remains. Test spot first to avoid surface damage.
Plan B: Deep blue/green stains from metal reactions
Address deep blue-green toilet-seat stains as metal-induced corrosion rather than ordinary dye marks.
Identify sources: leaching from copper, brass, or iron fixtures and water chemistry.
Protect hands, remove seat if possible.
Apply a phosphoric-acid cleaner or diluted vinegar, let sit, scrub with a nonabrasive pad.
Rinse thoroughly, inspect for pitting; replace seat if corrosion persists or structural damage appears.
Plan C: Moldy or biological blue-green growth
If blue-green staining persists after ruling out metal corrosion, consider biological growth as the source: mold, mildew, or cyanobacteria can form in damp, poorly ventilated bathrooms and produce pigmented colonies on plastic or porcelain seats.
Treat affected areas with diluted bleach (1:10) or hydrogen peroxide, scrub with a soft brush, rinse thoroughly, and improve ventilation to prevent recurrence.
Wear gloves and eye protection.
Plan D: Stains on soft or porous seats (vinyl/plastic)
Treat vinyl or other soft, porous toilet seats with gentler, non-abrasive methods because harsh solvents or scrubbing can gouge the surface and trap dyes in micro-texture.
Test a mild detergent or diluted vinegar in an inconspicuous spot. Blot stains with microfiber, repeat rinsing, then apply a poultice of baking soda and water for persistent marks.
Rinse, air dry, and avoid bleach.
How to Avoid Damage to the Seat Surface
The section outlines which chemicals and tools can scratch or degrade common seat finishes and which should be avoided.
It also summarizes safe techniques for cleaning hinges and tight seams without forcing parts or trapping moisture.
Finally, it explains when removing the seat is advisable for thorough access and how to do so without harming mounting hardware.
Which chemicals and tools to avoid
Which cleaners and tools should be avoided to prevent surface damage?
Strong abrasives, powdered scouring agents, and wire brushes can scratch and dull plastic or painted seats.
Bleach concentrates and undiluted oven cleaners may weaken finishes or cause discoloration.
Avoid razor blades, metal scrapers, and harsh solvents like acetone.
Use mild, nonabrasive cleaners and soft cloths instead.
Safe techniques for hinges and hard-to-reach seams
After avoiding abrasive tools and harsh solvents, attention should turn to hinges and narrow seams where residues collect and improper cleaning can cause scratches, stripped paint, or loosened hardware.
Use soft-bristled toothbrushes, cotton swabs, and a mild detergent solution. Work gently, blot rather than scrub, and dry thoroughly.
Protect painted or plastic finishes and tighten any loose fasteners carefully without over-torquing.
When to remove the seat for deeper cleaning
Knowing when to remove the toilet seat for deeper cleaning hinges on visible signs and reachable limits: if stains persist after gentle cleaning, discoloration extends beneath the hinges, or buildup accumulates in seams inaccessible with a toothbrush, detachment is warranted.
Before removing, consult manufacturer instructions, use proper tools, protect the seat surface from scratches, and document hinge orientation to guarantee correct reassembly without cause of damage.
Preventing Future Blue Stains
To prevent recurring blue stains, the article recommends establishing a regular cleaning schedule and simple habits that remove dyes and mineral deposits before they set.
It also compares alternatives to in-tank blue tablets and notes their risks to seals and finishes.
Finally, it addresses water treatment options, such as filters or softeners, when minerals are the primary cause of staining.
Best cleaning schedule and habits
Establishing a consistent cleaning schedule and simple daily habits prevents the mineral and dye buildup that causes blue stains on toilet seats. A concise routine limits staining and eases maintenance.
- Wipe seat daily with mild cleaner; dry thoroughly.
- Deep clean weekly with nonabrasive cleanser; inspect hinges.
- Flush and run water-check monthly; address any in-tank additives promptly.
Alternatives to in-tank blue tablets and their risks
After outlining routine cleaning habits, attention turns to the common practice of using in-tank blue tablets and safer options that prevent stains.
Concentrated liquids, tablet alternatives placed in the bowl, and enzyme-based cleaners reduce discoloration risk.
However, in-tank products can corrode flappers, degrade seals, and void warranties.
Users should weigh convenience against potential plumbing damage and choose manufacturer-approved cleaners.
Water treatment options if minerals cause staining
When hard water minerals—chiefly iron, manganese, and calcium—are the underlying cause of persistent blue or discolored stains, treating the supply water can prevent recurrence more effectively than repeated surface cleaning.
Options include whole-house water softeners to remove calcium and magnesium, iron filters or oxidation systems for iron and manganese, and point-of-use filters for toilets; choose based on water test results and maintenance capacity.
When to Replace the Toilet Seat Instead of Cleaning
If stains penetrate the surface, cause pitting, or resist all safe cleaning methods, replacement is often the most practical option.
The discussion that follows covers how to choose a stain-resistant material—such as molded plastic, coated wood, or antimicrobial options—and what to look for in durability.
It concludes with straightforward tips for quick removal and installation to minimize downtime.
Signs that staining is permanent or seat is compromised
Several clear indicators show that blue staining on a toilet seat may be permanent or that the seat itself is compromised: deep discoloration that persists after thorough cleaning, surface cracks or pitting where stains penetrate, warping or softening of the plastic, and a foul odor that cannot be removed.
Additional signs include flaking finish, exposed underlying material, and loose or corroded fasteners indicating structural failure.
Choosing a stain-resistant replacement material
A practical replacement decision prioritizes materials that resist chemical staining, absorb fewer pigments, and withstand frequent cleaning without degrading.
Recommended options include solid polypropylene and molded wood with durable finishes, which repel dyes and tolerate cleaners.
Avoid porous plastics and untreated wood.
Consider colorfast, scratch-resistant surfaces and replace if discoloration recurs despite proper maintenance, ensuring longevity and hygiene.
Quick removal and installation tips
When frequent deep cleaning fails to remove persistent blue staining, replacing the toilet seat becomes the practical choice; quick removal and installation tips help minimize downtime and guarantee a proper fit.
Shut off water if needed, inspect bolt types, keep hardware organized, measure mounting hole spacing, choose compatible hinges, gently unfasten bolts, align new seat, hand-tighten then test movement; avoid overtightening.
Troubleshooting Common Problems
The section addresses why blue stains may return after cleaning, identifying common causes and effective fixes.
It also covers how to handle faint ghost stains that persist after treatment and recommends next steps.
Finally, it explains targeted approaches for discoloration near hinges and bolt holes.
Stain returns after cleaning: root causes and fixes
Several common causes explain why blue stains reappear after cleaning: mineral-rich hard water, copper corrosion in pipes, bacterial or algal growth, and residual dye from cleaning products that only masks but doesn’t remove deposits.
Identification requires water testing, inspecting supply lines and fixtures for corrosion, and swabbing for microbes.
Effective fixes include chelating cleaners, replacing corroded parts, shock-disinfecting, and switching to non-dye cleaners.
Faint ghost stains after treatment: next steps
Address lingering faint blue ghost stains by treating them as surface-embedded residues rather than fresh deposits: this reframes the problem and guides targeted follow-up.
Gently abrade with a nonabrasive pad and a paste of baking soda and water, rinse, then inspect under bright light.
If faint tint persists, repeat once; persistent discoloration may require a mild oxidizer or professional evaluation.
Dealing with discoloration near hinges and bolt holes
Inspect hinges and bolt holes closely, since mineral deposits and trapped cleaner often concentrate in these recessed areas and resist routine scrubbing.
Use a small brush, cotton swabs, or a toothbrush with vinegar or a mild descaler to loosen buildup.
Remove the seat if necessary to access bolt cavities.
Rinse thoroughly, dry, and apply a protective sealant to prevent recurrence.
Product Recommendations and Comparison
The article now compares effective household items for removing blue stains, ranking them by efficacy, safety, and cost.
It then reviews top-rated commercial products specifically formulated for blue stain removal.
Readers can use the comparison to choose the most suitable option for their toilet seat and situation.
Effective household items ranked
When ordinary blue stains appear on a toilet seat, a handful of common household items consistently outperform novelty cleaners.
This section ranks those remedies by effectiveness, availability, and safety so readers can choose the best option for their situation.
Practical rankings:
- White vinegar — gentle, lifts dye, widely available.
- Baking soda paste — mild abrasion, safe for finishes.
- Hydrogen peroxide — oxidizes stains, quick but use cautiously.
Top-rated commercial products for blue stain removal
After outlining effective household remedies, attention turns to commercial products formulated specifically for dye and mineral stains; these are compared here by cleaning power, speed, surface safety, and price. Reviews favor enzymatic cleaners for safe, steady removal; acidic descalers for rapid mineral lift; and oxygen bleaches for balance. Choose based on seat material and desired speed.
| Product Type | Speed | Surface Safety |
|---|---|---|
| Enzymatic | Moderate | High |
| Acid descaler | Fast | Moderate |
Final Checklist: Fast Routine to Restore a Clean Toilet Seat
A concise final checklist presents a 5-minute emergency clean routine for quick stain removal and sanitizing.
It also outlines a weekly maintenance checklist to prevent recurrence and preserve finish.
The section prepares the reader to apply practical steps immediately.
5-minute emergency clean routine
If a quick fix is needed to remove fresh blue stains and restore a presentable toilet seat, follow this streamlined five-minute emergency routine.
Gather gloves, paper towels, a mild detergent or vinegar solution, and a soft cloth.
Blot stains, apply solution, let sit 30–60 seconds, gently rub, rinse with water, and dry.
Inspect; repeat spot treatment if necessary.
Weekly maintenance checklist
One clear weekly checklist streamlines upkeep: inspect the seat for new discoloration, wipe all surfaces with a mild cleaner or vinegar solution, rinse and dry thoroughly, and check hinges and seals for buildup or looseness.
A concise routine maintains appearance and prevents stains. Recommended steps:
- Remove deposits with gentle scrubbing.
- Disinfect and dry.
- Tighten or replace faulty hardware.
Conclusion
About 60% of homeowners report encountering stubborn toilet-seat stains at least once, underscoring how common blue discoloration can be. The guide demonstrated practical, safety-minded options—from quick spot treatments to stronger approaches and replacement guidance—so readers can choose based on stain age and material. Regular inspection and gentle maintenance prevent recurrence; when deep discoloration or damage persists, replacing the seat is often the faster, more hygienic long-term solution.