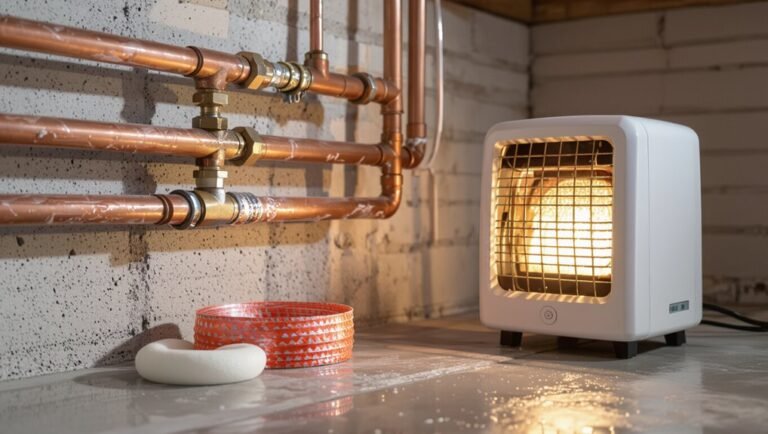
How to Install a Coupling on a Tank Backup: Step-by-Step Guide for Safe, Leak-Free Connections
To install a coupling on a tank backup safely and ensure leak-free connections, follow these essential steps:
- Isolate and Depressurize: Begin by isolating the tank backup and fully depressurizing it. Drain the connection and inspect all pipes and fittings for any signs of damage.
- Select the Right Coupling: Measure the pipe and choose the appropriate coupling type and size.
- Prepare the Pipes: Clean and deburr the ends of the pipes to ensure a proper fit.
- Apply Sealant: Use the suitable sealant or PTFE tape on the threads of the pipe.
- Align and Tighten: Align the coupling components and tighten them to the specified torque, following the recommended sequence for the coupling style.
- Re-pressurize and Test: Once installed, re-pressurize the system slowly. Conduct leak and pressure-hold tests, documenting the results to ensure compliance and safety.
These steps will help you achieve a secure and reliable connection for your tank backup.
Overview of Tank Backup Couplings and Why Proper Installation Matters
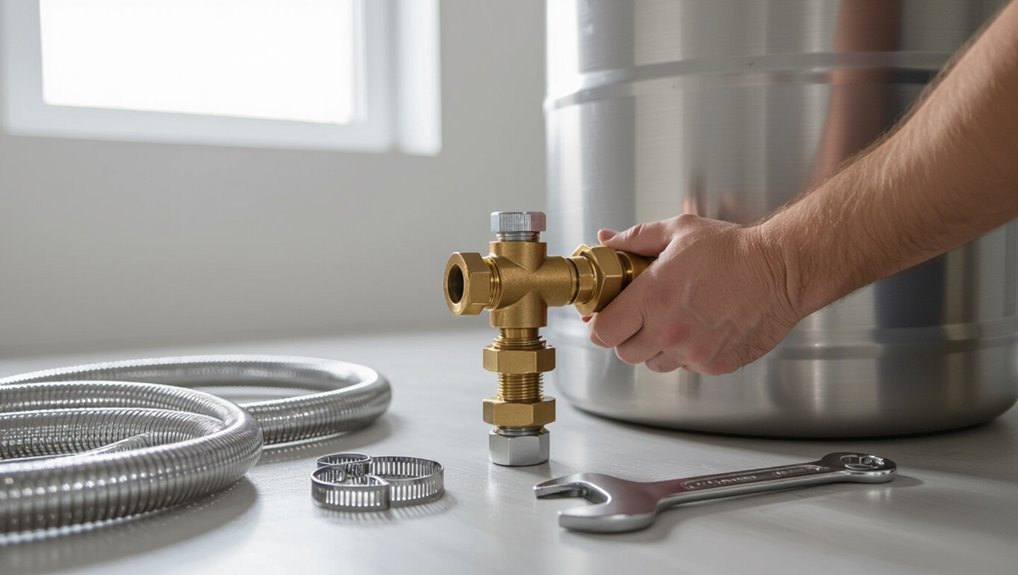
A coupling on a tank backup connects piping or hoses to the tank, maintaining a secure fluid or gas pathway during normal operation and emergency transfer.
These couplings are commonly used in water storage, fuel systems, and industrial process tanks where reliable connections are required.
Incorrect installation can cause leaks, operational failures, and safety hazards such as spills or pressure loss.
What a coupling on a tank backup does
Guarantee secure fluid transfer and system integrity by correctly coupling a tank backup. The coupling connects the backup tank to the primary system, controls flow direction, and prevents leaks or contamination.
It also isolates the backup during maintenance, equalizes pressure, and supports safety valves. Clear guidance on how to install a coupling on a tank backup guarantees tight seals, correct alignment, and reliable operation under varying pressures.
Common applications and systems that use these couplings
With the coupling ensuring secure connections, proper flow control, and isolation during maintenance, it becomes straightforward to identify the systems that rely on these fittings.
They appear in potable water storage, fire suppression tanks, HVAC condensate and chilled-water systems, industrial process vessels, agricultural irrigation reservoirs, and emergency fuel or chemical storage.
Standardized couplings simplify integration across valves, pumps, and monitoring equipment.
Risks of improper installation (leaks, system failure, safety hazards)
How severe are the consequences when a coupling is installed incorrectly?
Faulty installation can cause fluid leaks, pressure loss, contamination, and cascading system failures. Equipment downtime, costly repairs, environmental harm, and regulatory penalties may follow.
Safety hazards include slips, fires, exposure to hazardous substances, and burst lines.
Proper assembly, torque, seals, and inspection mitigate these risks and preserve system integrity.
Quick Answer: Step-by-Step Summary for Installing a Leak-Free Coupling
The technician must achieve a secure, leak-free seal and proper alignment of the coupling as the required outcome, with success measured by no visible leaks under operating pressure and stable mechanical fit.
The typical procedure can be completed in 30–60 minutes for a moderately skilled installer and is rated as low to moderate difficulty.
Tools, replacement gaskets, and adherence to torque and sealing specifications are essential to meet the success criteria.
Required outcome and success criteria for installation
Although precise alignment and secure seals are essential, the required outcome for installing a coupling on a tank backup is a mechanically sound, leak-free connection that maintains system pressure and resists vibration and thermal movement.
Success criteria include zero detectable leakage under operating pressure, proper torque and clamp engagement, verified alignment within tolerance, preserved flow capacity, and durable materials and joints meeting applicable codes and inspection acceptance.
Time estimate and difficulty level
When should a technician expect the job to take, and how hard will it be: installing a leak-free coupling on a tank backup typically requires 30–90 minutes for a competent technician—longer if confined space entry, heavy corrosion, or custom fittings are involved—and rates as moderate difficulty, demanding basic mechanical skills, torque tools, alignment checks, and adherence to safety and code requirements.
Reasonable contingency time and inspection planning are advised.
Tools, Materials, and Safety Equipment Needed
The following section lists the essential tools and fittings required for coupling installation, including wrenches, tubing cutters, sealant, and appropriate clamps.
It also compares common coupling types and material compatibility—PVC, brass, stainless steel, and rubber—to help select the correct part for the tank system.
Finally, recommended personal protective equipment and key safety precautions are outlined to prevent injury and contamination during the job.
List of tools and fittings
Before beginning the installation, assemble a compact kit of essential tools, fittings, and safety gear to guarantee efficient, safe work.
- Adjustable wrench and torque wrench for secure tightening
- Pipe cutter or tubing saw for clean ends
- Deburring tool and emery cloth for proper sealing surfaces
- Thread sealant (PTFE tape or compound) and appropriate clamps
- Safety gloves, goggles, and a flashlight for precise, protected work
Types of couplings and materials compatibility (PVC, brass, stainless steel, rubber)
Several common coupling types—PVC solvent-weld, threaded brass, stainless-steel compression, and rubber flexible—offer distinct advantages and compatibility constraints that determine choice for a tank backup installation.
PVC suits drainage and chemical resistance but requires solvent welding; brass tolerates higher temperatures and threaded connections; stainless steel provides corrosion resistance for aggressive fluids; rubber couplings absorb vibration and misalignment but need appropriate clamps and chemical compatibility checks.
Personal protective equipment and safety precautions
Wear appropriate personal protective equipment (PPE) and verify tools and materials for compatibility and condition before beginning any coupling installation on a tank backup.
Use chemical-resistant gloves, safety goggles, face shield, and steel-toe footwear. Employ hearing protection for power tools and respirator for solvents.
Isolate and depressurize the system, lockout/tagout energy sources, guarantee adequate ventilation, and keep a spill kit and fire extinguisher nearby.
Preparing the Tank Backup System Before Installation
Before beginning the coupling installation, the operator must shut down and depressurize the tank backup system and then drain and clean the connection area to guarantee a safe, contaminant-free workspace.
All pipes, threads, and seals should be inspected for corrosion, cracks, or deformities that could compromise the joint.
Finally, accurate measurements of the pipe dimensions must be taken to select the correct coupling size.
Shutting down and depressurizing the system
Shut down the supply and isolate the tank backup from all sources of pressure to create a safe work environment.
Verify isolation by closing valves, locking/tagging out actuators, and disconnecting feed lines as required.
Slowly bleed residual pressure using designated vents or bleed valves while monitoring gauges.
Confirm zero PSI and document status before proceeding.
Guarantee appropriate PPE and communication with team members.
Draining and cleaning the connection area
Drain the connection area completely and remove any standing liquid to prevent contamination and slipping hazards.
The technician wipes surfaces with a lint-free cloth, uses appropriate cleaners compatible with tank materials, and flushes residual residue into a designated containment.
All debris, rust flakes, and sediments are collected and disposed of per regulations.
Drying is verified before proceeding to coupling installation.
Inspecting pipes, threads, and seals for damage
With the connection area cleaned and dried, the technician conducts a systematic inspection of pipes, threads, and seals to verify integrity prior to coupling installation.
Surfaces are examined for cracks, corrosion, pitting, deformations, and burrs. Thread profiles are checked for wear or cross-threading; seals and gaskets are inspected for cuts, hardening, or compression set.
Any damaged components are documented and replaced before proceeding.
Measuring and selecting the correct coupling size
Before selecting a coupling, the technician measures the pipe diameter, wall thickness, and the distance between mating ends to determine the exact coupling size and type required.
They record material, pressure rating, and temperature limits, compare measurements to manufacturer charts, and select a coupling with compatible end fittings and seal type.
Final verification confirms alignment and adequate tolerance for thermal expansion.
Step-by-Step Installation Process
The installation sequence begins with proper alignment and positioning of the coupling relative to the tank and piping.
Pipe ends must be prepared—deburr, clean, and apply primer where required—before sealant or tape is applied using the correct type and technique.
The final steps cover the recommended tightening sequence and torque, with specific instructions for compression, threaded, push-to-connect, and welded couplings.
Aligning and positioning the coupling
One set of precise measurements and a steady reference point guide the initial alignment and positioning of the coupling to guarantee concentricity and axial clearance between the tank backup shaft and the driven component.
Technicians verify shaft runout, set axial gap per manufacturer, center coupling halves, and use feeler gauges or dial indicators.
Fasteners are finger-tightened, rechecked, and torqued in sequence after final alignment confirmation.
Preparing pipe ends (deburring, cleaning, applying primer if needed)
Prepare pipe ends by removing burrs, cleaning surfaces, and applying primer where specified to guarantee a reliable, leak-free joint.
Deburr with a file or reamer until edges are smooth and square.
Wipe residues with a clean, lint-free cloth and suitable solvent. Allow surfaces to dry.
Apply primer only when manufacturer instructions require it, covering the socket and pipe uniformly.
Applying sealant or tape (types, correct technique)
Apply sealing compound or thread tape carefully to secure a durable, leak-free connection without contaminating mating surfaces.
Use PTFE tape for threaded fittings (wrap clockwise three to five turns), and anaerobic or pipe joint compound for metal-to-metal seats.
Keep sealant off flange faces and gasket areas. Guarantee even, thin coverage; remove excess.
Allow recommended cure time before pressurizing the system.
Tightening sequence and torque guidance
Begin the tightening sequence by hand-engaging all fasteners to guarantee proper alignment before torqueing.
Use a cross or star pattern for multi-bolt couplings to distribute load evenly.
Gradually increase torque in stages to the manufacturer’s specified final value, verifying with a calibrated torque wrench.
Recheck all fasteners after system pressurization and during initial operation for any loosening or leakage.
Special instructions for compression, threaded, push-to-connect, and welded couplings
Several distinct coupling types—compression, threaded, push-to-connect, and welded—require different step-by-step procedures to guarantee a secure, leak-free installation.
Compression couplings need ferrule alignment, gradual nut tightening, and final torque check.
Threaded fittings require proper thread sealant and controlled engagement.
Push-to-connects must be fully inserted and tested for pull-out.
Welded joints demand qualified welding, clean surfaces, and non-destructive inspection afterward.
Post-Installation Procedures and Testing
After the coupling is installed, the technician re-pressurizes the system slowly and monitors for abnormalities during startup.
Leak testing is performed using visual inspection, soapy water checks, and a pressure-hold test, with any minor leaks isolated, tightened, or resealed as needed.
A final inspection checklist confirms pressure stability, absence of leaks, proper alignment, and documentation of the work.
Re-pressurizing and gradual system startup
Restore system pressure slowly to protect the coupling and connected components from shock and to verify integrity under working conditions.
Gradually increase inlet pressure in controlled increments, pausing between steps to monitor gauges and listen for abnormal noises.
Observe temperature and alignment. Confirm valves operate smoothly and safety devices engage.
Document pressure stages and durations, then proceed to normal operation only after stable readings and no signs of distress.
Leak testing methods (visual inspection, soapy water, pressure hold test)
Begin leak testing with a systematic inspection that combines visual checks, a soapy-water surface test, and a pressure-hold evaluation to confirm sealing integrity.
Inspect all joints and fittings for drips, corrosion, or misalignment. Apply soapy solution to suspect areas and watch for persistent bubbles.
Perform a calibrated pressure-hold test for a set duration and monitor gauge stability to verify no pressure decay.
What to do if a minor leak is detected
If a minor leak is detected, the technician isolates the affected section, relieves pressure, and documents the location and characteristics of the leak before any corrective action.
The technician then tightens fittings, replaces damaged seals or gaskets, and repositions the coupling as needed.
After repairs, leak tests are repeated on the isolated section; if still present, replace the coupling and report for further evaluation.
Final inspection checklist
Once the coupling installation and leak repairs are complete, the technician performs a structured final inspection checklist to verify system integrity and compliance with safety standards.
The checklist includes visual joint inspection, torque confirmation, pressure test results, leak detection scan, corrosion and alignment checks, verification of seals and clamps, documentation of readings, confirmation of isolation valves, and sign-off with date, name, and corrective actions recorded.
Troubleshooting Common Problems
The troubleshooting section addresses persistent leaks after installation by identifying common root causes such as improper sealing, torque errors, or damaged gaskets.
It also covers misalignment and vibration-induced failures, plus corrosion, chemical incompatibility, and material degradation that can compromise coupling integrity.
Guidance is provided on criteria for repair versus full coupling replacement based on damage extent and risk.
Persistent leaks after installation and root causes
Persistent leaks after installing a coupling often indicate underlying issues rather than superficial sealing failures.
Investigation should focus on damaged flange faces, compromised gasket material, improper torque sequence, contaminated sealing surfaces, or incorrect coupling selection for pressure/temperature.
Corrosion, hairline cracks, or thread damage can bypass seals.
System pressure testing, visual inspection, and material verification identify root causes and guide corrective actions to guarantee durable, leak-free service.
Misalignment and vibration-related failures
Having ruled out seal and material defects as causes of ongoing leakage, attention should shift to mechanical alignment and vibration as frequent contributors to coupling failure.
Misalignment—axial, angular, or parallel—induces uneven loading, seal extrusion, and fatigue.
Vibration from pumps or flow pulsation loosens fasteners and accelerates wear.
Inspect alignment with gauges, correct offsets, secure mounts, and employ dampers or flexible elements to mitigate motion.
Corrosion, chemical incompatibility, and material failures
Many coupling failures trace back to corrosion, chemical attack, or inappropriate material selection, which compromise components through pitting, stress corrosion cracking, or general degradation.
Inspect for surface rust, crevice corrosion, swelling, or embrittlement.
Verify chemical compatibility charts, assess protective coatings, and confirm galvanic pairings.
Replace or isolate affected parts, improve seals and drainage, and document materials to prevent recurrence.
When to replace the coupling vs. repair
After identifying corrosion, chemical attack, or material incompatibilities as root causes, technicians must determine whether a coupling can be safely repaired or requires full replacement.
Criteria favoring replacement include structural cracks, extensive wall thinning, compromised sealing surfaces, or unknown material history.
Repair suits minor surface pitting, isolated gasket damage, or mechanical fastening failures when compatibility and integrity can be reliably restored and verified by testing.
Maintenance and Longer-Term Reliability
A routine inspection schedule should be established, highlighting wear, misalignment, leaks, vibration, and unusual noise as primary signs to watch for.
Regular lubrication, periodic retorquing of fasteners, and scheduled seal replacement based on operating hours or manufacturer guidance will extend service life.
When recurring failures or changing load/temperature conditions occur, consideration of upgraded materials or alternative coupling types should guide replacement decisions.
Routine inspection schedule and signs to watch for
When establishing a routine inspection schedule for a tank backup coupling, technicians should set fixed intervals based on operating hours, environmental exposure, and manufacturer recommendations to guarantee early detection of wear or failure.
Inspections should record visual corrosion, loose fasteners, seal distortion, vibration marks, fluid seepage, and alignment shifts.
Document findings, prioritize urgent repairs, and escalate recurring issues to engineering for root-cause analysis.
Lubrication, retorquing, and seal replacement intervals
Although service intervals vary with duty cycle and environment, a conservative maintenance regimen for tank backup couplings should specify regular lubrication, periodic retorquing of fasteners, and scheduled seal replacement to prevent premature failure.
Lubricate sliding surfaces and O-rings with manufacturer-approved grease every 3–6 months; retorque bolts after thermal cycles and at 6‑month intervals; replace seals annually or when wear, hardening, or extrusion is detected.
Upgrades and when to switch coupling types for reliability
Why consider upgrading a coupling now? The article explains that aging, frequent failures, vibration, corrosive environments, or higher pressure demands justify switching coupling types.
Upgrading to stainless, flexible, or quick-release designs improves sealing, alignment, and serviceability. Selection should match operating stresses, compatibility, and maintenance capacity.
Planned upgrades reduce downtime and extend backup tank reliability while lowering cumulative repair costs.
Comparison of Coupling Types for Tank Backup Use
Different coupling types are compared by performance, durability, cost, and ease of installation to determine the best fit for specific tank backup scenarios. The table below highlights typical trade-offs and recommended use-cases. Readers should use these contrasts to match coupling attributes to operational needs.
| Coupling Type | Strengths | Best Use |
|---|---|---|
| Flanged | High durability, robust sealing | Long-term installations with high pressure |
| Compression | Easy installation, moderate cost | Quick repairs and tight spaces |
| Flexible (rubber/gel) | Good vibration damping, lower cost | Temporary backups and vibration-prone systems |
Performance, durability, cost, and ease of installation
Reliability guides the selection of couplings for tank backup systems. Evaluating performance, durability, cost, and installation effort together reveals practical trade-offs.
Metal cam and threaded couplings offer high pressure tolerance and longevity but cost more and require tools.
Composite and elastomeric couplings are cheaper, lighter, easier to install, and resist corrosion but may wear faster and handle lower pressures.
Best-use scenarios for each coupling type
Application context determines the ideal coupling choice for tank backup systems.
Flexible rubber couplings suit vibration-prone, short-term repairs; stainless steel clamp couplings excel for corrosive environments and long-term reliability; flange couplings suit high-pressure, precision-align installations; quick-release camlock couplings enable frequent connections and maintenance; welded joints remain preferred for permanent, leak-critical pipelines.
Select based on pressure, chemistry, access, and maintenance frequency.
Safety, Compliance, and Regulatory Considerations
The installation should comply with applicable industry standards and local codes to guarantee mechanical integrity and legal conformity.
Attention must be paid to environmental and spill‑prevention requirements, including secondary containment and proper sealing, to minimize contamination risk.
A certified technician or inspector should be engaged for permit‑triggering work, complex repairs, or any situation where certification, testing, or formal documentation is required.
Industry standards and codes to follow
Codes and standards establish the minimum requirements for safe, compliant coupling installation on tank backups, defining materials, pressure ratings, testing, and documentation.
Applicable references include API, ASME, NFPA, ANSI, and relevant ISO standards, plus local building and fire codes.
Installers must follow manufacturer instructions, use certified components, maintain traceable inspection records, and guarantee third-party testing and certification where required.
Environmental and spill-prevention requirements
Following adherence to applicable standards and manufacturer instructions, attention must turn to environmental protections and spill-prevention measures that minimize release risks and regulatory exposure.
Implement secondary containment, compatible drip trays, and corrosion-resistant seals. Use appropriate absorbents, clear labeling, and leak-detection sensors.
Maintain inspection records, follow local discharge limits, and guarantee waste is stored and disposed per regulations to prevent soil and water contamination.
When to involve a certified technician or inspector
When should a certified technician or inspector be engaged for a coupling installation on a tank backup?
A certified professional is required whenever local codes, permits, or insurer conditions mandate certification, after any complex modification, following detected leaks or structural damage, or when welding, pressure testing, or fuel system interfacing occurs.
Engagement guarantees compliance, accurate testing, and documented approval for safe, insurable operation.
Practical Tips and Common Mistakes to Avoid
Practical tips and common mistakes are highlighted to streamline installations and reduce hazards. Key quick tips and frequent errors are summarized below to guide proper technique and prevention. Reviewing these points before beginning can save time and prevent damage.
- Verify seal orientation and torque specifications before final tightening.
- Use appropriate corrosion-resistant materials and clean mating surfaces.
- Avoid over-tightening which can crack fittings or deform gaskets.
- Confirm alignment to prevent stress on the coupling and pipeline.
- Keep a checklist to guarantee all safety steps and leak tests are completed.
Quick tips for faster, safer installations
Speed up installations by preparing tools and parts in a logical sequence: gather the correct coupling size, compatible gaskets, solvent or thread sealant, appropriately sized wrenches, and safety gear before approaching the tank.
Work methodically: clean mating surfaces, dry-fit components, apply sealant sparingly, and torque to specifications.
Use quick-access trays, label parts, maintain clear lighting, and verify alignment to reduce rework and exposure time.
Top installation mistakes and how to prevent them
Having organized tools and followed an efficient sequence, installers still encounter recurring errors that compromise seals, safety, and service life.
Common mistakes include misaligned flanges, inadequate surface cleaning, improper gasket selection, and under- or over-torqued fasteners.
Prevention requires measuring alignment, following cleaning protocols, verifying material compatibility, using calibrated torque tools, and performing pressure tests.
Documenting procedures and training reduces repeat failures.
Useful Resources and Reference Materials
The section lists concise reference materials and trusted suppliers to support correct coupling installation and torque selection. Relevant sources include manufacturer manuals, published torque specifications, and vetted parts vendors.
Suggested starting points:
- Official manufacturer installation manual and torque chart
- Model-specific service bulletins and OEM updates
- Certified torque tool documentation
- Reputable parts suppliers and distributors
- Industry-standard handbooks and safety guidelines
Manufacturer manuals and torque specifications
Because manufacturer manuals contain the definitive assembly steps, part numbers, and torque values, they should be consulted before any coupling installation on a tank backup.
Manuals provide exact torque specifications for bolts and fittings, bolt grade and lubrication notes, sealing recommendations, and inspection criteria.
Adhering prevents overtightening, leaks, and warranty voidance.
Record referenced page numbers and batch-specific data for compliance and future maintenance.
Recommended products and parts suppliers
After consulting manufacturer manuals for specifications and torque values, attention shifts to sourcing approved products and reliable suppliers that match those requirements.
Recommended sources include OEM parts lists, authorized distributors, and accredited industrial suppliers carrying ANSI/ASME-certified couplings, gaskets, and fasteners.
Verify part numbers, material grades, and traceability.
Maintain purchase records and contact technical support for compatibility confirmations before procurement.
Conclusion
Proper coupling installation guarantees tank backup systems remain secure, functional, and leak-free. After following safety checks, correct component selection, and precise assembly, the system will perform reliably under pressure and temperature variations. What risks could arise from skipping steps or using improper fittings? Adherence to manufacturer instructions, local codes, and routine inspections mitigates failures and environmental hazards. Ultimately, meticulous installation and testing protect equipment, property, and personnel from preventable incidents.