How to Install a Dry Well Drainage System: Step-by-Step Guide
A dry well drainage system is an effective solution for managing stormwater by capturing and infiltrating it underground, preventing surface pooling and foundation damage. This installation process includes assessing your site, securing necessary permits, locating utilities, excavating according to your roof runoff and soil type, and setting up a geotextile liner, graded bedding stone, and a perforated chamber or crate. Additionally, you’ll need to connect inlet piping and backfill with clean aggregate. Regular inspections and maintenance are crucial to avoid clogging. This guide will cover the required materials, a step-by-step installation process, sizing recommendations, common pitfalls to avoid, and advice on when to seek professional help for more complex situations.
Can You Install a Dry Well Drainage System Yourself?
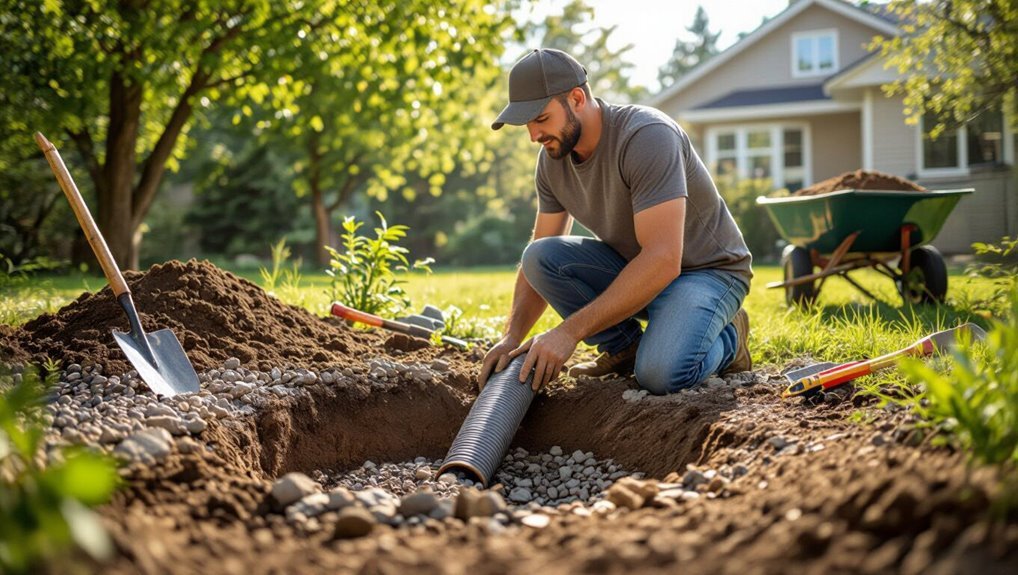
A homeowner can install a dry well by locating the discharge area, excavating the pit, laying gravel and a perforated chamber or tank, connecting inlet piping with a filter fabric, and backfilling.
Typical DIY installation takes a weekend for a small system and may cost several hundred to a few thousand dollars depending on materials and equipment rental.
Professional installation adds labor costs but can save time and guarantee proper siting and permitting.
Short summary of steps and time/cost estimate
Begin by outlining the key steps: site assessment and permitting, trenching and pipe layout, connection to downspouts or runoff sources, backfilling with gravel and installing the dry well chamber, and final grading and outlet testing.
A concise summary, time/cost estimate, and DIY feasibility for how to install dry well drainage:
- Assess site and get permits
- Excavate and lay pipe
- Install chamber and backfill
- Test and finish grading
What Is a Dry Well and Why Use One?
A dry well is an underground pit or chamber filled with gravel or a prefabricated crate that collects and disperses stormwater into surrounding soil.
It provides a low-maintenance way to manage runoff on-site, reducing pooling and directing water away from foundations.
Compared with rain gardens, soakaways, or sump pumps, a dry well requires less surface area than a rain garden, can be simpler to install than extensive soakaway systems, and avoids the mechanical failure risks of a sump pump.
Definition and basic components
Dry wells are underground structures that collect and disperse stormwater or roof runoff into surrounding soil, reducing surface pooling and directing excess water away from foundations.
Components include an excavation, perforated chamber or crate, geotextile fabric, gravel backfill, and inlet piping or catch basins.
Proper sizing, bedding, and access for inspection guarantee functionality and longevity of the system.
Benefits compared to alternatives (rain garden, soakaway, sump pump)
Having outlined the components and installation basics, the next consideration is how a dry well stacks up against other stormwater solutions. Compared to rain gardens, soakaways, and sump pumps, dry wells offer compact footprint, low maintenance, and reliable infiltration where soil permits, but less filtration and ecological benefit than vegetated options and no mechanical backup like pumps.
| Advantage | Note |
|---|---|
| Footprint | Small |
| Maintenance | Low |
| Ecology | Limited |
| Reliability | Passive |
When a Dry Well Is Appropriate Site Assessment
A site assessment for a dry well begins with evaluating soil type and percolation—simple DIY tests can indicate suitability, but professional testing is advised for ambiguous results or clay soils.
Local regulations, required permits, and utility locates must be confirmed before any excavation.
Finally, sizing is determined by roof or runoff area and local rainfall intensity to guarantee the dry well can handle expected flows.
Soil type and percolation testing (simple DIY tests and when to get a pro)
Determine soil type and percolation before installing a dry well, since infiltration rate dictates whether a dry well will function and what size is required.
Perform simple DIY tests: dig a test hole, saturate, then measure drop rate over several hours. Fast-draining sandy loam favors dry wells; slow-clay soils may require alternatives.
Hire a pro for inconsistent results, high water tables, or complex sites.
Local regulations, permits, and utility locate
Before installing a dry well, homeowners should verify local regulations, obtain any required permits, and arrange utility locates to avoid legal issues and safety hazards.
Municipal codes may restrict placement, setbacks, or materials; homeowner associations can impose additional rules.
Permit review guarantees compliance with stormwater and groundwater protection.
Utility locates prevent damage to unseen cables, pipes, and drainage lines during excavation.
Sizing considerations based on roof/runoff area and rainfall intensity
When sizing a dry well, runoff volume from the contributing roof or paved area and the design rainfall intensity together set the required storage and infiltration capacity.
Calculations use area, runoff coefficient, and rainfall depth to estimate peak and volume.
Consider soil infiltration rates, seasonal saturation, and safety factor.
- Roof/paved area (sq ft)
- Runoff coefficient
- Design storm intensity (in/hr)
- Soil infiltration rate
Materials, Tools, and Estimated Costs
The section outlines common dry well types—prefabricated plastic crates, perforated pipe with surrounding stone, and cast concrete wells—and how each influences material needs and cost.
It then lists specific supplies, such as pipe, geotextile, stone, fittings, and backfill, alongside required tools and optional equipment rentals.
Estimated cost ranges for materials and rental tools are provided to help compare approaches and budget the project.
Dry well types (prefab plastic crate, perforated pipe with stone, concrete dry well)
Choosing the right dry well type—prefab plastic crate, perforated pipe with stone, or concrete dry well—depends on site constraints, expected water volume, and budget; each option requires specific materials, tools, and differing cost ranges that affect installation complexity and long-term performance.
| Type | Typical attributes |
|---|---|
| Prefab crate | Lightweight, faster install, moderate cost |
| Perforated pipe + stone | Flexible layout, labor-intensive, lower material cost |
| Concrete | Durable, heavy equipment, highest cost |
Detailed materials list
A clear inventory of required materials, tools, and realistic cost ranges prevents delays and budget overruns during a dry well installation.
The list below outlines typical consumables, structural components, and estimated price bands to plan purchases. Include locally sourced options and contingency for extra stone or liner.
- Perforated pipe, catch basin, or prefab crate (cost range)
- Washed gravel or crushed stone
- Geotextile fabric for separation
- PVC fittings and connectors
Tools required and optional equipment rental
Gather necessary hand tools and list optional rentals before excavation begins to streamline the install and avoid downtime.
Required tools include:
- shovel
- wheelbarrow
- tape measure
- level
- utility knife
- trenching shovel
- tamper
- PVC fittings tools.
Optional rentals:
- mini-excavator
- plate compactor
- wet/dry vacuum
- skid-steer for larger sites.
Include cost estimates and shop comparisons for budgeting.
Step-by-Step Installation Guide
The installation begins with a clear plan: lay out the dry well location, mark the excavation area, and contact 811 to locate utilities before work starts.
Excavation proceeds to the required depth with attention to grade, followed by placement of filter fabric and bedding stone to form the base.
Finally, the dry well unit is set in place or a stone chamber assembled and connected to the inlet piping.
Step 1 Plan layout and mark excavation area
Several factors determine the ideal dry well location, so the installer should evaluate surface drainage patterns, soil type, and distance from foundations and utilities before marking the excavation.
Next, outline inlet and outlet alignments, establish required dimensions and slopes, and mark boundaries with stakes and string.
Confirm access for equipment and guarantee the excavation avoids landscaping features and shallow services already identified.
Step 2 Call 811 and prepare site
With the layout marked and boundaries established, the installer should contact 811 to locate underground utilities before any digging begins.
After utilities are marked, secure permits as required, notify neighbors, and arrange traffic or access controls.
Clear surface debris, set safety barriers, and gather personal protective equipment and tools.
Confirm weather and staging area for soil and material storage before excavation.
Step 3 Excavate to required depth and check grade
Begin excavation to the planned depth using a trencher, excavator, or hand tools appropriate for soil type and access, following the marked layout and ensuring vertical walls where specified.
Maintain consistent slope toward the dry well inlet, check elevations with a level or transit, remove unstable or saturated soil, and stockpile excavated material away from the edge to prevent collapse and maintain safe access.
Step 4 Prepare base (filter fabric and bedding stone)
Lay a continuous, nonwoven geotextile filter fabric over the excavated floor and up the sides, cutting it to fit without gaps and overlapping seams by at least 12 inches; the fabric prevents soil migration while allowing water to pass.
Spread a 4–6 inch layer of clean, uniformly graded bedding stone, level and compact lightly to create a stable, permeable base ready for the dry well.
Step 5 Install dry well unit or build stone chamber
Position the dry well unit or assemble the stone chamber carefully atop the prepared bedding so the inlet aligns with the incoming drain and the unit sits level.
Secure sections per manufacturer instructions or stack and geotextile-wrap stone evenly to prevent collapse.
Confirm access riser placement and serviceability.
Backfill around the unit with clean stone, tamp gently, and maintain designed void space for infiltration.
Step 6 Connect inlet pipe(s) (downspouts, yard drains) and ensure proper slope
With the dry well set and backfilled, the next step is to connect inlet pipes from downspouts and yard drains, ensuring each runs to the inlet opening with a continuous, downward grade.
Cut and fit PVC or corrugated pipe, secure joints with appropriate couplings, slope at least 1/8–1/4 inch per foot, anchor pipes, and test flow for unobstructed drainage before finishing.
Step 7 Backfill with gravel and wrap with filter fabric
Begin filling around the dry well by placing clean, washed gravel in even lifts, bringing material up to about 6–12 inches below grade.
Tamp each layer lightly to eliminate voids while maintaining permeability.
Once gravel reaches the specified height, wrap the assembly with geotextile filter fabric, overlapping seams and securing edges to prevent soil migration into the gravel reservoir.
Confirm fabric remains taut and intact.
Step 8 Finish surface (soil, turf, decorative cover) and test system with water
After the gravel reservoir is wrapped and secured, attention turns to restoring the surface and verifying system performance.
Topsoil is replaced, turf or decorative cover is installed, and edges are smoothed.
A controlled water test directs flow into the inlet to confirm rapid percolation and absence of pooling or leakage.
Adjustments—adding soil or correcting grade—are made until drainage meets expectations.
Step 9 Post-installation checks and settling period
Several inspections should occur during the initial settling period to assure the dry well operates as planned: monitor for pooling, surface erosion, or depressions weekly for the first month, then monthly for three months.
Ensure inlet/outlet pipes remain clear, check perforated chamber stability, and verify vegetation establishes without obstructing drainage.
Document observations and schedule corrective actions if flow or soil compaction issues appear.
Troubleshooting Common Problems
Common issues with a dry well include poor drainage or slow infiltration, often caused by compacted soil or an undersized system.
Clogging from sediment or intrusive roots can reduce performance and lead to surface pooling or overflow during heavy rain.
Structural failure or collapse of the dry well is less common but serious, requiring inspection and prompt repair or replacement.
Poor drainage or slow infiltration
Encountering poor drainage or slow infiltration in a dry well often signals issues with soil permeability, compaction, or blockages within the system. Diagnosing the root cause requires systematic inspection of inlet pipes, surrounding soil conditions, and the dry well’s aggregate and geotextile layers.
Evaluate surrounding grade, test percolation, check for perched water, confirm correct aggregate size and placement, and consider soil amendment or added recharge zones.
Clogging from sediment or roots
Clogs from sediment or roots reduce a dry well’s capacity and can cause surface pooling or system failure if not addressed promptly.
Regular inspection, flushing with clean water, and removing debris from inlet filters prevent buildup.
Root intrusion requires cutting back vegetation and installing root barriers or replacing affected aggregate and fabric.
Periodic jetting or mechanical rodding restores flow when infiltration slows.
Surface pooling or overflow during heavy rain
Surface pooling or overflow during heavy rain indicates the dry well is unable to accept runoff at the rate it is arriving, usually due to undersized capacity, saturated surrounding soil, blocked inlet/outlet, or excessive roof or pavement runoff.
Inspect inlet piping and surface drains, clear debris, verify gravel and geotextile permeability, and assess catchment area.
Consider upsizing the dry well, adding overflow routing, or increasing infiltration area.
Structural failure or collapse of dry well
When a dry well shows signs of structural failure or collapse, the problem shifts from capacity and permeability to the integrity of the shell and surrounding soils.
Investigate settling, cracking, or pipe disconnection.
Excavate cautiously, shore excavation, and assess the chamber for damage.
Replace or reinforce the structure, recompact backfill in lifts, improve subsurface drainage, and retest for stability before restoring surface finishes.
Maintenance and Inspection Schedule
Routine inspections after heavy storms help identify clogs, erosion, or overflow issues before they worsen.
Technicians should clean inlet screens and remove accumulated sediment on a regular basis to maintain proper flow.
Media should be inspected periodically and pumped out or replaced when infiltration slows or contamination is present.
Regular inspections after storms
Inspect the dry well promptly after significant storms to identify clogging, sediment buildup, or signs of overflow that can compromise performance.
Visually assess surrounding soil for erosion, pooling, or wet spots indicating impaired infiltration.
Check access covers and observation ports for standing water or debris.
Record findings, note frequency and severity, and schedule repairs or professional evaluation if recurring issues or damage are observed.
How to clean inlet screens and remove sediment
Following post-storm inspections, attention should turn to cleaning inlet screens and removing accumulated sediment to restore proper flow and prevent blockages.
Wear gloves, remove screens, and clear debris with a brush or hose. Inspect screen integrity and replace damaged units.
Scoop or vacuum sediment from access points, dispose of waste properly, and flush piping until water runs clear.
Record cleaning date and observations.
When to pump out or replace media
Determine the need to pump out or replace media based on measurable signs of reduced infiltration and material degradation rather than on a fixed calendar alone.
Inspect biannually and after heavy storms; record infiltration rates. Consider pumping when flow drops considerably or when sediment depth and odors indicate clogging.
Replace media if crushed, contaminated, or biologically bound beyond recovery.
- Reduced infiltration rate
- Excess sediment depth
- Foul odors or discoloration
- Visible media breakdown
Common Mistakes to Avoid
Common errors include undersizing the system, skipping soil percolation or utility checks, and using improper backfill or omitting filter fabric.
Failing to test soil or mark utilities can lead to poor performance or dangerous damage.
Connecting sewage or contaminated runoff is strictly prohibited and compromises both function and safety.
Wrong sizing or undersized system
When a dry well is undersized, runoff exceeds its storage and infiltration capacity, causing surface pooling, soil saturation, and potential damage to foundations or landscaping.
Incorrect capacity calculations or ignoring peak flow events lead to frequent overflow, erosion, and clogged discharge paths. Repair costs and retrofits rise.
Properly sizing based on roof area, drainage area, and expected storm intensity prevents system failure and reduces maintenance.
Ignoring soil/percolation tests and utility lines
If soil percolation and the location of underground utilities are not checked before installation, a dry well can fail quickly or create safety hazards.
Skipping percolation tests risks poor drainage, flooding, and premature system collapse.
Ignoring utility maps can sever cables, pipes, or gas lines, causing costly repairs, legal liability, and danger.
Proper testing and locates are essential to safe, effective installation.
Using improper backfill or skipping filter fabric
Using incorrect backfill materials or omitting filter fabric undermines a dry well’s functionality and longevity.
Coarse, unstable fill or native silts clog voids and reduce infiltration. Without geotextile separation, fines migrate, causing interior sedimentation and collapse risks.
Properly graded aggregate and a durable filter fabric maintain permeability, structural support, and prevent premature failure, preserving designed drainage capacity and reducing maintenance.
Connecting prohibited sources (sewage, contaminated runoff)
Many homeowners mistakenly route household sewage or chemically contaminated runoff into dry wells, a practice that undermines groundwater quality and violates health codes.
The installer should never connect toilets, sinks, industrial wastes, or pesticide-laden runoff to a dry well. Such contamination risks public health, legal penalties, and system failure.
Proper separation, licensed plumbing, and local permit compliance are mandatory safeguards.
Alternatives and Upgrades
The section compares rain gardens, dry swales, and infiltration trenches as alternatives to traditional dry wells, noting trade-offs in space, maintenance, and filtration capacity.
It also outlines common upgrades such as adding overflow routes and inspection ports to improve performance and access.
Finally, it briefly covers pretreatment options—catch basins and sediment traps—to protect system longevity.
Rain gardens, dry swales, and infiltration trenches comparison
Several common low-impact alternatives to a dry well—rain gardens, dry swales, and infiltration trenches—offer distinct ways to manage runoff by promoting infiltration and slowing flow. Each suits different slopes, soil types, and space constraints; maintenance and planting differ accordingly.
| Option | Best Use | Maintenance |
|---|---|---|
| Rain garden | Flat to mild slope | Seasonal planting, weeding |
| Dry swale | Linear conveyance | Debris removal, occasional grading |
| Infiltration trench | Limited space | Sediment removal, inspection |
Adding overflow routes, inspection ports, and pretreatment (catch basins, sediment traps)
Beyond choosing among rain gardens, swales, or trenches, designers should plan how a dry well system handles excess flow, routine access, and incoming sediment.
Include overflow routes to divert surge to storm drains or surface outlets.
Install inspection ports for visual checks and maintenance.
Add pretreatment like catch basins and sediment traps to capture debris, prolong infiltration, and reduce clogging risk.
Cost-Benefit and When to Hire a Professional
A cost-benefit assessment weighs the lower upfront cost of DIY against risks such as improper installation, voided warranties, and long-term repair expenses.
Professional installation adds certainty and warranty protection but carries higher labor costs.
Contractors are recommended when site conditions include bedrock, a high water table, or complex grading that increase failure risk.
DIY vs professional installation risks and warranty considerations
When weighing whether to DIY or hire a professional for a dry well installation, homeowners should balance upfront savings against potential risks and the value of warranties.
DIY saves labor costs but raises liability for mistakes, permits, and long-term performance.
Professionals offer insured workmanship, manufacturer warranties, and code compliance—often reducing future repair expenses.
Warranty terms and contractor credentials merit careful review before deciding.
Signs you should hire a contractor (bedrock, high water table, complex grading)
If site conditions include shallow bedrock, a high water table, or steep, irregular grading, hiring a contractor is usually the prudent choice; these factors complicate excavation, drainage design, and permit compliance in ways that increase the risk of failure for an inexperienced installer.
A professional assesses soil, designs appropriate infiltration capacity, manages dewatering, stabilizes slopes, secures permits, and provides liability coverage and workmanship guarantees.
Quick Checklist and Sizing Calculator Guidance
A concise pre-installation checklist covers permits, required tools, and basic safety precautions to confirm readiness before any excavation.
A simple sizing formula—estimating required dry well volume from roof area and local rainfall intensity—is presented with a clear example calculation.
This guidance helps homeowners verify capacity needs and prepare paperwork and equipment prior to installation.
Pre-installation checklist (permits, tools, safety)
Preparation assures the dry well functions as designed and complies with local requirements. A concise pre-installation checklist verifies permits, proper tools, and safety measures are addressed before excavation.
- Verify permits, utility locates, and zoning rules.
- Gather tools: shovel, level, pipe fittings, gravel.
- Confirm PPE: gloves, eye protection, boots.
- Plan traffic control and emergency contact procedures.
Simple sizing formula and example calculation
With permits, tools, and safety confirmed, attention shifts to sizing the dry well to handle expected runoff.
Use volume = area × rainfall depth × runoff coefficient. Convert to cubic feet (1 inch = 0.0833 ft).
Divide required volume by effective storage per dry well to determine needed wells or dimensions.
Example: 1,000 ft² × 1″ × 0.8 = 66.64 ft³; choose capacity accordingly.
Resources and Further Reading
The article points readers to local building code resources and permit application links to guarantee compliance before beginning work.
It also lists recommended suppliers and specific product specifications for dry wells, pipe, and filtration materials.
These references support safe, code-compliant material selection and permit navigation.
Local building codes and permit links
Before beginning any excavation or installation, homeowners should verify local building codes and permit requirements to guarantee the dry well complies with setback, stormwater, and erosion-control regulations.
Consult municipal planning or public works departments, county soil and water conservation districts, and state environmental agencies for permit applications, conditional approvals, and inspection schedules.
Provide site plans, drainage calculations, and contractor credentials as required.
Recommended suppliers and product specifications
Resources: a concise list of reputable suppliers and clear product specifications helps guarantee a durable, code-compliant dry well system.
Recommended manufacturers include ADS, NDS, and Infiltrator; local landscape suppliers and plumbing wholesalers are useful.
Specify high-density polyethylene or corrugated polypropylene chambers, geotextile filter fabric, crushed stone aggregate (¾–1½ inch), and ASTM-compliant components.
Confirm material warranties and local code conformity before purchase.
Conclusion
A dry well provides a practical solution for dispersing stormwater, and a homeowner can often install one with proper preparation and tools. Like a sponge quietly absorbing a spill, it reduces surface runoff and protects foundations when sited and sized correctly. Attention to local codes, soil conditions, and gravel/backfill quality secures functionality. For complex terrain, high water tables, or larger drainage needs, consulting or hiring a professional is recommended to assure long-term performance.