How to Clear a Clogged Drain Without a Snake: 9 Simple DIY Methods That Work
If you’re facing a clogged drain and don’t have a snake, there are several effective DIY methods you can try. Begin by ensuring safety and removing any visible debris. You can use a plunger, flush the drain with boiling water, or combine baking soda and vinegar. Other options include a salt-baking-soda mix, a straightened wire hanger, a wet/dry vacuum, enzyme cleaners, manually removing the P-trap, or creating a homemade auger. Choose the method based on the location and type of clog—be it hair, grease, or organic material. Always wear gloves and exercise caution with chemicals. If the clog persists, it may be time to call a professional. Detailed instructions for each method follow.
What to do first when a drain is clogged and you don’t have a snake
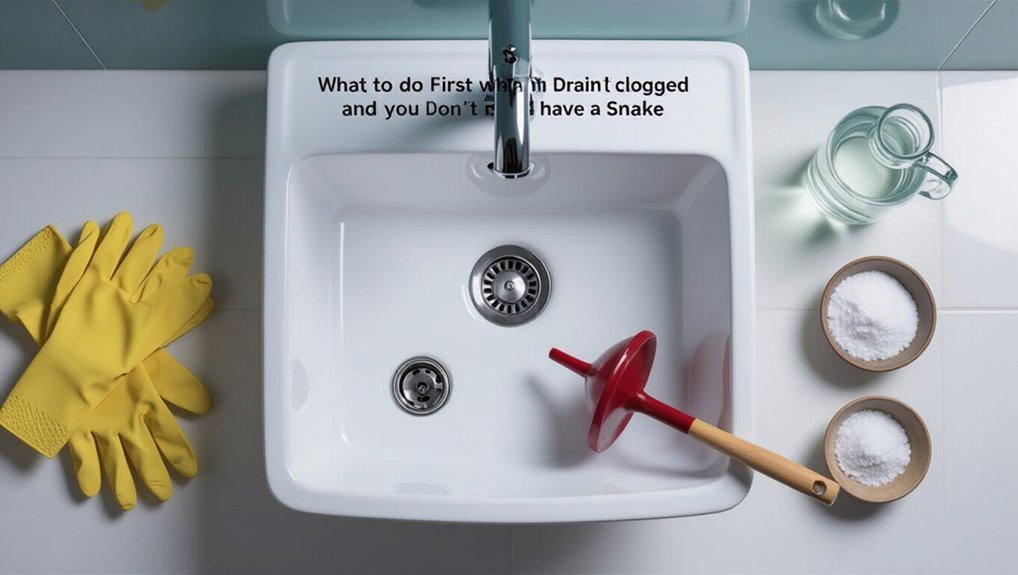
Before attempting any repairs, the person should perform basic safety checks, such as turning off water supply and avoiding electrical contacts.
Next, they should gather simple tools and household items like gloves, a plunger, a bucket, and a pair of adjustable pliers.
Finally, a quick assessment of the clog—identifying whether it is slow-draining, fully blocked, or emitting odors—will guide the appropriate next step.
Quick safety checks before attempting any fix
When a drain clogs and no snake is available, the first priorities are evaluating hazards and stopping further damage: turn off nearby water sources, remove electrical appliances or unplug outlets near the affected area, and check for signs of leaking or backflow that could cause flooding.
The person then assesses disease risks, ventilates if chemical cleaners were used, and wears gloves while considering how to clear a clogged drain without a snake.
Tools and common household items to gather
A few basic tools and household items can make clearing a clogged drain without a snake safer and more effective: rubber gloves, a plunger, a bucket, adjustable pliers, and a flashlight to inspect hard-to-see areas.
Also useful are a cloth or rag, sealable container for removed debris, white vinegar and baking soda for mild clogs, and a wire coat hanger straightened for simple snagging.
How to assess the type and severity of the clog
How can the source and severity of a clog be identified quickly and safely?
Observe flow: slow drain versus standing water indicates partial or full blockage.
Listen for gurgles or bubbling in nearby fixtures.
Remove visible debris from the stopper or grate.
Test other fixtures to locate shared vs. localized clogs.
Note odors and recent disposal of grease, hair, or solids for likely causes.
Nine effective DIY methods to clear a clogged drain without a snake
Homeowners can try several simple, tool-free techniques before calling a plumber to address a clogged drain. The following methods are widely recommended for sinks and tubs and can often dislodge common blockages quickly and safely.
Each method requires minimal materials and basic precautions to avoid damage.
- Boiling water flush; baking soda and vinegar reaction; salt and baking soda combination
- Plunger use for sinks and tubs
- Wire hanger or DIY inlet tool
Method 1 Boiling water flush
Boiling water flush is most effective for clearing soft, grease-based clogs in kitchen sinks and slow-draining tubs.
It should be avoided for PVC pipes that can warp, recently repaired joints, or drains with suspected grease buildup that has hardened into a solid mass.
A clear step-by-step technique—bringing water to a boil, carefully pouring in stages, and testing the flow between pours—will be outlined next.
When it works best and when to avoid it
Although simple, a hot water flush is most effective for slow drains caused by soap scum, toothpaste residue, and light grease buildup in metal or PVC pipes; it should be avoided for toilets, deeply packed clogs, or pipes with plastic fittings that might soften under high heat.
It works best as a first, low-risk attempt but won’t clear hair tangles, mineral scale, or foreign objects and risks damaging vulnerable materials.
Step-by-step technique
Begin by heating water to a rolling boil.
Then carefully pour it directly down the drain in two to three stages, allowing several seconds between pours for the hot water to work through soap scum and mild grease buildups.
Follow with cold water to solidify dissolved grease, test drainage, and repeat once if needed.
Use caution with PVC and older pipes.
Method 2 Baking soda and vinegar reaction
For the baking soda and vinegar method, the article specifies the typical materials and proportions needed: about half a cup of baking soda followed by half to one cup of white vinegar.
It explains the timing for the fizzing reaction and recommends waiting 15–30 minutes before flushing with hot water, noting when repeated applications may be necessary.
The discussion also covers how many cycles to try and when to move on to alternative methods.
Materials and proportions
Needed materials are minimal and commonly found: about 1 cup (240 ml) of baking soda, 1 cup (240 ml) of white vinegar, a kettle or pot of boiling water (about 1–2 liters), a measuring cup or spoon, and a plug or rag to seal the drain. Quantities suit typical household drains; scale proportionally for multiple drains. Use white vinegar, not colored varieties, for predictable reaction.
Timing and repeated application
After measuring the baking soda and white vinegar and heating the water, attention turns to timing and repeat use to get the best result from the chemical reaction.
Allow fizzing for at least fifteen minutes before flushing with hot water. If partial clearing occurs, repeat the sequence up to three times, spacing attempts several hours apart and checking flow between applications to avoid overuse.
Method 3 Salt and baking soda combination
The salt and baking soda combination works by adding abrasive and desiccating action to the mild alkaline cleaning of baking soda alone, often improving grease and residue breakdown.
To use it, pour about half a cup of baking soda followed by half a cup of salt into the drain, flush with hot water, and let the mixture sit.
Waiting times commonly range from 15 minutes for light clogs to several hours or overnight for tougher build-up.
How it differs from baking soda alone
Combining salt with baking soda changes the reaction dynamics and mechanical action compared with using baking soda alone: salt adds abrasive grit that helps physically scour soft buildup while altering the chemical environment so the baking soda’s fizzing is more focused on loosening debris than simply producing bubbles.
The blend improves mechanical scrubbing, reduces reliance on vigorous chemical foaming, and can enhance dislodging greasy or compacted residues.
Procedure and waiting time
Following the explanation of how salt alters both the chemical and mechanical action of baking soda, the procedure and timing are laid out to maximize effectiveness:
Pour half a cup baking soda, then half a cup coarse salt into the dry drain.
Follow with one cup hot (not boiling) water, wait 30–60 minutes for reaction and softening, then flush with hot water or run the tap to clear loosened debris.
Method 4 Plunger use for sinks and tubs
For sinks and tubs, selecting a plunger with the proper cup shape and creating a tight seal over the drain are the first priorities.
The correct plunging technique—steady, forceful thrusts with occasional breaks to test flow—maximizes chances of clearing the blockage.
The following steps outline a clear, safe sequence for effective plunging.
Choosing the right plunger and seal technique
Select a plunger sized and shaped for the fixture and focus on achieving an airtight seal before plunging. A cup plunger suits sinks and tubs; a flange plunger fits toilets.
Inspect the rubber for cracks and clean the rim. Use a wet cloth or dampen the rubber to improve suction.
Position centrally over the drain and guarantee no air gaps before applying force.
Step-by-step plunging method
Once the proper plunger and seal are in place, begin plunging with steady, controlled strokes to dislodge the blockage.
Maintain a firm seal, plunge vertically for 20–30 seconds, then pause to check drainage.
Repeat up to five cycles.
If improvement occurs, run hot water to flush residue.
If not, consider alternate methods or professional assistance.
Method 5 Wire hanger or DIY inlet tool
A straightened wire hanger can be shaped into a simple inlet tool to fish hair and debris from near-surface clogs while avoiding the expense of a plumbing snake.
Instructions should emphasize safely removing the hanger’s coating, forming a small hook, and using gentle, controlled motions to prevent snagging.
The discussion must also cover precautions—such as not forcing the tool, avoiding thin or corroded pipes, and wearing gloves—to reduce the risk of pipe damage and injury.
How to safely craft and use a straightened hanger
Straighten a basic wire coat hanger and fashion a small hook at one end to create a simple, stiff probe for dislodging hair and debris from a drain.
Bend remaining wire into a comfortable grip, smooth sharp edges with pliers, and insert gently into the pipe.
Probe and withdraw slowly to capture clogs, transfer debris to a container, and repeat until flow improves, then dispose of waste properly.
Precautions to avoid damaging pipes
Several simple precautions can prevent accidental pipe damage when using a wire hanger or DIY inlet tool.
Use gentle motions, avoid forcing the tool past resistance, and keep bends smooth to prevent scraping.
Pad sharp edges with tape, limit insertion depth to visible blockage, and wear gloves and eye protection.
Stop if corrosion, leaks, or unusual sounds appear and consult a professional.
Method 6 Wet/dry vacuum or shop vac
A wet/dry vacuum can dislodge clogs by alternating suction and blow modes when properly set up with a sealed hose over the drain or removed tailpiece.
Users should be advised to wear eye and hand protection, avoid electrical hazards, and expect partial to full clearing depending on clog type and proximity.
Proper sealing and technique determine success and reduce the need for chemical cleaners or professional intervention.
Setup, suction vs. blow modes, and sealing tips
Before using a wet/dry vacuum, assemble the setup and decide whether to use suction or blow mode based on the clog type.
Then create an airtight seal around the hose to maximize pressure transfer.
Position hose directly over the drain, use appropriate attachments, plug overflow or adjacent openings, and wrap rags or a rubber gasket to seal.
Choose blow for dislodging, suction for extraction.
Safety notes and expected results
After preparing the vacuum setup and choosing suction or blow mode, attention should turn to safety and realistic outcomes when using a wet/dry vacuum on a clog.
Wear eye protection, gloves, and avoid chemical residue; guarantee electrical connections stay dry.
Expect partial to full clearing for loose debris or standing water; dense hair or deep blockages may require repeat attempts or professional tools.
Method 7 Enzyme or bacterial drain cleaners
Enzyme and bacterial drain cleaners use living organisms or their enzymes to break down organic matter gradually, unlike caustic chemical cleaners that dissolve clogs through harsh reactions.
They are best suited for organic build-up in slow drains and for regular maintenance rather than fast-acting emergency clearing.
Compared with chemical alternatives, enzyme products are generally safer for pipes, septic systems, and the environment, though they require longer contact time and specific temperature ranges to be effective.
How enzyme cleaners work vs. chemical ones
Distinguishing between biological and chemical drain cleaners helps homeowners choose the safest, most effective option for a clogged pipe.
Enzyme or bacterial cleaners release enzymes and microbes that digest organic matter slowly and require time and warm conditions.
Chemical cleaners use strong caustics or oxidizers to dissolve or break clogs quickly but can corrode pipes and harm fixtures and skin.
Best-use cases and environmental/safety considerations
Several situations favor enzyme or bacterial drain cleaners: slow, recurring clogs from hair, soap scum, food residue, or organic buildup in older plumbing and septic systems where gentle, non-corrosive action is needed.
They are safest for pipes, septic tanks, and aquatic environments when used per instructions.
Avoid mixing with chemical cleaners, store away from extremes, and allow time for biological activity to work effectively.
Method 8 Manual trap removal and cleaning (P-trap)
This section outlines the tools required and a step-by-step procedure for removing a P-trap, including which wrenches, bucket, and gloves to have on hand.
It then explains how to inspect the trap for hair, grease, and debris, the proper cleaning techniques, and how to check seals and washers before reassembly.
Finally, it covers correct reinstallation, leak testing, and simple troubleshooting if the drain remains slow.
Tools needed and step-by-step removal
Gather the right tools before attempting manual P‑trap removal: a bucket, adjustable pliers or a wrench, channel‑lock pliers for stubborn slip nuts, a stiff brush or old toothbrush, plumbers’ putty or thread tape for resealing if needed, and gloves and rags to manage water and debris.
Turn off water, place the bucket under the trap, loosen slip nuts, lower trap carefully, empty contents into bucket, and wipe fittings.
How to inspect, clean, and reinstall the trap
Inspect the removed P‑trap carefully before cleaning to locate the source of the clog and any signs of damage.
Empty debris into a bucket, scrape soft buildup with a brush, and flush with hot water and mild detergent.
Check washers and threads; replace cracked or corroded parts.
Reassemble hand-tight, then snug with pliers, test for leaks, and retighten if necessary.
Method 9 Homemade drain auger using plastic tubing or PVC
The next method outlines how to fashion a simple drain auger from plastic tubing or PVC, listing required materials and step-by-step construction.
It also explains proper techniques for feeding and rotating the auger to dislodge blockages while minimizing pipe damage.
Safety precautions and tips for effective use are summarized to reduce injury and prevent leaks.
Materials and construction steps
For this homemade drain auger using plastic tubing or PVC, list only the essential materials and outline each construction step in clear, sequential order so a reader can build the tool safely and efficiently.
Materials:
- flexible plastic tubing or thin PVC
- sturdy wire or coat hanger
- screwdriver
- utility knife
- tape
- pliers.
Steps:
- Cut tubing.
- Straighten wire.
- Create hooked tip.
- Insert wire into tubing.
- Secure with tape.
- Trim excess.
How to use it safely and effectively
After assembling the homemade auger from tubing and a wired core, a user should focus on safe, controlled operation to push or retrieve the clog without damaging pipes or causing injury.
Wear gloves and eye protection, work slowly, feed tubing gently, rotate minimally to avoid kinks, and stop if resistance feels sharp.
Flush with hot water afterward and inspect for leaks before finishing.
How to choose the right method based on location and clog type
Choosing a clearing method depends on fixture location and the clog’s composition, since bathroom sink, kitchen sink, and shower/tub setups have different trap shapes and typical blockages.
Organic hair and soap scum respond well to enzymatic cleaners or a plumbing snake.
Grease in kitchen drains usually requires hot water and degreasing agents or manual removal.
Solid debris may need mechanical extraction.
Methods can be combined cautiously for stubborn clogs, but mechanical approaches should stop if damage or sewer odors appear, signaling a need for professional help.
Bathroom sink vs. kitchen sink vs. shower/tub differences
Because drain location and debris type determine both access and likely causes, selecting a clearing method depends on whether the clog is in a bathroom sink, kitchen sink, or shower/tub.
Bathroom sinks often involve hair and soap scum—easy to access via pop-up or trap.
Kitchen sinks may require addressing food and grease near the trap or disposal.
Showers/tubs usually need hair removal and surface plunging.
Organic vs. grease vs. debris clogs: recommended approaches
Determine the clog type before selecting a method: organic blockages (hair, soap, plant matter), grease buildup, and miscellaneous debris (food particles, small objects, mineral scale) each respond best to different treatments.
For organic clogs, manual removal, drain plugs, or enzyme cleaners work well.
Grease needs hot water, degreasing agents, or biodegradable solvent.
Debris often clears with mechanical agitation, a wet vacuum, or targeted flushing.
When to combine methods and when to stop
After identifying whether a clog is organic, grease-based, or caused by debris, the next step is deciding if a single technique will suffice or a combination is required based on where the blockage sits and how it behaves.
Combine mechanical (plunger, drain snake alternatives) with enzymatic or hot-water treatments for soft, accessible clogs.
Stop and call a pro if odors, slow drainage persists, or fixtures back up.
Signs that the clog is more serious and requires professional help
Persistent backups, foul odors, or simultaneous slow drains in multiple fixtures often indicate a deeper or widespread blockage that needs professional assessment.
Attempting aggressive DIY fixes—chemical drain cleaners, forceful snaking, or disassembling traps without experience—can damage pipes or push problems further into the main line.
Homeowners should note when symptoms began, which fixtures are affected, and any recent changes or repairs to relay to a plumber for faster diagnosis.
Persistent backups, multiple fixtures affected, and odors
When water repeatedly backs up, several fixtures drain slowly at once, or foul odors persist, these are clear indicators the blockage lies beyond a simple trap and likely requires a professional plumber.
Such symptoms suggest a mainline clog, sewer line problem, or venting issue that DIY fixes will not reliably resolve.
Immediate professional assessment prevents health hazards, property damage, and recurring failures by identifying root causes and recommending corrective repairs.
Risks of DIY attempts that can worsen problems
Attempting complex drain repairs without proper tools or training can transform a manageable clog into a costly, hazardous problem.
DIY efforts risk pipe damage, dislodged blockages causing wider backups, chemical burns from mislabeled cleaners, and hidden leaks that lead to mold or structural harm.
If plunging, simple snaking, or basic cleaners fail, or if sewage odors persist, professional assessment is advised.
What to tell a plumber to speed diagnosis
If basic remedies fail or signs point beyond a simple clog, providing clear details to a plumber can speed diagnosis and reduce repair time.
Note persistent foul odors, gurgling sounds, multiple fixtures affected, slow drains after plunging, backups into other drains, sewage smells, visible leaks, recent DIY attempts, and any unusual noises.
Mention pipe age and prior repairs to prioritize camera inspection.
Preventive measures to reduce future clogs
Preventive measures focus on everyday habits, simple hardware upgrades, and scheduled upkeep to keep drains flowing.
Recommended daily and weekly practices include clearing hair and food debris, running hot water, and using enzyme cleaners periodically.
Installing strainers or improved trap designs and arranging routine professional inspections can greatly reduce recurrence.
Daily and weekly habits to keep drains clear
While small habits may seem insignificant, consistent daily and weekly care dramatically reduces the chance of clogs forming.
Wiping sink edges, rinsing food particles into a compost bin, and running hot water after use prevent buildup.
Weekly flushes with boiling water or a baking soda–vinegar cycle clear residues.
Periodic removal of visible hair and debris from stoppers maintains steady flow and reduces blockages.
Simple hardware upgrades and strainers to install
Several straightforward hardware upgrades and strainers can greatly reduce the likelihood of future clogs.
Install fine-mesh sink strainers, tub/shower drain covers, and hair catchers to trap debris.
Replace old pop-up stoppers with removable models for easier cleaning.
Fit a basket trap under sinks to catch solids and consider a dishwasher inlet filter.
Choose stainless or silicone for durability and easy maintenance.
When to schedule routine maintenance
After installing strainers and improved hardware, homeowners should establish a routine maintenance schedule to keep drains flowing and catch problems early.
Monthly visual checks, quarterly enzyme treatments or hot-water flushes, and biannual professional inspections for older plumbing help prevent buildup.
Increase frequency if slow drainage, odors, or frequent soap scum occur.
Document actions and adjust timing based on usage and household size.
Troubleshooting common problems after DIY clearing
If a drain remains slow after treatment, the next steps include repeating the cleaning with a mechanical auger or inspecting the trap and vent for deeper obstructions.
If leaks or damage are discovered during repair, immediate actions should focus on shutting off water, containing leaks, and evaluating whether parts require replacement or professional repair.
For recurring clogs, deeper cleaning options such as camera inspection, mainline snaking, or hydro-jetting should be considered.
Slow drain persists after treatment next steps
When a drain remains sluggish despite initial DIY efforts, the next steps focus on diagnosing whether the issue is partial blockage, trapped air, or a deeper fixture or sewer-line problem.
This begins with simple checks—running hot water, testing multiple fixtures, and inspecting the P-trap—before escalating to mechanical clearing, camera inspection, or professional service.
If flow improves, monitor; if not, document symptoms and escalate promptly.
Leaks or damage discovered during repair immediate actions
A few common scenarios—cracked trap arms, pinhole leaks at fittings, or damaged tailpieces—require immediate containment and assessment before continuing repairs.
Stop water, place a bucket, and dry the area.
Tighten accessible fittings; if leak persists or damage is structural, replace the faulty section.
Document condition, note parts needed, and consult a professional if unsure or if repairs exceed basic DIY capability.
Handling recurring clogs: deeper cleaning options
After addressing immediate leaks or replacing visibly damaged sections, recurring clogs require a different level of intervention that targets buildup deeper in the drainage system.
Professional-grade enzyme cleaners, extended hot-water flushes, and repeat mechanical agitation (manual auger alternatives) can reduce persistent residue.
Inspect traps and vents, consider hydro-jetting by a pro for severe obstructions, and schedule periodic maintenance to prevent recurrence.
Quick reference: methods compared at a glance
A concise comparison helps the reader choose a method based on situation, cost, speed, safety, and likely effectiveness. The table below presents key options side by side for quick scanning. Use it as a snapshot before selecting a technique.
| Method | Best for | Cost |
|---|---|---|
| Plunger | Minor blockages | Low |
| Drain snake | Hair and solid clogs | Low–Medium |
| Chemical cleaner | Grease and organic buildup | Low–Medium |
Table columns: Method, Best for, Cost, Time to work, Safety concerns, Effectiveness
Organize the quick-reference table into six clear columns—Method, Best for, Cost, Time to work, Safety concerns, and Effectiveness—to allow fast comparison of common drain-clearing options.
Each row summarizes a technique (plunger, baking soda/vinegar, boiling water, enzyme cleaner, manual removal, chemical drain cleaner).
Indicate typical costs, expected response time, main hazards, and relative success rates for quick, practical decision-making.
Step-by-step checklists for each method
A concise set of checklists helps readers follow each unclogging method safely and efficiently.
The section will present clear, ordered steps for common approaches and note necessary tools and precautions. Readers can quickly choose the checklist that matches their situation and begin.
- Plunging, baking soda/vinegar, trap removal
- Wet/dry vacuum use, safety gear, disposal
- Tools list, troubleshooting tips, when to call a pro
Checklist for plunging
Several clear steps guarantee plunging is effective and safe: gather tools (plunger, gloves, bucket, rag), remove standing water if it’s too high, create a tight seal, use controlled thrusts, and test drainage periodically.
Place rag around overflow, position plunger vertically, start with slow pumps to dislodge air, increase force if needed, clear debris, pour water to confirm flow, repeat once if necessary.
Checklist for baking soda/vinegar
When using baking soda and vinegar to clear a drain, follow a concise, sequenced checklist to guarantee a safe and effective reaction:
gather supplies and protective gloves;
remove visible debris;
pour 1/2 cup baking soda into the dry drain;
add 1 cup vinegar slowly;
cover drain and wait 15–30 minutes;
flush with hot water;
repeat once if needed;
ventilate area.
Checklist for trap removal
Although some traps can be cleared without tools, removing the P-trap or S-trap is often the most reliable way to access and clear clogs.
The following checklists outline step-by-step procedures for common trap types, emphasizing safety, containment, and proper reassembly.
Gather tools, shut off water, place bucket, loosen slip nuts, drain and inspect, remove debris, clean parts, replace washers, hand-tighten, test for leaks.
Checklist for wet/dry vacuum use
Prepare the wet/dry vacuum by selecting the correct attachments, sealing any gaps, and positioning a receptacle to catch expelled water and debris.
The following checklist breaks the process into concise, safety-focused steps covering machine setup, suction testing, clog removal, and cleanup.
Verify power and ground-fault protection, set to wet mode, attach hose and adapter, test suction, attempt brief pulls, clear loosened debris, flush drain, empty and sanitize tank, store equipment.
Conclusion
When a stubborn clog is met with a quiet sink and no snake, small acts—pouring boiling water, plunging, or fishing out gunk with a bent wire—stand ready. The ordinary tools contrast with the sudden relief of flowing water: domestic improvisation against microscopic obstruction, calm persistence against the small panic of stoppage. Each simple method is a practiced breath, restoring movement and order, reminding one that minor domestic crises often yield to patient, resourceful care.