How to Paint an Acrylic Bathtub: Step-by-Step Guide for a Durable, Professional Finish
To successfully paint an acrylic bathtub, you need to refinish it using a specialized process that involves resurfacing the existing finish with proper cleaners, repairs, primer, and a durable two-part topcoat instead of regular paint. This ensures a long-lasting and professional look. The process includes degreasing, sanding or etching the surface, filling any chips, applying a compatible primer, and carefully applying a thin, even coat of epoxy or urethane. Make sure to allow for adequate flash time and ensure proper ventilation. Allow the tub to cure fully before use, and test the adhesion to confirm a successful finish. Further guidance on tools, timing, troubleshooting, and when to consider hiring a professional is provided below.
What Painting an Acrylic Bathtub Entails and When to Consider It
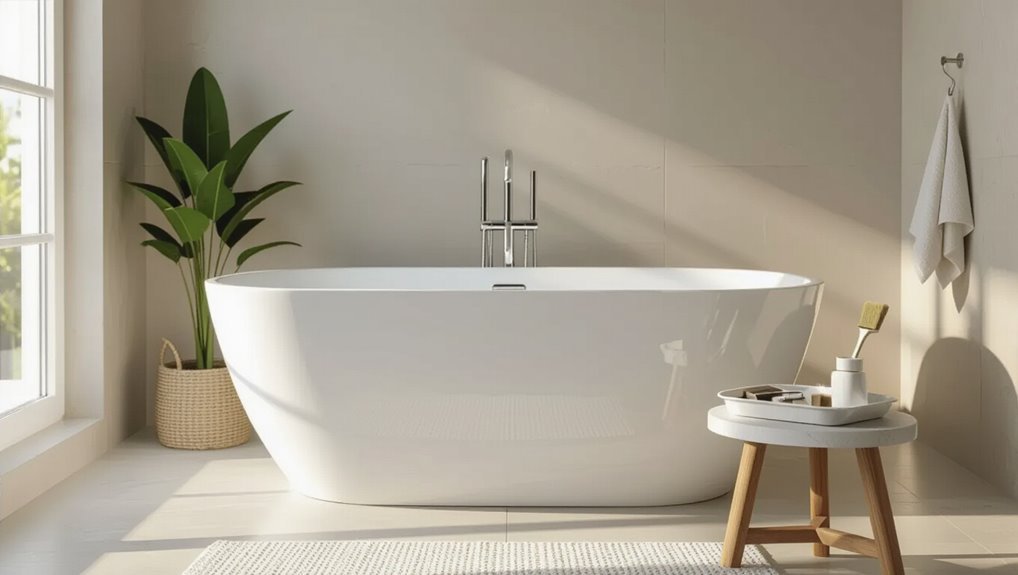
“Painting” an acrylic bathtub typically refers to resurfacing or reglazing to restore finish and color rather than applying ordinary house paint.
Indicators that a tub needs refinishing include persistent scratches, staining, loss of gloss, or peeling of the original coating.
Options range from a homeowner DIY kit—cheaper but riskier and shorter-lived—to hiring a professional for more durable, warranty-backed results.
What “painting” an acrylic bathtub means resurfacing vs. reglazing
Reviving an aging acrylic bathtub can mean one of two distinct processes: resurfacing or reglazing.
Resurfacing involves removing old coatings, repairing gouges, then applying durable acrylic compounds for structural restoration.
Reglazing, often called refinishing, applies a thin enamel or epoxy topcoat over a cleaned surface for cosmetic renewal.
Both relate to how to paint an acrylic bathtub, differing in depth and longevity.
Signs your acrylic bathtub needs repainting or refinishing
Recognize the warning signs early: an acrylic bathtub that shows discoloration, persistent staining, surface scratches, peeling or flaking finishes, or areas where water beads inconsistently is a candidate for repainting or refinishing.
Additional indicators include dull, worn gloss, hairline cracks, exposed fiberglass, or chemical etching. Frequent cleaning failures, mildew embedded in pores, or chips revealing substrate also justify resurfacing to restore appearance and protect structure.
Pros and cons of DIY painting vs. hiring a pro
After identifying signs that an acrylic bathtub needs attention, the next decision is whether to attempt a DIY repaint or hire a professional.
The choice balances cost, time, skill level, and risk. DIY saves money but demands careful prep and may void warranties; pros offer speed, durable results, and guarantees.
- Cost versus quality tradeoff
- Time and inconvenience
- Skill and equipment requirements
- Warranty and liability considerations
Materials, Tools, and Safety Equipment You’ll Need
For a successful refinishing job, the guide outlines suitable coatings—two-part epoxies, acrylic urethanes, and purpose-made tub-and-tile kits—along with the pros and cons of brush, roller, and spray applications.
It then lists essential tools and supplies such as sanders, abrasive pads, tack cloths, brushes and rollers, and optional spray equipment.
Finally, it covers required safety gear and ventilation practices, including respirators, eye protection, and proper exhaust to control fumes.
Recommended paint and coating types for acrylic tubs (epoxy, acrylic urethane, tub and tile refinishing kits)
Selecting the right coating is essential to achieving a durable, attractive finish on an acrylic tub. Common options include two-part epoxies, acrylic urethane paints, and purpose-made tub-and-tile refinishing kits, each offering different levels of adhesion, chemical resistance, and application complexity.
Epoxy provides toughness and chemical resistance. Urethane offers UV stability and smoothness. Kits simplify prep and curing.
- Two-part epoxy: high durability
- Acrylic urethane: UV resistant
- Refinishing kits: user-friendly
- Curing times and VOCs: vary
Required tools and supplies (sanders, abrasives, respirator, tack cloths, brushes, rollers, spray gun options)
A compact set of quality tools and safety gear makes acrylic bathtub refinishing efficient and safe: sanders (random-orbit or palm), a selection of abrasives (80–400 grit), clean tack cloths, high-density foam rollers or a solvent-resistant brush, and a spray gun for professional jobs.
Essential extras include mixing sticks, strainers, masking materials, and disposal containers.
- Variable-speed sander
- Assorted sandpaper
- Foam rollers/brushes
- HVLP spray option
Safety gear and ventilation considerations
Because refinishing involves solvents, dust, and fine particulates, proper personal protective equipment and effective ventilation are essential to prevent respiratory and skin exposure.
Use a NIOSH-approved respirator with appropriate cartridges, chemical-resistant gloves, eye protection, and disposable coveralls.
Guarantee cross-ventilation, exhaust fans, and filtration or a vapor scrubber for confined spaces.
Monitor air, follow product SDS, and avoid ignition sources.
Preparing the Bathroom and Bathtub for a Durable Finish
Before painting, the bathtub and surrounding area must be inspected and prepared to guarantee the new finish bonds and lasts. This includes step-by-step repair of chips, cracks, and hairline fractures.
Thorough cleaning and degreasing to remove soap scum, oils, and mildew is essential. Additionally, progressively sanding and etching the acrylic with the correct grit sequence for adhesion is necessary.
All nearby surfaces, fixtures, and drains should be carefully masked and protected to prevent overspray and contamination.
How to assess and repair surface damage (chips, cracks, hairline fractures) step-by-step
Inspect the tub systematically to identify chips, hairline fractures, and deeper cracks, noting their size, location, and whether they penetrate to the substrate.
Record defects, sand surrounding areas to feather edges, clean dust, and apply appropriate filler or epoxy per manufacturer instructions.
For through-cracks, reinforce with backing and multiple epoxy layers.
Sand smooth, re-evaluate, and mask repaired zones before priming.
Proper cleaning and degreasing to remove soap scum, oils, and mildew
Start by stripping the surface of visible residues—soap scum, body oils, and mildew—so the primer and paint can bond uniformly.
Use a nonabrasive mildew cleaner or diluted bleach solution, rinse thoroughly, then apply a citrus- or solvent-based degreaser to dissolve oils.
Wipe with lint-free cloths, repeat until no film remains, and finish with a final water rinse and complete air-dry before priming.
Sanding and etching acrylic for adhesion grit sequence and technique
Prepare the acrylic surface by mechanically abrading and chemically etching to create a consistent profile that promotes primer and paint adhesion.
Lightly sand with 320–400 grit, follow with 600 grit for feathering edges, then clean residue.
Apply an appropriate plastic etch or mild acid per manufacturer instructions, rinse thoroughly, and allow full drying.
Inspect for uniform dullness before priming.
Masking and protecting surrounding surfaces, fixtures, and drains
Before any primer or paint is applied, all adjacent surfaces, fixtures, and drains must be carefully masked and protected to prevent overspray, drips, and accidental damage.
Protective measures include sealing edges, covering hardware, and using barrier films. Proper masking guarantees clean lines and easy cleanup.
- Use painter’s tape rated for trim and silicone
- Apply plastic sheeting anchored with tape
- Plug and seal drains
- Remove or cover fittings
Step-by-Step Painting Process for a Professional Finish
The step-by-step painting process begins with final prep—tack clothing, thorough dust removal, and choosing the appropriate primer for acrylic.
Next come primer application, drying times, and tips for even coverage, followed by mixing and thinning the topcoat to suit spraying or rolling.
Finally, application technique (spray vs roller vs brush), stroke patterns, wet-edge control, recommended coat counts, and cure intervals determine a professional, durable finish.
Step 1 Final prep: tack cloth, dust removal, and primer selection
Begin by removing all loose particles and surface oils so the new coating can bond uniformly; a tack cloth followed by a lint-free wipe with a solvent like isopropyl alcohol is standard.
Inspect for remaining dust, rinse and dry thoroughly, then scuff-sand glossy areas to improve adhesion.
Finally, choose a primer compatible with acrylic surfaces and the selected topcoat, matching adhesion and flexibility requirements.
Step 2 Applying primer: types, drying times, and tips for even coverage
With the surface cleaned, scuffed, and inspected, attention moves to primer selection and application to guarantee consistent adhesion and an even base for the topcoat.
Use a high-build epoxy or acrylic primer formulated for plastics; apply thin, even coats with a foam roller or spray, following manufacturer drying times between coats.
Lightly sand between coats for smoothness and wipe dust before topcoat.
Step 3 Mixing and thinning the topcoat for spraying or rolling
Prepare the topcoat by measuring and mixing components precisely, then adjust viscosity to the chosen application method; follow manufacturer ratios for two-part acrylic or polyurethane finishes, combine thoroughly, and de-gas briefly to eliminate bubbles.
Thin incrementally with recommended solvents, checking flow and sag resistance. Strain the mix through a fine mesh before loading.
Maintain pot life limits and ambient temperature guidelines to guarantee consistent cure and performance.
Step 4 Application techniques: spray vs. roller vs. brush, stroke patterns, and wet-edge control
Select the appropriate application method—spray, roller, or brush—based on tub geometry, finish requirements, and shop conditions.
Then execute consistent stroke patterns and wet-edge techniques to achieve a smooth, uniform coat. Spray yields the finest finish for curves and gloss; microfoam rollers minimize texture on flats; sash brushes handle edges and seams.
Maintain overlap, moderate speed, and controlled film thickness.
Step 5 Recommended number of coats and proper cure times between coats
After choosing the application method and establishing consistent stroke patterns and wet edges, determine the number of coats and exact cure intervals to build film thickness without trapping solvents or creating runs.
Typically two to three thin coats provide coverage; allow recommended tack-free times between coats (usually 30–90 minutes) and longer full-cure periods (24–72 hours) before light use, following manufacturer specs.
Step 6 Applying a clear protective topcoat for durability and gloss options
Apply a clear protective topcoat to lock in the color coat, increase abrasion and chemical resistance, and set the desired gloss level.
The applicator should use compatible polyurethane or epoxy clear, apply thin even coats with a fine roller or spray, allow recommended flash times, and sand between coats if instructed.
Final cure should be followed before regular use for maximum durability and shine.
Curing, Testing, and Reinstalling Fixtures
After the finish is applied, a clear schedule for safe curing times—distinguishing light use from full weight-bearing use—must be observed.
Simple adhesion and hardness tests, such as a fingernail scratch check and a tape-pull test on an inconspicuous area, confirm readiness.
Reinstalling drains, faucets, and hardware should be done carefully with proper seals and soft tools to avoid scratching or compressing the new coating.
Safe curing times before light use and full weight-bearing use
Because curing times vary by product and environmental conditions, it is essential to follow the manufacturer’s specified minimum wait periods before any use; typically a light use window (splashing or short soaks) begins after 24–48 hours.
Full weight-bearing and regular bathing should be deferred until the coating reaches its full cure, often 7 days or more.
After that, reinstall fixtures and resume normal use.
How to test adhesion and hardness (simple checks to perform)
Once the coating has met the manufacturer’s minimum cure window, simple on-site checks can confirm readiness for fixtures and use.
Perform a thumb-nail hardness test, light fingernail press and gentle tap to detect softness.
Use a 3M cross-hatch adhesion test or peel tape over a small scored square.
Inspect for lifting, bubbling, or powdering; any failure requires additional cure or recoat.
Reinstalling drains, faucets, and hardware without damaging the finish
Carefully reinstall drains, faucets, and hardware only after the finish has reached the manufacturer’s specified cure and passed the adhesion and hardness checks.
Use soft protective pads or nylon washers to prevent scratches, and tighten fittings by hand before final torque with appropriate tools.
Apply plumber’s putty or compatible sealant sparingly.
Inspect seals, run water, and check for leaks and finish damage; adjust as needed.
Maintenance and Care for a Painted Acrylic Bathtub
After curing and reinstallation, attention to proper cleaning and maintenance guarantees the painted acrylic finish remains durable and attractive.
Recommended cleaners, a simple weekly and monthly maintenance routine, and clear do’s and don’ts help prevent damage from abrasives, harsh chemicals, and prolonged moisture.
Minor scratches and chips can usually be smoothed and retouched with manufacturer-specified repair kits to restore the surface.
Cleaning products and methods that preserve the finish
Maintain the painted acrylic finish by using gentle, nonabrasive cleaners and soft tools that remove soil without scratching or dulling the surface.
Recommended options include mild dish soap diluted in water, pH-neutral tub cleaners, isopropyl alcohol for spot cleaning, and commercial acrylic-safe products.
Avoid bleach, strong acids, and abrasive powders that degrade coatings.
- Mild dish soap solution
- pH-neutral cleaner
- Isopropyl alcohol (spot)
- Acrylic-safe commercial cleaner
Routine maintenance schedule and do’s and don’ts
While a painted acrylic bathtub can hold its finish for years with proper attention, a simple routine prevents common wear and staining: wipe the surface after each use, perform a gentle cleaning once weekly, and inspect for chips or peeling monthly.
Use nonabrasive cleaners, soft cloths, and lukewarm water. Avoid bleach, scouring pads, and heavy impact. Limit standing water and avoid harsh chemical baths.
How to handle minor scratches, chips, and touch-ups
Routine upkeep naturally leads to addressing small imperfections before they worsen.
The owner inspects for scratches and chips, cleans the area, lightly sands, and applies a compatible primer if needed.
Touch-up paint is feathered with a fine brush or applicator, cured per manufacturer instructions, then buffed gently.
Regular checks and prompt repairs extend finish longevity and prevent larger refinishing.
Common Problems and How to Fix Them
Common issues after refinishing an acrylic bathtub include peeling or flaking finishes, surface texture problems such as orange peel or runs, and yellowing or loss of gloss.
Each problem has distinct causes—poor surface preparation or incompatible products for peeling, spray technique or viscosity errors for texture defects, and UV exposure or chemical damage for discoloration—and requires specific corrective steps.
The following section outlines diagnosis, targeted repairs, and prevention strategies for each condition.
Peeling or flaking finish causes and remediation
Peeling or flaking acrylic paint typically indicates a failure in surface preparation, adhesion, or coating compatibility.
Causes include oily residue, inadequate sanding, moisture entrapment, or incompatible primer/topcoat.
Remediation requires removing loose paint, sanding to sound substrate, cleaning with solvent, applying a suitable adhesion-promoting primer, and recoating with compatible acrylic enamel.
Allow proper cure times and avoid early water exposure to guarantee durability.
Orange peel, runs, or uneven texture troubleshooting and corrective steps
Addressing orange peel, runs, and uneven texture begins with diagnosing whether the issue stems from application technique, paint viscosity, or environmental conditions.
Corrective steps: sand textured areas smooth with fine-grit, clean thoroughly, feather edges, and recoat using proper thinning and spray or roller technique.
Control temperature and humidity, apply thin even coats, allow full flash time.
Inspect between coats and finish with light polishing for uniform texture.
Yellowing, discoloration, or loss of gloss prevention and repair options
After correcting texture issues, attention should turn to yellowing, discoloration, and loss of gloss, which often stem from chemical reactions, UV exposure, improper curing, or incompatible cleaning products.
Prevent by using UV-stable coatings, fully following cure times, and recommending pH-neutral cleaners.
Repair faded or yellowed finishes by light sanding, solvent cleaning, applying compatible primer, and recoating with a durable, non-yellowing topcoat formulated for acrylic surfaces.
Cost, Timeframe, and When to Choose Replacement
A quick comparison of costs helps homeowners weigh DIY material expenses against professional refinishing quotes.
Typical timeframes for prep, painting, and curing are summarized to set realistic expectations for the project timeline.
Guidance is provided on when full bathtub replacement is a smarter long-term choice than refinishing.
Typical DIY material cost vs. professional refinishing quotes
Many homeowners find the choice between tackling an acrylic bathtub repaint as a DIY weekend project and hiring a professional hinges on cost, time, and the tub’s condition. DIY materials (stripper, sandpaper, primer, epoxy kit) commonly total $75–$200; professional refinishing quotes range $300–$800. Replacement usually exceeds $1,000 and suits severe damage or structural issues.
| Option | Typical Price |
|---|---|
| DIY materials | $75–$200 |
| Professional refinish | $300–$800 |
| Replacement | $1,000+ |
| Decision factor | Damage level |
Time estimates for each phase (prep, painting, curing)
Cost and timing weigh heavily alongside expense when deciding between DIY refinishing and hiring a professional, so estimating how long each phase takes helps set realistic expectations.
Typical prep—cleaning, sanding, masking—takes 2–4 hours.
Painting (primer plus two coats) requires 2–5 hours active time over several hours for flash drying.
Full curing needs 24–72 hours before normal use; heavy use may wait up to seven days.
When bathtub replacement is a better long-term option
Several situations justify replacing an acrylic bathtub rather than refinishing it: extensive structural damage like deep cracks or punctures, severe discoloration or persistent stains that resist professional restoration, chronic leaks or hidden plumbing issues, and design or accessibility upgrades that refinishing cannot address.
Replacement typically costs substantially more, requires days to weeks for removal and installation, but yields longer lifespan, warranty options, and improved plumbing access.
Quick Checklist Before You Start
Before beginning, a final readiness checklist verifies tools, materials, safety measures, and the work environment are all confirmed.
The homeowner or contractor should check each item to prevent delays and guarantee a quality finish. Skipping this step increases the risk of mistakes and rework.
- Confirm presence and condition of all tools (sanders, brushes, rollers, respirator)
- Verify materials and quantities (primer, acrylic paint, cleaners, masking tape)
- Ascertain safety gear and ventilation are available and functioning
- Prepare the environment (clean, dry, temperature-controlled, protected surfaces)
Final readiness checklist for tools, materials, safety, and environment
A final readiness checklist confirms that all tools, materials, safety gear, and environmental conditions are in place and acceptable so work can proceed without interruptions.
Verify ventilation, temperature, and humidity are within product specifications.
Inspect tub surface, cleaners, sandpaper, primers, and paint for compatibility and quantity.
Make certain respirator, gloves, goggles, drop cloths, tape, and disposal bags are ready.
Confirm lighting and emergency plan.
Example Project Timeline and Step Sequence
The article outlines 1-day, 2-day, and weekend project schedules tailored to varying repair and refinishing scopes.
Each timeline specifies a clear step sequence—surface prep, sanding, priming, coating, and curing—with estimated durations and critical wait times.
Readers are guided to choose the schedule that matches the bathtub’s condition and the desired finish quality.
1-day, 2-day, and weekend project schedules for different job scopes
When time constraints and bathroom size vary, clear project timelines help determine whether a bathtub repaint can be completed in a single day, requires an overnight cure, or fits into a full weekend.
Each scope—touch-up, full refinish, or full reglaze—has a distinct step sequence and allowable drying windows that affect labor and materials planning.
- Touch-up: 1 day, spot prep, quick cure
- Refinish: 2 days, sand, prime, topcoat, overnight cure
- Reglaze: Weekend, stripping, repair, multiple coats with longer cure
- Contingencies: ventilation, temperature, unforeseen repairs
Conclusion
The final coat dries under a low hum of the exhaust fan, and the room holds its breath. All prep, sanding, and masking converge into a single, fragile moment: the reveal. Hands step back, tools set aside; the surface gleams but the true test waits — a cautious drop of water, the first run of the faucet. If the finish endures this quiet trial, the bathtubs’ new skin will keep secrets well.