How to Install a Bathtub Overflow Gasket: Step-by-Step Guide for a Leak-Free Seal
To install a bathtub overflow gasket and ensure a leak-free seal, follow these steps:
- Remove the overflow cover.
- Clean the flange thoroughly.
- Take out the old gasket.
- Fit a correctly sized replacement gasket.
- Reattach the overflow plate, applying even torque and sealant as necessary.
After installation, fill the tub to the overflow level for 15–30 minutes to check for any moisture. Additionally, the guide includes troubleshooting tips for warped plates, material choices for gaskets, and advice on when to hire a professional. This process will help prevent leaks and water damage effectively.
What a bathtub overflow gasket is and why it matters
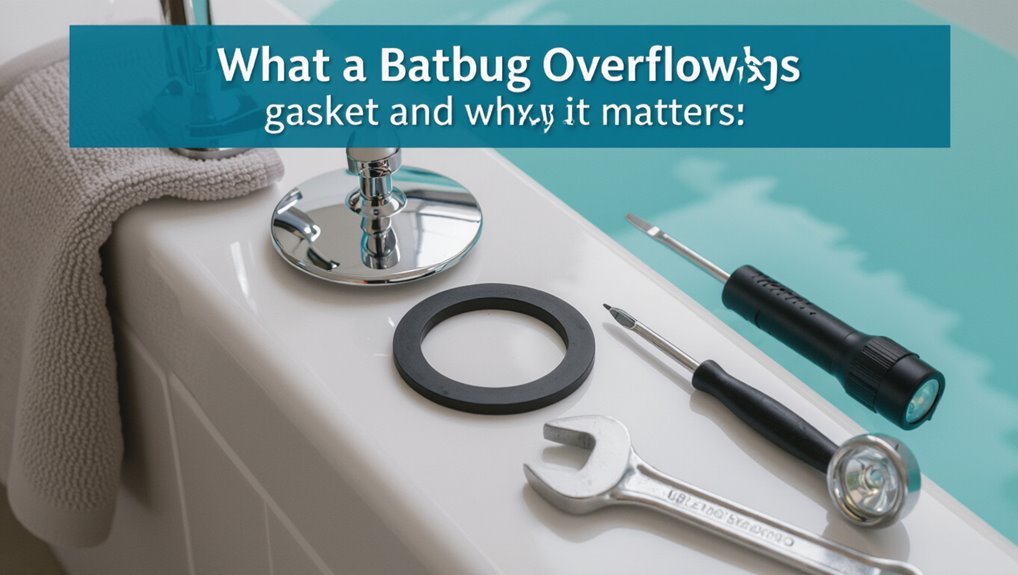
The bathtub overflow gasket seals the gap between the overflow plate and the tub to prevent water from leaking into the wall or subfloor.
Over time the gasket can degrade from age, improper installation, mineral buildup, or movement of the overflow assembly, creating leaks.
Visible water stains, damp drywall or floor, a musty odor, or water dripping behind the overflow plate are clear signs the gasket needs replacement.
Function of the overflow gasket in a bathtub drain assembly
A bathtub overflow gasket seals the junction between the overflow plate and the tub wall to prevent water from escaping into the wall cavity.
It creates a watertight barrier, directs overflow into the drain channel, and cushions metal components to reduce vibration.
Understanding this function is essential when following instructions on how to install bathtub overflow gasket to guarantee a secure, long-lasting seal and proper drainage.
Common causes of overflow gasket leaks
Identify common causes of overflow gasket leaks to target repairs effectively: age-related deterioration, improper installation, chemical damage from harsh cleaners, and shifting or flexing of the tub wall can all compromise the seal.
Additional contributors include corrosion of mounting hardware, uneven surface contact, overtightened or loose fasteners, and incompatible replacement materials that fail to match original thickness or resilience, causing progressive leakage.
Signs your overflow gasket needs replacement
When should a homeowner suspect a failing overflow gasket?
Visible water stains on the ceiling or walls below the bathroom, persistent dampness around the tub trim, mold or mildew growth near the overflow, and a sudden increase in water bills are key indicators.
Also check for moisture under the tub access panel, rusted overflow plate screws, or a loose, wobbly overflow cover.
Tools and materials required for replacing an overflow gasket
A clear inventory of tools and materials streamlines the overflow gasket replacement process and helps prevent interruptions.
This section lists the essential tools, recommended replacement parts and gasket types, and optional supplies that make installation easier. Readers should verify compatibility with their bathtub before purchasing parts.
- Adjustable wrench or socket set
- Replacement overflow gasket (rubber or foam) and compatible mounting hardware
- Screwdriver, plumber’s putty or silicone sealant, and plumber’s tape
- Towels, a flashlight, and a small mirror for tight spaces
Essential tools
Necessary tools and materials for replacing a bathtub overflow gasket include both basic hand tools and a few plumbing-specific items to guarantee a secure, leak-free seal.
Required items: adjustable wrench, screwdriver set (Phillips and flat), hex/allen keys, pliers, utility knife, silicone sealant or plumber’s putty, clean rags, flashlight, bucket, and nitrile gloves.
Proper tools streamline removal and installation.
Recommended replacement parts and gasket types
Having the right tools on hand makes identifying compatible replacement parts straightforward.
Recommended items include molded rubber or silicone overflow gaskets sized to common standard drains (1.25–1.5 in), a neoprene backup for older fixtures, stainless steel overflow bolts and washers, and a compatible trim plate gasket.
Choose OEM or ANSI/ASME-compliant parts to guarantee fit, durability, and a reliable, leak-free seal.
Optional supplies for easier installation
Several handy extras can make replacing an overflow gasket faster and less frustrating. A magnetic parts tray, LED work light, flexible extension bit, and small pick simplify access and retrieval.
Thread lubricant, plumber’s grease, and non-curing silicone aid sealing and reassembly. Disposable gloves, shop towels, and a container for old parts keep the workspace tidy and prevent contamination or lost pieces.
Preparing to replace the overflow gasket
Before beginning work, the installer should follow basic safety precautions, clear and protect the workspace, and lay down towels or a drop cloth to protect bathroom surfaces.
Water to the tub must be shut off and the area dried before removing the overflow plate. A careful inspection of the overflow plate, overflow tube, and surrounding area should identify corrosion, mineral buildup, or damage that could affect the gasket replacement.
Safety precautions and workspace setup
When preparing to replace a bathtub overflow gasket, the person should first confirm the area is dry, well-lit, and ventilated, and that water and power to nearby fixtures are shut off.
They should wear gloves and eye protection, use non-slip footwear, keep tools organized, place a basin for small parts, and verify stable access with a step stool or ladder.
How to shut off water and protect bathroom surfaces
Shut off the main supply to the tub by closing the appropriate valve or, if unsure, shutting off the home’s water supply to prevent accidental flow while working.
Drain remaining water from taps and the tub.
Lay down towels and waterproof drop cloths to protect floors and fixtures.
Remove nearby toiletries and secure electrical devices.
Keep a bucket and rags handy for minor spills.
Inspecting the overflow plate, overflow tube, and surrounding area
Inspect the overflow assembly visually and by touch to identify corrosion, mineral buildup, cracks, or loose fittings that could complicate gasket replacement.
Note warped or stripped screws, degraded flange edges, and rigid or crushed tubing.
Check surrounding tile, drywall, and access panels for water stains or mold.
Photograph findings, gather needed replacement parts, and decide if additional repairs or professional help are required before proceeding.
Step-by-step guide to remove the old overflow gasket
The process begins by removing the overflow cover plate and retaining screws to expose the seal.
Next, the seal is accessed either from inside the tub or through the wall access panel, using penetrating oil and appropriate tools to free stuck or corroded fasteners.
Careful prying and steady traction remove the old gasket while avoiding scratches or deformation of the tub.
Removing the overflow cover plate and screws
Begin by draining any standing water and laying down a towel to protect the tub finish.
Removing the overflow cover plate and its screws exposes the old gasket and creates access for replacement.
Using a screwdriver that fits, loosen screws counterclockwise, holding the plate to prevent dropping.
Lift the plate and set screws aside in a container.
Inspect the opening for corrosion or debris before proceeding.
Accessing the overflow seal from inside the tub or access panel
With the cover plate removed, locate the overflow opening and determine whether access from inside the tub or through an adjacent access panel is required.
Reach into the opening (or open the panel) and use a flashlight and needle-nose pliers to grasp and gently pull out the old gasket, taking care not to damage the overflow pipe or surrounding finish.
Inspect the groove, clean residue with a rag and mild solvent, and clear debris before fitting the new gasket.
Tips for loosening stuck screws and corroded components
Apply penetrating oil to corroded screws and fittings, letting it soak for 10–15 minutes to loosen rust and mineral buildup before attempting removal.
Use the correctly sized screwdriver or nut driver to prevent cam-out.
Tap stubborn fasteners gently with a hammer to break corrosion.
Heat metal parts with a heat gun if safe, then try slow, steady turning.
Use extractor tools for rounded heads.
Removing the old gasket without damaging the tub
Remove the overflow cover and backing plate carefully, then inspect the area to plan a controlled gasket extraction that avoids chipping the tub finish.
Use a plastic scraper or wooden tongue depressor to pry softened gasket remnants; apply penetrating oil and let it sit for minutes.
For stubborn bits, heat gently with a hair dryer, then lift residues with a nylon brush.
Clean surface thoroughly before installing new gasket.
Installing the new bathtub overflow gasket
Next, the installer confirms the correct gasket size and material for the tub’s overflow assembly.
The sealing surfaces are cleaned and prepped before the gasket is carefully positioned and seated to guarantee an even contact.
Finally, the overflow plate is reinstalled and tightened to the manufacturer’s torque recommendations to prevent leaks or distortion.
Selecting the correct gasket size and material
Choosing the correct gasket size and material is a critical step before installing a new bathtub overflow gasket. The installer measures the overflow opening and matches gasket inner and outer diameters.
Material choice—rubber, neoprene, silicone, or cork—depends on durability, flexibility, and chemical resistance. Select a gasket that fits snugly without stretching and resists heat, cleaning agents, and compression set for long-term leak prevention.
Cleaning and prepping the sealing surfaces
Begin by wiping the overflow face and surrounding area with a clean cloth to clear loose debris and dust.
Remove old sealant and residue with a plastic scraper, then clean with a mild degreaser or isopropyl alcohol. Allow surfaces to fully dry.
Inspect for corrosion, pitting, or warped metal; gently sand minor rough spots and re-clean to guarantee a smooth, contaminant-free sealing surface.
Proper placement and seating of the new gasket
Position the new gasket squarely over the overflow opening, aligning any tabs, notches, or bolt holes with their corresponding features on the flange.
Make certain the gasket sits flush without twists or folds, pressing evenly around the perimeter.
Verify the sealing lip contacts the flange uniformly and that no debris is trapped beneath.
Confirm visual alignment before proceeding to secure components.
Reinstalling the overflow plate and torque guidelines
With the gasket verified as seated evenly and free of debris, the overflow plate can be reinstalled to compress the seal and secure the assembly.
Align the plate, insert screws, and hand-tighten evenly in a crisscross pattern.
Use a torque wrench or driver set to manufacturer’s recommended spec—typically low torque (around 8–12 in·lb)—to avoid distortion.
Inspect for gaps and test for leaks.
Testing for leaks and final adjustments
A water test is performed by filling the tub to the overflow and observing the gasket area for at least 15–30 minutes to confirm a leak-free seal.
If leaks persist, the installer should tighten or reseat the gasket, check for damaged threads or warped plates, and consider replacing the gasket or adjacent components as needed.
Final adjustments are made only after determining the leak source, repeating the water test until no seepage is detected.
Water test procedures to confirm a leak-free seal
Begin by filling the tub to a level that covers the overflow opening and letting it sit for at least 15–30 minutes while observing the overflow faceplate, surrounding wall, and floor for any signs of seepage or dampness.
If dry, drain and inspect the gasket area for residual moisture.
Repeat with intermittent partial fills and a final full fill to confirm a consistently leak-free seal.
What to do if you still see leaks after replacement
If intermittent or persistent dampness appears during the water tests, proceed to a systematic leak diagnosis and final adjustments.
Inspect the overflow cover, gasket seating, and mounting screws for alignment and even compression.
Dry the area, run short, controlled fills while observing for seepage, and mark any source.
Reapply plumber’s putty or sealant sparingly if gaps are evident, then retest to confirm dryness.
When to tighten, re-seat, or replace other components
Inspect the assembled overflow and surrounding fittings for movement or wear before making adjustments.
If slight seepage appears, tighten mounting screws incrementally and retest.
Persistent leaks or warped escutcheons require reseating the gasket and realigning the flange.
Corroded, cracked, or stripped components should be replaced.
After repairs, run a full fill-and-drain test to confirm a secure, leak-free assembly.
Common problems and how to troubleshoot them
Common issues encountered after installation include warped or damaged overflow plates, cracked or corroded overflow housing behind the tub, and gasket compatibility or improper sizing.
Each problem presents distinct signs—misaligned plates, persistent leaks at the housing, or gaps and compression failures with the gasket.
Troubleshooting requires inspecting the visible components, checking the housing condition from behind the tub when accessible, and verifying gasket dimensions against the overflow assembly.
Warped or damaged overflow plates
Warped or damaged overflow plates can prevent a proper seal against the bathtub wall, causing leaks, reduced suction for the overflow channel, and difficulty seating a new gasket.
Inspect the plate for bends, dents, or stripped fasteners. Replace warped plates or tighten/replace screws.
Make certain the new plate aligns flush; test for leaks before finishing. Dispose of corroded plates promptly.
Cracked or corroded overflow housing behind the tub
If a replacement overflow plate sits flush but leaks persist, the problem may lie behind the tub: the overflow housing can crack or corrode, allowing water to escape into the wall cavity or under the floor.
Inspect via access panel or remove trim; look for hairline fractures, mineral buildup, or rust.
Replace damaged housing, repair surrounding framing if wet, and test for leaks before closing walls.
Gasket compatibility and improper sizing issues
When a replacement overflow gasket fails to create a proper seal, the issue is often a mismatch in size, profile, or material compatibility with the tub and overflow housing.
Installers should verify inner and outer diameters, flange shape, and whether the gasket is designed for metal or plastic fittings.
Common signs include uneven compression, persistent drips, or gasket deformation.
Measure, source the correct spec, or use an adapter.
Maintenance tips to extend gasket life
A concise maintenance routine helps prevent leaks and prolong gasket service life through scheduled inspections and quick visual checks after heavy use.
Careful selection of cleaning products—avoiding harsh solvents, bleach, and abrasive cleaners—protects the rubber from premature degradation.
The gasket should be proactively replaced if it shows cracking, permanent deformation, or persistent leaks despite cleaning.
Regular inspection schedule and quick checks
Although bathtubs rarely show immediate signs of failure, establishing a regular inspection schedule helps catch gasket wear before it causes leaks. Owners should perform quick visual and tactile checks monthly and a more thorough assessment every six months to extend gasket life.
Inspect for cracks, compression, and discoloration; press edges for firmness, check mounting hardware for corrosion, and note any dampness behind trim or on surrounding drywall.
Cleaning products and chemicals to avoid
Few household cleaners are safe for bathtub overflow gaskets; harsh acids, strong alkalis, and solvent-based products can degrade rubber and compressible materials quickly.
Chlorine bleach, acidic limescale removers, paint strippers, and petroleum-based cleaners should be avoided.
Use mild soap, diluted vinegar (spot-tested), or manufacturer-recommended noncaustic cleaners.
Rinse thoroughly and air-dry surfaces to prevent chemical damage and premature gasket failure.
When to proactively replace the gasket
When should a bathtub overflow gasket be replaced before it fails?
Routine replacement is advised every 5–7 years or sooner if signs appear: visible cracking, flattening, persistent dampness, mold accumulation, or recurring leaks despite proper tightening.
Proactive replacement during bathroom remodels or when the tub is removed prevents unnoticed deterioration.
Use quality materials and inspect annually to extend gasket life.
Cost, time estimates, and when to call a professional
Costs and time vary by scenario, with simple gasket swaps taking less time and complex repairs requiring more expertise. A brief table below outlines typical DIY time and difficulty, estimated part/tool costs, and key signs that indicate calling a plumber. If damage, persistent leaks, or unclear access are present, professional help is recommended.
| Scenario | Estimated Cost | When to Call a Professional |
|---|---|---|
| Simple gasket replacement | $10–$40 parts, $0–$30 tools | Minor leak, easy access |
| Moderate access/old hardware | $40–$100 parts/tools | Stubborn corrosion, awkward access |
| Complicated repair/pipe damage | $100+ parts, $100+ labor | Structural damage, continuous leaking |
Typical DIY time and difficulty by scenario
Typical scenarios for replacing a bathtub overflow gasket range from a quick parts swap to a more involved repair, with cost and time scaling accordingly.
Simple gasket replacement: 30–60 minutes, low difficulty.
Moderate job with access panel removal or minor corrosion: 1–3 hours, moderate skill.
Extensive corrosion, mortar access or pipe work: several hours to a day, advanced skills; hire a professional to avoid water damage.
Estimated part and tool costs
A concise breakdown of likely expenses helps homeowners decide whether to DIY or call a pro:
Basic overflow gasket kits range from $5–$25, specialty or OEM gaskets $25–$60, and a replacement overflow assembly $50–$150 depending on finish and brand.
Basic hand tools typically cost $10–$30; sealant or plumber’s tape $3–$10.
Allow one to two hours; professional service starts around $100–$200.
Signs that warrant hiring a plumber
Recognize persistent leaks, repeated clogs, visible corrosion, or water damage around the overflow as clear indicators to hire a plumber; these issues often signal underlying problems that basic gasket replacement won’t fix and can worsen if handled incorrectly.
Expect pro diagnosis and repair costs ranging $150–$600, with 1–4 hours typical.
Call a professional when repairs exceed DIY comfort, require wall access, or involve mold.
Quick comparison of gasket materials and aftermarket options
A brief comparison of common gasket materials and aftermarket choices helps readers select the right part for fit and longevity. The table below summarizes rubber, silicone, and foam options alongside OEM vs. universal and adhesive-backed vs. compression seals. This frames trade-offs in durability, flexibility, and installation method for quick decision-making.
| Item | Key traits |
|---|---|
| Rubber gasket | Durable, affordable, moderate flexibility |
| Silicone gasket | High flexibility, long life, pricier |
| Foam gasket | Compressible, best for irregular surfaces, less durable |
| OEM vs. Universal / Adhesive vs. Compression | OEM = exact fit; universal = versatile; adhesive-backed = easier install; compression = reusable, tool-assisted |
Rubber vs. silicone vs. foam gaskets
Several common materials—rubber, silicone, and foam—offer distinct trade-offs in durability, sealing performance, and cost for bathtub overflow gaskets.
Rubber delivers good resilience and low cost but may harden over years.
Silicone provides superior flexibility, longevity, and temperature resistance at higher price.
Foam is inexpensive and compressible for uneven surfaces but offers shorter lifespan and weaker chemical resistance than rubber or silicone.
OEM vs. universal gaskets
When choosing between OEM and universal overflow gaskets, homeowners weigh fit and compatibility against cost and availability.
OEM parts match original dimensions and materials, reducing installation adjustments and leak risk but usually costing more and requiring specific sourcing.
Universal or aftermarket gaskets offer broader availability and lower prices, but may need trimming or adapters and carry variable quality and durability.
Adhesive-backed vs. compression seals
Having weighed OEM against universal options, the next consideration is the sealing method: adhesive-backed gaskets versus compression seals.
Adhesive-backed types stick directly to the tub, offering simple installation but reduced repositioning and potential adhesive failure over time.
Compression seals rely on mechanical pressure from the overflow plate, providing easier replacement and stronger long-term reliability but requiring precise plate torque and correct flange alignment.
Visual aids and diagrams to guide installation

A labeled diagram of the overflow assembly clarifies each component and its relationship to the gasket.
A clear photo sequence shows the exact removal and installation steps, highlighting fasteners and seal orientation.
Together, these visuals reduce mistakes and speed the repair.
Diagram of overflow assembly components
A clear diagram labels each part of the overflow assembly—faceplate, screws, overflow tube, gasket, and the slip nut or clamp that secures the tube—to show how they fit and align before installation.
Callouts indicate gasket orientation, mating surfaces, and fastener locations.
Exploded-view detail clarifies sequence for reassembly.
Scale and simple measurements help confirm correct gasket size and tube alignment against the drain line.
Photo sequence of removal and installation steps
Begin by laying out a clear photo sequence that documents each step of removing the faceplate, extracting the old gasket, and installing the new one.
Each image should be focused, well-lit, and show tool position and hand placement. Numbered captions identify actions, required tools, and common pitfalls.
Include close-ups of gasket seating, torque points, and a final leak-test shot to confirm correct alignment and seal.
Conclusion
The homeowner recognizes that a properly seated overflow gasket prevents leaks, protects finishes, and preserves plumbing integrity; the DIYer values clear tools, patient preparation, and careful torqueing; the cautious chooser compares materials, weighs costs, and considers professional help when needed. By following systematic steps, maintaining seals, and inspecting periodically, one safeguards water containment, extends fixture life, and avoids costly repairs, ensuring a dependable, long-lasting bathtub installation.