How to Install an American Standard Toilet Seat: Step-by-Step Guide for a Secure Fit
Installing an American Standard toilet seat is a quick and straightforward process that can be completed in just a few minutes using basic tools. Here’s how to do it:
- Confirm Fit: Measure the bolt centers and bowl length to ensure the new seat matches.
- Remove Old Seat: Take off the old toilet seat and clean the mounting area.
- Align New Seat: Position the new seat over the bowl.
- Insert Bolts: Use top-fix or bottom-fix bolts to secure the seat in place.
- Tighten Nuts: Gradually tighten the nuts alternately until snug, being careful not to overtighten.
- Install Hinges: Fit the quick-release hinges according to the instructions provided.
- Test for Stability: Check for any wobble and adjust as necessary.
- Inspect Components: Look over rubber bumpers and hardware for any signs of wear.
For detailed step-by-step tips, troubleshooting advice, and upgrade options, continue reading.
Overview of Installing an American Standard Toilet Seat
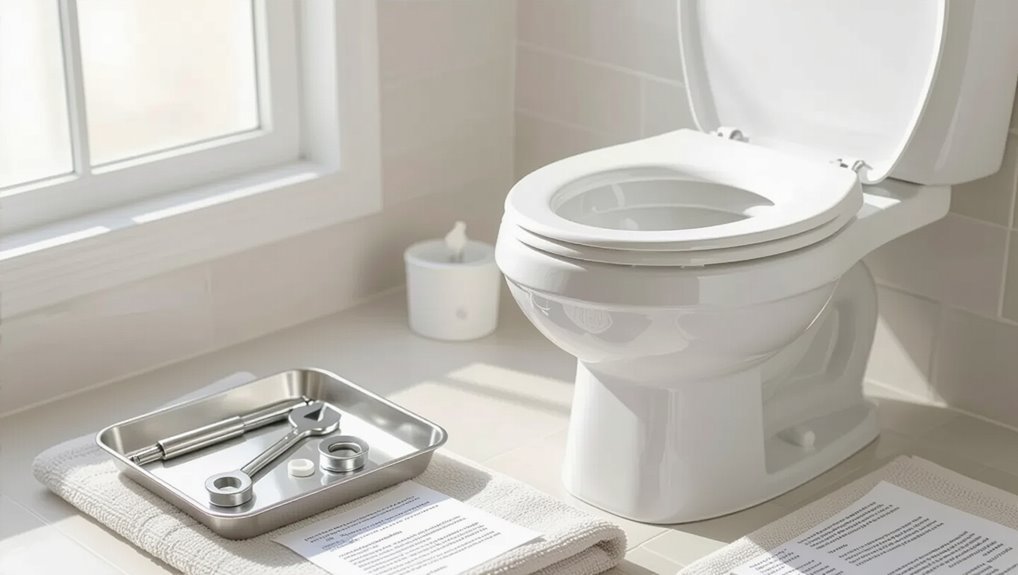
“American Standard” denotes a common toilet brand and a set of seat shapes and mounting standards that determine compatibility with different bowl styles.
Installation generally requires basic tools—such as a screwdriver, adjustable wrench, and possibly pliers—plus the new seat and mounting hardware.
The job typically takes 15–30 minutes and suits a person with basic DIY skills.
What “American Standard” refers to and compatibility considerations
Although often used as a brand name, American Standard more broadly denotes a style and set of dimensions common to many North American toilets; this affects seat shape, bolt spacing, and hinge types.
Compatibility requires matching seat length (round or elongated), bolt spread, and hinge design.
Readers learning how to install American Standard toilet seat should verify measurements and select compatible seats to guarantee secure fit and proper function.
Typical tools and materials required
A small set of basic tools and a few consumable materials are all that’s typically needed to install an American Standard–style toilet seat.
Required items are compact, commonly found, and aimed at removal, alignment, and secure fastening without plumbing changes.
- Adjustable wrench or pliers
- Phillips screwdriver and flathead for caps
- Replacement bolts, nuts, and antiseptic wipes
Estimated time and skill level for the project
With tools and materials on hand, the installation typically takes 15–30 minutes for someone with basic DIY experience; beginners may need up to an hour to work more deliberately.
The task requires only basic hand tools and common sense. No specialized plumbing skills are necessary. Attention to alignment and secure fastening guarantees a stable seat.
Time varies with bolt condition and access.
Identify Your Toilet Seat Type and Mounting System
Before beginning the swap, the installer measures bolt centers and confirms whether the bowl is elongated or round to guarantee seat fit.
They then inspect the hinge type—top-fix, bottom-fix, or quick-release—to determine mounting method and tools required.
Finally, they assess the condition of existing hardware and select suitable replacement bolts, nuts, or hinges if corrosion or damage is present.
Measuring bolt centers and seat shape (elongated vs round)
Measuring the bolt centers and determining whether a bowl is elongated or round is the essential starting point for replacing a toilet seat.
Measure bolt center-to-center (typically 5.5 inches) and front-to-hinge bowl length.
Compare length to standard dimensions: round ≈ 16.5 inches, elongated ≈ 18.5 inches.
Record both measurements to guarantee compatible replacement seat and proper fit.
Inspecting hinge type: top-fix, bottom-fix, quick-release
How can the hinge type be identified quickly and accurately?
Visual inspection reveals mounting access: top-fix hinges expose bolts through the seat top for hand-tightening; bottom-fix require access beneath the bowl, with nuts under the rim; quick-release features a visible release tab or button allowing the seat to detach from hinges.
Note hinge material and alignment to guarantee compatibility.
Checking existing hardware condition and replacement options
A quick visual and tactile check of the existing hardware reveals whether hinges, bolts, and nuts are serviceable or need replacement: look for corrosion, stripped threads, cracked plastic, loose movement, or warped plates that can compromise fit and function.
If defects appear, choose matching stainless steel or nylon replacements, consider universal kits or OEM parts, and verify thread size and mounting spacing before purchasing.
Preparing for Installation
Before fitting a new American Standard seat, the old seat should be removed safely by loosening fasteners and lifting it clear to avoid damage or injury.
The bowl mounting area must then be cleaned and inspected for cracks, mineral buildup, or worn bolt holes that could affect fit and seal.
Finally, the installer should verify the new seat’s included parts—bolts, nuts, and bushings—match the toilet’s mounting system before proceeding.
How to safely remove the old seat
Start by shutting off the toilet’s water supply and flushing to lower the bowl level.
Then place a towel beneath the hinge area to catch drips and small parts.
Loosen nuts under each hinge with a wrench while holding the top bolts to prevent rotation.
Remove corroded fasteners with penetrating oil or a hacksaw if seized.
Lift the old seat straight up and dispose of hardware safely.
Cleaning and inspecting the bowl mounting area
Inspect the bowl mounting area for mineral buildup, old gasket remnants, and damaged porcelain before installing the new seat.
Remove deposits with a nonabrasive cleaner and soft brush, rinse thoroughly, and dry.
Check bolt holes for cracks or jagged edges and clear obstructions.
Replace or repair any compromised porcelain to guarantee a flat, secure surface for the new seat’s hardware.
Verifying included parts with a new American Standard seat
With the bowl cleaned and mounting holes checked, attention shifts to confirming that the new American Standard seat includes all required components.
The installer inspects hardware and parts against the packing list, ensuring compatibility with the toilet model. Missing items are noted before proceeding.
Checklist highlights:
- Hinges with mounting bolts and nuts
- Rubber bumpers and washers
- Installation instructions and template
Step-by-Step Installation Guide
The guide shifts to clear, sequential actions for fitting the seat: positioning it and aligning the bolt holes precedes any fastening.
It then separates procedures for top-fix and bottom-fix bolt and anchor installation, and explains attaching quick-release hinges and verifying their operation.
Final steps cover proper bolt tightening techniques to secure the seat without cracking the porcelain.
Positioning the seat and aligning bolt holes
Place the seat on the bowl so the hinges rest near the tank, then slide it forward or back until the bolt holes in the seat base line up with the mounting holes in the porcelain.
Make certain the seat sits centered over the rim, parallel to the bowl front, and holds level.
Check both hinges clear the tank gap and confirm symmetry before fastening.
Installing seat bolts and anchors for top-fix mounts
Begin by preparing the top-fix hardware: insert the rubber or plastic anchor into each mounting hole, then drop the threaded bolt through the hinge and into the anchor so the bolt head sits flush against the hinge base.
Tighten the nuts from above using a screwdriver to hold the bolt head and a wrench for the nut, compressing anchors evenly until the seat is secure and wobble-free.
Installing seat bolts and anchors for bottom-fix mounts
For bottom-fix mounts, install long threaded bolts upward through the toilet bowl from beneath so their threaded ends protrude through the seat mounting holes.
Position plastic anchors or grommets into the underside holes, align seat over protruding threads, add washers and hex nuts, then hand-tighten.
Use a wrench for final snug adjustment, avoiding overtightening to prevent porcelain cracking.
Verify secure, even seating.
Using quick-release hinges: attachment and testing
Attach the quick-release hinges by fitting their hinge pins into the seat’s mounting brackets and aligning the hinge bases over the toilet bowl’s mounting holes; engage the release latches so the seat locks to the hinges.
Verify alignment visually, press down to confirm secure engagement, and cycle the release mechanism to detach and reattach once.
Check for wobble, smooth movement, and flush clearance before regular use.
Tightening bolts without cracking porcelain
With the hinges secured and quick-release latches tested, attention turns to tightening the seat bolts without cracking the porcelain.
Use a hand screwdriver or socket wrench with steady, short turns. Alternate tightening both sides incrementally, feeling for resistance.
Stop when snug; avoid overtightening. If plastic anchors are used, compress until flush.
Place a soft cloth or rubber washer between metal and porcelain for added protection.
Final alignment and hinge adjustments
Carefully check the seat’s position over the bowl, ensuring the front edge aligns evenly with the rim and the hinges sit square on their mounting points.
Slightly loosen hinge fasteners if repositioning is required, then center and level the seat.
Tighten progressively, alternating sides to maintain alignment.
Verify smooth lid movement and secure hinge engagement; retighten to manufacturer torque specifications.
Common Problems During Installation and How to Fix Them
Common installation issues include stripped or corroded mounting bolts, a misaligned or wobbling seat, and cracked porcelain around the bolt holes.
The article outlines repair and replacement options for damaged bolts, simple shimming and torque tips to stop movement, and temporary crack repairs plus guidance on when to hire a professional.
Each problem is paired with clear corrective steps and safety considerations.
Stripped or corroded mounting bolts repair and replacement options
Dealing with stripped or corroded mounting bolts requires a methodical approach: assess whether the fasteners can be rescued with penetrating oil and a bolt extractor or whether replacement is safer and more practical.
If extraction succeeds, clean threads and fit stainless replacements with nylon caps.
If bolts break or flange threads are damaged, use a repair kit or replace the toilet flange; confirm new hardware fits American Standard spacing.
Misaligned seat or wobbling shims and torque tips
Addressing a misaligned or wobbly American Standard seat begins with identifying whether the issue stems from uneven shims, loose torque tips, or incorrect hinge positioning; diagnosing the root cause prevents needless parts replacement.
Once located, tighten torque tips to specified torque, reposition or trim shims for even contact, and realign hinges before final tightening.
Test for movement and readjust until stable and centered.
Cracked porcelain around bolt holes temporary fixes and when to call a pro
If tightening torque tips or trimming shims reveals hairline cracks or chipping around the toilet’s bolt holes, quick stabilization and cautious repair can prevent further damage before a professional is needed.
Apply epoxy or porcelain repair kit, insert cushioning washers, and avoid overtightening.
For spreading cracks, structural damage, large fragments, or leaks into the tank base, stop and contact a licensed plumber or porcelain restoration specialist.
Upgrading and Customizing Your Toilet Seat
The article next considers options for upgrading the toilet seat, including soft-close models, heated seats, and bidet-compatible designs.
It outlines a compatibility checklist for bidet attachments and sensors to guarantee proper fit and function with American Standard bowls.
Aesthetic choices and ergonomic features are also reviewed to balance comfort and bathroom style.
Choosing soft-close, heated, or bidet-compatible seats
When upgrading an American Standard toilet seat, homeowners should weigh the practical benefits of soft-close hinges, integrated heating, and bidet compatibility against installation complexity and budget.
Soft-close reduces wear and noise; heated seats add comfort and modest energy use.
Bidet-compatible models may require reinforced mounting and electrical access.
Prioritize desired features, durability, and warranty to guarantee a secure, long-lasting upgrade.
Compatibility checklist for bidet attachments and sensors
Because bidet attachments and sensor-equipped seats vary in size, mounting style, and power needs, a clear compatibility checklist prevents costly returns and frustrating rework.
Verify bowl shape (round/elongated), bolt spacing, and hinge type. Confirm clearance for nozzle deployment and seat movement.
Check water inlet orientation, pressure limits, and electrical requirements (battery, outlet, or hardwired).
Review manufacturer compatibility lists and warranty implications.
Aesthetic and comfort considerations
Many homeowners balance form and function when selecting a toilet seat, weighing materials, profile, and added features to match bathroom style and comfort needs.
Choices include molded plastic, wood, or soft-close hinges; ergonomic contours, padding, and seat height affect comfort.
Color, finish, and slim or raised profiles coordinate décor.
Durability, easy-clean surfaces, and upgrade options like heated or antimicrobial seats inform final selection.
Maintenance and Care After Installation
After installation, routine cleaning with mild, nonabrasive cleaners preserves the seat’s finish and protects hinge mechanisms.
Periodic inspections for loose bolts and wobble should prompt gentle retightening to the manufacturer’s torque recommendations.
If cracks, persistent looseness, or irreparable hinge corrosion appear, replacement of the seat is advised.
Cleaning recommendations to protect hinges and finish
Protect hinges and the seat’s finish by using mild, nonabrasive cleaners and soft cloths for routine cleaning; abrasive pads, bleach-based products, and harsh solvents can dull finishes and corrode metal components.
- Wipe spills promptly with a damp microfiber cloth and mild detergent.
- Dry metal parts after cleaning to prevent water spots and corrosion.
- For stubborn grime, use a diluted vinegar solution and rinse thoroughly.
Periodic checks and when to retighten bolts
Keeping hinges and finishes clean helps reveal wear or loosening that may occur over time, so periodic checks of the seat and fasteners should be part of routine maintenance.
Inspect bolts monthly, ensuring plastic nuts and metal hardware are snug but not over-tightened.
Tighten slightly when wobble appears, replace stripped or corroded fasteners promptly, and confirm alignment after any adjustment to maintain secure operation.
When to replace the seat entirely
When cracks, persistent staining, or warped contours compromise comfort or hygiene, the toilet seat should be replaced rather than repaired.
Replacement is also advised when hinges corrode, mounts fail repeatedly, or gaps allow bacterial buildup.
Choose a durable, compatible model and dispose of the old seat per local guidelines.
Regular replacement intervals depend on use, material, and visible wear; inspect annually.
Comparison of Installation Scenarios
A brief comparison highlights how quick fixes and full replacements differ in time, cost, and required tools, and contrasts DIY versus professional installation pros and cons. The following table summarizes core considerations for each scenario to guide decision-making. Readers should weigh convenience, budget, and skill before choosing an approach.
| Scenario | Typical Time | Key Trade-off |
|---|---|---|
| Quick fix (DIY) | 10–30 min | Low cost, minimal tools, limited longevity |
| Full replacement (DIY/pro) | 30–90 min | Higher cost, more tools, longer-lasting |
Quick fix vs full replacement time, cost, tools
Most homeowners can choose between a quick fix—tightening bolts, replacing bumpers, or swapping a simple seat—and a full replacement that removes the bowl-mounted hardware and installs a new seat assembly.
Quick fixes take 10–30 minutes, cost under $15, and need basic tools (screwdriver, adjustable wrench).
Full replacements take 30–90 minutes, cost $20–$80, and may require pliers, socket set, and penetrating oil.
DIY vs professional installation pros and cons
Many homeowners weigh DIY and professional installation by balancing cost, time, skill, and risk.
DIY saves money and offers quick scheduling but requires basic tools and care to avoid leaks or misalignment.
Professional service costs more yet guarantees proper fit, warranty, and trouble-free results, especially for complex mounts or older fixtures.
Choice hinges on confidence, budget, and urgency.
Troubleshooting Checklist to Ensure a Secure Fit
Several quick checks can pinpoint why an American Standard toilet seat feels loose or misaligned.
Inspect hinge bolts, tighten or replace corroded hardware, and verify seat alignment with mounting holes.
Confirm rubber bumpers are intact and positioned to prevent slippage.
Check bowl surface for cracks or unevenness that impede seating.
- Tighten or replace rusted bolts
- Replace worn bumpers
- Realign and test fit
Conclusion
In a world where a toilet seat’s wobble can topple empires, the installer emerges victorious: bolts snug, hinges aligned, and porcelain peace restored. With a few common tools and patient hands, the American Standard seat transforms from loose liability to throne-like perfection. Minor hiccups bow to simple fixes; upgrades glitter like royal regalia. Now secure, dependable, and oddly triumphant, the bathroom stands redeemed — fit for monarchs, metrication skeptics, and anyone who cherishes silence.