How to Make a Faucet Key: Simple DIY Methods to Turn Off Stubborn Outdoor Faucets
To make a faucet key for stubborn outdoor faucets, you can easily create one using a sturdy metal bar or hex bolt. Simply file a socket that fits the faucet stem. If you need alternatives, consider using adjustable pliers, a wrapped pipe wrench, or a wooden block key for lower torque needs. To help free stuck valves, apply penetrating oil and use steady pressure, but be cautious to avoid excessive force that could cause damage. Follow along for detailed step-by-step instructions, safety tips, and troubleshooting advice.
What a Faucet Key Is and When You Need One
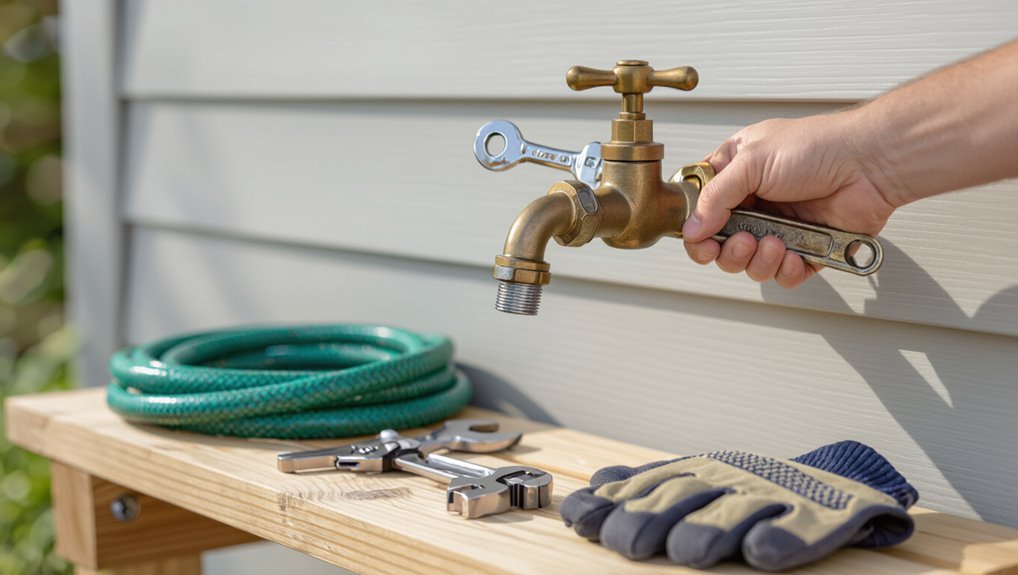
A faucet key, also called a spigot key or outdoor faucet wrench, is a small tool designed to operate hose bibs and other outdoor valves.
It is typically used to open frozen, recessed, or otherwise hard-to-reach outdoor faucets and to shut off water at exterior spigots during maintenance.
Before attempting to bypass or turn off any valve, the user should check property ownership, local regulations, and potential safety hazards to avoid damage or legal issues.
Definition and common names (faucet key, spigot key, outdoor faucet wrench)
Faucet key (also called a spigot key or outdoor faucet wrench) refers to a small handheld tool designed to turn outdoor hose bibs, frost-free spigots, and recessed shutoff stems that lack standard knobs.
Known variously as a hydrant wrench, meter key, or sillcock key, it provides leverage and fit for odd-shaped valves.
This article covers what it is and how to make faucet key.
Typical use cases for outdoor hose bibs and stubborn faucets
When outdoor water outlets lack a standard knob or are recessed behind a cover, homeowners and maintenance workers rely on a faucet key to operate hose bibs, yard irrigation shutoffs, and seasonal spigots.
It is also essential for turning stubborn, corroded valves that cannot be gripped by hand. Common scenarios include winterization, emergency shutoffs for leaks, garden watering zones, maintenance access in shared grounds, and municipal curb stops.
Safety and legality considerations before bypassing or turning off a valve
Before operating any outdoor water valve, individuals should confirm ownership and obtain necessary permissions to avoid trespass or liability.
The person must assess safety risks—water pressure, frozen pipes, backflow—and use proper tools and protective gear.
Local codes, utility rules, and property agreements may prohibit tampering; contacting the responsible authority or a licensed plumber is advised to guarantee compliance and prevent damage.
Quick Methods to Turn Off a Stubborn Outdoor Faucet
When an outdoor faucet refuses to close, practical quick fixes can help regain control without specialized gear.
A makeshift wrench from household tools, a temporary key fashioned from a flat metal strip or screwdriver, or adjustable pliers, a pipe wrench, or locking pliers used with care can often turn the valve.
If the valve is damaged, leaks persist, or excessive force is required, a professional plumber should be contacted.
Using a makeshift wrench from household tools
A homeowner can quickly fashion a reliable makeshift wrench from common household items to shut off a stubborn outdoor faucet when a proper key or adjustable wrench is unavailable.
Using pliers, a vise grip, or a sturdy pipe, wrap cloth or rubber for grip and protection. Clamp firmly on the faucet stem or packing nut, apply steady even pressure, and turn slowly to avoid damage.
Creating a temporary key from a flat metal strip or screwdriver
One simple method uses a flat metal strip or a sturdy screwdriver to fashion a temporary key that fits into the faucet’s slot or behind its stem, providing leverage to turn off a stubborn outdoor spigot.
Cut or file the strip to width, bend a small lip for grip, insert carefully, and apply steady pressure.
Remove slowly to avoid damage.
Using adjustable pliers, pipe wrench, or locking pliers safely
Grab adjustable pliers, a pipe wrench, or locking pliers to gain the leverage needed to turn a seized outdoor faucet, while taking precautions to avoid damaging the valve or surrounding fittings.
Position jaws on the stem or appropriate flat surface, apply steady pressure, and use short, controlled turns. Protect metal with cloth, avoid excessive force, and reassess grip before each attempt.
When to stop and call a professional plumber
When should persistent attempts to free a stuck outdoor faucet stop and a professional plumber be called?
If repeated safe attempts fail, metal deforms, threads strip, leaks worsen, or water cannot be shut off, contact a licensed plumber.
Also call if the shutoff is inaccessible, freezing risk exists, or the homeowner lacks tools or confidence.
Professionals prevent damage and guarantee code-compliant repairs.
Materials and Tools Needed for DIY Faucet Key Options
A brief inventory of tools and materials helps determine whether a quick fix or a fabricated key is appropriate.
Consider these options:
- Basic household tools to try first (pliers, adjustable wrench, screwdriver).
- Materials for crafting a simple permanent key (metal bar, bolt, socket).
- Recommended purchased faucet key types and sizes (universal and size-specific models).
Basic household tools to try first
Several common household tools can serve as quick, makeshift faucet keys for loosening garden-faucet hose bibs or frozen outdoor spigots.
Useful items include adjustable pliers, channel-lock pliers, a crescent wrench, and vise grips for gripping valves.
A sturdy flathead screwdriver or metal pry bar can provide leverage.
Protective gloves and rag improve grip and prevent damage during operation.
Materials for crafting a simple permanent key (metal bar, bolt, socket)
Materials for a simple permanent faucet key can be limited to a short metal bar, a matching hex bolt, and a socket or nut that fits the faucet stem.
Choose corrosion-resistant steel or brass components. The bar should be sturdy enough for leverage and drilled to accept the bolt. The bolt secures the socket; the socket engages the stem.
Fasteners must fit tightly and resist outdoor exposure.
Recommended purchased faucet key types and sizes
Types and sizes of purchased faucet keys vary by application, so selecting the right model requires matching the key’s socket configuration and length to the faucet stem and access conditions.
Common options include T-handle keys, bent-rod keys, and telescoping keys; socket sizes typically range from 3/8″ to 3/4″ or metric equivalents.
Choose durable materials (brass, steel) and compact designs for outdoor use.
Step-by-Step: Make a Simple Metal Faucet Key
First, the faucet stem should be measured and the fitting type identified to determine the appropriate key dimensions.
Next, a metal strip is cut and shaped for a snug fit, with a hole, notch, or drill point added to engage the stem securely.
Finally, the key is tested on the valve and edges are finished to prevent damage during use.
Measure the faucet stem and identify fitting type
Measure the exposed stem diameter and inspect its profile to determine the correct fitting type before fabricating the key.
The author records diameter with calipers or a ruler, notes whether the stem is round, square, splined, or fluted, and checks for grooves or notches.
Matching these measurements to common key profiles guarantees a snug, functional engagement and prevents slippage or damage.
Cut and shape a metal strip for a snug fit
With the stem profile and diameter confirmed, the metal strip can be cut and formed to match those dimensions.
A firm hacksaw or metal snips remove excess length; files smooth rough edges.
The strip is bent gently over a mandrel or rounded surface to create a close, uniform curve that hugs the stem without binding.
Test fit and refine until contact is even and secure.
Drill or notch the key for secure engagement
Align the formed strip against the faucet stem to mark the exact locations for holes or notches that will engage the stem’s flats or splines.
Secure the strip in a vise and use a center punch on marks.
Drill progressively sized holes or file precise notches with a triangular or round file.
Remove burrs and verify alignment before proceeding to final fitting.
Test the key and finish edges to avoid damage
Try the key on the faucet stem to confirm a snug fit without forcing it; the key should engage the flats or splines cleanly and rotate the stem smoothly.
If binding occurs, file contact points slightly and retest.
Deburr and round all edges with a fine file or sandpaper to prevent scratching seals or skin.
Clean metal shavings and apply light lubricant before final use.
Step-by-Step: Make a Socket-Style Faucet Key from a Bolt and Nut
The section outlines how to fashion a socket-style faucet key by selecting a bolt and nut that match the faucet stem’s dimensions.
It then covers cutting and shaping the bolt to create a precise socket, attaching a secure handle for leverage, and testing the assembly on the valve.
Final notes address refining the fit to guarantee reliable operation without damaging the stem.
Choosing the right bolt size and socket
Selecting the correct bolt and matching socket diameter is essential for a secure, functional faucet key.
Measure the faucet stem across flats or the round stem diameter, then choose a bolt whose head and nut fit snugly without excessive play.
Match a socket or box wrench to those dimensions. Prefer hardened steel for durability and common metric or SAE sizes for interchangeability.
Cutting and modifying the bolt to fit the stem
With the bolt and socket size confirmed from measuring the faucet stem, attention turns to cutting and shaping the bolt so it seats firmly on the stem without damaging the valve.
The bolt is trimmed to length, edges deburred, and the tip filed to match stem flats or splines.
Fit is tested repeatedly; small adjustments guarantee snug engagement and full rotation without binding.
Securing a handle for leverage
Attach a sturdy handle to the modified bolt assembly to provide the leverage needed to operate the faucet without slipping.
Use a metal rod or old wrench perpendicular to the bolt, align centrally, and secure with a lock nut or weld for permanence.
Guarantee the grip is comfortable and corrosion‑resistant.
Test hand torque briefly to confirm stability before regular use.
Testing and refining fit
Begin by fitting the socket end onto the faucet stem to check alignment and engagement; note any wobble, binding, or gaps that indicate mismatched dimensions.
Adjust by filing or reshaping the bolt head edges and chamfering nut openings incrementally.
Re-test after each modification until the key seats snugly, rotates smoothly without slippage, and provides secure leverage without damaging the faucet stem.
Using Common Alternatives as Emergency Faucet Keys
When a proper faucet key is unavailable, common tools can serve as emergency substitutes if used carefully.
Adjustable pliers or a pipe wrench can turn a valve with attention to jaw placement and pressure to avoid marring the fitting; a screwdriver or pry bar may work briefly for leverage if contact is limited and controlled.
For lower-torque situations, a simple wooden block key can be fashioned to fit the valve and reduce risk of damage.
How to use adjustable pliers or a pipe wrench without damaging the valve
Using adjustable pliers or a pipe wrench as an emergency faucet key requires careful technique to avoid deforming the valve stem or damaging the surrounding fittings.
Select correct jaw size, protect the stem with a cloth or rubber strip, apply steady pressure perpendicular to the stem, avoid twisting motions, and tighten incrementally.
Release slowly after operation to check for leaks or loosened fittings.
Using a screwdriver or pry bar safely for short-term use
A flathead screwdriver or small pry bar can serve as a temporary faucet key for turning stubborn or seized valves, but proper technique and caution are essential to prevent damage.
The tool should fit snugly into the valve slot, applied steadily without sudden force. Protect the valve with a thin cloth, work slowly to avoid slipping, and stop if resistance feels abnormal to prevent stripping or bending.
Crafting a wooden block key for less torque situations
Craft a simple wooden block key by cutting a small strip of hardwood to fit snugly over the faucet stem and drilling a matching notch or slot to engage the valve.
Sand edges, test fit, and mark orientation. Use a durable screw or epoxy to secure a small handle for leverage.
This solution suits low-torque shutoffs; avoid forcing tight or corroded valves to prevent damage.
How to Turn Off Water at Source Instead of Forcing the Faucet
When possible, the article recommends turning water off at its source rather than forcing a stuck faucet.
It notes how to locate exterior shut-off valves, interior stop or main shut-off valves, and water meter or building-level shutoffs for apartments.
Practical steps for accessing and operating each type of valve will follow.
Locating and using exterior shut-off valves
Locating the exterior shut-off valve before any faucet work prevents damage and saves time.
The user should inspect along the hose bib run, near the foundation, or in a nearby valve box for a quarter-turn or gate valve.
Confirm by turning off and testing the spigot.
Use a wrench or valve key sized to the valve stem, then drain remaining water.
Finding and shutting off the main valve or interior stop valves
If an exterior shut-off cannot be found or does not fully stop flow, the next step is to locate the building’s main shut-off or interior stop valves to cut water at the source rather than forcing the faucet.
Inspect basements, utility rooms, or near the water heater for wheel or lever valves.
Close slowly, test the outdoor faucet, and reopen slightly if needed to relieve pressure.
Using the water meter shutoff or building shutoffs for apartments
One practical option is to shut off water at the meter or a building-level valve to stop flow to an outdoor faucet without forcing its components.
Access requires locating the meter or communal shutoff, often in a basement or utility room. Proper tools and permission from the landlord or utility are necessary.
After closure, relieve pressure at the faucet and document the action for restoration.
Preventing Damage When Operating Stubborn Outdoor Faucets
When confronting a stubborn outdoor faucet, the operator should apply controlled, incremental torque to avoid stripping threads or shearing components.
Targeted lubrication or a penetrating oil can free seized parts, applied sparingly and given time to work.
Seasonal precautions and awareness of freeze-related risks help prevent pipe damage and guide whether to continue forcing the valve.
Proper torque and incremental turning technique
Apply steady, measured torque and advance the valve in small increments to reduce the risk of snapping stems or stripping threads.
The operator should apply force gradually, pausing between quarter-turns to assess movement. If resistance persists, reverse slightly before retrying.
Use a properly sized key or wrench for even load distribution and avoid sudden jerks that concentrate stress on fittings or packing components.
Lubrication and penetrating oil application
After using steady, incremental torque to work a stuck stem, attention should turn to lubrication and penetrating oil to free seized threads and packing.
Apply a penetrating oil sparingly to the bonnet, stem base, and exposed threads. Allow dwell time, then work the stem gently to distribute lubricant.
Use silicone or plumber’s grease for packing; avoid excess that attracts dirt or contaminates water.
Avoiding frozen-pipe damage and seasonal precautions
Plan ahead to prevent frozen-pipe damage by draining and insulating stubborn outdoor faucets before cold spells arrive.
A homeowner should shut off interior supply, open spigots to drain residual water, and install frost-free covers or foam insulation.
Operate valves gently to avoid stress.
Inspect for cracks, replace damaged components, and winterize hoses and attachments to minimize burst-pipe risk and costly repairs.
Signs You Should Replace the Faucet Rather Than Repair
Severe corrosion, stripped stems, and leaks that recur after multiple fixes are clear signs a faucet may need full replacement rather than another repair.
Weighing the cost and complexity of repeated repairs against the one-time expense of replacement helps determine the more practical choice.
In many cases, replacement is the safer, more durable option—especially when structural deterioration or frequent failures are present.
Corrosion, stripped stems, and persistent leaks
Corrosion that eats through metal, stripped stems that no longer engage cartridges, and persistent leaks that continue despite repeated repairs all indicate a faucet has reached the end of practical service life.
When structural integrity is compromised, seals fail repeatedly and repair attempts become temporary.
Replacement restores reliable shutoff, prevents water damage, and avoids recurring labor and parts waste that signal irreversible component degradation.
Cost and complexity comparison: repair vs replacement
When repeated fixes fail or components are visibly damaged, owners should compare the costs and complexity of further repairs against full replacement. Assess parts availability, time, and tool needs; factor long-term reliability and warranty differences. Simple valve rebuilds can be cheap; extensive corrosion or obsolete models often favor replacement.
| Factor | Repair vs Replacement |
|---|---|
| Cost | Often lower vs higher upfront |
| Time | Shorter vs longer |
| Parts | Readily available vs sometimes hard |
| Reliability | Limited vs improved |
| Warranty | Minimal vs extended |
When replacement is the safer or more durable option
If frequent leaks, persistent mineral buildup, or recurring mechanical failures continue despite multiple repairs, replacement is often the safer and more durable choice.
Replacement is advised when corrosion compromises valve bodies, threads are stripped, parts are obsolete, or water quality accelerates deterioration.
A new faucet restores reliable shutoff, reduces future labor and parts costs, and guarantees compatibility with modern freeze protection and hose connections.
Step-by-Step: Removing and Replacing a Stubborn Outdoor Faucet
Before beginning, the area should be cleared and the water supply fully shut off to prevent spills and frost damage.
Corroded fittings are eased with penetrating oil and, when safe, applied heat to free stubborn connections before removal.
After fitting a correctly sized replacement hose bib and securing all joints, the system is pressurized and inspected for leaks.
Preparing the area and shutting off water
Clear the work area around the outdoor faucet and locate the main water shutoff for the house or the dedicated shutoff for that line.
Remove hoses, debris, and nearby obstructions. Place a bucket and towels to catch residual water.
Gather tools, flashlight, and gloves. Notify household members, then close the shutoff slowly and verify flow is stopped by opening the faucet briefly to drain remaining water.
Loosening corroded fittings and using heat or penetrating oil
Apply steady force and patience when tackling corroded fittings: start by spraying a generous amount of penetrating oil on the threads and let it soak for at least 15–30 minutes.
Then use a properly sized wrench with controlled, even pressure to avoid rounding edges. If the fitting resists, alternate cycles of heat (using a heat gun or propane torch at a safe distance) and reapplication of penetrating oil to break the corrosion bond before attempting removal.
After loosening, clean threads and inspect for damage, using a wire brush and additional lubricant as needed before final removal.
Selecting and installing a new hose bib
Once the old, corroded fitting has been freed and the threads cleaned, attention turns to selecting a replacement hose bib that matches the pipe material, connection type, and local climate conditions.
Choose frost-resistant models for cold areas, brass for durability, or plastic for corrosion resistance.
Align male/female threads, apply appropriate sealant or tape, hand-start threads, then tighten with a wrench to secure the new bib.
Testing for leaks after replacement
Turn the water back on slowly and observe the replaced hose bib and connections for any signs of leaking.
Watch joints, packing nut, and supply line for drips. Feel around seals for moisture.
If pressure causes seepage, tighten fittings incrementally or replace faulty washers/threads.
Recheck after several minutes and under full pressure.
Verify no persistent dampness before completing insulation or backfill.
Maintenance Tips to Keep Outdoor Faucets Working Smoothly
Seasonal winterization and simple insulation prevent freeze damage and extend faucet life.
Regular lubrication and scheduled inspections catch wear early and keep valves operating smoothly.
Professional preventive service should be sought when persistent leaks, stiff operation, or visible corrosion appear.
Seasonal winterization and insulation
As temperatures drop, outdoor faucets require deliberate winterization and insulation to prevent freezing, ruptures, and costly repairs.
Homeowners should shut off interior supply valves, drain exterior lines, and remove hoses.
Insulating covers, foam pipe wrap, or heat tape applied to exposed spigots reduces freeze risk.
Regularly verify insulation integrity before cold snaps and secure covers against wind to maintain protection.
Routine lubrication and inspection schedule
Establish a simple, regular schedule for lubricating and inspecting outdoor faucets to prevent stiffness, leaks, and premature wear.
Inspect monthly during active seasons: check handles, stems, packing nuts, and spouts for corrosion or drips.
Apply plumber’s grease to stems and silicone lubricant to O-rings quarterly.
Record dates and findings, tighten fittings as needed, and replace worn seals promptly to maintain reliable operation.
When to call a plumber for preventive service
Recognize signs that warrant professional preventive service to avoid small issues becoming costly repairs.
A plumber should be contacted for persistent leaks, reduced flow, frozen or irregular operation, corroded valves, or visible pipe damage.
Annual or biannual inspections are advisable for older systems.
Professional servicing prevents emergencies, guarantees proper seal replacement and winterization, and extends faucet and supply-line lifespan.
Troubleshooting Common Problems When Using a DIY Faucet Key
When a homemade faucet key slips or rounds the stem, simple fixes such as adding a shim, tightening the grip, or using a replacement adapter can restore function quickly.
If water continues to leak after turning the valve off, common causes include a worn washer or seat, an improperly seated packing nut, or damage to the valve stem that warrant inspection and targeted repair.
For a stuck faucet, mineral buildup is often to blame and can be addressed with descaling solutions, soaking the stem, and gentle mechanical loosening.
Key slips or rounds the stem quick fixes
If a DIY faucet key slips or rounds the stem, the most likely causes are an ill-fitting key, excessive torque, or a corroded/softened stem surface; addressing these quickly prevents further damage and restores function.
Use a properly sized key or add a thin protective sleeve, apply steady controlled force, clean corrosion with a wire brush, and lubricate the stem before retrying to minimize slippage.
Water continues to leak after turning off likely causes
Several common factors can cause water to continue leaking after the valve is turned off using a DIY faucet key.
Possible causes include a worn or damaged seat washer, failing valve packing, a compromised O-ring, or an imperfectly seated valve stem.
Loose packing nuts or residual pressure in the line also allow drips.
Inspection and part replacement or tightening usually resolve persistent leaks.
Stuck faucet due to mineral buildup descaling methods
Apply targeted descaling to free a faucet stuck from mineral deposits without damaging the valve components.
A DIY approach uses vinegar or commercial descaler applied around the stem and bonnet; let soak, then gently work the stem with penetrating oil and a faucet key.
For severe buildup, disassemble the handle and soak internal parts, scrub with a brush, rinse thoroughly, and reassemble, replacing worn seals.
Recommended Affordable Faucet Keys and Tools to Buy
The following recommendations focus on affordable, durable options for homeowners needing reliable faucet keys and basic outdoor plumbing tools.
- Multi-size faucet keys that fit common spigot sizes and include a compact carrying ring.
- Adjustable wrench (6–12 inch) for stubborn fittings.
- Tongue-and-groove pliers for grip on irregular surfaces.
Best multi-size faucet keys for homeowners
A compact multi-size faucet key streamlines common shutoff tasks by combining several wrench profiles into a single, affordable tool designed for homeowners.
Durable steel construction, corrosion-resistant finishes, and clearly labeled sizes improve usability.
Recommended options include foldable models with multiple heads, T-handle variants for leverage, and flat keys with hex and square cutouts.
Prioritize fit, build quality, and wallet-friendly warranties.
Essential wrenches and pliers for outdoor plumbing tasks
Moving from multi-size faucet keys, homeowners should also assemble a small set of wrenches and pliers tailored for outdoor plumbing work.
Recommended tools include an adjustable wrench (6–10 inch), a tongue-and-groove plier, needle-nose pliers for tight fittings, and locking pliers for stubborn valves.
Choose corrosion-resistant, budget-friendly brands with comfortable grips to guarantee durability and ease of use.
Safety Checklist Before Attempting Any DIY Faucet Work
Before attempting any DIY faucet work, a concise safety checklist should cover personal protective equipment and maintaining a safe working posture.
It should also include steps to prevent water damage and identify any electrical hazards near the work area.
Finally, documenting valve positions and taking photos before disassembly guarantees accurate reassembly and provides a reference if issues arise.
Personal protective equipment and safe working posture
Gather appropriate personal protective equipment and adopt a stable working posture to minimize injury risk when attempting any DIY faucet task.
The individual selects gloves for grip and cut resistance, safety glasses for debris, and sturdy footwear.
Kneeling pads or a small stool reduce strain; maintain a neutral spine and avoid overreaching.
Pause to reposition tools or body rather than forcing awkward angles.
Preventing water damage and electrical hazards
Having secured proper protective gear and a stable posture, the next step is to verify the work area is safe from water and electrical hazards.
Inspect for nearby outlets, extension cords, and low‑lying power lines; move or cover electrical devices.
Shut off interior breakers if flooding is possible.
Contain leaks with buckets and absorbent materials, and guarantee clear, dry access to the valve before proceeding.
Documenting valve positions and taking photos for reference
Photograph and label each shutoff and service valve from multiple angles so their current positions—open, closed, or partially open—are unmistakable for later reference.
Record date, time, and any distinguishing marks; note handle orientation and surrounding landmarks.
Store images and notes with the project file or phone album, and backup offsite.
Clear labeling prevents errors, speeds restoration, and aids communication with contractors or household members.
Conclusion
A practical DIY faucet key can save time and money when battling a stubborn outdoor spigot. One in five homeowners encounters outdoor faucet issues annually, underscoring the value of simple solutions and basic tools. With proper materials, careful steps, and routine maintenance, a homemade key often restores control without a plumber. Always follow safety precautions and consult professional help for persistent leaks or complex valve damage to prevent property harm and wasted water.