How to Install CSST Fittings Safely: Step-by-Step Guide for DIYers and Pros
To safely install CSST fittings, start by obtaining the necessary permits and ensuring you have personal protective equipment (PPE) and approved fittings. Before beginning, isolate the gas supply. Follow these key steps: measure and cut the tubing squarely, deburr and clean the edges, and fit sleeves, ferrules, and connectors to the required depths. Use calibrated tools to apply the correct torque values. Conduct pressure tests and check for leaks with soap or electronic methods. Lastly, verify bonding to the electrical service according to code with low-resistance testing, and document all steps. For detailed procedures, code references, and troubleshooting tips, continue reading.
What CSST Fittings Are and Why Safe Installation Matters
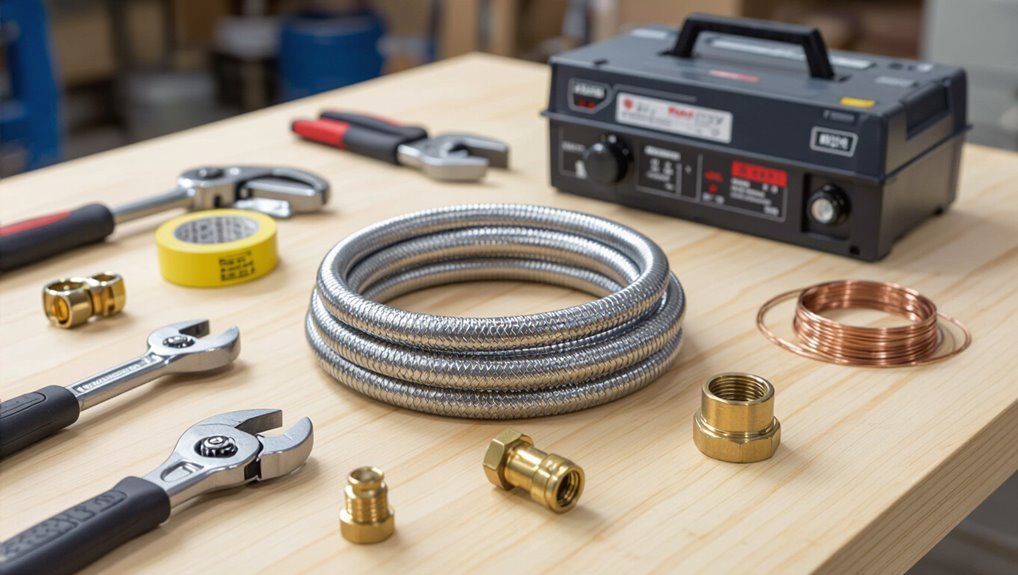
Corrugated stainless steel tubing (CSST) is a flexible gas piping available in several types and coatings designed for residential gas distribution.
It is commonly used to supply appliances, furnaces, and other gas fixtures where flexibility and easier routing are needed.
Improper installation can cause gas leaks, fire hazards, and code violations that compromise safety and liability.
Definition and types of CSST (Corrugated Stainless Steel Tubing)
CSST (corrugated stainless steel tubing) is a flexible gas piping material composed of a thin, corrugated stainless steel inner tube with various external jackets and fittings designed for residential and commercial gas distribution.
Types include jacketed, unjacketed, and bonding-enhanced CSST, available in different diameters and connector styles.
Understanding material variations, compatible fittings, and manufacturer instructions informs how to install csst fittings safely.
Common uses in residential gas systems
After outlining the types and components of corrugated stainless steel tubing, attention turns to how its fittings are used within homes and why proper installation matters.
CSST fittings commonly connect gas lines to appliances—ranges, water heaters, furnaces, fireplaces—and branch lines to meters and regulators.
Their flexibility simplifies routing through walls and attics, reduces joints, and accommodates remodeling while meeting appliance-specific connection requirements.
Risks of improper installation (leaks, fire hazards, code violations)
Any lapse in proper fitting installation can create immediate and long-term dangers: gas leaks that lead to asphyxiation or explosions, ignition risks from electrical arcing or nearby flames, and regulatory noncompliance that may void insurance or require costly remediation.
Improperly tightened or damaged CSST, missing bonding, or wrong fittings increase leak probability, fire initiation, and failed inspections, prompting repairs, fines, and potential liability for property damage or injury.
Quick Safety Checklist Before You Start
Before beginning work, verification of required permits and compliance with local codes should be completed.
The installer must confirm availability of proper personal protective equipment and observe basic safety precautions.
A final check of tools and materials guarantees fittings and connectors match specifications and are in good condition.
Required permits and local code considerations
Because gas-line work intersects public safety and local regulation, verifying permits and code requirements is the first practical step before installing CSST fittings.
Contractors or DIYers should check municipal codes, state plumbing/gas regulations, and utility company rules.
Confirm permit types, inspection schedules, bonding/grounding mandates, approved fittings, and licensed-installer requirements.
Document approvals and keep copies on site for inspections.
Personal protective equipment and safety precautions
A concise safety checklist guarantees all necessary personal protective equipment (PPE) and precautions are in place before work begins: hard hat, eye protection, cut-resistant gloves, flame-resistant clothing, and steel-toe boots.
A gas detector, fire extinguisher, and adequate ventilation should also be accessible.
Confirm gas supply is isolated and verified off, electrical hazards managed, work area cleared, and a spotter or communication plan is established for emergency response.
Tools and materials verification
Several quick checks confirm all required tools and materials are present and serviceable before work commences: verify correct-size CSST fittings, approved connectors, compatible pipe supports, and a calibrated torque wrench; confirm thread sealant or approved tape, proper cutting and deburring tools, and a functioning leak detector.
Inspect for damage, expiration, and certification marks; guarantee spare parts, grounding components, and clear manufacturer instructions are available.
Required Tools, Materials, and Parts
The section lists the specific approved CSST fittings, connectors, and bonding clamps required for a compliant installation.
It also notes compatible pipe thread sealants and PTFE tape types suitable for gas service.
A concise recommended tools list covers wrenches, torque tools, cutters, and testing equipment.
Approved CSST fittings, connectors, and bonding clamps
One essential step before beginning any CSST installation is confirming that all fittings, connectors, and bonding clamps are listed or certified for use with the specific CSST brand and model.
Approved components match manufacturer specifications, pressure ratings, and installation instructions.
Use only compatible listed changeover fittings, approved bonded connectors, and manufacturer-authorized clamps to guarantee leak-free joints, proper bonding, and code compliance during installation.
Compatible pipe thread sealants and tape
Appropriate pipe thread sealants and tape must be selected to match the CSST manufacturer’s recommendations, fuel type, and threaded fitting material to guarantee gas-tight, durable joints.
Use approved yellow gas-rated PTFE tape or manufacturer-specified anaerobic or pipe-thread compound compatible with brass, iron, or stainless fittings.
Avoid common plumber’s tape not rated for gas.
Apply sparingly and follow cure times and torque specs.
Recommended tools list
Necessary tools and materials are listed to guarantee safe, code-compliant CSST installation and prevent costly rework.
The list includes essential hand and safety tools, fittings, and sealants. Practitioners should verify material compatibility and local code before starting.
- Adjustable wrench and torque wrench
- CSST-compatible fittings and clamps
- Pipe thread sealant or approved tape
- Tubing cutter and deburring tool
- Safety glasses and gloves
Pre-Installation Inspection and Preparation
Before any joints are made, the installer inspects CSST and fittings for kinks, punctures, corrosion, or missing components and measures the planned gas run to determine lengths and bends.
They confirm the gas type and system pressure to guarantee compatible fittings and correct regulator settings.
Finally, the work area is cleared, utilities secured, and the main gas supply shut off and verified before proceeding.
How to inspect CSST and fittings for damage
A thorough visual and tactile inspection of CSST and its fittings is required to identify dents, kinks, abrasions, loose or missing fittings, degraded jacket material, and signs of corrosion or manufacturing defects that could compromise integrity.
The inspector should check connection threads, ferrules, and compression areas for cracks or deformation, verify jacket continuity, note any oil or chemical residues, and reject compromised components.
Measuring and planning the gas run
Several key measurements determine a safe, code-compliant CSST run: total length, number and type of fittings, elevation changes, and distances from potential hazards or electrical sources.
The installer maps the route, measures uninterrupted runs, counts elbows and shifts, and logs required clearances. Allowances for future access, support spacing, and expansion loops are noted.
Accurate measurements inform material lists and permit-ready plans.
Verifying gas type and system pressure
With route measurements finalized and material needs logged, the installer verifies the gas type and system pressure to confirm compatibility with CSST and associated fittings.
They check appliance labels, service documentation, and meter information to distinguish natural gas from propane. A manometer or calibrated gauge measures static and operating pressures, ensuring values fall within CSST and fitting specifications before proceeding.
Preparing the work area and shutting off gas
Before any fittings are handled, the installer secures the work area and isolates the gas supply to eliminate ignition and leak risks.
The installer ventilates enclosed spaces, clears flammable materials, and posts warnings. Gas is shut off at the appropriate valve, downstream appliances are capped or disconnected, and a pressure gauge confirms zero flow.
A combustion air check and leak detection plan are established before proceeding.
Step-by-Step CSST Fitting Installation
The installation sequence begins with precise cutting and deburring of the CSST tubing, followed by sliding on the specified protective sleeves and fitting components.
Attention to insertion depth, alignment, and correct tightening torque using a calibrated torque wrench guarantees leak-free joints.
When connecting to rigid pipe, installers must use approved connector fittings and confirm compatibility with the system.
Cutting and deburring CSST tubing
Cutting and deburring CSST tubing requires steady hands and the right tools to guarantee a clean, square end that seals properly with the fitting.
Measure and mark, then cut with a tubing cutter or fine-tooth saw, keeping the cut perpendicular.
Remove burrs with a deburring tool or round file, inspect the edge for nicks, and clean swarf before proceeding to the next step.
Sliding on protective sleeves and fitting components
Slip the protective sleeve over the CSST end, orienting the seam and any marked alignment features toward the installer’s reference.
Then slide the sleeve back far enough to expose the prepared tubing for fitting assembly.
Next, thread or position backing rings, ferrules, and the fitting body in the specified order, ensuring components sit flush and move freely without twisting before final connection.
Insertion depth and proper alignment techniques
Insert the tubing fully until the prepared end meets the fitting shoulder, then verify alignment by sight and feel to confirm the CSST lies straight through the coupling without kinks or angular stress.
Mark insertion depth and recheck after seating. Guarantee tubing and fitting faces are flush, concentric, and free of debris.
Support tubing to prevent movement during completion and maintain straight runs through the joint.
Tightening torque and using a torque wrench
Proper torque is critical to guarantee a leak-free, mechanically secure CSST connection without over-stressing components.
Using a calibrated torque wrench and following manufacturer-specified values prevents under-tightening that leaks and over-tightening that deforms fittings.
The installer should set the wrench, apply steady force, verify clicks or digital readout, and recheck torque after initial pressure testing.
Record settings and inspections for compliance.
Installing transition fittings to rigid pipe
After confirming torque settings and verifying leak-free connections, the installer moves on to joining the corrugated stainless tubing to the rigid piping system using the manufacturer’s specified fitting assembly.
The installer deburrs and aligns pipe ends, seats the ferrule or gasket per instructions, threads or inserts the adapter, and tightens to the prescribed torque.
Installed fittings are supported and protected from strain or vibration.
Performing a leak test after assembly
Begin the leak test by isolating the system and applying the recommended test medium and pressure according to the manufacturer’s procedure and local code.
Inspect all joints and fittings with approved leak detection solution or electronic detector.
Monitor pressure for the specified hold time.
Restore service only after zero leak indication and pressure stability.
Document results and corrective actions for compliance records.
Bonding and Grounding Requirements
Bonding and grounding are mandatory for CSST to reduce the risk of lightning-induced or fault-current damage and to guarantee the system is at the same electrical potential as the building.
The installer must place the bonding clamp on the manufacturer-approved metallic portion of the piping and size the conductor per local code and equipment grounding requirements.
Final connections to the electrical service should follow accepted methods and be verified by testing continuity and measuring the bond to confirm proper installation.
Why bonding and grounding are mandatory for CSST
Maintain electrical continuity between CSST and the building electrical system because without proper bonding and grounding the tubing can sustain damage or permit arcing during a lightning strike or electrical fault.
Bonding redirects stray currents, minimizes potential differences, and reduces fire risk.
Grounding provides a low‑impedance path to earth, protecting fittings and occupants.
Compliance with codes guarantees safety and insurance validity.
Correct bonding clamp placement and conductor sizing
Place the bonding clamp where it guarantees solid electrical contact to the CSST or its associated metal fitting—on the rigid metallic component or the tubing jacket manufacturer-designated bonding point—avoiding thin-walled sections, paint, corrosion, or nonconductive coatings.
The conductor must match code-required gauge for the system (commonly #6 AWG for residential), be continuous, secured, and routed to minimize mechanical damage and corrosion.
Grounding connection methods to electrical service
Having established proper clamp placement and conductor sizing, the next focus is on how that conductor is connected to the building electrical service to achieve an effective grounding electrode system. The installer ties the bonding conductor to the service ground/grounding electrode conductor per code, using listed connectors or bonding jumpers at meter, main panel, or grounding electrode conductor points.
| Location | Connector type |
|---|---|
| Meter base | Listed lug |
| Main panel | Grounding bar |
| Service entrance | Bonding jumper |
| Ground rod | Clamp |
| Counterpoise | Listed clamp |
Testing continuity and verifying proper bond
Begin testing continuity with a calibrated low-resistance ohmmeter or continuity tester to confirm the bonding conductor provides an unbroken, low-impedance path between the CSST bonding clamp and the building grounding electrode system.
Measure resistance; expect values near zero ohms. Inspect mechanical connections, torque, and corrosion.
Repeat after system stresses. Document readings and corrective actions. Retest until readings meet local code and manufacturer specifications.
Common Installation Scenarios and How to Handle Them
Typical installation scenarios present predictable challenges that require specific practices for routing through walls, floors, and ceilings and for working around appliances and meters.
The guidance also addresses considerations for long runs and proper support spacing, plus techniques for making bends, offsets, and using elbows without compromising the tubing.
Clear, code-compliant methods minimize damage and guarantee system integrity.
Routing through walls, floors, and ceilings
Many installations require CSST to pass through walls, floors, or ceilings, and each penetration must be planned to protect the tubing, preserve firestopping and structural integrity, and comply with code.
Use approved sleeves or bushings, maintain required clearances from combustible materials and electrical wiring, seal with listed firestop materials, avoid sharp edges and pinch points, and secure tubing to prevent movement or strain.
Working around appliances and meters
After routing through walls, floors, and ceilings, CSST often encounters appliances and meters that require specific clearances, fittings, and support to secure safe operation and code compliance.
Installers should maintain manufacturer clearance distances, use approved connectors and shutoff valves, bond and ground at meter points per local code, avoid routing behind heat sources without protection, and guarantee accessible service stops for inspection and emergency shutoff.
Long runs and support spacing
Long CSST runs require careful planning to control sag, prevent mechanical damage, and maintain required clearances. Installers should follow manufacturer-prescribed support intervals, use approved straps or hangers, and plan changes in direction to minimize stress at fittings.
Supports must be spaced per spec, secured to structural members, avoid sharp edges, and allow inspection access. Continuous runs should consider thermal movement and mechanical protection where exposed.
Making bends, offsets, and using elbows
When routing CSST through typical residential and commercial layouts, installers must choose between field-bending, offsets, or factory elbows based on space, required clearances, and manufacturer limits.
Each option affects stress at fittings, flow characteristics, and code compliance, so decisions should prioritize maintaining bend radius, avoiding kinks, and minimizing joint count while using approved techniques and tools.
Field bends follow bend-radius specs; offsets use double bends; elbows reduce fittings but require proper connectors and support.
Inspection, Testing, and Commissioning
Inspection, testing, and commissioning verify the integrity and safety of CSST fittings through methods such as soap solution checks and electronic gas leak detectors, each with different sensitivities and appropriate use cases.
Pressure testing must follow specified procedures and hold times, with any failures documented, corrected, and retested before service.
Complete documentation, labeling, and as-built notes should be prepared, and a licensed inspector or professional engaged whenever code requirements, uncertain results, or complex systems dictate.
Soap test vs. electronic gas leak detectors
Detecting leaks in CSST installations requires a choice between traditional soap solution testing and modern electronic gas detectors, each with distinct advantages and limitations.
Soap tests are inexpensive, simple, and immediately reveal escaping gas via bubbles but require visual access and can miss slow leaks.
Electronic detectors provide sensitivity to low concentrations and logging capability yet need calibration, battery power, and operator training for reliable results.
Pressure testing procedures and hold times
Begin pressure testing the CSST system only after all fittings are tightened, purged of air, and appliances isolated.
Apply test pressure per local code (typically 3–10 psi for residential leak testing or higher for code-mandated tests), monitor gauges, and maintain pressure for the required hold time (commonly 10–30 minutes).
Inspect joints for pressure decay; rectify leaks and retest until stable readings confirm integrity.
Documentation, labeling, and as-built notes
When testing and commissioning are complete, thorough documentation, clear labeling, and accurate as-built notes provide the permanent record needed for future maintenance, safety checks, and code compliance.
Records should include test results, fitting locations, materials, torque values, and corrective actions.
Labels on piping identify service, pressure rating, and installation date.
Store drawings and digital files securely and make them available to owners and inspectors.
When to call an inspector or licensed professional
Under what circumstances should an inspector or licensed professional be contacted during inspection, testing, and commissioning of CSST fittings?
An inspector or licensed professional should be contacted when leaks are suspected, pressure tests fail, fittings show damage or improper assembly, grounding bonding is unclear, local code compliance is uncertain, or complex system modifications occur.
They verify safety, correct deficiencies, and provide official approval.
Typical Mistakes to Avoid
Common installation errors include over-tightening or under-tightening fittings, using incorrect or non-listed fittings and sealants, and failing to bond or placing bonds improperly.
Incorrect support spacing and tubing stress are frequent causes of leaks and mechanical failure.
Addressing these specific mistakes reduces safety risks and guarantees long-term system integrity.
Over-tightening or under-tightening fittings
Force-fitting or leaving connections loose both compromise CSST system integrity.
Over-tightening can strip threads, deform ferrules, or crack fittings, causing leaks or stress points. Under-tightening allows gas seepage and vibration-induced loosening.
Proper torque per manufacturer specifications and use of calibrated wrenches prevent damage.
Inspect joints after assembly and pressure-test the system to confirm secure, leak-free connections.
Using wrong or non-listed fittings and sealants
After proper torque and leak testing are confirmed, attention must turn to the components themselves: using non-listed or incorrect fittings and sealants undermines the entire CSST installation.
Unapproved parts can cause leaks, void warranties, and fail safety standards. Only manufacturer-listed fittings and compatible, approved sealants should be used.
Inspect labels and documentation; replace any doubtful components before pressurizing the system.
Failing to bond or improper bond placement
Neglecting to bond CSST or placing the bonding clamp incorrectly greatly increases the risk of lightning damage and electrical hazards.
Inspectors note common errors: clamps on jacketed sections, loose connections, or bonding to nonconductive components.
Properly located, tight, listed bonding clamps on bare metal gas piping guarantee equipotential grounding.
Failure compromises system safety, increases fire risk, and may void warranties or code compliance.
Incorrect support spacing and tubing stress
Improper spacing of supports and excessive bending stresses on CSST lead to kinks, damage to the jacket, and increased risk of leaks or premature failure.
Install supports at manufacturer-specified intervals, maintain gentle bends with recommended bend radii, and avoid tension or compression.
Secure tubing to prevent movement from thermal expansion or vibration.
Inspect for stress points and correct routing before finalizing connections.
Troubleshooting Leaks and Performance Issues
The text outlines methods for diagnosing slow leaks and intermittent performance issues, including pressure testing and visual inspection for hairline breaches.
It then summarizes repair options—repair coupling, partial replacement, or full retrofit—and the criteria for choosing among them.
Finally, it explains when fitting-level repairs suffice and when complete CSST replacement is warranted for safety and code compliance.
Diagnosing slow leaks and intermittent symptoms
Begin by isolating subtle signs—staining, faint odor, fluctuating appliance performance, or pressure drops—that indicate slow CSST leaks or intermittent faults, since these often evade standard visual checks and require methodical observation and testing to pinpoint their source.
Log symptom timing, compare readings with a manometer, inspect fittings under soap solution, monitor ambient gas detectors, and document correlations to narrow probable leak locations.
Repair options: repair coupling, replacement, or retrofit
Having narrowed likely leak points through symptom logs, pressure checks, and soap-test inspections, attention turns to repair options: repair coupling, section replacement, or complete retrofit.
Repair couplings seal localized joint failures quickly; section replacement addresses damaged tubing lengthwise.
Complete retrofit substitutes outdated CSST systems for bonded, jacketed alternatives when integrity or grounding is compromised.
Choose based on access, cost, and long-term safety requirements.
When to replace CSST vs. repair fittings
Assess options by weighing leak severity, damage location, and system history: isolated joint leaks with intact tubing and sound grounding often suit repair couplings, whereas pervasive corrosion, multiple compromised fittings, evidence of lightning or electrical arcing, or damaged jacketed layers warrant section replacement or full retrofit to a bonded, jacketed CSST system.
Document findings, consult manufacturer guidance, verify bonding, and replace sections when safety or longevity is uncertain.
Maintenance, Upgrades, and Lifetime Considerations
A regular inspection schedule helps guarantee CSST systems remain secure, bonded, and free of damage over time.
When older or non-bonded installations are identified, upgrading to current bonded fittings and practices reduces risk and may be required by code.
Owners should review manufacturer warranties and expected product lifespan to plan replacements and preserve coverage.
Routine inspection schedule for CSST systems
When should CSST systems be inspected to maintain safety and performance?
Inspections are recommended annually by a qualified professional and after any significant event—renovation, earthquake, lightning strike, or suspected impact.
Checklist items include visual condition, fittings and connections, bonding/grounding integrity, and signs of corrosion or abrasion.
Document findings, address defects promptly, and schedule follow-up inspections after repairs or environmental changes.
Upgrading older CSST or non-bonded installations
Following an inspection that reveals aging components, improper bonding, or installations predating current standards, owners should consider upgrading older CSST or non-bonded gas systems to reduce risk and meet modern codes.
Professional evaluation identifies necessary actions: replace degraded tubing, install bonding clamps and bonding conductors, convert to bonded CSST fittings, and update clearances and supports.
Documentation and permit compliance complete the upgrade.
Manufacturer warranties and product lifespan
Because manufacturers set specific limits and conditions for coverage, understanding warranties and expected service life is essential for planning maintenance and upgrades of CSST systems.
Warranty terms specify installation, bonding, inspection, and transferability requirements. Lifespan estimates depend on material, environment, and usage.
Homeowners should document installations, follow required procedures, and verify warranty validity before modifying or replacing components to avoid denied claims.
Resources, Codes, and Manufacturer Guidance
Relevant codes such as the IFGC, NFPA standards, and applicable local amendments establish the legal and safety framework for CSST installation.
Manufacturer installation manuals provide specific requirements, diagrams, and torque values that must be followed exactly.
Licensed gasfitters, local building departments, and certified inspectors provide verification, interpretation, and contact information for compliance and inspections.
Key code references (IFGC, NFPA, local amendments)
Which codes govern CSST installation depends on jurisdiction, but installers must primarily consult the International Fuel Gas Code (IFGC) and applicable NFPA standards along with any state or local amendments.
These documents define allowable materials, bonding/grounding, seismic and support requirements, inspection protocols, and alterations.
Local amendments can be stricter; compliance verification with authority having jurisdiction guarantees legal and safety conformity.
How to read and follow manufacturer installation manuals
Consult manufacturer installation manuals as the primary, binding source for safe CSST installation, since they translate codes and product limitations into specific, actionable requirements.
Review scope, approved fittings, torque values, bend radii, grounding/bonding instructions, and required clearances.
Follow sequence diagrams, fastener specifications, and warning boxes.
Retain manuals on-site, record model and lot numbers, and follow revision dates to guarantee compliance.
Where to find licensed professionals and inspection contacts
When seeking qualified installers and inspection contacts for CSST work, homeowners and contractors should start with state and local licensing boards, utility company lists, and manufacturer-authorized installer directories to verify credentials match the scope of work.
Verify insurance, ask for references, confirm familiarity with local code, and request proof of manufacturer training.
- State licensing board
- Utility company list
- Manufacturer directory
- Local code inspector
- Insurance and references
Conclusion
Tools set down like closed shells, the new CSST runs cleanly through walls and floors, a quiet river bridged by careful hands. Each fitting, seated and tightened, reflects a commitment to safety and code—the bright sheen of vigilance against unseen sparks. When inspections pass and labels remain, the system breathes steady; regular checks and respectful maintenance keep risk at bay, turning installation into a durable promise of protection and peace.