How to Install a Shower Seat: Step-by-Step Guide for Safe, Stable Mounting
To install a shower seat safely and securely, start by selecting the right seat and locating the wall studs or blocking for support. Use corrosion-resistant anchors to ensure durability. You’ll need tools such as a stud finder, drill, level, and waterproof sealant. Begin by marking the mounting points, drilling pilot holes, and attaching the brackets to solid backing. Secure the seat in place and perform gradual load testing to confirm it can handle the rated capacity. Finally, seal all penetrations to protect your shower’s waterproof membrane and maintain it regularly. For additional tips on alternative methods, compliance, and troubleshooting, refer to further guidance.
Overview of Shower Seat Installation and Safety Outcomes
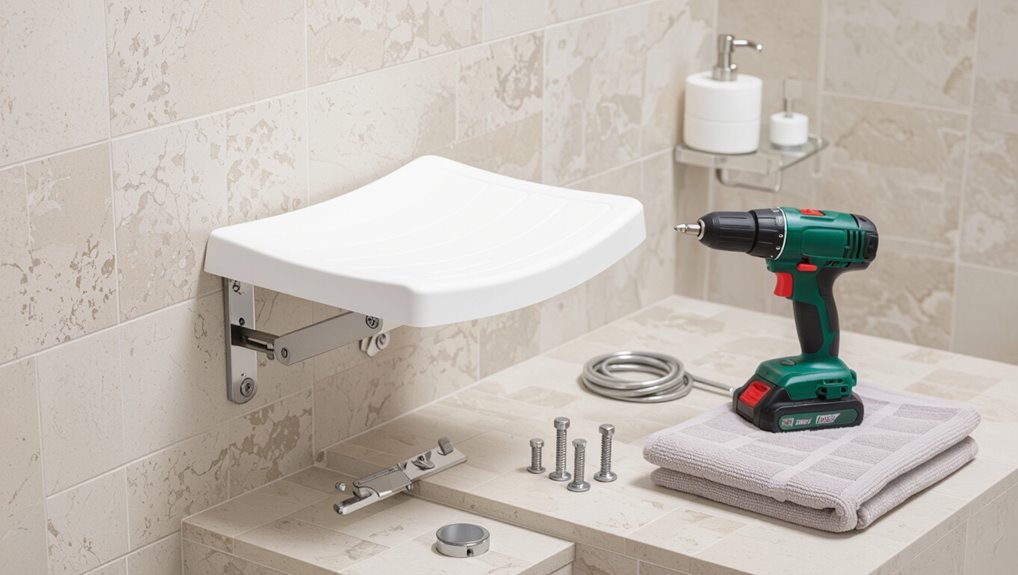
A shower seat is commonly used by older adults, people with mobility or balance issues, and caregivers assisting bathing tasks.
Proper installation enhances safety by reducing fall risk, improving comfort, and increasing independence during showers.
Wall-mounted, fold-down, freestanding, and transfer bench options suit different bathroom layouts and user needs, with each type chosen for weight capacity, space, and permanence.
Who needs a shower seat and common use cases
Who benefits most from a shower seat? Older adults, people with mobility impairments, post-surgery patients, and caregivers often require seated bathing for safety. Care facilities, rehabilitation centers, and family homes commonly use shower seats to reduce fall risk and assist transfers. Installers referencing how to install a shower seat should match seat type and mounting method to user needs, space, and weight capacity.
Benefits of a properly installed shower seat
When securely mounted, a shower seat reduces fall risk, preserves independence, and eases caregiver tasks by providing a stable, ergonomic surface for bathing.
Proper installation guarantees weight capacity, prevents wall or anchor failure, and minimizes water intrusion and mold risk.
Users experience improved comfort, shorter bathing times, and greater dignity; caregivers benefit from safer transfers and reduced strain during assistance.
Types of shower seats and brief suitability guide
Building on the safety and usability benefits of a securely mounted shower seat, an overview of common seat types helps match user needs and installation constraints.
- Wall-mounted: permanent, highest stability for heavy users.
- Fold-down: space-saving, requires solid wall anchors.
- Freestanding: portable, needs non-slip flooring.
- Transfer/bench: aids transfers, longer surface, may require reinforcement.
Choosing the Right Shower Seat for Your Bathroom
Selection hinges on seat type—wall-mounted, folding, freestanding, or corner—each offering different stability and space benefits.
Material, weight capacity, and ADA compliance should be matched to user needs and bathroom conditions.
Accurate measurements and determination of ideal seat height complete the decision.
Wall-mounted vs. folding vs. freestanding vs. corner seats
Compare the four main shower-seat types—wall-mounted, folding, freestanding, and corner—to match space, stability, and user needs.
Each offers trade-offs: wall-mounted maximizes stability but needs solid backing; folding saves space; freestanding requires floor room but is movable; corner seats fit small showers.
- Wall-mounted
- Folding
- Freestanding
- Corner
Material, weight capacity, and ADA compliance considerations
Material choice, weight capacity, and ADA compliance are the functional pillars that determine a shower seat’s safety, durability, and suitability for different users.
Select corrosion-resistant materials (teak, stainless steel, high-density plastic) for wet environments.
Confirm load ratings—standard seats often support 250–400 lbs; bariatric options exceed 600 lbs.
Verify ADA guidelines for clearances, seat dimensions, and mounting to guarantee accessibility and legal compliance.
Measuring the space and determining optimal seat height
Before ordering or installing a shower seat, measure the shower footprint and nearby fixtures to guarantee proper fit and clearances; this includes the stall width, depth, door swing or curtain arc, and the location of controls and grab bars.
Determine seat height by measuring user knee-to-floor distance; typical heights range 17–19 inches, adjust for comfort and transfer needs.
Verify mounting points and clearances before purchase.
Tools, Materials, and Preparations
Before beginning installation, a clear checklist of required tools and hardware should be assembled, including drill, level, stainless fasteners, and appropriate anchors.
The mounting wall must be inspected for studs, backing, tile condition, and any waterproof membrane to guarantee secure attachment and avoid damage.
Installers should use safety precautions and personal protective equipment—glasses, gloves, and a dust mask—while following safe drilling and handling practices.
Required tools and hardware checklist
A concise checklist of tools, fasteners, and preparatory items helps guarantee the shower seat installation proceeds efficiently and safely.
Required items include measuring and leveling instruments, cutting and anchoring tools, appropriate fasteners, and sealing supplies.
Suggested essentials:
- Tape measure, level, pencil, stud finder
- Drill, hole saw, wrench set
- Stainless steel screws/bolts, toggle anchors
- Silicone sealant, cleaning cloth
Wall inspection: studs, backing, tile, and waterproof membranes
Wall inspection verifies that studs, backing, tile, and waterproof membranes can support the shower seat and that attachment points are accessible; this assessment requires confirming stud spacing and depth, identifying solid backing or blocking, locating tile substrate and grout lines, and checking for intact waterproofing behind finished surfaces.
The inspector marks stud locations, measures cavity depth, notes tile condition, and plans fastener placement to engage structural backing.
Safety precautions and personal protective equipment
When preparing to install a shower seat, the installer should prioritize safety by selecting appropriate personal protective equipment (PPE) and establishing clear site controls.
Gloves, eye protection, a dust mask or respirator rated for silica if cutting tile or concrete, and hearing protection are essential.
Secure work area, use non-slip footwear, confirm electrical power isolation, have a first-aid kit and fire extinguisher nearby, and follow tool manufacturer instructions.
Step-by-Step Installation: Wall-Mounted Shower Seat (Standard Method)
The installer first locates studs or blocking and marks exact mounting points before transferring measurements to the wall for bracket placement.
Pilot holes are drilled and anchors or blocking installed as required, then the mounting brackets are secured and checked for level.
Finally, the seat is mounted, fasteners tightened, and a load test performed to confirm stability.
Locate studs or blocking and mark mounting points
Begin by locating the structural supports behind the shower wall to guarantee the seat anchors into solid framing or blocking.
Use a stud finder and probe to confirm stud centers or existing blocking. Mark vertical lines at each support and note top and bottom heights.
Verify spacing matches the seat’s bracket pattern. Record measurements clearly for accurate bracket placement later.
Transfer measurements and mark seat bracket positions
Measure twice and transfer the recorded stud or blocking locations onto the shower wall, aligning those marks with the seat’s bracket pattern.
Using a level and straightedge, scribe horizontal and vertical reference lines for each bracket. Mark hole centers precisely, noting seat height and clearance.
Confirm symmetry by measuring between bracket centers. Recheck all marks before proceeding to drilling.
Drill pilot holes and install anchors or blocking as needed
Prepare to drill pilot holes at the previously marked centers, confirming drill bit size matches the screw shank and anchor type.
Drill perpendicular, controlling depth with tape on the bit. For studs, sink pilot holes sized for wood screws.
For hollow or tiled walls, install appropriate anchors or toggle bolts per manufacturer directions.
If blocking is required behind tile, access and install blocking before final anchoring.
Attach mounting brackets securely and verify level
With pilot holes and anchors or blocking in place, the installer aligns the mounting brackets over the marked centers and seats them flush against the wall surface.
Fasteners are driven using appropriate screws into anchors or blocking, tightened securely but not overdriven. A spirit level verifies horizontal alignment; minor adjustments are made before final tightening.
Fastener torque and bracket stability are confirmed visually and by hand.
Mount the seat, tighten fasteners, and perform load test
Place the seat onto the mounted brackets, ensuring alignment with the bracket slots and that any locating tabs engage fully.
Secure with specified fasteners, alternating turns for even clamping and avoiding over-torquing.
Confirm flush seating and tighten to manufacturer torque.
Perform a load test by applying gradual downward force up to rated load, inspecting for movement, creaks, or loosening; retighten if necessary.
Seal penetrations and finish edges to maintain waterproofing
Seal all penetrations and finish edges to preserve the shower’s waterproof barrier and prevent water intrusion.
The installer applies a compatible silicone or polyurethane sealant around fastener heads, escutcheons, and between seat flange and wall.
Joints are tooled smooth, excess removed, and allowed full cure.
Any trim or caulk lines are inspected for continuity and repaired to guarantee long-term watertight integrity.
Alternative Installation Scenarios and Methods
The guide next outlines adaptations for nonstandard substrates and seat types, beginning with tile-specific drill bits, anchors, and techniques to prevent cracking.
It then covers mounting approaches for glass block, cement board, and concrete, plus options for surface-mounted blocking or retrofit reinforcement where stud access is limited.
Finally, it highlights the distinct mounting considerations for corner and folding seats, noting hardware and placement differences.
Installing on tile: drill bits, anchors, and preventing cracks
Drilling into tile requires the right bits, anchors, and technique to secure a shower seat without cracking the surface.
Use a carbide or diamond-tipped bit, start with a pilot hole at low speed, and apply masking tape to prevent slipping.
Choose toggle or sleeve anchors rated for wet environments, seal penetrations with silicone, and avoid excessive pressure or lateral force to prevent fractures.
Installing on glass block, cement board, or concrete walls
After covering tile-specific bits, anchors, and techniques, attention shifts to other common substrates—glass block, cement board, and concrete—each of which demands different hardware and methods.
For glass block, anchor to surrounding framing or use masonry-rated adhesive; avoid penetrating hollow units.
Cement board accepts corrosion-resistant screws into studs or masonry anchors.
Concrete requires hammer-set or epoxy anchors sized to load, drilled with a carbide masonry bit.
Using surface-mounted blocking or retrofit reinforcement
Consider surface-mounted blocking or retrofit reinforcement when stud access is limited or existing walls cannot be opened; these options provide a strong, minimally invasive foundation for a shower seat.
Professionals secure hardwood or metal plates to tile or finished surfaces using appropriate anchors and sealants.
Confirm load-rated hardware, corrosion-resistant fasteners, and backing spans that distribute weight.
Verify alignment and test load before finishing.
Corner and folding seat specific mounting steps
Mount corner and folding shower seats by first identifying the seat type, hinge orientation, and desired load path so mounting points align with studs, blocking, or surface-mounted reinforcement.
For corner seats, place brackets into both adjacent studs or reinforced backing.
For folding seats, confirm hinge fasteners transfer load to blocking, set stops to prevent over-rotation, seal penetrations, and test stability under expected loads.
Post-Installation Checks and Safety Testing
After installation, the seat should undergo a load testing procedure using progressively heavier weights up to the manufacturer’s recommended limit to confirm structural integrity.
The installer should inspect for wobble, loose fasteners, and correct drainage to prevent water pooling and failure.
A routine maintenance checklist with defined inspection intervals (for example, monthly visual checks and annual full fastening and seal reviews) should be established.
Load testing procedure and recommended weights
Begin load testing by visually inspecting all fasteners and the seat for correct alignment and secure engagement.
Gradually apply weight in controlled increments: first 25% of planned load, then 50%, 75%, and full design load.
Hold each increment for 30–60 seconds, watching for deformation, movement, or fastener slippage.
Recommended design loads: 250–400 pounds for residential seats; use higher ratings for commercial or bariatric applications.
Inspecting for wobble, loosening, and proper drainage
Check the seat for wobble, loosening, and proper drainage by applying light lateral pressure, visually inspecting all fasteners and seams, and running a short stream of water to confirm unobstructed flow.
Note any drift, creaking, or visible gap at mounts. Tighten hardware to manufacturer torque, recheck seals, and verify water exits without pooling near hinges or drain channels before regular use.
Routine maintenance checklist and inspection intervals
A simple, regular inspection schedule helps guarantee the shower seat remains safe and functional.
Visual checks, fastener torque, and drainage clearance prevent failures. Recommended intervals balance frequency and practicality:
- Monthly: visual, drain, surface cleanliness.
- Quarterly: check anchors, tighten bolts.
- Biannually: inspect wall integrity, sealant.
- Annually: full load test and replace worn components.
Common Problems, Causes, and How to Fix Them
Common issues after installing a shower seat include looseness or wobble, water intrusion that can damage the waterproof membrane, and corrosion, mildew, or general wear.
Each problem has identifiable causes—improper anchor installation, failed seals or grout, and inadequate materials or maintenance—that suggest specific remedies.
The following section outlines quick diagnostics and corrective actions for tightening or reanchoring seats, repairing membranes and seals, and preventing or remediating corrosion and mildew.
Loose or wobbly seat diagnosis and corrective fixes
Diagnose a loose or wobbly shower seat by systematically identifying where movement originates—mounting hardware, wall anchors, seat brackets, or the substrate behind the wall—and then apply corrective fixes matched to the cause.
Tighten or replace fasteners; upgrade anchors to toggle bolts or threaded inserts; realign and secure brackets; reinforce substrate with blocking or plywood access plates; replace stripped anchors; retest for rigidity before finishing.
Water intrusion and membrane damage repair options
Inspect the shower area for signs of water intrusion—stained grout, soft or discolored wallboard, mold, damp insulation, or rusted fasteners—and trace damage back to failed seams, penetrations, improper waterproofing, or compromised substrate.
Remove affected finishes, dry substrate, and evaluate membrane integrity.
Repair options include patching or replacing waterproof membrane, re-sealing seams and penetrations, replacing damaged backerboard, and re-flashing penetrations before reinstalling finishes.
Corrosion, mildew, and wear prevention and remediation
Once water intrusion has been addressed and membranes and substrates repaired, attention should turn to preventing and remedying corrosion, mildew, and general wear that threaten a shower seat’s longevity and safety.
Regular drying, ventilation, and noncorrosive materials reduce problems.
Clean mildew with diluted bleach or enzymatic cleaners; remove rust with mild abrasives and apply corrosion-resistant coatings.
Inspect fasteners, replace damaged seals, and schedule periodic maintenance.
Accessibility, Comfort, and Compliance Tips
Recommended seat heights, required clearances, and proper grab bar placement are key to safe shower seating and should be planned before installation.
Attention to cushioning, non-slip surfaces, and ergonomic contours improves comfort and reduces fall risk.
Compliance with ADA guidelines and local codes guarantees legal accessibility and informs dimension and mounting decisions.
Recommended seat heights, clearances, and grab bar placement
A range of seat heights, clearances, and grab bar locations should be selected to balance accessibility, user comfort, and code compliance; typical fixed shower seat heights fall between 17 and 19 inches (430–485 mm) above the finished floor, while bariatric or higher-use seats may be 20–22 inches (510–560 mm).
Clear floor space of at least 30×48 inches enables transfers.
Mount grab bars 33–36 inches above finished floor, ensuring secure backing and horizontal and vertical placement for varied reach.
Cushioning, non-slip surfaces, and ergonomics
Consider seat cushioning, non-slip surfaces, and overall ergonomics together to guarantee safety, comfort, and compliance: cushioning should provide firm support without excessive sinkage. Non-slip finishes or textured mats must offer reliable traction when wet.
Seat contours and edge radii should minimize pressure points while facilitating safe transfers and cleaning. Select water-resistant, fast-drying foams and low-profile, antimicrobial covers; test traction with wet hands and feet.
Meeting ADA guidelines and local code considerations
When ensuring accessibility, installers must align shower seat selection and placement with ADA standards and any stricter local codes to guarantee safe, legal use; this includes adhering to required seat dimensions, mounting heights, load capacities, and clearances for transfers. Installers verify regulations, document compliance, and choose materials meeting slip resistance and strength requirements.
| Requirement | Typical Value | Notes |
|---|---|---|
| Seat height | 17–19 in | ADA preferred |
| Load rating | 250–500 lb | Safety margin |
| Clearance | 30×48 in | Transfer space |
Cost Estimates, Timeframe, and When to Hire a Professional
Typical materials and labor for a shower seat installation can range from basic wall-mounted brackets and a prefab seat at low cost to custom folding or built-in seats with higher material and contractor fees.
A DIY install often takes a few hours to a day depending on wall construction and tools, while a licensed professional typically completes the job faster and can address surprises.
Homeowners should hire a licensed contractor or plumber when plumbing modifications, structural reinforcements, water intrusion risk, or local permit requirements are involved.
Typical materials and labor cost ranges
A straightforward shower-seat installation commonly costs between $150 and $1,500 for materials and $200 to $1,000+ for labor, depending on seat type and installation complexity.
Typical prefabricated seats run $150–$500; solid teak or top-quality fold-down units reach $600–$1,500.
Labor varies by wall reinforcement, plumbing access, and local rates; expect higher costs for tile, studs relocation, or accessibility compliance.
Time required for DIY versus professional installation
Estimating time for a shower-seat installation depends largely on seat type and site conditions: a simple prefabricated corner or suction-mount seat can be installed by a competent DIYer in 1–3 hours, while a secure, wall-reinforced fold-down or custom teak bench often requires 4–12+ hours and professional expertise.
DIY saves labor costs but may extend duration; pros guarantee quicker, code-compliant completion.
Signs you should hire a licensed contractor or plumber
Several clear indicators signal when hiring a licensed contractor or plumber is prudent: structural reinforcement needs, plumbing relocations, building-code or permit requirements, evidence of mold or water damage, or installation in a commercial or multiunit building.
Professionals provide cost estimates, reliable timelines, and warranty-backed work.
Hire a pro when scope, safety, or legal compliance exceeds DIY skill, or when unforeseen issues escalate time or expense.
Quick Reference: Installation Checklist and Troubleshooting Guide
One clear checklist and concise troubleshooting guide helps installers confirm required materials, follow proper steps, and resolve common problems quickly.
A compact checklist outlines tools, anchor type, wall material, and safety checks.
Troubleshooting lists common fixes and when to stop and call a professional.
- Verify studs and anchors
- Confirm weight rating
- Test seat stability
- Address leaks or loose fasteners
Conclusion
Like a well‑anchored harbor for weary travelers, a properly installed shower seat secures comfort and independence. Careful selection, solid mounting into studs or with appropriate anchors, and attention to clearance, weight ratings, and slip resistance transform a simple fitting into dependable safety. When uncertainties loom, professional help steadies the course. Regular inspection and prompt repairs keep the seat trustworthy — a quiet guardian turning daily routines into dignified, secure rituals.