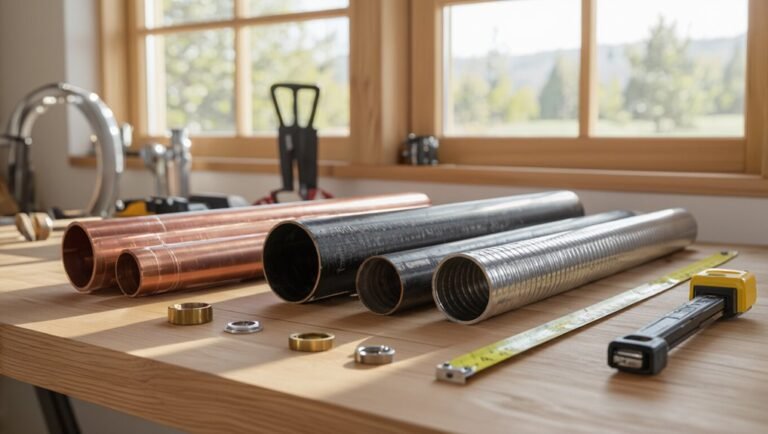
How to Join CPVC Pipe: Step-by-Step Guide to Clean, Solvent-Weld Connections
To join CPVC pipe effectively, use the solvent welding method. Start by measuring and cutting the pipe squarely, followed by deburring and chamfering the edges. Dry-fit the components to ensure proper alignment. Clean and prime both the pipe and fitting surfaces to remove any contaminants, then wait for the primer to become tacky. Apply a consistent bead of approved solvent cement, fully insert the pipe while slightly rotating it, and hold until it sets. Allow the specified cure time before conducting any pressure tests. For additional tips on special cases, testing, and long-term maintenance, continue reading.
How to Join CPVC Pipe: Quick Overview and Best Uses
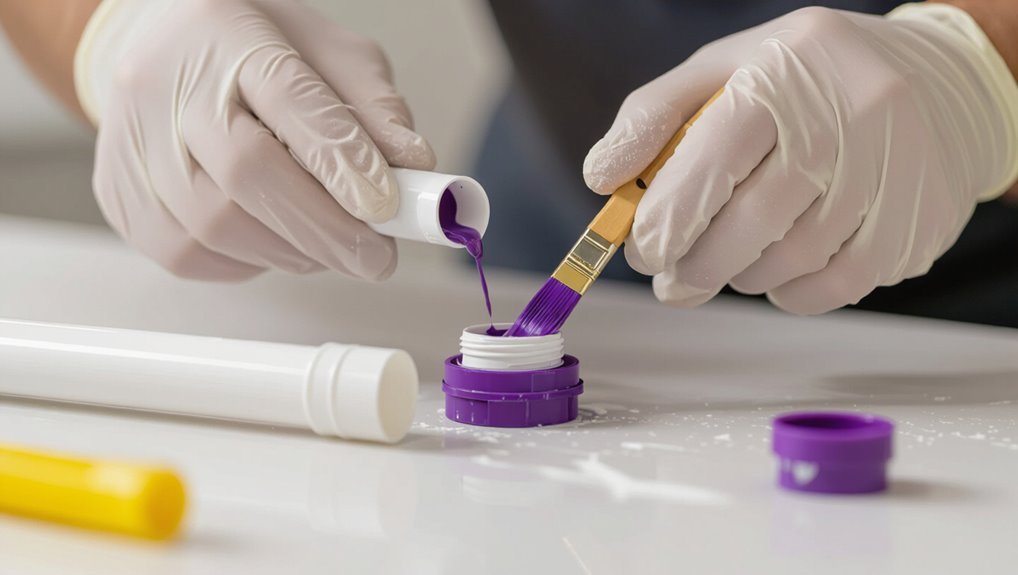
CPVC is a chlorinated thermoplastic commonly used for hot and cold potable water and is typically joined with solvent-weld fittings because the chemical weld creates a strong, permanent bond.
This solvent-weld method is favored in residential and light commercial plumbing, hydronic heating, and corrosive-resistance applications where leak-free, pressure-rated joints are required.
For most homeowners, a properly executed CPVC solvent-weld connection is a straightforward DIY task using the correct primer, cement, and basic cutting and deburring tools.
What CPVC pipe is and why solvent-weld joints are standard
A rigid thermoplastic formulated from chlorinated polyvinyl chloride, CPVC offers improved heat and chemical resistance compared with standard PVC, making it suitable for hot- and cold-water distribution and many industrial applications.
Its solvent-weld joints chemically fuse mating surfaces, creating strong, leak-resistant connections without adhesives or heat.
Guides on how to join cpvc pipe emphasize cleaning, priming, proper solvent, and correct insertion depth for reliable assemblies.
Typical applications where CPVC solvent-weld is preferred
Given its heat and chemical resistance and the strength of solvent-weld joints, many installers and engineers favor this joining method for systems where durability and leak-tight performance matter.
Typical applications include hot and cold potable water distribution, hydronic heating, corrosive chemical transfer, and industrial process lines.
It also suits confined commercial plumbing and retrofit projects requiring reliable, long-lasting connections.
Quick answer: Can you DIY a CPVC solvent-weld connection?
Can a homeowner reliably make a solvent-weld joint? Yes.
With proper tools, rated CPVC primer and cement, clean cuts, and careful alignment, a competent DIYer can produce a durable connection for pressurized hot or cold water.
Attention to manufacturer instructions, cure times, and local plumbing codes is essential.
For complex systems or code-required inspections, professional installation is recommended.
Safety Precautions and Preparation Before Joining CPVC
Before beginning CPVC jointing, the installer should confirm appropriate personal protective equipment and guarantee adequate ventilation to control solvent fumes.
They must verify the system’s pressure, temperature, and chemical compatibility limits and gather the correct tools, fittings, cleaners, and solvent cement.
The workspace should be arranged for safe handling of solvents, with spill control, fire precautions, and clear access for cutting and drying.
Personal protective equipment and ventilation requirements
When working with CPVC solvent cements and primers, proper personal protective equipment and adequate ventilation are essential to prevent chemical exposure and inhalation of fumes.
Wear chemical-resistant gloves, safety goggles, and long sleeves; use a NIOSH-approved respirator when ventilation is insufficient.
Confirm cross-ventilation or local exhaust near joints, keep a spill kit and eyewash accessible, and follow product safety data sheet instructions.
Identifying pressure, temperature, and chemical compatibility limits
Understanding a CPVC system’s allowable pressure, temperature, and chemical limits is critical to safe, durable installations.
Installers must verify manufacturer ratings, system design pressure, and maximum operating temperature for the designated application.
Chemical compatibility charts should be consulted for transported fluids and cleaning agents.
Exceeding these limits risks joint failure, deformation, or degradation; document limits and confirm operating conditions before assembly.
Tools and materials checklist
A concise, task-focused checklist guarantees installers have the correct tools, materials, and personal protective equipment on hand to complete CPVC joints safely and efficiently.
Required items include cutter, deburring tool, primer, cleaner, cement, coupling, measuring tape, marker, gloves, goggles, and rags. Confirm quantities and compatibility before starting.
- Pipe cutter and deburrer
- Primer and solvent cement
- PPE: gloves, goggles
- Clean rags and marker
Workspace setup and handling solvents safely
With tools, materials, and PPE verified, the installer should prepare a well-ventilated, uncluttered workspace that keeps solvent containers upright and away from ignition sources.
Store solvents in labeled, sealed containers on stable surfaces. Use absorbent pads for spills and a grounded disposal bin for rags.
Avoid sparks, open flames, and confined areas. Ascertain a fire extinguisher and first-aid kit are accessible.
Understanding CPVC Fittings, Pipes, and Solvent Types
This section outlines common CPVC fittings—such as socket, slip, and threaded connections—and how their assembly differs.
It then clarifies the distinct roles of solvent cement, primer, and cleaner in creating a durable joint.
Finally, it explains how to read product labels and check shelf-life to guarantee materials are suitable before use.
Common CPVC fittings and connection types (socket, slip, threaded)
Several distinct CPVC connection types—socket (solvent-weld), slip, and threaded—cover most residential and commercial plumbing needs.
Socket fittings require primer and solvent cement for permanent joints.
Slip fittings allow pipes to slide into couplings for alignment prior to bonding.
Threaded fittings use tapered threads for mechanical seals, often with PTFE tape, suitable for valves or removable assemblies.
Differences between CPVC solvent cement, primer, and cleaner
Understanding the roles of solvent cement, primer, and cleaner clarifies why each product is necessary for reliable CPVC joints.
Cleaner removes surface contaminants and oils; primer softens and slightly dissolves the CPVC surface to promote molecular fusion; solvent cement fills the joint and chemically welds softened surfaces.
Each product has a distinct function and sequence, ensuring strong, leak-free solvent-weld connections.
How to read product labels and shelf-life considerations
Having distinguished the functions of cleaner, primer, and solvent cement, attention turns to interpreting product labels and managing shelf life so materials perform as expected.
Users should check manufacturer compatibility with CPVC, application temperatures, VOC content, and NSF/ASTM approvals.
Note production and opened-date markings; store unopened cans cool and dry.
Discard solvent cement or primer past recommended months after opening to guarantee reliable bonds.
Step-by-Step Guide to Making a Clean Solvent-Weld CPVC Connection
The following steps outline the practical sequence for a reliable solvent-weld CPVC joint, from measuring and cutting to final assembly.
Each step—clean cuts, deburring and chamfering, dry-fitting for alignment, proper priming with correct timing and coverage, and applying solvent cement with the right amount and motion—affects bond integrity.
Clear adherence to technique and order reduces leaks and guarantees a durable connection.
Measuring and cutting the pipe cleanly
Measure twice and mark once: accurate measuring and clean cuts are the foundation of a reliable solvent-weld CPVC joint.
The technician measures from fittings, transfers marks, and uses a fine-toothed saw or tubing cutter held square to the pipe.
Cutting slowly prevents melting, while supporting the pipe minimizes chatter.
After cutting, the ends are ready for the next preparation steps.
Deburring, chamfering, and checking fit
Deburr and chamfer the freshly cut CPVC end to guarantee a smooth, square mating surface: remove burrs from the inside edge with a round file or reamer, and bevel the outside edge with a deburring tool or utility knife to a slight 15–30° chamfer so the fitting can slide on without scraping solvent-weld cement off the pipe.
Verify pipe and fitting surfaces are clean, dry, and free of nicks.
Dry-fitting components to confirm alignment
Dry-fit each CPVC stub and fitting without adhesive to verify alignment, orientation, and reach before applying solvent cement.
Guarantee components seat fully and rotation matches planned routing. Check that marked depth stops align and that mating parts sit flush with no gaps or stress.
Confirm fixture clearances, supports, and valve orientations. Adjust cuts or fittings until joints assemble cleanly and repeatably.
Applying primer: timing, technique, and coverage
Apply primer promptly after final fitment is confirmed, using steady, even strokes to remove surface contaminants and soften the CPVC for solvent welding.
Work both pipe end and fitting socket, covering entire bonding areas. Maintain wet film without pooling; recoat any missed spots.
Allow brief tack time per manufacturer instructions before proceeding.
Use approved primer and proper ventilation for safety.
Applying solvent cement: correct amount and motion
With the primer tacky and evenly coated, the technician moves on to solvent cement, focusing on the right amount and consistent motion to form a strong weld.
A thin, even bead is applied to the pipe exterior and fitting interior—enough to wet surfaces without excess drips.
Strokes are smooth and continuous, avoiding pooling; coverage is uniform for immediate, intimate contact.
Assembling and rotating for proper distribution
Bring the joint together promptly after coating, aligning the pipe squarely into the fitting while the cement is still wet.
Rotate the pipe a quarter to half turn to evenly spread cement and seat it fully. Confirm alignment marks remain matched.
Withdraw excess cement from the exterior seam with a rag.
Avoid twisting or rocking that could displace assembly or force cement outward.
Holding time, initial cure, and avoiding stress
Allow the joint to sit undisturbed for the manufacturer’s recommended holding time—typically 15 to 60 seconds for CPVC—so the solvent weld can develop initial tack and prevent separation.
Support the assembly to avoid movement or bending stresses. Do not disturb or apply mechanical loads during initial cure.
Minimize temperature extremes and vibration to prevent joint misalignment or stress concentrations that compromise bond integrity.
Final cure time and when to pressure-test or return to service
After the initial hold and undisturbed cure period, attention shifts to the final cure time before testing or placing the system into service.
Final cure varies with temperature, humidity, pipe size and solvent used; typically 24 hours at moderate conditions.
Longer waits are required in cold or large-diameter systems.
Only perform pressure tests or introduce water after manufacturer’s full cure recommendation is met.
Special Situations and Advanced Techniques
The section addresses common repair methods such as slip-sleeves, couplings, and cutting out and replacing damaged sections.
It also covers connecting CPVC to other materials (copper, PVC, PEX) with appropriate adapters and considerations for adhesive compatibility.
Guidance is provided for temperature-related adjustments to cure times and techniques, plus planning for long runs, offsets, and necessary expansion allowances.
Making repairs: slip-sleeves, couplings, and replacing sections
Repairs to CPVC piping often require techniques beyond standard solvent welding, with slip-sleeves, couplings, and section replacement providing reliable options for leaks, cracks, or access modifications.
For small localized damage, use a rubber-sleeve clamp or CPVC-rated slip-sleeve; for cutouts, solvent-weld couplings or mechanical repair couplings restore continuity.
When replacing sections, cut squarely, deburr, dry-fit, solvent-weld, and pressure-test before concealment.
Joining CPVC to other materials (copper, PVC, PEX) and adapter options
Moving from local repairs and section replacements, joining CPVC to dissimilar materials introduces different compatibility and connection concerns. Use mechanical adapters, specialty solvent cements for PVC, dielectric fittings for copper, and changeover fittings for PEX; guarantee pressure ratings and temperature compatibility.
| Material | Adapter type |
|---|---|
| Copper | Dielectric / compression |
| PVC | Solvent-weld / changeover |
| PEX | Crimp / push-fit |
Working in cold or hot environments: adjustments to cure times and technique
Adjust procedures when working with CPVC in extreme temperatures, because cure time, solvent behavior, and material flexibility change noticeably in cold or hot environments.
In cold, extend tack and full cure times, warm solvent slightly, and handle joints gently to avoid cracking.
In heat, expect faster set; assemble quickly, allow extra working time by shading parts, and verify cure before pressure testing.
Long runs, offsets, and using expansion allowances
Plan long runs and offsets with attention to thermal expansion, supported spans, and joint accessibility so the CPVC system can accommodate movement without stress.
Calculate expansion allowances, incorporate loops, offsets, or expansion joints, and follow manufacturer spacing for supports.
Use slip fittings where appropriate, allow for directional changes, and inspect clearances to prevent binding, noise, or strain during temperature cycles.
Common Problems, Diagnosis, and How to Fix Them
Common installation issues are summarized here to help identify causes and implement precise remedies.
Topics include joint leaks with stepwise repair, recognizing and correcting solvent-cement failures, preventing and addressing CPVC deformation or crazing, and immediate actions if primer or solvent contacts skin or sensitive materials.
Each item will present diagnostic clues, safety precautions, and clear corrective steps.
Leaks at joints: causes and step-by-step fixes
Leaks at CPVC joints most often stem from improper solvent welding, inadequate primer or cement coverage, misaligned fittings, or damage to pipe ends; identifying the specific cause guides the repair approach.
Diagnose by drying, pressurizing, and inspecting joints. For gaps or misalignment, cut out the joint, deburr, dry-fit, reapply primer and cement, align fully, hold until set.
Replace cracked fittings. Test under pressure.
Solvent cement failure signs and corrective actions
Understanding solvent cement failure is essential to reliably repairing CPVC joints. Signs include persistent leaks, softened or powdery joint edges, discoloration, joint separation, and solvent smell.
Diagnose by drying, pressure-testing, and inspecting bond lines.
Corrective actions: cut out failed joint, clean and chamfer ends, apply proper primer and fresh compatible cement, maintain correct cure time, and retest under normal pressure.
Deformation or crazing of CPVC: prevention and repair
Deformation and crazing in CPVC appear as bowed, warped, or hairline surface cracks that weaken fittings and pipe walls and often indicate chemical attack, excessive stress, or heat exposure.
Prevent by selecting compatible materials, avoiding solvent overuse, controlling joint stress, and limiting heat.
Repair limited crazing by replacing affected sections; do not attempt patching.
Inspect regularly and document locations for early intervention.
What to do if primer/solvent contacts skin or materials
If primer or solvent contacts skin or other materials, act quickly to minimize damage: remove contaminated clothing, flush skin with water and mild soap for several minutes, and seek medical attention for irritation or burns.
For surfaces, blot—do not rub—then rinse with water or appropriate cleaner. Test hidden areas before restoration.
Dispose of contaminated rags safely and ventilate the area.
Testing, Inspection, and Code Compliance
The section outlines pressure testing procedures and essential safety checks to verify joint integrity before system commissioning.
It provides a concise visual inspection checklist for acceptable CPVC joints, including solvent-weld appearance, alignment, and cure time considerations.
Applicable plumbing codes, industry standards, and manufacturer instructions are referenced to guarantee compliance and proper documentation.
Pressure testing procedures and safety checks
Several essential steps govern CPVC pressure testing and safety checks to confirm system integrity and compliance with relevant codes.
The procedure includes isolating the section, gradually applying air or water to specified test pressure, monitoring for pressure decay within a defined time, checking supports and valves for leaks, and documenting results.
Appropriate PPE and depressurization protocols confirm technician safety and code adherence.
Visual inspection checklist for acceptable joints
When inspecting CPVC joints for acceptability, attention focuses on fusion quality, alignment, and absence of defects that compromise pressure integrity.
Inspectors verify solvent evenly fused, full socket depth, and uniform fillet. Look for proper alignment and no angular stress.
Reject joints with voids, gaps, cracks, or visible uncured solvent.
- Fusion completeness
- Fillet uniformity
- Alignment/fit
- Surface defects
Relevant plumbing codes, standards, and manufacturer instructions
Inspection findings must be evaluated against applicable plumbing codes, industry standards, and manufacturer instructions to determine acceptability and required corrective actions.
Inspectors should reference local code amendments, UPC/IPC, ASTM F493/F441, and manufacturer installation guides for approved solvents, primer use, pressure ratings, and curing times.
Noncompliance requires documented remediation, retesting, and notification to authorities having jurisdiction to guarantee safety and warranty preservation.
Maintenance, Longevity, and Best Practices
A routine inspection schedule should be established to catch cracking, discoloration, softening, or joint leaks early.
Proper storage of CPVC pipe and solvent cements—cool, dry, and away from UV and extreme temperatures—helps preserve material properties and shelf life.
Consistent, professional-quality joints are achieved by following manufacturer‑specified preparation, correct solvent application, and controlled curing times.
Routine inspection schedule and signs of deterioration
Although CPVC piping is durable, a regular inspection schedule is essential to detect early signs of deterioration and prevent failures.
Inspections every 6–12 months should check joints, solvent-weld beads, discoloration, cracking, warping, soft spots, and leaks.
Note any chemical exposure, UV damage, or excessive thermal cycling.
Document findings, prioritize repairs, and replace compromised sections promptly to maintain system integrity and safety.
Storing CPVC and solvents to maximize lifespan
Because proper storage minimizes degradation and maintains joint reliability, CPVC pipe and solvent containers should be kept in cool, dry, and shaded areas away from direct sunlight and sources of heat.
Store pipes horizontally supported to prevent warping; keep solvents sealed, upright, and in original labeled containers.
Control temperature fluctuations, avoid strong chemicals nearby, rotate stock by date, and follow manufacturer shelf-life guidance.
Tips to ensure consistent, professional-quality joints
Begin by establishing a consistent workflow and using the proper tools and materials for each joint to reduce variability and prevent failures. Attention to technique preserves integrity and appearance.
- Clean and deburr surfaces before priming.
- Apply primer then solvent evenly; avoid excess.
- Assemble with controlled rotation and full insertion.
- Allow specified cure time, protect from stress and temperature.
Tools and Product Recommendations
The article outlines recommended cutters, deburring tools, and applicators suited to CPVC work, emphasizing clean cuts and proper chamfering for reliable joints.
It then highlights trusted brands and selection tips to help readers choose durable, code-compliant products.
Finally, it compares cost versus performance to advise which features are worth prioritizing for long-term value.
Recommended cutters, deburring tools, and applicators
A handful of purpose-built tools makes clean, reliable CPVC joints far easier to achieve.
Use a ratcheting PVC cutter for straight, burr-free cuts; a fine-toothed hacksaw with a guide when cutters won’t fit.
Remove burrs and chamfer with a deburring tool or carbide scraper.
Apply solvent and primer with a brush applicator or dauber; consider a syringe applicator for precise small-diameter work.
Trusted brands and product selection tips
Several reliable manufacturers and a few selection rules make choosing CPVC tools straightforward: look for ratcheting cutters from brands like RIDGID or Milwaukee, deburring tools and scrapers from General Pipe Cleaners or Imperial, and solvent/primer systems from Oatey, Weld-On, or Christy’s.
Choose corrosion-resistant applicators, certified solvent formulations, and ergonomically designed cutters.
Verify compatibility with CPVC ratings and local plumbing codes before purchase.
Cost vs. performance: what to prioritize
When balancing cost against performance, prioritize items that directly affect joint integrity and long-term reliability—quality solvent/primer systems, a proper ratcheting cutter, and a deburring tool—while accepting economy on disposable or low-impact accessories. Choose proven brands for solvents; budget blades and gloves are acceptable. Match investment to project scale and expected lifespan.
| Priority item | Recommendation |
|---|---|
| Joint materials | High quality solvent/primer |
| Cutting/deburr | Ratcheting cutter, deburr tool |
Conclusion
Careful, calculated craftsmanship consistently creates clean, cohesive CPVC connections. Professionals prepare properly, protect pipes, and precisely apply primer and cement to prevent pinhole problems and premature leaks. Through thoughtful testing, timely troubleshooting, and tendonlike tenacity toward code-compliant techniques, technicians transfer temporary tasks into trustworthy, long-term tubing. Regular review, routine maintenance, and responsible replacement render resilient systems, reassuring residents, reducing repairs, and reliably returning robust water delivery for years.