How to Replace Pool Vacuum Hose Ends: A Step-by-Step Guide for DIY Repairs
To replace the ends of your pool vacuum hose, start by cutting off any damaged fittings. Clean and align the hose, then attach compatible replacement ends, securing them with stainless clamps or pool-grade adhesive. Use a utility knife for cutting, apply heat if necessary for tight fits, and test the assembly with the pump to check for leaks or air bubbles. Ensure that the new ends match the type of hose you have—rigid or soft—and inspect for any corrosion or brittle sections. Follow the detailed step-by-step instructions below for a successful repair and troubleshooting tips.
What a Pool Vacuum Hose Is and When to Replace It
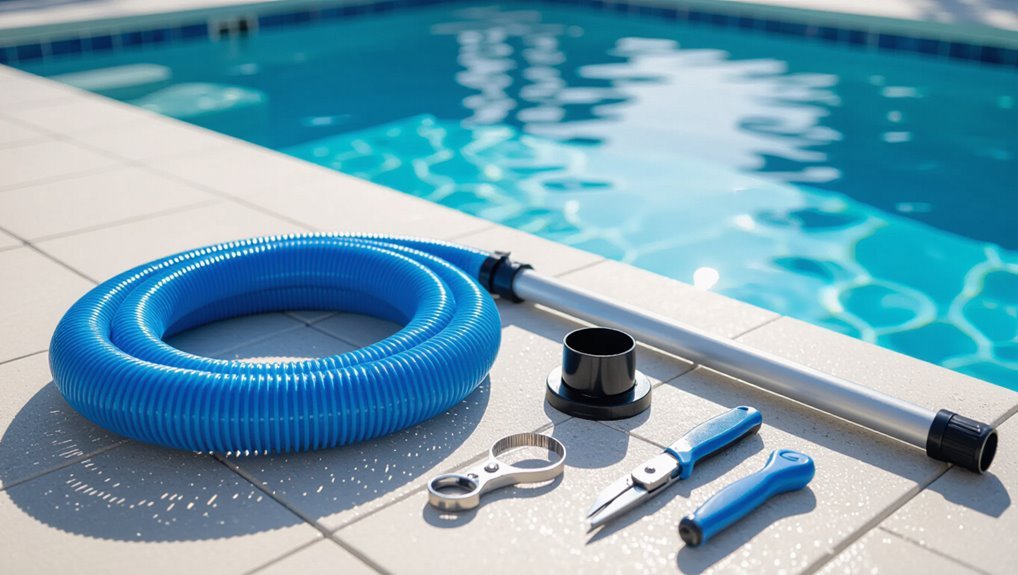
A pool vacuum hose is a flexible conduit used to transport debris-laden water from the pool to the filter system. It is available in sectional, continuous, and corrugated varieties suited to different cleaners.
Visible cracks, persistent leaks, stiff or collapsed sections, and damaged or loose ends indicate the hose or fittings should be replaced.
Before attempting repairs or replacements, the pool pump should be turned off, power isolated, and the hose emptied. Handle the hose with protective gloves to avoid injury and contamination.
Purpose and common types of pool vacuum hoses
Pool vacuum hoses connect the vacuum head to the skimmer or pump, channeling suction that lifts debris from the pool floor and walls. They also link telescopic poles and attachments to complete the cleaning system.
Common types include flexible corrugated hoses, smooth-walled hoses for better flow, and reinforced commercial hoses. Understanding these types aids decisions on maintenance and how to replace pool vacuum hose ends.
Signs your hose or ends need replacement
Having reviewed hose types and their roles, attention turns to recognizing when a hose or its ends need replacement.
Visible cracks, splits, or frayed ends; persistent leaks despite secure connections; loss of suction or frequent air bubbles; brittle or warped sections from UV or chemical exposure; fittings that no longer grip or threads stripped.
Timely replacement prevents inefficient cleaning and further equipment strain.
Safety precautions before starting repairs
Many common repairs require basic safety steps to prevent injury, equipment damage, or water contamination.
Before replacing hose ends, disconnect power to pumps and cleaners, remove electrical plugs from outlets, and guarantee the pool area is dry.
Wear gloves and eye protection, inspect tools for damage, and keep children and pets away.
Follow manufacturer instructions and test fittings for secure seals after repair.
Tools and Materials You’ll Need
The section lists the essential tools and replacement parts required for replacing pool vacuum hose ends, such as replacement hose ends, clamps, a utility knife, and a heat source if needed.
It also notes optional tools that can make the job easier, like hose cutters, pliers, and a heat gun.
The goal is to prepare readers with both must-have items and useful extras before starting the repair.
List of essential tools and replacement parts
A concise inventory of tools and replacement parts helps secure a smooth hose-end repair or swap.
Essential items include durable hose ends, hose clamps, and solvent or adhesive rated for pool use.
Also needed are basic cutting and fastening tools plus sealing materials to guarantee watertight connections.
- Replacement hose ends
- Stainless clamps
- PVC/pipe adhesive
- Utility knife or tubing cutter
- Silicone or Teflon tape
Optional tools for easier repairs
Several handy extras can make replacing pool vacuum hose ends quicker and less frustrating.
A heat gun or hair dryer softens PVC or rubber for snug fits. Hose clamp pliers secure bands evenly. Silicone lubricant eases connections without damaging seals.
A utility knife with a fresh blade guarantees clean cuts. A small vise or bench clamp stabilizes fittings during assembly.
How to Identify the Correct Replacement Hose Ends
The technician begins by measuring the hose diameter and overall length to guarantee a proper fit.
Next, cuff and end types are compared to match the original fittings and coupling method.
Finally, material compatibility and UV resistance are checked to verify durability in the pool environment.
Measuring hose diameter and length
Accurate measurements of both hose diameter and length are essential when selecting replacement ends, because mismatched sizes cause leaks, poor suction, or fittings that won’t seat.
Measure internal and external diameters with calipers or a tape, noting nominal hose size.
Record total usable length between fittings, including any couplers.
Round measurements to standard increments for ordering correct replacement ends.
Matching cuff/end types and fittings
Identifying the correct replacement hose ends requires matching cuff styles and fittings to the pool system’s connectors, since even slight differences in bead shape, barb count, or thread pattern will affect sealing and suction.
Inspect existing ends for slip-on cuffs, male/female threaded adapters, quick-connect collars, or multiple-barb sections.
Record type, diameter, and locking method before sourcing replacements to guarantee compatibility.
Identifying material compatibility and UV resistance
Many pool hose ends are made from PVC, polyethylene, or thermoplastic elastomers. Choosing a material that resists chlorine, pool chemicals, and prolonged UV exposure guarantees a longer service life.
Inspect replacement parts for chemical-grade ratings, UV stabilizers, and temperature tolerance. Prefer molded ends with reinforced collars.
Test fittings for flexibility and solvent or mechanical compatibility with existing hose and clamps before final installation.
Step-by-Step Guide to Replacing Rigid Vacuum Hose Ends
A concise, practical procedure for replacing rigid vacuum hose ends begins with preparing the hose and a clear work area.
The process then covers removing the damaged rigid ends, cleaning and prepping the hose, installing new fittings with secure clamps, and finally testing for leaks and proper fit.
Each step emphasizes safe handling, correct alignment, and a watertight seal to restore vacuum performance.
Preparing the hose and work area
Clear the work area and lay out tools and materials before handling the hose.
Inspect the hose for cracks, weak spots, and debris; note end types and measurements.
Clean with a mild detergent and rinse thoroughly; dry surfaces to guarantee adhesive or fittings bond properly.
Arrange protective gloves, clamps, replacement ends, sandpaper, and adhesive within reach for an efficient, safe operation.
Removing damaged rigid ends
With the hose inspected and the workspace set, attention turns to removing the damaged rigid ends.
The technician secures the hose, marks alignment, then cuts away cracked or crushed collars with a utility knife or plastic saw.
Remaining adhesive or fragments are carefully scraped or filed flush.
Any embedded barbs or inserts are extracted with pliers, avoiding further tearing of the hose wall.
Cleaning and prepping hose for new fittings
Before installing new fittings, the hose must be thoroughly cleaned and prepared to guarantee a secure, leak-free connection.
Inspect the cut end for evenness and remove frayed strands. Flush the interior with clean water to clear debris and let dry.
Wipe the exterior with alcohol to remove oils. Measure and mark insertion depth, ensuring a straight, smooth edge for proper seating.
Installing new rigid ends and securing clamps
Begin by aligning the prepared hose end and the rigid fitting so the marked insertion depth is visible; this guarantees the fitting seats fully and evenly.
Push the fitting firmly into the hose until the mark meets the hose edge.
Position a stainless clamp over the joint, tighten incrementally with a screwdriver or nut driver, and verify the clamp sits flat and centered for secure, lasting attachment.
Testing for leaks and proper fit
After the clamp is tightened and centered, the installer should check the joint for leaks and proper fit.
The hose assembly is submerged and the pump run briefly. Observers watch for air bubbles, water seepage, or misalignment.
If leaks appear, shut off pump, retighten or reposition the hose, replace damaged fittings, and retest until the connection remains dry and secure under normal suction.
Step-by-Step Guide to Replacing Soft/Flexible Vacuum Hose Ends
This section contrasts soft, flexible hose end repairs with the previously covered rigid fittings, highlighting differences in material behavior and failure modes.
It then outlines safe removal techniques to avoid tearing the hose, followed by heat-shrink and adhesive attachment options and methods for securing and reinforcing the new soft end.
Finally, it summarizes key post-repair inspection and testing steps to confirm a watertight, durable connection.
Differences between soft and rigid end repairs
Repairing soft and rigid vacuum hose ends requires different tools, techniques, and expectations because the materials behave differently under stress and when joined.
Soft ends need flexible adhesives, heat-shrink or clamping methods and gentle compression to avoid deformation.
Rigid ends demand stronger mechanical fittings, precise cuts and solvent or epoxy bonds for stability.
Matching replacement material and load expectations guarantees durable repairs.
Removing worn soft ends without damaging hose
Begin by securing the hose so it cannot roll or twist.
Then inspect the worn soft end for splits, adhesive buildup, or embedded debris that could catch during removal.
Use gentle twisting and steady pulling while supporting the adjacent hose to avoid stress.
If stuck, work a thin plastic wedge around the collar to loosen the bond, keeping cuts and sharp tools away from the hose body.
Using heat shrink or adhesive methods
After the worn soft end is removed and the hose is secured, attention turns to reattaching a new flexible end using either heat-shrink tubing or adhesive bonding.
For heat-shrink, slide appropriate tubing over the joint, apply controlled heat until snug, and avoid deforming the hose.
For adhesive, use a marine-grade PVC solvent or flexible epoxy, and clamp until set.
Inspect the seal for gaps before use.
Securing and reinforcing soft end repairs
Clamp the joint firmly and add reinforcement layers to confirm a durable seal that withstands pressure and flexing.
Wrap nylon or silicone tape tightly over the splice, then apply a few overlapping wraps of weatherproof PVC or rubber repair tape.
Secure ends with stainless steel hose clamps positioned over the reinforced area.
Trim excess material and verify no sharp edges remain.
Post-repair inspection and testing
Inspect the repaired hose visually and by touch to confirm the splice is smooth, tightly seated, and free of gaps or protrusions.
Submerge the hose and connectors, then pressurize with the pump to check for leaks.
Operate the vacuum over varied surfaces to verify suction and flexibility.
Re-inspect after initial use for loosening, abrasion, or water intrusion, addressing issues immediately.
Using Repair Kits and Aftermarket Connectors
Repair kits and aftermarket connectors range from simple snap-on fittings and push-fit couplers to full sets that include clamps, adapters, and hose barb inserts.
Instructions for snap-on and push-fit connectors typically emphasize clean cuts, proper alignment, and secure seating to prevent leaks.
Readers should weigh the lower cost and accessibility of DIY kits against the greater durability and warranty support often offered by professional-grade parts.
Types of repair kits and what they include
Three main types of pool vacuum hose repair kits are commonly available: adhesive-based sleeve kits, mechanical crimp or clamp kits, and quick-connect aftermarket fittings.
Each kit varies by materials and tools included, designed for different damage and skill levels.
- PVC or rubber sleeves
- Epoxy or solvent adhesive
- Stainless steel clamps or crimp rings
- Replacement hose barb fittings
- Instruction sheet and basic tools
How to use snap-on and push-fit connectors
Start by selecting the correct snap-on or push-fit connector sized for the hose diameter and designed use.
Clean and trim hose ends squarely, then insert fully until a tactile stop or audible click confirms engagement.
For push-fit, make certain inner barbs bite; for snap-on, lock clamps or tabs.
Test with a light tug and submerge to check for leaks before regular use.
Pros and cons of DIY kits vs. professional parts
After confirming a secure fit with snap-on or push-fit connectors, the choice between DIY repair kits and professional replacement parts becomes the next consideration.
DIY kits offer lower cost, immediate availability, and simplicity for minor fixes but vary in durability and fit.
Professional parts guarantee exact compatibility, longer lifespan, and warranty coverage, though they cost more and may require specialist installation.
Temporary Fixes and Emergency Repairs
For quick on-the-spot leaks, a section of tape, a hose clamp with a rubber patch, or a short coupler can restore suction long enough to finish cleaning.
Such temporary repairs typically last from a few hours to a few weeks depending on stress, water chemistry, and UV exposure.
If leaks are large, recurring, or located near fittings, a full hose replacement is recommended rather than prolonged temporary fixes.
Quick fixes for on-the-spot leaks
When a pool vacuum hose develops a leak during use, quick, temporary fixes can keep cleaning going until a proper repair is made; immediate options include wrapping the puncture with waterproof tape, sliding a short hose sleeve or rubber patch over the hole, or using a hose clamp to compress a patch.
Test suction briefly, replace or perform permanent repair as soon as practical.
How long temporary repairs typically last
Although temporary repairs can restore suction quickly, their longevity varies widely depending on the method used, hose material, and operating conditions.
Short-term fixes like tape or clamps often last hours to days under light use. Better temporary solutions—epoxy patches, emergency couplers—may hold for weeks.
Exposure to sunlight, chlorinated water, and pressure fluctuations shorten effectiveness, so monitoring is essential.
When to avoid temporary fixes and replace the hose
Recognize that some damage demands replacement rather than patching: extensive cracks, frayed or split corrugations, missing cuff ends, and hoses collapsing under suction indicate structural failure that temporary repairs cannot reliably fix.
Replace hoses showing recurrent leaks after multiple patches, signs of interior degradation, or compromised fittings that impair seal and flow.
Prioritize replacement to guarantee safety, suction consistency, and long‑term pool maintenance.
Common Problems During Replacement and How to Solve Them
Common problems that can arise during hose end replacement include material cracking or splitting, a new end that does not fit snugly, persistent leaks after installation, and connector corrosion or incompatibility.
Each issue requires a different fix, from replacing damaged hose sections to selecting the correct-size fittings and applying sealant or replacing corroded connectors.
The following guidance explains how to identify each problem and apply the appropriate repair.
Hose material cracking or splitting
Many pool vacuum hoses eventually show cracking or splitting, especially around connection points and near areas exposed to sunlight or chemical residue.
Inspect sections for hairline cracks, soft spots, and brittleness. Small splits can be temporarily sealed with silicone tape or PVC repair adhesive; severely degraded sections require replacement.
Prevention includes proper storage, UV-resistant hoses, and avoiding prolonged chemical contact to extend service life.
New end not fitting snugly
A handful of replacements fail because the new end does not seat tightly, leaving gaps that reduce suction or allow leaks; this usually stems from slight size mismatches, worn fittings, or improper installation technique.
Inspect hose and end for burrs, deformations, or corrosion. Match diameters and brands when possible, trim uneven edges, use a proper clamp or adhesive rated for pool use, and retest suction.
Persistent leaks after installation
Investigate persistent leaks immediately after installation, since ongoing seepage typically signals issues beyond simple misalignment—cracked fittings, incompatible materials, or degraded seals are frequent culprits.
Inspect joints, replace damaged O-rings, and test with low-pressure water before full use.
Tighten clamps evenly, apply appropriate pool-grade sealant sparingly, and retest.
If leaks persist, isolate sections to pinpoint the failing component for targeted repair.
Connector corrosion or incompatibility
Examine connectors for signs of corrosion or material mismatch before installation, since degraded metals or incompatible plastics can cause leaks, weak joints, or accelerated wear.
Replace corroded fittings with stainless steel or brass and choose UV-resistant, pool-rated plastics.
Match thread types and diameters, use proper seals or tape, and test under pressure.
Regular inspection prevents premature failure and maintains reliable vacuum performance.
Maintenance Tips to Extend Hose and End Lifespan
The section outlines practical maintenance steps to prolong the life of pool vacuum hoses and end fittings.
It covers proper storage and handling, seasonal care including winterizing procedures, and a concise regular inspection checklist.
Following these practices reduces wear, prevents damage, and minimizes the need for frequent replacements.
Proper storage and handling practices
Proper storage and careful handling greatly reduce wear on pool vacuum hoses and ends, preserving seals and fittings while preventing kinks, abrasions, and UV damage.
Hoses should be drained, coiled loosely on a reel or padded rack, kept shaded and off concrete, and stored dry.
Avoid dragging over rough surfaces, sharp bends, chemical exposure, and compressive loads that deform fittings or weaken material.
Seasonal care and winterizing hoses
Prepare hoses for seasonal changes by draining, cleaning, and inspecting them before storage to prevent freeze damage and material degradation.
After drying, cap ends and coil loosely on a flat, elevated surface away from sunlight and rodents.
Store in a climate-controlled area, ideally in breathable bags or bins.
Apply a light silicone lubricant to fittings to preserve seals and ease reassembly in spring.
Regular inspection checklist
A concise, routine inspection helps detect wear and minor damage before it becomes costly. Operators should check hose length, fittings, and end cuffs for cracks, splits, or deformation.
Confirm secure connections and intact seals, and verify flexibility along the entire hose to spot stiffness or brittleness.
- Inspect for surface cracks or abrasions
- Check end cuff integrity
- Verify clamp tightness
- Test for leaks under pressure
- Note unusual stiffness or kinks
Cost Estimates and When to Replace the Entire Hose
Typical DIY repairs and replacement ends generally cost between $10 and $50, while full-length hoses range from $30 to $150 depending on length and material.
If multiple sections show cracks, persistent leaks, or frequent fittings failures, replacing the entire hose often proves more economical than repeated repairs.
The article will compare part prices to replacement thresholds to help decide when repair is worthwhile versus when to purchase a new hose.
Typical costs for parts and DIY repairs
Many pool owners find that repairing vacuum hose ends is far less expensive than replacing the entire hose; common parts like end caps, cuff adapters, and crimp sleeves typically cost between $2 and $15 each, while DIY repair kits run $10–$30. Estimated costs and typical items:
| Item | Typical Price | Notes |
|---|---|---|
| End cap | $2–$8 | Quick fix |
| Cuff adapter | $4–$12 | Fits different diameters |
| Crimp sleeve | $3–$6 | Secures joints |
| DIY kit | $10–$30 | Includes tools and parts |
Signs that replacement is more cost-effective than repair
Consider replacing the hose when multiple sections show extensive cracking, persistent leaks after successive repairs, or damage near several fittings that makes patching impractical; in such cases labor and parts costs can quickly exceed the price of a new hose and ongoing failures can reduce cleaning effectiveness.
Replacement is preferable if frequent downtime, worsening performance, or visible interior collapse indicate imminent failure and higher long‑term expense.
When to Call a Professional
When tears, internal collapse, or multiple failed repairs complicate a hose issue, a professional assessment is warranted.
Homeowners should look for a licensed pool technician with positive reviews and relevant experience in suction-side equipment.
Recommended preliminary questions include warranty coverage, diagnostic fees, and anticipated repair or replacement options.
Complex damage scenarios requiring pros
Call a professional if damage extends beyond a simple split or cuff wear—cases involving crushed fittings, internal delamination, multiple longitudinal cracks, or hose sections fused by heat require specialized tools and experience to diagnose and repair safely.
Technicians assess structural integrity, test suction performance, and replace or splice hoses with industrial-grade materials.
Attempting complex repairs without proper equipment risks leaks, reduced flow, or further damage.
Choosing a pool service technician and questions to ask
How should a homeowner select a pool service technician?
The homeowner should verify licensing, insurance, and local references.
Ask about experience with vacuum hose repairs, parts warranties, diagnostic fees, and turnaround times.
Request a written estimate, inquire about safety and pool chemistry knowledge, and confirm communication preferences.
Choose a technician with clear pricing, documented reviews, and professional credentials for reliable service.
Conclusion
Like an old oar mended before a long voyage, a replaced pool vacuum hose end lets routine maintenance turn back time on wear. The DIYer gains renewed flow and fewer leaks, saving small sums while preserving summer rituals. When repairs stop holding or costs near replacement, the sensible course is clear. Whether tightening a clamp or fitting a new cuff, care extends usefulness—so the pool remains ready, calm as a well-kept harbor.