
How to Snake a Drain With a Hanger: Step-By-Step DIY Guide to Clear Clogs Safely
To clear shallow clogs in your sink or tub drain using a wire coat hanger, follow these steps:
- Shape the Hanger: Straighten the hanger and create a hook at one end.
- Wear Gloves: Protect your hands while you work.
- Probe the Drain: Gently insert the hooked end into the drain and use cautious in-and-out motions to avoid pushing debris further down or scratching pipes.
- Inspect and Dispose: Carefully remove any debris you pull out and dispose of it properly.
- Flush with Hot Water: Run hot water down the drain to help clear any remaining buildup.
- Repeat if Necessary: If the clog persists, repeat the process.
For deeper or more stubborn clogs, consider using specialized tools or contacting a plumber. Follow the additional safety tips provided for best results.
What snaking a drain with a hanger involves
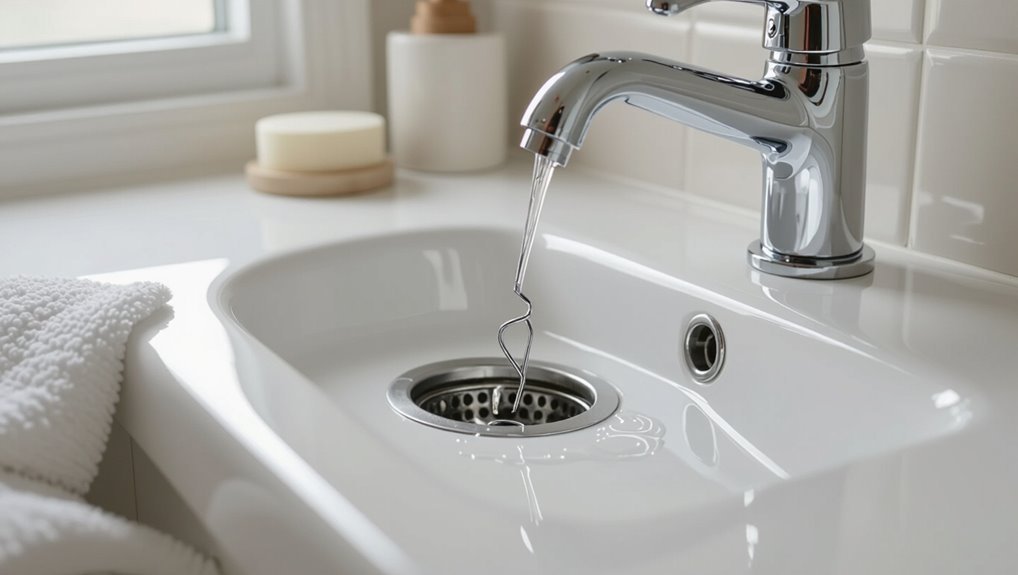
Snaking a drain with a hanger means straightening and inserting a wire to break up or retrieve clogs near the pipe entrance.
It is a reasonable DIY option for shallow blockages in sink or bathtub drains when the clog is visible and the plumbing is accessible.
The method has clear limitations and risks—it may not reach deep or pipe-held obstructions and can scratch pipes, worsen damage, or push debris farther in.
Simple definition and purpose
A wire hanger drain snake is a makeshift tool fashioned from a straightened coat hanger used to remove hair, gunk, and small obstructions from sink and tub drains.
It involves forming a hooked or spiral tip, inserting the wire into the drain, and snagging or dislodging debris.
The purpose is targeted mechanical clearing without chemicals, offering a quick, low-cost method for basic clogs.
When a hanger is a reasonable DIY option
Consider using a straightened wire hanger when the clog is near the surface, involves hair or soap buildup, and the fixture is a sink, bathtub, or shower with accessible drain openings.
It suits shallow, localized blockages where mechanical reach and hooking remove debris. Minimal tools are required, and the method is quick, inexpensive, and appropriate for homeowners comfortable with basic manual retrieval and cleanup.
Limitations and risks of using a hanger
Using a straightened wire hanger to clear a drain carries clear limitations and hazards that homeowners should weigh before attempting the method.
It risks scratching pipes, dislodging seals, pushing clogs deeper, or causing injury. Thin wire may break or fail to remove hair and grease.
Professional tools or plumbers are safer for stubborn blockages or fragile plumbing.
Assess risks before proceeding.
Tools and materials needed
A list of common household items—wire coat hanger, pliers, bucket, and rags—frames the basic approach to snaking a drain.
Appropriate safety gear such as gloves and eye protection is noted to prevent injury and contact with contaminants.
Optional tools like a flashlight, screwdriver, or an inexpensive auger are mentioned as items that can make the task quicker and more effective.
List of household items
Essential tools for snaking a drain include a wire coat hanger, pliers, a flashlight, rubber gloves, a bucket, and rags; optional items such as a screwdriver, needle-nose pliers, and a drain stopper can make the job easier.
The list below summarizes common household items useful for unclogging drains:
- Wire coat hanger
- Pliers
- Flashlight
- Bucket and rags
Safety gear and why it matters
Because even minor plumbing tasks can expose skin and eyes to debris, chemical cleaners, and bacteria, appropriate safety gear is necessary before snaking a drain with a hanger.
Gloves protect skin from contaminants and sharp edges; goggles shield eyes from splashes; a mask limits inhalation of fumes or mold; closed-toe shoes prevent foot injury.
Long sleeves add extra protection.
Optional tools that make the job easier
Gathering a few optional tools can greatly reduce effort and speed up unclogging when using a hanger snake. A pair of long-nose pliers helps grasp debris; a bucket and towels contain spills.
Channel-lock pliers assist with trap removal. A flashlight improves visibility. Disposable gloves, a drain brush, and a small mirror make inspection and cleanup easier, saving time and reducing mess.
Preparing the area and safety precautions
Before beginning, the workspace should be cleared of obstructions and any standing water removed to prevent slips and guarantee access to the drain.
The area must be ventilated and checked for chemical residue from past cleaners that could produce harmful fumes or reactions.
Gloves, eye protection, and appropriate clothing should be worn to minimize exposure to contaminants and sharp edges.
Clearing the workspace and removing standing water
Clear the area around the sink to allow unimpeded access and protect nearby items from splashes or drips.
Remove rugs, towels, and fragile objects.
Place a bucket and absorbent cloths to catch water.
Use a cup or small container to bail out standing water into the bucket, lowering liquid level to expose the drain.
Dry surfaces to prevent slips and electrical hazards.
Ventilation and chemical residue concerns
Adequate ventilation and awareness of residual chemicals are essential when preparing to snake a drain. Open windows and exhaust fans to disperse fumes from prior cleaners.
Inspect for lingering liquids or foam around the drain and carefully dilute or blot them with absorbent material before proceeding.
Avoid mixing unknown substances; document visible labels and ventilate until odors subside to reduce inhalation and reaction risks.
Personal protective measures
Personal protective gear and a secured work area reduce injury and contamination risks when snaking a drain with a hanger.
Wear chemical-resistant gloves, eye protection, and closed-toe shoes.
Remove pets and children, clear nearby surfaces, and place absorbent towels to catch drips.
Guarantee good ventilation and have a flashlight, pliers, and a container for debris.
Dispose of waste safely.
Step-by-step guide to snaking a drain with a hanger
The procedure begins with straightening a wire hanger and shaping one end into a hook or small corkscrew tip to catch obstructions.
The hanger is inserted into the drain with steady, controlled motions while probing to locate and snag the clog.
After withdrawing the hanger, the debris is inspected and disposed of, and the drain is tested for clearance.
Straightening and shaping the hanger
One or two minutes of careful work will turn a coathanger into an effective drain snake: straighten the wire, leave a 6–8 inch section unbent for a handle, and form a small hook or spiral at the opposite end to catch debris.
Using pliers, remove kinks and smooth bends; guarantee the shaft is rigid yet slightly flexible.
Test length and adjust for reach.
Forming a hook or small corkscrew tip
Start by securing the pliers near the hanger’s working end and bend a small 1–1.5 inch loop or spiral, keeping turns tight and uniform so the tip can catch hair and debris without snagging on pipe walls.
Form a pronounced single hook or a compact corkscrew depending on clog type.
Smooth any sharp burrs and verify the tip retains shape under light tension.
Inserting the hanger into the drain safely
Gently feed the prepared hanger into the drain, guiding it slowly while keeping the shank close to the pipe’s curve to prevent catching on fittings or enamel.
Pause if resistance is felt; withdraw slightly, rotate gently, then resume. Maintain steady control to avoid sudden slips.
Keep a cloth around the pipe entry to catch drips and protect surfaces from scratches during insertion.
Techniques for locating and snagging the clog
After the hanger is fed into the pipe and positioned against the curve, the technician advances in small, controlled pushes while rotating the shank to probe for resistance that indicates the clog.
Upon sensing resistance, subtle back-and-forth and gentle twisting work to entangle debris. Tactile feedback guides depth and angle adjustments.
If no snag occurs, retract slightly, reposition, and repeat until solid catch is achieved.
Withdrawing, inspecting, and disposing of debris
With the clog secured, the technician withdraws the hanger slowly, maintaining steady rotation to keep debris entwined on the shank while monitoring resistance to avoid sudden releases.
Once clear, the technician inspects the material, using gloved hands and a paper towel to transfer waste into a sealed bag.
Tools and sink are rinsed and disinfected; contaminated disposables are discarded properly.
Repeating the process and testing the drain
Proceed to repeat the snaking motions, re-inserting the hanger and advancing until the same resistance point is reached. Then manipulate and withdraw again to extract remaining debris.
This cycle is continued until the hanger passes through smoothly. After several successful passes, run hot water and check flow and drainage speed.
If slow, repeat snaking or try a plunger; if clear, reassemble fixtures and clean tools.
Troubleshooting common problems while snaking
If the hanger will not reach the clog, the writer notes methods for extending reach or accessing the trap.
Guidance is provided for freeing a hanger that becomes stuck without causing pipe damage.
Clear indicators are listed that show the clog may require better tools or a professional.
When the hanger won’t reach the clog
Sometimes a closet hanger simply lacks the length or flexibility to reach a deep or offset clog.
The guide advises testing alternate angles, straightening or re-bending the wire for added reach, and removing the trap for direct access when safe.
If obstruction persists beyond reachable depth, recommend switching to a proper drain snake or calling a professional to avoid damage or ineffective attempts.
What to do if the hanger gets stuck
Work slowly and stop at the first sign of resistance to avoid bending the wire further or damaging the pipe.
If the hanger becomes stuck, gently rotate and pull while applying steady, even pressure.
Try pushing slightly to dislodge debris, then withdraw a few inches and repeat.
If it won’t budge, cut power tools; consider rope or professional help to avoid pipe damage.
Signs the clog is beyond a hanger’s ability
After attempts to free a lodged hanger—rotating, pulling, pushing slightly, or withdrawing and repeating—there are clear indicators that the clog exceeds what a homemade wire will handle.
Persistent backup despite attempts, strong resistance or inability to advance beyond a short distance, foul odors signaling decomposed buildup, recurring blockages soon after clearing, or visible debris types (grease, roots) suggest calling a professional or using proper tools.
Alternatives to a hanger for stubborn clogs
When a bent hanger fails, other options merit consideration: a plunger used with firm, controlled strokes can often dislodge blockages near the trap.
For more persistent clogs, chemical or enzyme cleaners can be appropriate if used according to label directions and with attention to pipe type, while a proper drain snake or auger provides a mechanical solution for deeper obstructions.
If these methods do not restore flow or if the user is unsure, a licensed plumber should be contacted.
Plunger technique basics
A plunger offers a simple, effective alternative to a wire hanger for dislodging stubborn clogs by creating pressure and suction to move blockages through the pipe.
Choose a cup-sized plunger, guarantee a tight seal, add water if necessary, and use steady, forceful pumps.
Test flow, repeat if needed, and clean the plunger after use to prevent odors and bacteria spread.
Chemical and enzyme cleaners’ when to use them
How effective are chemical and enzyme cleaners against clogs, and which situations warrant their use?
Chemical cleaners dissolve hair, grease, and organic buildup quickly but can damage pipes, seals, and septic systems if misused.
Enzyme cleaners act slower, safer for plumbing and septic, ideal for organic buildup and maintenance.
Choose enzymes for regular care; reserve chemicals for severe, non-biological clogs with caution.
Using a proper drain snake or auger
After considering chemical and enzyme options, attention turns to mechanical methods for stubborn blockages: a purpose-built drain snake or auger provides controlled, physical removal where cleaners fall short.
These tools reach deeper, break or extract hair and debris, and reduce pipe damage versus improvised wire. Select size and head type for the drain, operate slowly, retract debris steadily, and sanitize afterward.
When to call a professional
When should one stop trying DIY fixes and call a professional? Signs include persistent blockage after multiple attempts, foul odors indicating deep buildup, slow drains across several fixtures, sewage backup, or visible pipe damage.
Professionals use motorized snakes, hydro-jetting, camera inspection, and safe chemical treatments.
For recurring clogs or complex systems, hiring a licensed plumber prevents damage and guarantees lasting resolution.
Preventing future clogs
Preventing future clogs requires consistent habits such as flushing drains with hot water after use and avoiding flushing hair or grease.
Regular maintenance routines—periodic snaking, using enzyme cleaners, and inspecting traps—helps catch buildup before it hardens.
Installing strainers and grease-capturing products can greatly reduce hair and grease accumulation.
Best habits to keep drains flowing
Developing a few simple habits can greatly reduce the chance of clogs and extend the life of household drains.
Regularly use strainers to catch hair and food, dispose of grease in sealed containers, run hot water after dishwashing, avoid flushing non-degradable items, and rinse sinks after use.
Promptly address slow drainage before it worsens to prevent tougher blockages.
Recommended maintenance routines
Although simple habits reduce most blockages, a short, regular maintenance routine helps guarantee drains remain clear and catch early buildup before it becomes a clog.
Inspect visible drains weekly, remove hair and debris, flush with hot water after use, and run water for several seconds in seldom-used sinks.
Schedule monthly deeper checks and address slow drainage promptly to prevent stubborn blockages.
Products that reduce hair and grease buildup
Once routine inspections and hot-water flushes are in place, selecting the right products can considerably reduce hair and grease buildup before it becomes a problem.
Recommended items include:
- Silicone drain screens to catch hair.
- Enzymatic cleaners that digest organic residue.
- Grease-cutting dish detergents for sink use.
- Biodegradable degreasers applied periodically.
These choices minimize clog formation and extend pipe life.
Environmental and safety considerations for disposal
The article now addresses responsible disposal of removed debris and the safe handling of any chemical cleaners used during unclogging.
It explains that solids should be bagged and discarded with household waste or composted when appropriate, while greasy or hazardous residues require sealed containers and proper disposal per local regulations.
It also stresses wearing gloves, rinsing tools outdoors when possible, and avoiding mixing chemicals to prevent dangerous reactions.
How to dispose of removed debris responsibly
After removing hair, grease, and other material from a clogged drain, it should be collected and handled to minimize environmental harm and health risks.
Use gloves, deposit solids into a sealable trash bag, wipe tools with paper towels, and place soiled towels in the trash.
Avoid rinsing debris into storm drains.
For large volumes of oily waste, consult local hazardous waste guidelines for proper disposal.
Safe handling of chemical cleaners
Although chemical drain cleaners can dissolve clogs quickly, they pose significant health and environmental risks and must be handled and disposed of with care.
Users should wear gloves and eye protection, avoid mixing products, and ventilate the area.
Neutralize small amounts per label instructions, never pour concentrated residues down storm drains, and take unusable containers to hazardous waste facilities for proper disposal to protect people and ecosystems.
Estimated time, difficulty, and cost
Typical clogs such as hair and soap buildup often take 10–30 minutes to clear with a hanger.
In contrast, tougher blockages like tree roots or deep grease can take hours or require repeated attempts.
Using a bent hanger is effectively free but less efficient than a consumer drain snake ($10–40) and usually far cheaper than professional service ($75–250+).
The article will compare expected effort and outcomes for each option to help readers choose the most appropriate approach.
Typical time required for different clog types
Many clogs take between 10 minutes and an hour to clear with a wire hanger, but tougher blockages can require more time, effort, or repeated attempts. Typical times, difficulty, and low material cost vary by type:
| Clog type | Typical time |
|---|---|
| Hair and soap | 10–30 min |
| Food scraps | 15–45 min |
| Grease buildup | 30–90 min |
| Mineral deposits | 45–120 min |
| Foreign objects | 30–180+ min |
Cost comparison: hanger vs. purchased tools vs. professional help
Comparing costs, time, and difficulty across three approaches—an improvised wire hanger, store-bought drain tools, and professional plumbers—helps homeowners choose the most efficient option for a given clog.
A hanger costs near-zero, suits simple clogs, and takes 10–30 minutes with low skill.
Basic snake or auger: $10–50, moderate time and skill.
Professional service: $100–300+, rapid, guaranteed, higher complexity.
Quick checklist to follow before and after snaking
Before beginning, a concise pre-task checklist guarantees safety and readiness by confirming required tools, protective gear, and that water and power supplies are controlled.
After snaking, a brief post-task checklist verifies that the drain flows freely, fixtures are clean and reassembled, and any disposal of waste is handled properly.
Together these checks minimize risk and help confirm the job was completed successfully.
Pre-task checklist
A short checklist guarantees safety and efficiency when preparing to snake a drain. The practitioner confirms water supply is off, clears the area, dons gloves and eye protection, and reads local plumbing basics.
The following pre-task steps guide readiness:
- Turn off water and remove nearby items.
- Wear gloves and goggles.
- Ventilate and lay down towels.
- Inspect hanger and tools.
Post-task checklist
1. After snaking, the person confirms drain flow, cleans tools, and sanitizes surfaces.
They dispose of debris and wash hands thoroughly.
They document results and note needed follow-up.
- Rinse drain thoroughly
- Clean and dry hanger/tool
- Sanitize workspace and hands
- Record outcome and schedule inspection
Conclusion
Snaking a drain with a hanger provides a quick, low-cost way to tackle minor clogs without calling a plumber. When done carefully, it can be as satisfying as untangling a knot in a necklace, restoring flow and saving time. Following proper preparation, safety steps, and disposal guidelines reduces risks and environmental impact. For persistent or complex blockages, professional help is advised to avoid damaging pipes or causing bigger problems.
