
How to Increase Water Pressure on an Outside Faucet: Simple Fixes That Work
To effectively increase water pressure on an outside faucet, start by ensuring that both the main and exterior shutoff valves are fully open. Next, inspect the spigot, aerator screen, backflow preventer, and hose for any mineral buildup, clogs, or corrosion; clean or replace any affected parts as necessary. Remove the hose and flush the line, then test the pressure using a gauge or timed container. Additionally, check for leaks or any frozen or damaged pipes. If you find seized valves or undersized lines, consider replacing them or adding a booster for persistent low flow. Further troubleshooting and solutions will be detailed below.
How to Tell If Your Outside Faucet Has Low Water Pressure
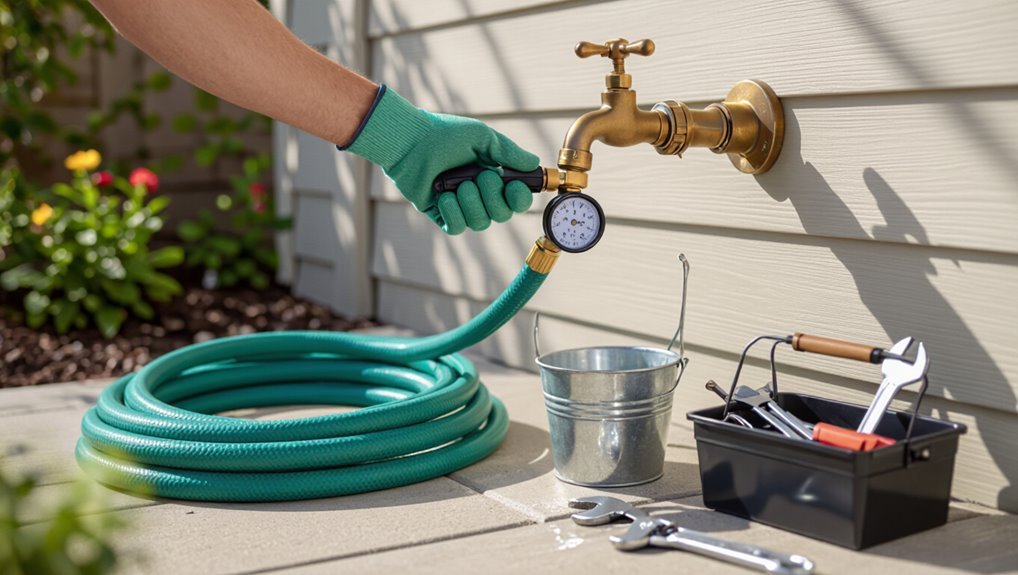
Visible signs such as a weak stream, sputtering flow, or slow hose fill indicate an outdoor spigot may have low water pressure.
Measuring pressure with a simple pressure gauge screwed onto the spigot or timing how long it takes to fill a known-volume container provides a quick quantification.
Typical healthy outdoor pressure is roughly 40–60 psi, while readings well below that or inconsistent flow point to a problem needing further inspection.
Signs of low pressure at outdoor spigots
Several clear indicators reveal when an outdoor spigot is delivering less water than it should.
Visible signs include a weak, sputtering stream, slow hose filling, and poor sprinkler coverage.
Irregular flow or extended time to complete outdoor tasks signals restriction or leak.
Corrosion buildup or discolored flow at the spigot mouth also suggests deterioration.
Homeowners researching how to increase water pressure on outside faucet should note these clues.
How to measure water pressure at an outside faucet (tools and simple methods)
To determine whether an outside faucet is delivering adequate pressure, a few simple tools and methods provide quick, reliable measurements.
Attach a garden hose pressure gauge to the spigot or use a digital handheld gauge for direct readings.
Alternatively, time how long to fill a known-volume container and calculate flow rate.
Record readings at different times to check consistency and identify intermittent issues.
Normal vs problem pressure ranges for outdoor use
After measuring pressure or flow, homeowners can compare results to common benchmarks to determine whether an outdoor faucet is performing normally or requires attention.
Typical outdoor faucet pressure ranges 40–60 psi; flow rates above 6–8 gallons per minute indicate healthy supply.
Readings under 40 psi or markedly low flow suggest issues: clogged aerator, valve problems, frozen lines, leaks, or supply restrictions needing diagnosis.
Quick Fixes to Boost Water Pressure at an Outside Faucet
A few simple checks can often restore strong flow at an outside faucet.
First, verify the main and supply valves are fully open and inspect the aerator or screen for mineral buildup, cleaning or replacing parts as needed.
Additionally, clear debris from the hose bib and spout and replace any kinked or restrictive hoses and fittings to recover proper pressure.
Turning the main valve and supply valves fully on
Check that the main shut-off and any local supply valves are fully open before assuming there is a more complex problem.
Verify the house shut-off valve near the meter and any isolating valve feeding the outside faucet.
Turn valves counterclockwise until they stop; use a wrench gently if stiff.
Partially closed valves commonly reduce flow and are a simple, quick fix to restore pressure.
Cleaning or replacing the faucet aerator and screen
Inspect the faucet aerator and internal screen for mineral buildup or debris, as these small components often restrict flow despite fully open valves.
Remove the aerator, soak parts in vinegar to dissolve scale, and scrub gently with a brush.
Replace damaged screens or purchase a new aerator assembly sized to the spout.
Reinstall and test flow; improved pressure often follows.
Clearing debris from the hose bib and spout
Clear loose sediment and small debris from the hose bib and spout to quickly restore flow without tools beyond pliers and a soft brush.
Turn water off, remove any attached hose, and inspect the opening.
Use a soft brush to dislodge grit and pliers to gently extract lodged particles or a damaged washer.
Flush briefly, recheck, and reinstall hose to verify improved pressure.
Checking and replacing garden hoses or fittings that restrict flow
Once the spout and washer are free of grit, attention should shift to the hose and fittings, which often cause noticeable pressure loss.
Inspect hoses for kinks, internal collapse, or narrow-bore design. Check connectors, washers, and pressure-reducing attachments for debris or damage.
Replace worn hoses with wide-bore, kink-resistant models and swap corroded or restrictive fittings to restore full flow.
Step-by-Step Troubleshooting Checklist
A concise troubleshooting checklist helps determine whether low flow is isolated to the outside faucet or reflects a whole-house pressure problem.
The homeowner should inspect shutoff valves, the service line, and any backflow preventer, test flow with and without hoses or attachments, and watch for visible leaks or pressure drops while water runs.
If these steps do not identify or resolve the issue, a professional plumber should be called.
Verify home-wide vs localized pressure problems
How can one determine whether low pressure at an outdoor faucet stems from a whole-house issue or a localized problem?
Test multiple indoor fixtures (kitchen, bathroom) with taps and shower; note pressure differences and whether issues are simultaneous.
Check other outdoor spigots if present.
If low pressure occurs everywhere, suspect house-wide supply or municipal issues; if isolated, focus on the specific exterior line or fixture.
Inspect shutoff valves, service line, and backflow preventer
Begin by locating and checking each valve and connection that controls water to the outdoor faucet: the interior shutoff (often in a basement, crawlspace, or utility area), the service line where it exits the house, and any backflow preventer installed near the exterior spigot.
Confirm valves are fully open, inspect for visible damage, leaks, or corrosion, and verify backflow devices are unobstructed and functioning properly.
Test with and without hoses/attachments to isolate the issue
Proceed to test the spigot with and without hoses or attachments to determine whether reduced flow originates at the faucet or from downstream accessories.
Run water directly from the bare spout, then attach each hose, nozzle, or splitter one at a time. Note changes in volume and pressure.
Replace or clean accessories that restrict flow; if pressure drops only with an attachment, the faucet is likely fine.
Look for visible leaks and pressure drops while water is running
With the spigot running, inspect the faucet, hose connections, and visible supply lines for dripping, wet spots, or sudden pressure loss; note whether flow weakens immediately after water starts or only after a short interval.
Watch for steady leaks, spray from fittings, or damp soil that indicate hidden breaks. Record locations and timing of drops, then retest after tightening connections or flushing lines to confirm improvements.
When to call a professional plumber
Call a professional plumber when basic diagnostics—visual inspection, hose and spigot tightening, aerator or screen cleaning, and simple flushing—fail to restore adequate flow or when signs indicate hazards or complex failures, such as persistent pressure drops, visible pipe bursts, contaminated water, frozen or buried line issues, or backflow concerns.
Documenting what was tested and when will help the plumber diagnose and prioritize repairs.
A plumber evaluates mains, pressure regulators, hidden leaks, and frozen or corroded sections safely.
Common Causes of Low Pressure on Outside Faucets
Low outside faucet pressure often traces to simple valve issues such as partially closed main or exterior shutoffs.
Other common causes include mineral buildup, corrosion, ice damage or sediment in the spigot and supply lines, plus clogged or faulty backflow preventers and vacuum breakers.
In some cases, low pressure originates with the municipal supply or shared line problems.
Partially closed main or exterior shutoff valves
A partially closed main or exterior shutoff valve is a frequent, easily overlooked cause of reduced flow to an outside faucet. Restricted valves limit supply pressure and volume.
Homeowners should inspect valve positions, fully open exterior shutoffs, and operate main valves slowly to avoid water hammer.
Corroded or seized valves may require replacement by a plumber to restore full flow and reliable operation.
Mineral buildup, corrosion, or ice damage in the spigot
Mineral deposits, internal corrosion, and ice damage are common causes of restricted flow and dripping at outdoor spigots.
Scale and rust narrow passages, seize valves, and damage washers or seats, reducing output.
Frost expansion can crack components, causing leaks and impaired flow.
Inspect spigots, remove visible scale, replace corroded parts or the entire fixture, and winterize to prevent recurrent deterioration.
Clogged supply lines, sediment, or frozen pipes
Check supply lines for blockages, sediment buildup, or freezing that can severely restrict outdoor faucet flow.
Inspect accessible piping, hose bib connections, and shutoff valves for debris, rust flakes, or ice.
Flush lines by opening valves and briefly running water after removing hoses.
Repair or replace damaged sections and insulate exposed pipes to prevent future freezing and restore consistent pressure.
Faulty or restricted backflow preventers and vacuum breakers
Problems unrelated to freezing or sediment can also impede flow: backflow preventers and vacuum breakers mounted on outdoor faucets frequently become restricted or fail.
These devices can clog with mineral buildup, corrode, or have worn seals, reducing throughput or causing intermittent flow.
Inspect and test for proper operation; replace malfunctioning units or clean components to restore normal pressure while maintaining required backflow protection.
Municipal supply pressure or shared line issues
When pressure at an outdoor spigot drops despite a clear, well-functioning faucet assembly, the issue often originates upstream with the municipal supply or shared service lines.
Reduced system pressure, main breaks, maintenance work, meter valve settings, or peak-demand variations can limit flow.
Coordination with the water utility and neighbors, pressure readings at the meter, and documenting intermittent patterns identify whether corrective action or infrastructure upgrades are needed.
How to Repair or Replace Problem Components
When low pressure traces to specific parts, addressing or replacing those components often restores proper flow. This can include swapping an outside faucet, cleaning or replacing a backflow preventer or vacuum breaker, repairing leaks in supply lines (including options for buried pipe repair), and upgrading valves and fittings for higher capacity.
The following section outlines common tools, parts, and basic steps for each repair or replacement.
Replacing an outside faucet (tools, parts, basic steps)
Begin by gathering the necessary tools and parts: an adjustable wrench, screwdriver, pipe thread sealant or plumber’s tape, replacement spigot assembly (match thread size and inlet type), and, if needed, soldering or compression fittings and a torch or tubing cutter.
Shut off supply, drain lines, remove old faucet, clean threads or cut pipe square.
Install new spigot with sealant or proper fitting, test for leaks and restore supply.
Cleaning or swapping a backflow preventer or vacuum breaker
Inspect the backflow preventer or vacuum breaker for mineral buildup, cracked seals, or corrosion before deciding on repair or replacement.
If clogged, soak parts in vinegar or a descaling solution and brush gently. Replace damaged check valves or O-rings.
When swapping, shut water, remove unit, match thread size and type, and install a rated replacement with proper sealing and torque.
Test for leaks.
Fixing leaks in supply lines and repair options for buried pipes
After checking and servicing the vacuum breaker or backflow preventer, attention should shift to the supply lines and any buried sections that commonly cause pressure loss due to leaks.
Inspect exposed piping for corrosion, damp soil, or pooling. Repair minor pinholes with epoxy or compression sleeves; replace severely damaged sections.
For buried pipe failures, excavate to expose, cut out the damaged run, and splice in new pipe with approved fittings.
Upgrading valves and fittings to increase flow
Upgrade valves and fittings that restrict flow to restore usable pressure at the outside faucet.
Assess shutoff valves, hose bibs, and adapters for corrosion, narrow passages, or partially closed positions.
Replace obsolete gate valves with full-bore ball valves, upsized fittings, and smooth-bore adapters.
Use compatible materials and proper thread sealant.
Test flow after replacement and inspect for leaks; adjust as needed.
When to Upgrade for Better Outdoor Water Pressure
When simple repairs no longer restore adequate flow, upgrading the outdoor water supply becomes the practical next step.
Options include installing a dedicated supply line, adding a pressure booster or variable-speed pump, or replacing undersized piping with common recommended sizes.
For irrigation or multiple-outlet systems, capacity and zoning should guide the chosen upgrade.
Installing a dedicated outdoor supply line
Consider installing a dedicated outdoor supply line if existing fixtures struggle to deliver adequate flow during simultaneous indoor and outdoor use. A separate line reduces pressure loss caused by shared plumbing and can deliver consistent volume to hoses, sprinklers, and faucets.
A new line sized appropriately, routed directly from the main, minimizes friction losses and valve interference, improving reliability for gardening, irrigation, and pressure-dependent outdoor equipment.
Adding a pressure booster or variable-speed pump
If a dedicated supply line still fails to provide the pressure or flow required for hoses, sprinklers, or pressure-dependent equipment, installing a pressure booster or a variable-speed pump becomes the next practical option.
These systems raise pressure at the source, offer adjustable output, and can protect against cavitation; professional sizing and electrical supply checks are recommended.
- Boosts static and dynamic pressure
- Variable speed conserves energy
- Requires proper controller
- Needs licensed installation
Replacing undersized piping and common sizing recommendations
Upgrading undersized outdoor piping often provides the most direct and reliable improvement in faucet pressure and flow; small-diameter lines create friction losses that limit available water for hoses, sprinklers, and pressure-dependent devices.
Replace 1/2-inch supply lines with 3/4-inch where feasible, and use 1-inch mains for long runs.
Match pipe material and fittings, minimize bends, and confirm local code and meter capacity before upsizing.
Considerations for irrigation systems and multiple outlets
After replacing undersized piping, homeowners should evaluate how many outlets and irrigation zones will run simultaneously, since multiple fixtures draw from the same supply and amplify pressure loss.
Calculate combined flow rates, check main meter and pipe capacity, and consider zone scheduling, larger mains, or a booster pump.
Prioritize critical zones, use low-flow heads where possible, and consult a pro for system upgrades.
Preventive Maintenance to Keep Outdoor Faucets Flowing Well
Preventive maintenance preserves flow and reduces the need for costly repairs.
Recommended practices include seasonal winterization and thawing tips, a routine cleaning and inspection schedule, and measures to protect against corrosion and mineral buildup.
Simple upgrades—such as installing frost-proof valves, strainer screens, or replaceable hose bibs—cut future problems and maintain steady pressure.
Seasonal winterization and thawing tips
Several simple seasonal tasks can greatly reduce the risk of frozen or burst outdoor faucets during winter.
Shut off and drain exterior valve lines before first freeze, install insulated covers, and disconnect hoses.
For frozen spigots, apply warm (not boiling) water or use a hairdryer toward the pipe, working from the faucet toward the house.
Call a plumber if thawing fails or pipes are damaged.
Routine cleaning and inspection schedule
Establish a simple, seasonal schedule for cleaning and inspecting exterior faucets to catch wear, leaks, and buildup before they worsen.
The homeowner notes valve operation, hose bib tightness, visible leaks, and mounting stability. Prompt minor repairs prevent pressure loss and costly replacements.
- Check handle operation and tightness
- Inspect for wet spots or drips
- Verify mounting and seals
- Test water flow monthly
How to protect against corrosion and mineral buildup
Keep faucets free of corrosion and mineral buildup by applying a few targeted, routine measures that extend service life and maintain flow.
Flush lines seasonally, wipe exposed metal with a mild vinegar solution, and remove aerators for descaling.
Apply plumber’s grease to stems and replace worn washers.
Use dielectric fittings where dissimilar metals join and inspect seals regularly to prevent leaks and scale accumulation.
Simple upgrades that reduce future problems
After routine cleaning and corrosion control come a few straightforward upgrades that greatly reduce future headaches and maintain steady flow.
Install a frost-free sillcock, replace rubber washers with silicone or EPDM, add a backflow preventer and pressure regulator, and fit a mesh screen and quick-connect hose adapter.
Schedule annual inspections and winterize lines to prevent freezing, leaks, and debris buildup.
Cost and Time Estimates for Repairs and Upgrades
A brief comparison of costs and durations helps homeowners decide between DIY fixes and hiring a plumber for outdoor faucet issues. The table below summarizes typical DIY versus professional price ranges and estimated completion times for common tasks. These figures are approximate and can vary by region and the job’s complexity.
| Task | DIY Cost Range | Pro Cost & Time |
|---|---|---|
| Replace washer/seat | $5–$20 | $75–$150 (30–60 min) |
| Replace valve stem | $10–$40 | $100–$250 (1–2 hrs) |
| Install pressure regulator | $30–$150 | $200–$400 (1–3 hrs) |
Typical DIY tasks vs professional services cost ranges
Distinguishing between DIY fixes and professional work helps homeowners choose the most cost-effective route for increasing outside faucet pressure.
Simple tasks—cleaning aerators, replacing washers, tightening valves—typically cost under $20–$50 in parts.
Intermediate jobs like replacing shutoff valves or short pipe sections may run $50–$200 DIY.
Professional services for corrosion, pipe replacement, or pressure regulator work commonly range $150–$800+.
Expected time to complete common fixes and replacements
Repair and upgrade timeframes for outside faucet issues vary widely based on complexity and access:
Simple tasks like cleaning screens, replacing washers, or tightening fittings typically take 15–60 minutes.
Moderate jobs such as swapping shutoff valves or replacing short pipe sections commonly require 1–3 hours.
More involved work—corroded fittings, in-wall pipe replacement, or installing/modifying a pressure regulator—can span half a day to multiple days when permitting, drying, or trenching is needed.
Minor jobs often complete within an hour; mid-level repairs need a few hours; major upgrades require scheduling, possible inspections, and contingency time for unexpected complications.
Troubleshooting Scenarios and Solutions
When outside faucet pressure drops only with a hose attached, the likely culprits are the hose or nozzle rather than the spigot.
If several faucets show low pressure, attention should turn to the municipal supply, the main shutoff, or a shared service line.
Intermittent drops often indicate a leak, a failing pressure regulator, or a pump issue and require targeted testing.
Low pressure only when hose is attached likely hose or nozzle issue
Check the hose and nozzle before assuming the outdoor faucet is at fault: restricted flow often originates in the hose itself, kinked sections, internal debris, or a clogged nozzle or spray attachment.
Inspect for kinks, crushes, or visible damage. Detach and run water through the hose, clear debris, replace washers or nozzle screens, and test with a known-good hose to isolate the problem.
Low pressure at multiple faucets municipal supply or main valve issue
If multiple outdoor and indoor faucets show similarly low flow, the cause often lies beyond individual fixtures—either a weakened municipal supply or a partially closed or failing main shutoff valve.
Confirm by checking neighbors’ water flow and inspecting the home’s main valve position.
Report sustained low pressure to the utility if neighbors are affected; replace or repair the main valve if it is stuck or leaking.
Intermittent pressure drops leak, pressure regulator, or pump problem
Investigate intermittent pressure drops by tracing whether the issue stems from a hidden leak, a failing pressure-reducing regulator, or a malfunctioning pump.
Check for damp patches, pooling, or unusually high water bills to locate leaks.
Test regulator output with a gauge; replace if fluctuating.
For pump systems, inspect cycling, electrical connections, and tank pressure.
Repair or call a licensed plumber if diagnostics are inconclusive.
Tools, Parts, and Materials You’ll Need
A clear list of basic tools—adjustable wrench, pliers, screwdrivers, plumber’s tape, and a basin wrench—helps guarantee efficient faucet repair or replacement.
Common replacement parts such as washers, O-rings, packing nuts, and a compatible spigot or cartridge should be matched to the faucet type and pipe size.
Selecting the right materials, including corrosion-resistant brass or stainless components and appropriate thread sealant, reduces future leaks and pressure loss.
Basic tools for faucet repair and replacement
Gathering the right tools and parts before starting prevents delays and reduces the chance of errors during an outside faucet repair or replacement.
Essential tools enable efficient diagnosis and safe work. Recommended basic tools include:
- Adjustable wrench and pliers
- Screwdrivers (flat and Phillips)
- Pipe tape and utility knife
- Hacksaw or tubing cutter
Common replacement parts and how to choose the right ones
After assembling the basic tools, attention shifts to the replacement parts most likely needed when servicing an outside faucet.
Selection prioritizes correct size, material compatibility, and valve type to restore flow and prevent leaks.
Common choices include:
- Replacement washers and seats
- New cartridge or stem assembly
- Frostproof faucet body
- Compression nuts and sleeves
Conclusion
In the end, the outside faucet is a small river gate: when clear and cared for, it sings; when clogged or wounded, it whispers. The homeowner who treats it with steady attention—flushing sediment, tightening fittings, replacing tired washers—restores a confident flow. Like tending a garden hose to coax blooms, routine checks and timely repairs turn trickles into sure streams, ensuring the yard’s waterways perform their quiet, indispensable work.
