How to Test for Electrolysis in Plumbing: Simple DIY Methods and When to Call a Pro
To test for electrolysis in plumbing, you can perform a few simple DIY methods. Electrolysis occurs when dissimilar metals in plumbing corrode due to electrical currents, leading to issues like pitting, discolored water, and leaks. Start by using a multimeter to check pipe-to-ground and pipe-to-pipe voltages; readings below 10–20 mV are usually not concerning, while values above 100 mV indicate potential problems. Additionally, look for visible signs of corrosion or perform continuity tests. If you find corrosion, high voltage readings, or grounding issues, it’s best to consult a licensed professional for further diagnosis and repairs.
What Electrolysis in Plumbing Is and Why It Matters
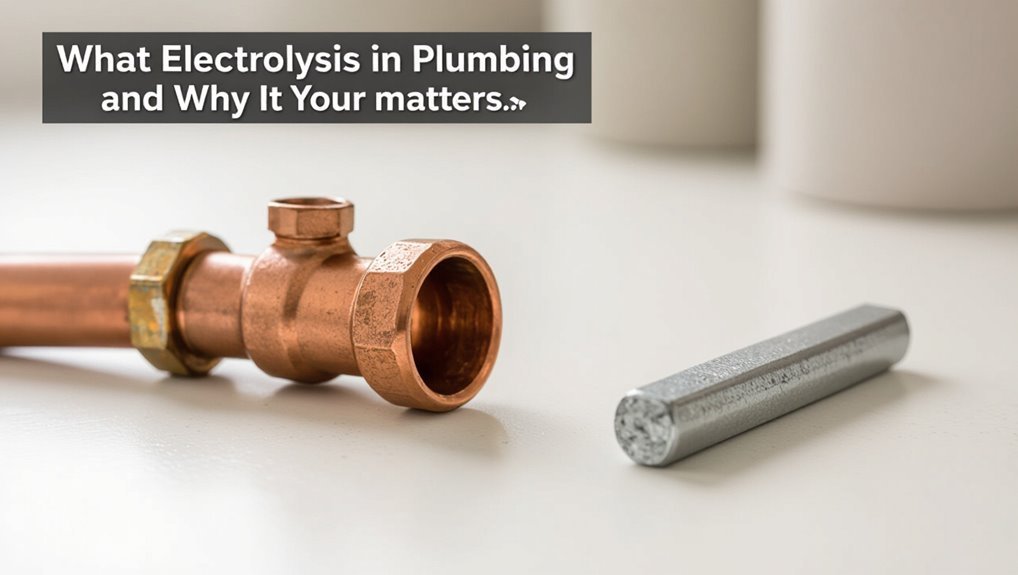
Electrolysis, or galvanic corrosion, occurs when dissimilar metals in a plumbing system form an electrochemical cell and metal ions are dissolved into the water.
Visible signs include pitting, leaks, green or blue staining, and accelerated joint or fitting failure, which can lead to reduced water quality and costly repairs.
Copper, brass, steel, and galvanized fittings — especially when joined without dielectric unions or proper grounding — are most at risk.
How electrolysis (galvanic corrosion) occurs in plumbing systems
Galvanic corrosion in plumbing occurs when two dissimilar metals come into electrical contact through a conductive medium—typically water—creating a small galvanic cell that drives metal ions from the anodic (less noble) metal into solution.
Electrical potential differences, oxygen concentration cells, stray currents, and electrolyte chemistry determine reaction rates.
Knowledge of these mechanisms informs how to test for electrolysis in plumbing and select compatible materials or isolation methods.
Common signs and consequences of electrolysis damage
Many plumbing systems show clear, measurable signs when electrochemical corrosion is active: localized pitting, green or white deposits at joints, accelerated thinning of pipes, and discolored or metallic-tasting water.
Consequences include leaks, reduced flow from narrowed passages, contaminated water, premature fixture failure, and costly emergency repairs.
Inspections often reveal corrosion scars, loose fittings, and elevated maintenance frequency signaling systemic electrolysis damage.
Typical pipe materials and fittings at risk
Numerous common plumbing materials and fittings are susceptible to electrochemical corrosion when dissimilar metals are electrically connected in the presence of an electrolyte.
Copper, brass, galvanized steel, cast iron, and stainless steel can suffer differing degrees of attack.
Brass fittings, unions, solder joints, and threaded connections are common problem points.
Plastic piping generally resists electrolysis but may conceal corroding metal components.
Quick Way to Know If You Might Have Electrolysis
A quick assessment begins with easy visual checks: look for greenish or powdery buildup on metal joints, accelerated rust, or pitting on exposed pipes.
Homeowners should use a simple symptom checklist—faucet leaks, unexplained corrosion near fittings, and metallic-tasting water—to flag probable electrolysis.
If several signs appear together, professional testing is recommended.
Easy visual checks to spot probable electrolysis
Several straightforward visual checks can quickly indicate probable electrolysis in plumbing systems.
Inspect joints and fittings for unusual pitting, white or greenish crusting, and flaking metal.
Look for verdigris on copper or green/blue deposits on brass, plus localized rust on steel near dissimilar-metal connections.
Note damp staining or rapidly spreading corrosion around clamps, unions, or grounding straps.
Simple symptom checklist for homeowners
Homeowners can use a short checklist of visible and functional symptoms to quickly assess whether electrolysis might be affecting their plumbing.
A detached evaluation helps decide next steps:
- Pinhole leaks or rapid corrosion on metal pipes.
- Discolored or cloudy water with metallic taste.
- Strange electrical tingling from fixtures.
- Unexplained frequent joint failures or loose fittings.
If several apply, consider testing or professional inspection.
Tools You Need to Test for Electrolysis at Home
A basic handheld multimeter and a non-contact voltage tester are recommended for measuring stray voltages and continuity, with guidance on features to look for and why they matter.
Additional useful items include a wire brush to clean contacts, a reference electrode for corrosion potential checks, and a wrench for safe disassembly.
Before testing, appropriate safety gear—insulated gloves, eye protection—and precautions for shutting off water and power are essential.
Handheld multimeter and voltage tester what to buy and why
Essential tools for diagnosing electrolysis include a handheld digital multimeter and a non-contact voltage tester, each serving distinct roles: the multimeter measures DC and AC voltages and continuity between dissimilar metals, while the voltage tester quickly detects live wiring and stray voltages without contact.
Choose a multimeter with millivolt DC resolution, low input impedance option, and true RMS; pick a reliable, rated non-contact tester.
Other useful tools: wire brush, reference electrode, wrench
After selecting a suitable multimeter and non-contact tester, a few hands-on tools make measurements and surface prep practical: a stiff wire brush cleans corrosion for reliable contact; a portable reference electrode (copper/copper sulfate or silver/silver chloride) provides stable potential for pipe-to-soil/pipe-to-water readings; and an adjustable wrench or pliers secures and isolates fittings during voltage or continuity checks, preventing false readings.
Safety gear and precautions before testing
Several pieces of personal protective equipment and simple precautions protect both the tester and the plumbing system during electrolysis checks.
Safety glasses, chemical-resistant gloves, and insulated footwear minimize injury.
Confirm power to nearby circuits is off, shut water supply if disassembling joints, ventilate confined spaces, and use nonmetallic tools when possible.
Verify meter leads are rated and undamaged before contact with fittings.
Step-by-Step DIY Electrical Potential Test for Plumbing
Before testing, the homeowner should isolate the plumbing system and shut off power to nearby circuits to guarantee a safe work area.
Using a multimeter, the procedure measures pipe-to-ground voltage and then voltage between dissimilar metal pipes at accessible joints or fittings.
Readings are compared to established thresholds to determine when voltages indicate a risk of electrolysis and require corrective action.
Preparing the plumbing system and safety shutdowns
When preparing the plumbing system for an electrical potential test, the technician isolates affected fixtures and shuts off water sources to prevent flow that could mask stray voltages. This includes closing supply valves, draining short sections of pipe if necessary, and disabling any recirculation pumps.
The technician tags shutoffs, de-energizes nearby electrical equipment, guarantees PPE, and notifies occupants. Documented lockout/tagout and emergency access are confirmed.
How to measure pipe-to-ground voltage with a multimeter
How should a technician measure pipe-to-ground voltage with a handheld digital multimeter? The technician verifies power off where required, sets the meter to AC or DC volts per local conditions, and probes pipe metal and nearby true earth ground. Read stabilized value, document, and repeat at other points.
- Inspect and ground reference selection
- Meter range confirmation
- Probe placement technique
- Record results and observe safety
How to measure voltage between dissimilar metal pipes
A simple voltmeter test can reveal electrical potential between dissimilar metal pipes by measuring the voltage directly across their exposed metal surfaces. The technician sets the multimeter to an appropriate voltage range (AC or DC per local conditions), places one probe on each pipe, waits for a stable reading, and notes the value and polarity for comparison and further investigation.
Record location, time, and test conditions; repeat tests after isolation.
Interpreting voltage readings and thresholds of concern
Why does a few millivolts matter? Small DC potentials indicate galvanic activity; readings under ~10–20 mV are generally negligible.
Consistent 20–100 mV suggests accelerated corrosion risk and monitoring.
Above ~100 mV or fluctuating values indicate active electrochemical attack or stray currents—call a professional.
Note polarity, trend over time, and document locations for effective diagnosis and remediation.
Copper Pipe Specific Checks
For copper piping, specific checks focus first on measuring stray electrical current along the runs to determine if the system is being energized.
Attention then shifts to joints where copper meets brass or steel, inspecting for localized corrosion patterns and discoloration.
Documented voltage readings and visible corrosion at these interfaces guide further isolation or repair steps.
Testing for stray current on copper systems
Several focused measurements can quickly reveal whether stray electrical current is affecting copper plumbing.
A multimeter measures AC and DC voltage between pipe and true earth; a clamp meter detects milliamps of stray AC/DC along the run.
Perform voltage drop tests at separate sections during energized loads.
Any measurable current or voltage indicates potential electrolysis and warrants corrective bonding and grounding by a qualified electrician.
Identifying corrosion at copper-to-brass or copper-to-steel joints
Inspecting copper-to-brass and copper-to-steel joints focuses on visible corrosion patterns, metal discoloration, and changes in joint integrity that signal galvanic action.
The observer notes green or blue deposits, white powder, pitting at contact points, and accelerated joint deterioration.
Tightness, leaks, or brittle solder indicate ongoing electrochemical attack.
Record locations, photograph damage, and isolate affected sections for repair or professional assessment.
Steel and Iron Pipe Specific Checks
For steel and iron lines, testing focuses on identifying accelerated corrosion patterns such as pitting, flaking, or rapid wall loss that exceed normal wear.
Technicians compare localized corrosion rates against baseline expectations and use electrical continuity checks to spot stray currents driving deterioration.
The presence of sacrificial anodes or protective coatings is noted and accounted for, since they can mask or alter electrochemical readings and must be isolated or bypassed for accurate tests.
Detecting accelerated corrosion on steel/iron lines
Detecting accelerated corrosion on steel and iron lines requires targeted checks that distinguish electrochemical deterioration from ordinary rusting.
Inspect for pitting, undercutting at joints, and localized perforations inconsistent with age. Measure stray current with a multimeter between pipe and true ground, and compare corrosion patterns upstream versus downstream of fittings.
Document rapid progression and consult a corrosion specialist if tests indicate active electrochemical attack.
How sacrificial anodes and coatings affect tests
Consider how sacrificial anodes and protective coatings alter both the onset and the observable signs of electrochemical attack on steel and iron pipes.
Sacrificial anodes divert corrosion, reducing surface pitting and lowering stray current readings until depleted.
Coatings mask early corrosion but can hide underfilm attack; insulation faults cause localized cells.
Testing should include anode condition checks, coating inspections, and targeted localized potential measurements.
Advanced Diagnostic Methods for Accurate Assessment
Advanced diagnostics employ reference electrodes and corrosion coupons to quantify galvanic potentials and localized metal loss.
Technicians also measure circuit current with clamp meters and ampere meters to identify stray or impressed currents.
Complementary soil and water chemistry tests determine ionic conditions that drive electrochemical attack.
Using reference electrodes and corrosion coupons
Introduce reference electrodes and corrosion coupons as complementary tools for quantifying electrochemical activity in plumbing systems.
Reference electrodes provide stable potential benchmarks to map stray voltages and polarisation, while corrosion coupons—fixed metal samples—measure material loss over time.
Together they distinguish galvanic versus stray-current corrosion, inform remediation choices, and validate protective measures without requiring continuous current magnitude measurements.
Current (ampere) measurement and clamp meters
Having established how reference electrodes and corrosion coupons quantify electrochemical activity and distinguish corrosion drivers, attention shifts to measuring the actual current causing metal loss.
Technicians use clamp meters for noninvasive DC/AC leakage measurements on buried or exposed piping. Readings confirm stray current presence and magnitude, guiding mitigation like isolation, grounding, or impressed-current cathodic protection.
Accurate clamps require stable zero and appropriate DC capability.
Soil and water chemistry tests that influence electrolysis
Because soil and water chemistry directly control the electrochemical environment around buried or submerged piping, targeted tests are essential to differentiate corrosive conditions from stray-current effects.
Recommended analyses include pH, resistivity/conductivity, chloride, sulfate, and dissolved oxygen.
Ion concentrations indicate corrosivity and differential aeration risk; resistivity estimates soil’s current-carrying propensity.
Interpret results against material-specific corrosion thresholds to guide mitigation and monitoring.
Quick Comparative Table of Test Methods and When to Use Them
A compact comparison summarizes each electrolysis test—visual inspection, multimeter voltage/current testing, sacrificial anode assessment, and corrosion rate coupons—highlighting required tools, accuracy, time, cost, and ideal scenarios for use so a technician can quickly select the most appropriate method for a given plumbing situation.
| Method | Tools | Best use |
|---|---|---|
| Visual | None/hand tools | Quick field checks |
| Multimeter | Multimeter, probes | Diagnose stray voltages |
| Coupons/Anode | Coupons, replacement anode | Measure long-term corrosion |
Common False Positives and How to Avoid Them
The author notes that temporary stray voltages from appliances and grounding issues can mimic electrolysis and should be ruled out before drawing conclusions.
Common multimeter misreadings and user errors are frequent sources of false positives and warrant careful measurement technique.
Confirming electrolysis requires correlating electrical measurements with physical corrosion patterns and isolation tests to separate electrochemical attack from other corrosion causes.
Temporary stray voltages from appliances and grounding issues
How can temporary stray voltages from appliances and grounding issues mimic electrolysis damage?
Occasional appliance leakage or improper grounding can create transient voltages on metal pipes, causing corrosion-like filaments, pitting, or stray meter readings.
These effects are intermittent and tied to device operation or weak earth connections.
Verify by isolating circuits, unplugging appliances, and checking grounding continuity before diagnosing true electrolysis.
Misreading multimeter results common mistakes
Detecting temporary stray voltages and grounding faults is only part of avoiding misdiagnosis; misreading multimeter results is a frequent source of false positives that can lead to unnecessary repairs.
Users often measure without proper reference, use incorrect mode or range, or ignore AC coupling and stray capacitance.
Proper zeroing, using DC mode, consistent reference points, and repeat measurements reduce false positives and misinterpretation.
How to confirm electrolysis versus other corrosion causes
Distinguish electrolysis from other forms of corrosion by correlating electrical measurements with physical evidence and service history.
Inspect for localized pitting at fittings, nonuniform deposits, and discoloration consistent with stray current.
Confirm with a clamp-on ammeter or voltmeter showing stray currents where corrosion appears.
Rule out galvanic coupling, chemical etching, and microbial influence via water chemistry, grounding checks, and corrosion pattern comparison before concluding electrolysis.
Immediate Temporary Fixes You Can Do Yourself
The homeowner can make several immediate temporary fixes to reduce electrolysis risk, including isolating dissimilar metals with dielectric unions.
Basic electrical measures such as adding bonding straps or improving grounding can also mitigate stray currents until a professional evaluates the system.
Short-term corrosion protection—using appropriate tape, pipe insulation, or anti-corrosion wraps—can slow damage while permanent repairs are arranged.
Isolating dissimilar metals with dielectric unions
One simple temporary fix for electrolysis in plumbing is to install dielectric unions between dissimilar metal pipes; these fittings create a nonconductive barrier that prevents galvanic current flow at the joint without requiring immediate pipe replacement.
They are straightforward to fit, chemically inert, and suitable for short‑term mitigation.
Inspect joints periodically for corrosion and leaks and replace with permanent solutions when practical.
Adding electrical bonding and grounding fixes for homeowners
After fitting dielectric unions, attention can turn to electrical bonding and grounding as additional temporary measures homeowners can apply to reduce stray currents and slow electrolysis.
A licensed electrician should be consulted, but homeowners can clamp a copper bonding wire between metallic pipes and a known grounding point as a short-term measure.
Confirm secure connections, insulation from vibration, and schedule professional inspection promptly.
Short-term corrosion protection and tape/insulation tips
Apply quick physical barriers to exposed pipe surfaces to slow corrosion while awaiting permanent repairs.
Use dielectric tape or plumber’s tape to isolate dissimilar metals, wrapping seams tightly.
Apply corrosion-inhibiting paste to joints, then cover with self-fusing silicone tape for waterproofing.
Add foam insulation to reduce condensation.
Monitor regularly; these are temporary measures only.
Arrange professional evaluation and permanent bonding or replacement promptly.
When to Call a Professional and What to Expect
If visible corrosion, persistent stray current readings above a few millivolts, recurring leaks, or signs of electrical faults are present, a licensed plumber or electrician should be contacted.
Professionals typically offer diagnostic services including visual inspection, pipe-to-soil and stray current testing, and a written report outlining findings.
Expected remedies range from electrical isolation and sacrificial anode installation to pipe replacement, with costs driven by scope of damage, accessibility, materials, and required electrical work.
Thresholds and situations that require a licensed plumber or electrician
Certain clear signs and measurement thresholds indicate that electrolysis in plumbing has advanced beyond DIY remedies and warrants a licensed plumber or electrician.
Immediate professional attention is recommended for:
- Persistent metallic taste
- Visible pipe pitting
- Stray voltage over 1–2 volts between fittings
- Rapid leak recurrence
- Grounding or bonding failures
- Appliance damage linked to plumbing
- When work requires permits, service disconnection, confined-space entry, or complex electrical isolation.
Diagnostic services professionals provide (scope, tests, reports)
When electrolysis indicators meet the thresholds described above or when homeowners are uncertain about electrical interactions with plumbing, a diagnostic service from a licensed professional provides systematic evaluation and documentation.
Technicians perform visual inspection, continuity and stray current testing, pipe-to-soil potential measurements, and thermal or corrosion imaging. They supply a written report detailing findings, measured values, risk assessment, and recommended next steps for remediation or further investigation.
Typical repair options and cost factors
Call a licensed plumber or electrician as soon as diagnostic results indicate active stray currents, significant metal loss, or safety hazards; typical repairs range from targeted fixes like bonding and sacrificial anode installation to more extensive work such as pipe replacement or rerouting to isolate plumbing from electrical paths.
- Localized bonding and grounding
- Sacrificial anode or cathodic protection
- Sectional pipe replacement
- Rewiring or isolation devices
Cost factors: materials, labor, accessibility, and testing severity.
Preventing Electrolysis Long-Term
The section outlines practical steps to prevent electrolysis, including choosing compatible pipe materials and following proper installation practices to minimize dissimilar metal contact.
It explains electrical bonding, grounding, and the use of sacrificial anodes as engineered protections.
It also recommends a concise maintenance and monitoring schedule homeowners can follow to catch early signs of corrosion.
Best materials and installation practices to avoid galvanic corrosion
Several practical steps greatly reduce the risk of galvanic corrosion in plumbing systems, starting with material selection and correct installation.
Use compatible metals (e.g., copper with copper, brass with brass), non-conductive dielectric fittings where dissimilar metals meet, and corrosion-resistant alloys or plastic piping.
Guarantee proper sealing, avoid stray electrical paths, maintain protective coatings, and follow manufacturer torque and support guidelines to prevent mechanical damage.
Electrical bonding, grounding, and sacrificial anodes explained
Proper material choices and isolation fittings reduce many galvanic risks, but long-term protection also relies on electrical measures: bonding, grounding, and sacrificial anodes work together to control stray currents and protect metal components.
Bonding equalizes potentials across metal parts; grounding directs fault currents safely to earth.
Sacrificial anodes (zinc/magnesium) corrode preferentially, preserving protected plumbing until replaced.
Maintenance schedule and monitoring tips for homeowners
Regular inspections at predictable intervals give homeowners the best chance to catch electrolysis before it causes significant damage.
A concise maintenance plan includes routine checks, simple monitoring, and timely professional help.
- Inspect visible joints and fittings monthly for corrosion.
- Test continuity and stray voltage quarterly.
- Replace sacrificial anodes annually or as needed.
- Log findings and actions; call a plumber for anomalies.
Real-World Examples and Case Scenarios
Two brief case scenarios illustrate common electrolysis causes and responses.
The first describes a mixed-metal domestic water supply where galvanic currents were identified with a multimeter and resolved by installing dielectric unions and replacing incompatible fittings.
The second shows stray current from a nearby electrical system traced with a clamp meter and corrected by locating and repairing the fault and adding proper grounding.
Scenario: mixed-metal domestic water supply’ diagnosis and fix
Several common household setups combine copper, galvanized steel, and brass fittings, creating conditions where galvanic corrosion can occur if electrical continuity and water chemistry align unfavorably.
Diagnosis involves visual inspection for pitting, measuring pipe-to-pipe voltage and continuity, and testing water conductivity.
Fixes include installing dielectric unions, isolating dissimilar metals, applying corrosion inhibitors, and replacing severely damaged sections; recheck after remediation.
Scenario: stray current from nearby electrical system’ diagnosis and fix
After addressing mixed-metal galvanic issues, attention turns to stray electrical currents from nearby systems that can accelerate pipe corrosion and cause erratic voltages on plumbing.
A technician measures AC/DC voltages and leakage with a clamp meter and earth-resistance tests. If confirmed, solutions include isolating grounding, installing insulating joints, re-routing offending conductors, or involving an electrician to correct wiring and bonding to eliminate stray current.
Quick Reference: Checklist for Testing and Next Steps
Begin with a concise checklist that outlines the essential tests, required tools, and immediate actions to take if electrolysis is suspected; this quick-reference summary lets a technician or homeowner move from diagnosis to remediation efficiently.
- Inspect visible corrosion and record locations.
- Use a multimeter and clamp meter to detect stray currents.
- Perform pipe-to-earth continuity and sacrificial anode checks.
- Isolate circuits, document results, then repair grounding or call a licensed plumber/electrician.
Conclusion
Electrolysis in plumbing can quietly wreck pipes faster than a lightning strike through a teacup. In short, homeowners are urged to recognize signs—corrosion, stray currents, and dissimilar metal joins—and use basic tools like a multimeter and reference electrodes for a simple electrical potential test. Copper-specific checks and preventive bonding reduce risk. When readings or damage are significant, a licensed plumber/electrician should be called to diagnose and remediate, ensuring long-term system integrity.