How to Add an Extension Piece to Your Sprinkler System: Step-by-Step Guide
To add an extension piece to your sprinkler system, start by identifying any coverage gaps and ensuring you have matching pipe materials and fittings. Isolate the zone where you’ll be working. Then, excavate to expose the existing line, cut it squarely, and prepare the ends by deburring and cleaning. Attach the extension using compatible couplings or adapters with the appropriate primer, solvent, or sealant. Once everything is connected, slowly repressurize the system to check for leaks, adjust the sprinkler heads, and confirm proper pressure and flow. Always follow safety precautions, and consider seeking professional assistance for more complex installations.
What Adding an Extension Piece to a Sprinkler System Involves
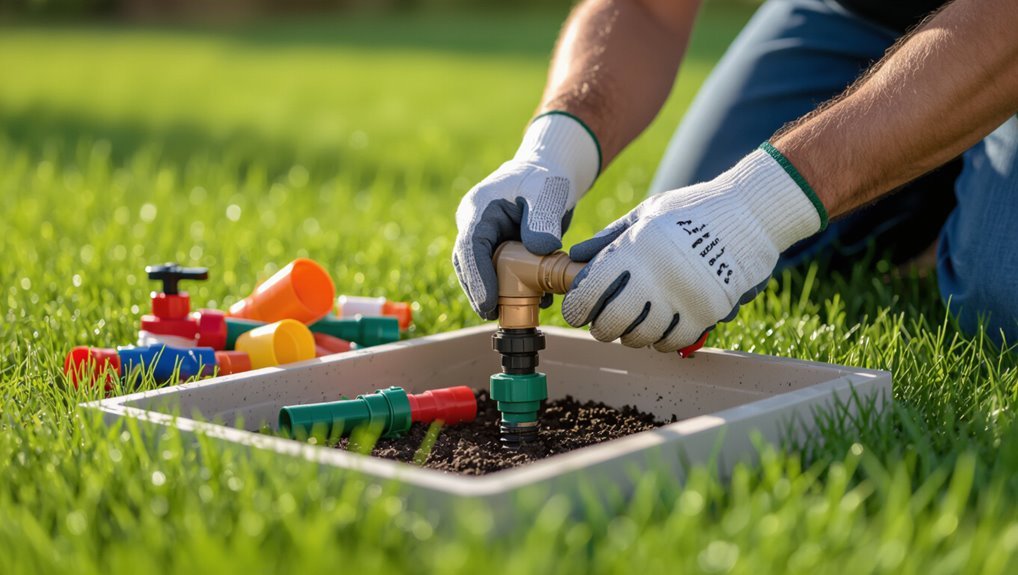
Adding an extension piece typically involves evaluating the existing layout, selecting compatible fittings and pipe, and connecting the new section with proper sealing and testing.
The expected outcome is increased coverage with minimal disruption when the extension is correctly sized and installed.
Homeowners should add an extension when new planting areas require irrigation or when existing heads no longer reach desired zones.
Quick overview of the process and expected outcomes
When extending a sprinkler system, the process generally involves locating the nearest supply line, shutting off water to the zone, cutting and fitting compatible pipe or poly tubing, joining the new run with appropriate couplers or barbed fittings, and testing the connection and coverage for leaks and proper spray pattern.
The guide outlines how to add extension piece on sprinkler system, required tools, steps, and expected reliable coverage.
When and why you should add an extension piece
A practical extension piece addresses gaps in coverage by lengthening a supply run or relocating a sprinkler head to reach dry spots and new plantings.
It is installed when existing heads leave turf, beds, or container areas underserved, when landscaping changes, or when zones require finer control.
Proper sizing preserves pressure; correct fittings prevent leaks.
Installation minimizes disruption and restores uniform irrigation.
Tools, Materials, and Safety Precautions
A concise list of required tools—pipe cutter, PVC primer and cement, wrench, Teflon tape, and a shovel—helps guarantee the job proceeds smoothly.
Common parts and fittings such as PVC pipe, couplers, elbows, risers, and barbed connectors should be gathered before starting.
Before any work begins the water must be shut off, existing lines marked, and appropriate PPE used to prevent injury.
Required tools list
Several specific tools and safety items are essential before extending a sprinkler system: a shovel, pipe cutter, PVC primer and cement (or appropriate fittings for polyethylene), replacement pipe and fittings, Teflon tape, a pressure tester or gauge, thread sealant, and personal protective equipment such as gloves and safety glasses.
- Clear excavation and cutting tools for clean joints.
- Proper adhesive/sealants and tape for leak-free connections.
- Pressure testing equipment and PPE for safe verification.
Common parts and fittings needed
Moving from tools and safety considerations to the specific parts, the most commonly needed components include PVC or polyethylene pipe, couplings, elbows, tees, threaded adapters, risers, and a selection of sprinkler heads and nozzle types.
Additional essentials are primer, solvent cement or barbed fittings, Teflon tape, clamps, and replacement seals. Proper sizing and fittings prevent leaks and guarantee uniform coverage.
- Pipe and fittings
- Connectors and adapters
- Seals and sealants
Safety steps before starting (shutting off water, marking lines, PPE)
Before any cutting or joining begins, guarantee the irrigation system is de-energized and depressurized: shut off the main supply valve, turn off the controller, and open a downstream drain or manual drain to relieve residual water.
Next, mark existing lines and valve locations with flags or chalk to avoid accidental cuts.
Wear gloves, safety glasses, and knee protection; use caution when handling sharp tools and PVC cement.
Assessing Your Existing Sprinkler System
Before adding an extension, the existing sprinkler layout must be assessed by identifying pipe types and sizes and mapping valves, zones, and connection points.
The inspector should also measure available water pressure and flow to guarantee the system can support additional heads.
Any mismatches or restrictions found will determine whether upgrades or reconfiguration are necessary.
Identifying pipe types and sizes
A quick visual inspection and simple measurements reveal the pipe types and diameters that determine compatibility for an extension.
The assessor notes material—PVC, polyethylene, copper, or polybutylene—measures outside diameter and wall thickness, and checks markings for schedule or SDR ratings.
Threaded versus slip joints, barbed fittings on flexible pipe, and any existing adapters are recorded to select matching connectors and avoid leaks.
Locating valves, zones, and connection points
With pipe types and sizes identified, the assessor moves on to locate valves, zones, and connection points that define how the system operates and where an extension can tie in.
They map the valve manifold, trace zone wiring to the controller, and mark irrigation mainlines and lateral branches.
Accessible connection points, isolation valves, and backflow device locations are noted for safe, compliant tie‑ins.
Checking water pressure and flow requirements
Measure static and dynamic water characteristics to determine whether the system can support an extension: static pressure indicates supply head at the meter or backflow device, while flow (gallons per minute) measured under operating conditions reveals available capacity for additional zones.
Use a pressure gauge and flow meter or bucket test, record results, compare to sprinkler head and zone demands, and factor in pressure losses from added fittings and pipe length.
Planning the Extension
The planner selects the appropriate extension type—main pipe, lateral, riser, or drip line—based on flow requirements and plant needs.
They calculate required pipe length, number and type of fittings, and emitter spacing to guarantee uniform coverage and proper pressure.
Finally, they map the layout and mark trench locations before purchasing materials and scheduling excavation.
Choosing the correct extension type (pipe, lateral, riser, drip line)
Choosing the correct extension type depends on the system’s layout, water pressure, and planned coverage area.
The installer assesses whether mainline pipe, lateral tubing, risers for sprinkler heads, or drip lines best match flow and terrain.
Consider durability, compatibility with existing fittings, maintenance access, and vegetation needs.
Select materials rated for local pressure and climate to guarantee reliable, efficient irrigation performance.
Calculating pipe length, fittings, and emitter spacing
Begin by mapping the extension route on a scaled plan. Then calculate linear feet of mainline and laterals to determine total pipe length, number and type of fittings, and placement of emitters.
Account for bends, elevation changes, and service access points when tallying components. Specify pipe diameters, coupling and elbow counts, valve and filter locations, and emitter flow rates and spacing to meet pressure and coverage requirements.
Mapping the layout and marking trenches
A clear, scaled plan is laid out on-site and translated to the ground to guide trenching: stake mainline and lateral routes, mark emitter and valve locations, and note obstacles, slopes, and utility corridors so trenches follow the plan exactly.
Lines are snapped or spray-marked, depths and widths recorded, connector and valve boxes positioned, and clearances verified against buried utilities before excavation begins.
Step-by-Step Installation Guide
Before any cutting or connections are made, the system should be turned off and fully depressurized to guarantee safety.
The installation begins by excavating to expose the existing pipe, cutting and preparing the pipe ends, and fitting appropriate couplings and adapters for the new extension.
Finally, the extension is installed and finished by adding risers, sprinkler heads, or drip components as required.
Turning off and depressurizing the system
Shut off the irrigation controller and close the main water supply valve to isolate the system.
Open a downstream manual drain or bleed screw and one sprinkler head to release trapped pressure.
Wait until flow stops and inspect the system gauge for zero pressure.
Cap or plug open fittings temporarily to prevent contamination.
Confirm no residual pressure before cutting or disconnecting pipes.
Excavating and exposing the connection area
Begin excavating at the marked connection point, removing turf and soil with a shovel or trenching tool until the pipe and surrounding fittings are clearly visible.
Work outward to create a stable, level workspace about 12–18 inches wide.
Clear debris, roots, and compacted soil from around fittings to prevent damage.
Keep a shallow spoil pile and protect nearby landscaping during exposure.
Cutting and preparing existing pipe ends
Cut the existing pipe squarely at the marked location using a pipe cutter or reciprocating saw fitted with a fine-tooth blade, ensuring the cut face is clean and free of burrs.
Deburr inner and outer edges with a file or deburring tool.
Clean pipe ends with a rag and appropriate solvent, inspect for cracks, and measure depth for fittings to guarantee correct alignment and insertion.
Installing couplings, adapters, and the extension piece
Fit the appropriate coupling or adapter to each prepared pipe end, verifying material compatibility (PVC, CPVC, polyethylene, or metal) and the correct size and pressure rating for the system.
Apply primer and solvent cement or insert push-fit fittings per manufacturer instructions.
Align the extension piece, confirm proper depth and orientation, tighten threaded adapters with appropriate tape or sealant, then secure and support the joint, checking for leaks.
Adding risers, heads, or drip components to the extension
With the extension secured and tested for leaks, attention turns to adding risers, heads, or drip components so the new run will deliver water where needed.
Select appropriate riser heights and head types for coverage. Thread or glue risers to fittings, position heads at grade or slightly above, and orient nozzles.
For drip, install emitters and pressure regulators. Test each outlet for correct flow and coverage.
Backfilling, compacting, and restoring the surface
After verifying all fittings and fixtures are leak-free and that heads and emitters function correctly, the installer begins backfilling the trench to protect the new piping and restore the surface.
Soil is added in layers, compacted gently to prevent settling, avoiding sharp rocks near the pipe.
Turf or mulch is replaced neatly, irrigation heads adjusted to grade, and final checks confirm proper operation and appearance.
Testing and Adjusting the Extended Zone
After installation, the extended zone should be re-pressurized and inspected for leaks at fittings and valves.
Sprinkler heads and spray patterns must be adjusted to guarantee proper coverage without overspray.
Finally, the zone should be run long enough to verify uniform water distribution and appropriate run time.
Re-pressurizing and checking for leaks
Re-pressurize the extended zone slowly and monitor pressure gauges and sprinkler operation closely; this controlled start-up helps reveal leaks, broken heads, or poorly seated fittings.
Inspect all joints, couplings, and replacement pipe runs for drips or damp soil.
Listen for hissing or gurgling.
Tighten or reseat fittings, replace damaged components, and retest until pressure stabilizes and no leaks are detectable.
Adjusting sprinkler heads and spray patterns
Begin by running the extended zone and observing each head’s spray to verify coverage, drop size, and throw distance.
Adjust nozzle arcs, rotate reversible tops, and fine-tune screw-adjustable spray nozzles to eliminate gaps and overlaps.
Raise or lower pop-up heights for turf vs. beds.
Replace worn nozzles or clean clogged filters to restore uniform patterns.
Retest until sprays align with desired coverage.
Verifying zone run time and water distribution
Once spray patterns and head adjustments are satisfactory, the extended zone should be run long enough to evaluate total water distribution and soak time per area.
Technicians observe for uniform coverage, pooling, or dry spots, measuring output with catch cups if needed.
Adjust zone duration, head spacing, or flow rates to eliminate deficiencies, then retest until distribution meets landscape watering requirements and system capacity.
Troubleshooting Common Issues
Common problems after adding an extension include leaks at new connections, reduced pressure or uneven coverage, and misaligned or incompatible pipes and fittings.
Each issue typically has a straightforward cause—improper sealing, undersized supply or obstructions, and mismatched pipe types or poor alignment—that can be identified with a quick inspection.
Practical fixes range from resealing joints and checking for clogs to correcting alignment, replacing incompatible fittings, or upgrading supply lines.
Leaks at new connections and how to fix them
Tightening fittings and sealing joints is the first response when water appears at a new connection, since most leaks stem from loose fittings, damaged threads, or insufficient sealing tape.
Identifying the exact source—threaded joint, barbed fitting, or compression coupling—allows targeted repairs such as re-torquing, replacing O-rings, or reapplying plumber’s tape and thread sealant to restore a watertight seal.
If leakage persists, replace the faulty connector or trim and refit the pipe end, ensuring proper seating and torque.
Low pressure or poor coverage after extension
Diagnose low pressure or poor coverage by checking flow and pressure at the source, then at successive points along the new extension to isolate where performance drops.
Inspect for partial blockages, kinked or undersized tubing, and clogged filters or emitters.
Verify zone valve and controller settings, confirm sprinklers are fully open, and test with a temporary bypass to determine if the extension or original line causes reduction.
Pipe alignment and fitting compatibility problems
Aligning pipe and matching fittings correctly is essential to prevent leaks, stress on joints, and reduced flow when extending a sprinkler line.
Misaligned runs, improper socket depths, or mismatched materials (PVC to polyethylene without proper adapters) cause loosening and breakage.
Inspect fittings for size markings, use appropriate junction connectors, maintain straight runs with gentle bends, and test under pressure before backfilling to confirm integrity.
Maintenance and Long-Term Considerations
The extension should be included in seasonal winterization and freeze-protection routines to prevent pipe damage.
A concise inspection checklist—valve operation, leak checks, and nozzle alignment—helps catch issues early.
If repairs involve buried lines, complex valve work, or persistent pressure problems, a professional should be contacted.
Seasonal winterization and freeze protection for extensions
Because extensions add new lines and components that are susceptible to cold, proper seasonal winterization and freeze protection are essential to prevent damage and guarantee reliable operation come spring.
Drain or blow out added lines, isolate and drain valves and backflow devices, insulate aboveground fittings, and close isolation valves.
Label winterized extension zones and record actions for easier spring reactivation.
Routine inspection checklist
A concise, regular inspection checklist helps guarantee extensions remain reliable and identify wear before it causes failures; it should cover zone operation, valve and solenoid function, sprinkler head alignment and coverage, leaks and pressure anomalies, pipe integrity, backflow device condition, and aboveground fittings and insulation.
- Verify each zone runs, valves cycle, solenoids respond, heads spray full pattern.
- Inspect pipes, joints, fittings for leaks, corrosion, insulation gaps.
- Check pressure at gauge, backflow device status, and record anomalies for remediation.
When to call a professional
Severe issues or uncertain diagnoses should prompt contacting a professional irrigation technician, especially when problems involve buried pipes, mainline leaks, backflow devices, or recurring pressure irregularities that simple adjustments do not fix.
A technician is also advised for complex valve assemblies, electrical controller faults, extensive zone redesigns, or code-required permits.
Timely professional intervention prevents water waste, landscape damage, and costly emergency repairs.
Cost Estimates and Time Required
Typical cost components include pipes, fittings, valves, and sprinkler heads versus labor charges for trenching and hookup.
Material expenses are often a modest fraction of total cost when professional labor rates are applied.
Timeframes range from a few hours for a skilled DIYer to half a day or more for a paid installer, depending on scope and site conditions.
Typical cost breakdown (materials vs. labor)
When planning an extension, homeowners should expect costs to split roughly between materials—pipes, fittings, sprinkler heads, valve boxes, and backflow components—and labor for trenching, installation, and system testing. Typical proportions vary: materials often account for 30–60% while labor covers 40–70%. Regional rates and complexity shift those shares; contingency for misc. parts is recommended.
| Item | Typical share |
|---|---|
| Materials | 30–60% |
| Labor | 40–70% |
Estimated time for DIY vs professional installation
Compare time commitments directly: a DIY homeowner adding a small zone can often complete trenching, pipe layout, and head installation in a weekend (8–16 hours).
In contrast, larger extensions or complex layouts typically require multiple days. A licensed professional crew usually finishes the same job in 2–6 hours for a single zone or a day for multi-zone work, not including scheduling.
Project time varies with soil, permits, and system complexity.
Alternatives and Upgrades to Consider
When planning an extension, consideration should be given to alternatives such as installing drip irrigation for new plantings to improve water efficiency.
The homeowner may also add a new zone or upgrade the controller to handle increased coverage and smarter scheduling.
Installing pressure-regulating or flow-monitoring devices can protect components and detect leaks or abnormal usage.
Switching to drip irrigation for new areas
Consider converting newly planted beds or isolated garden patches to drip irrigation to save water and deliver moisture directly to roots.
Drip systems reduce runoff and evaporation, require lower pressure than sprinklers, and integrate with existing supply lines using simple fittings.
Install tubing, emitters, and a pressure regulator; zone separately for sensitive plantings.
Routine flushing and emitter checks maintain performance and prevent clogging.
Adding a new zone or upgrading the controller
After converting new beds to drip irrigation, homeowners may evaluate whether existing control capacity and valve layout meet expanded watering needs.
They can add a dedicated zone by installing an additional valve and wiring it to the controller or upgrade to a larger-controller model with more station outputs and smart scheduling.
Consider future expansion, compatibility with current valves, and simple wiring practices to minimize disruption.
Using pressure-regulating or flow-monitoring devices
Adding pressure-regulating and flow-monitoring devices helps protect sprinkler components, guarantee uniform distribution, and detect leaks or blockages before they waste water or harm plants.
Install a pressure regulator near the mainline to prevent overpressure.
Add a flow meter or sensor at the zone manifold to monitor consumption and trigger alerts.
These upgrades improve efficiency, prolong equipment life, and simplify troubleshooting.
Practical Tips to Ensure Success
Practical success depends on clean, durable connections that resist leaks and wear.
Attention to compatible materials and correct fittings prevents failures and simplifies future repairs.
Considering soil conditions, plant needs, and efficient watering schedules maximizes performance while conserving water.
Best practices for clean, durable connections
Begin by preparing clean, square-cut pipe ends and dry-fitting all components to confirm alignment before applying any adhesive or sealant.
Follow these concise practices for lasting, leak-free joints:
- Remove burrs, clean surfaces with a cloth, and guarantee full insertion depth.
- Apply appropriate primer and adhesive evenly; rotate fittings for coverage.
- Support pipes to prevent stress and recheck for leaks after curing.
Materials and part compatibility tips
After confirming clean, square-cut ends and proper joint alignment, attention turns to selecting compatible materials and parts to guarantee system longevity and performance.
Use matching pipe materials (PVC to PVC, polyethylene to polyethylene) or approved connecting fittings. Match pipe diameter and pressure rating.
Choose threaded components with compatible thread types and quality seals. Prefer corrosion-resistant clamps, proper solvent cement, and manufacturer-recommended adapters for reliable joins.
Environmental and water-efficiency tips
Optimize water use and reduce environmental impact by selecting efficient emitters, scheduling irrigation during cooler hours, and minimizing runoff through proper grading and pressure regulation.
Inspect for leaks, zone by zone, and adjust heads to avoid overspray. Use timers and smart controllers tied to weather sensors.
Mulch and group plants by water needs to reduce frequency. Recycle runoff and test system efficiency periodically.
Conclusion
Adding an extension piece to a sprinkler system completes a practical task and extends functionality like a bridge joining two shores. With careful assessment, proper tools, and attention to fittings, the installation proceeds smoothly; regular maintenance preserves performance and prevents leaks. Cost and time vary, but planning and testing guarantee reliable coverage. When alternatives or upgrades offer better long-term value, consider them; otherwise, the modest investment rewards consistent, evenly watered landscape health.