How to Cap a Gas Line Safely: Step-by-Step Guide for Homeowners
To safely cap a gas line, first shut off the gas and ensure there’s zero pressure. Next, check local codes and utility requirements, gather the necessary fittings and sealants, and wear appropriate personal protective equipment (PPE). After exposing the pipe end, use the correct type of cap—threaded, compression, welded, or flanged—and tighten it according to the manufacturer’s specifications. Finally, conduct an approved pressure test and leak check, document necessary permits and labeling, and consult a licensed contractor if you’re unsure about any steps. Detailed instructions follow for each stage of the process.
How to Cap a Gas Line Safely: Quick Overview and Key Takeaway
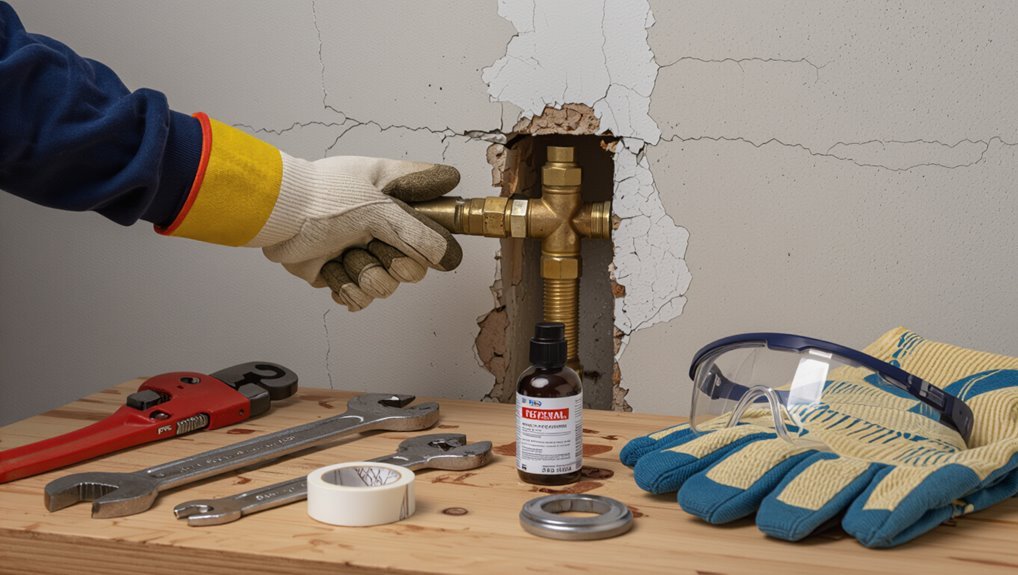
Homeowners should cap a gas line only when appliances are permanently removed or during approved renovations, and after confirming no future need for the outlet.
The legal and safety bottom line requires following local codes, obtaining permits if required, and using certified contractors or inspectors for final verification.
Proper planning and adherence to regulations prevent leaks, liabilities, and code violations.
When capping a gas line is appropriate for homeowners
When a gas appliance is permanently removed or a line is no longer needed, capping the gas line provides a safe, code-compliant way to prevent leaks and unauthorized use.
It is appropriate for property owners who will not reconnect the service, for short-term vacancy, or when converting spaces to non-gas use.
Homeowners researching how to cap a gas line should assess permanence, future plans, and cost versus professional service.
Legal and safety bottom line before you start
Before any work begins, verify local codes, utility company requirements, and permit obligations, and confirm that a licensed gas professional will perform or inspect the cap if regulations demand it.
The legal and safety bottom line: follow codes, obtain permits, notify the utility, and use certified fittings and procedures.
If uncertainty exists, defer to a licensed gas contractor to prevent leaks, fines, or liability.
Essential Safety Preparations Before Capping a Gas Line
Before beginning work, the operator verifies the gas type and service status with the utility and assembles the correct tools and materials.
They don appropriate personal protective equipment and establish worksite precautions to prevent ignition and exposure.
If the line condition, service shutoff, or required permits are unclear, a licensed professional is contacted.
Confirming the gas type and service status with the utility
Although typically taken for granted, verifying the exact gas type and whether service remains active is a critical first step before any capping work begins.
Contact the utility to confirm gas composition (natural gas, propane) and account status, request a service shutoff if needed, and obtain any required permits or inspection requirements.
Record dispatcher names, reference numbers, and scheduled disconnect times for compliance and safety.
Tools and materials required
A clear, concise inventory of tools and materials is essential for safely capping a gas line; this includes personal protective equipment, gas-specific fittings and caps, appropriate sealants, and testing instruments.
Necessary items, chosen to match pipe type and local code, allow accurate sealing and verification.
- Threaded caps or flanges rated for gas service
- Pipe wrenches and fitting tools
- Gas-rated sealant or tape
- Gas leak detector and pressure tester
Personal protective equipment and worksite precautions
When preparing to cap a gas line, the worker must don appropriate personal protective equipment and establish clear worksite precautions to control hazards and enable a safe, compliant operation.
Required PPE includes flame-resistant clothing, safety glasses, chemical-resistant gloves, hard hat, and respiratory protection if confined spaces or fumes are present.
The area must be ventilated, barricaded, and marked with warning signs; ignition sources controlled.
When to call a licensed professional instead
Recognize situations that exceed routine skills and immediately contact a licensed gas professional: any evidence of a leak (odor, hissing, dead vegetation), complex fittings or buried lines, modifications near meters or regulators, multi-family or commercial systems, insufficient ventilation or confined-space access, lack of proper permits, or uncertainty about line pressure and source.
A professional evaluates risks, secures permits, performs pressure testing, and guarantees code-compliant capping.
Step-by-Step Procedure to Cap a Gas Line (Residential)
The procedure begins with shutting off the gas supply and confirming zero pressure before any work proceeds.
Next, the installer locates and safely exposes the pipe end, then cleans and inspects it to guarantee a proper seal.
Finally, the correct cap or plug—threaded or compression—is selected and installed following manufacturer torque and sealing instructions.
Step 1 Shut off gas supply and verify zero pressure
Shut off the main gas valve and confirm that no pressure remains in the line before any capping work begins.
A qualified person isolates the supply, notifies the utility if required, and vents residual gas outdoors.
Using a certified manometer or gas detector, they verify zero pressure at the worksite.
Only after confirmed depressurization does preparatory capping proceed.
Step 2 Locate and expose the pipe end safely
With pressure confirmed at zero and the workspace ventilated, the installer locates the pipe end using visual cues, building plans, and non-sparking probing tools.
Marking the route, they remove minimal material to expose the pipe, avoiding electrical lines and structural members.
All openings are kept ventilated; surroundings cleared of ignition sources.
Protective gear and a second person remain on hand for safety.
Step 3 Clean, inspect, and prepare the pipe end
Begin by clearing any debris and residual moisture from the exposed pipe end using a clean cloth and a wire brush.
Then visually inspect for corrosion, cracks, or burrs that could compromise a seal.
Measure the pipe OD and verify thread condition if present.
Remove sharp edges, deburr, and clean with solvent.
Confirm the area is dry, oil-free, and well-lit before proceeding.
Step 4 Choosing the correct cap or plug type for your pipe
Because pipe materials, thread types, and pressure ratings vary, selecting the correct cap or plug requires matching the fitting to the specific pipe characteristics and local code requirements.
Inspect material (black steel, galvanized, copper, CSST) and determine male/female threads or plain cut ends.
Choose rated fittings (pressure class and approved gas use), compatible sealant type, and manufacturer-approved components to guarantee code compliance and long-term integrity.
Step 5 Installing a threaded cap or compression cap correctly
Turn off the gas supply and verify the line is depressurized before attempting to install a cap; this precaution reduces risk and allows safe handling of threads or compression fittings.
Clean threads, apply approved thread sealant or tape for gas-rated connections, and hand-start the cap to avoid cross-threading.
Tighten with proper tools to manufacturer torque, inspect for alignment, then test for leaks per code.
Step 6 Using a flanged or welded cap when required
When a threaded or compression cap is not suitable due to pipe material, pressure rating, or code requirements, a flanged or welded cap provides a permanent, code-compliant seal.
This method is typically required for steel mains, larger-diameter lines, or installations subject to higher pressures.
Trained technicians align flanges or prepare weld joints, inspect fit-up, perform welding or bolting per code, and then pressure-test the joint before returning the line to service.
Step 7 Applying approved sealants or tape and torque guidelines
Apply only manufacturer-approved pipe sealants or PTFE tape and follow specified torque values to guarantee a gas-tight joint without damaging fittings.
Clean threads, apply tape clockwise or a thin bead of approved compound, and avoid excess that can contaminate the line.
Use a calibrated torque wrench set to the fitting manufacturer’s specification.
Inspect visually for proper coverage and correct torque application before proceeding.
Step 8 Pressure testing and leak detection after capping
Begin pressure testing immediately after capping to verify the integrity of the seal and to detect any leaks before restoring service or burying the line.
Use a calibrated gauge and approved test medium (air or inert gas per code), pressurize to specified test pressure, hold for required duration, and inspect joints with a soap solution or electronic detector.
Record results and correct any leaks found.
Step 9 Restoring service or marking an abandoned capped line
Decide whether the capped line will be returned to service or permanently abandoned, then proceed with the appropriate steps.
If restoring service, have a qualified technician reconnect, purge, and restore pressure per code; confirm leak-free operation.
If abandoning, permanently cap and label the pipe, document location on property plans, notify the gas utility, and mark the area to prevent future excavation incidents.
Detailed Guidance for Different Pipe Materials and Connections
The following section outlines specific capping methods for common gas line materials and connection types.
It contrasts techniques for black iron, copper, CSST and other flexible lines, and addresses differences between threaded, soldered, and galvanized fittings.
Safety considerations and appropriate sealants or fittings for each material are summarized to guide correct, code-compliant closures.
Capping black iron pipes
When capping black iron gas pipes, technicians must account for the pipe material, thread type, and connection method to guarantee a secure, leak-free seal.
Common approaches include threaded caps, welded plugs, or flanged blind-offs depending on whether the line is malleable iron, steel, or joined to copper or CSST via conversion fittings.
Threads require proper sealant and torque; welds need qualified welders; flanges use gasketed bolting and pressure testing.
Capping copper lines
Addressing copper gas lines requires attention to tubing type, joint method, and compatible capping technique to guarantee a gas-tight, code-compliant termination.
Identify rigid versus soft copper and whether joints are soldered, brazed, or flared.
Use approved fittings: flare caps on flared ends, threaded adapters with compression or press fittings for others.
Pressure-test after capping and follow local code for permits and inspection.
Capping CSST and flexible gas lines
Start by identifying the exact type of CSST or flexible gas line, since jacketed stainless-steel (CSST), corrugated stainless steel tubing, and various polymer-lined flex connectors each require different capping methods and fittings.
Use manufacturer-approved end caps or compression fittings, guarantee proper torque and backing nuts, apply approved sealant or thread tape only where specified, and test for leaks with soapy water or a manometer.
Capping galvanized steel and threaded versus soldered joints
Different approaches are required to cap galvanized steel versus threaded or soldered copper joints because material properties, joint types, and compatible fittings determine the correct method and required safety precautions.
Galvanized steel uses pipe thread fittings with proper thread sealant (gas-rated PTFE or pipe dope) and torque; copper soldered joints require removal and either sweat caps or changeover to threaded fittings using compression/adapters.
Always test and follow code.
Permits, Codes, and Inspection Requirements
Before beginning work, the author notes that most jurisdictions require a permit for gas-line capping and advises contacting the local building department to confirm specific application steps and fees.
Installations should comply with applicable codes such as NFPA 54 and the local building and plumbing ordinances that adopt or modify those standards.
Inspectors typically verify correct materials and fittings, proper shutoff and purge procedures, leak testing, and that documentation and permits are on site.
Typical permit needs and how to check local requirements
Although capping a gas line is a straightforward mechanical task, it frequently involves municipal permits, code compliance, and inspections that vary by jurisdiction.
Homeowners should contact the local building department or permitting office to confirm permit types, application fees, required documentation, and licensed-worker rules.
Online municipal portals, phone inquiries, or a licensed plumber/gas fitter can verify requirements and inspection scheduling before work begins.
Code standards to follow (NFPA, local building codes)
Codes and standards provide the baseline for safe, compliant gas-line capping and should be consulted alongside local permit requirements.
The NFPA 54 (National Fuel Gas Code) and applicable municipal codes specify materials, joint methods, venting and testing.
Adherence guarantees legal compliance, safety, and inspection readiness.
Contractors should reference current editions, local amendments, and any utility company requirements before proceeding.
What inspectors look for during a final check
Inspectors verify that permits are on file, required tests were performed, and the capped gas line meets current code and permit conditions.
They confirm proper fittings, approved caps or plugs, leak-free joints, and correct materials.
Documentation of pressure tests and repair records is reviewed.
Inspectors guarantee accessibility, labeling, and that work matches approved plans before issuing final approval or noting deficiencies for correction.
Common Problems and How to Avoid Them
Common problems when capping a gas line include improper caps, persistent leaks, hidden corrosion, and weak fittings that can compromise safety.
Recognizing signs such as unusual odors, hissing sounds, or soot staining helps identify an improper cap or ongoing leak.
Addressing common installation mistakes—using incorrect materials, skipping proper sealing, or neglecting inspections—prevents most failures.
Signs of an improper cap or ongoing leaks
How can one tell if a cap is failing or a line is still leaking? A failing cap often smells of gas outdoors or indoors, shows hissing sounds near fittings, or registers positive on a handheld gas detector.
Visible frost, oil residue, or soapy-bubble reactions at joints indicate leakage.
Persistent pilot outages, unexplained appliance odor, or sudden utility meter movement also suggest an improper seal.
Detecting hidden corrosion and weak connections
Signs of a failing cap often point investigators toward nearby fittings, but corrosion and weakened connections can hide deeper within the pipework and behind walls.
Inspectors should look for rust stains, pitting, loose or misshapen joints, and remnants of sealant.
Use inspection mirrors, borescopes, and pressure tests to confirm integrity.
Prioritize replacing compromised sections rather than patching temporary fixes.
Mistakes that lead to gas leaks and how to prevent them
Oversights and shortcuts during installation, maintenance, or repairs are the primary causes of gas leaks, often arising from improper fittings, inadequate sealing, damaged components, or incorrect pressure testing.
Common mistakes include using wrong materials, loose connections, neglecting thread sealant or tape, skipping pressure/soak tests, and ignoring corrosion.
Prevent by following codes, using correct parts, performing leak tests, and hiring licensed professionals.
Alternatives to Full Capping and When to Use Them
Alternatives to a permanent full cap include installing a capped shutoff valve to allow future reconnection, using temporary plugs for short-term work, or choosing between abandoning the line in place and removing it entirely.
Each option carries different safety, cost, and regulatory implications that should inform the choice. Guidance from local codes and a qualified technician helps determine the appropriate approach.
Installing a capped shutoff valve versus permanent cap
When deciding between a capped shutoff valve and a permanent cap, homeowners and technicians should weigh accessibility, future use, and regulatory requirements.
A capped shutoff valve provides a reusable, testable closure ideal for temporary decommissioning or planned reconnection, while a permanent cap is best for permanently abandoned lines where long-term integrity and minimal maintenance are priorities.
Choice depends on planned reuse, inspection access, code, and cost.
Temporary plugs for short-term work
If a line will be taken out of service only briefly for repairs or testing, temporary plugs offer a practical option instead of installing a full cap or shutoff valve.
These devices provide a secure, removable seal for short durations when handled by qualified personnel.
Verify correct size, pressure rating, and leak testing before reintroducing gas; never rely on temporary plugs for long-term isolation.
Abandon-in-place versus removal: pros and cons
Although both abandoning a gas line in place and removing it achieve the goal of taking it out of service, they involve distinct trade-offs in cost, safety, regulatory compliance, and future property use. Abandon-in-place is cheaper and less disruptive but can complicate future work and may require documentation. Removal eliminates hazards and eases reuse but costs more and is invasive.
| Option | Key trade-off |
|---|---|
| Abandon-in-place | Lower cost, possible future constraints |
| Removal | Higher cost, clearer future use |
Post-Work Documentation and Safety Steps
After capping a gas line, the technician should mark and label the capped section clearly and attach relevant documentation to the property file for future reference.
All receipts, work orders, and inspection reports must be kept together and stored according to local regulations.
If gas is detected after capping, the technician should evacuate the area, shut off supply if safe, and contact the gas utility and emergency services immediately.
Marking and labeling capped lines for future reference
Documentation and clear labeling of capped gas lines preserves safety and aids future maintenance or inspections.
The installer should attach durable, weatherproof tags at the shutoff and visible junctions indicating “CAPPED GAS LINE,” date, and installer contact.
Mark maps or plans with the capped location. Use permanent markers or metal tags; place labels where they endure routine access, avoiding temporary tape or paint alone.
Keeping records, receipts, and inspection reports
Several key records should be retained to verify that a capped gas line was closed safely and in compliance: receipts for parts and labor, the installer’s work order, any test results (such as pressure decay or leak detection), and official inspection reports or certificates.
These documents should be stored securely, copied digitally, and provided to future owners or contractors to document compliance and facilitate safe maintenance or alterations.
Emergency steps if you detect gas after capping
If gas is detected after a line has been capped, immediate, decisive steps are required to protect people and property: evacuate the area, avoid using electronic devices or lighting switches, shut off the main gas supply if it can be done safely from outside, and call the gas utility and emergency services from a safe location.
Document the incident, record actions taken, obtain utility and inspector reports, and preserve receipts for repairs.
Practical Tips and Best Practices for Homeowners
Homeowners should follow a concise checklist for a safe DIY capping job, including proper tools, materials, and gas shutoff verification.
They should also know when to schedule professional inspections and routine maintenance to confirm seals and system integrity.
Cost considerations and vetting qualified contractors—license, insurance, and references—will help determine whether to proceed independently or hire a pro.
Checklist for a safe DIY capping job
A concise checklist helps guarantee a DIY gas line capping job is done methodically and safely, reducing the risk of leaks, fire, or regulatory violations.
Confirm shutoff and depressurize the line. Gather correct fittings, pipe dope, and tools. Verify materials match pipe type and pressure rating.
- Confirm gas is off and ventilate area
- Use approved fittings and thread sealant
- Tighten to torque specifications
- Leak-test with approved solution
When to schedule professional inspections and maintenance
When should a professional be called to inspect or maintain a capped gas line? A licensed technician is warranted after any smell of gas, unusual hissing, visible damage, seismic activity, major renovations, or suspected improper capping.
Schedule periodic inspections following local codes or after prolonged vacancy.
Professionals verify seals, pressure, and corrosion, ensuring safety and detecting hidden issues beyond DIY capability.
Cost considerations and choosing qualified contractors
Many factors influence the total cost of capping a gas line, including pipe material, location accessibility, permit and inspection fees, and whether ancillary work (like rerouting utilities or repairing finished surfaces) is required.
Homeowners should obtain multiple written estimates, verify contractor licensing, insurance, and gas-specific certifications, check references and recent work, and prioritize clear contracts with scope, timelines, and warranty terms to avoid unexpected expenses.
Visual Aid Recommendations
The section recommends documenting the capping process with clear photographs for evidence and inspection.
It also suggests including labeled diagrams that illustrate common cap types and their correct installation positions.
Such visual aids help verify compliance and guide reviewers or contractors.
Photos to take during the process for evidence and inspection
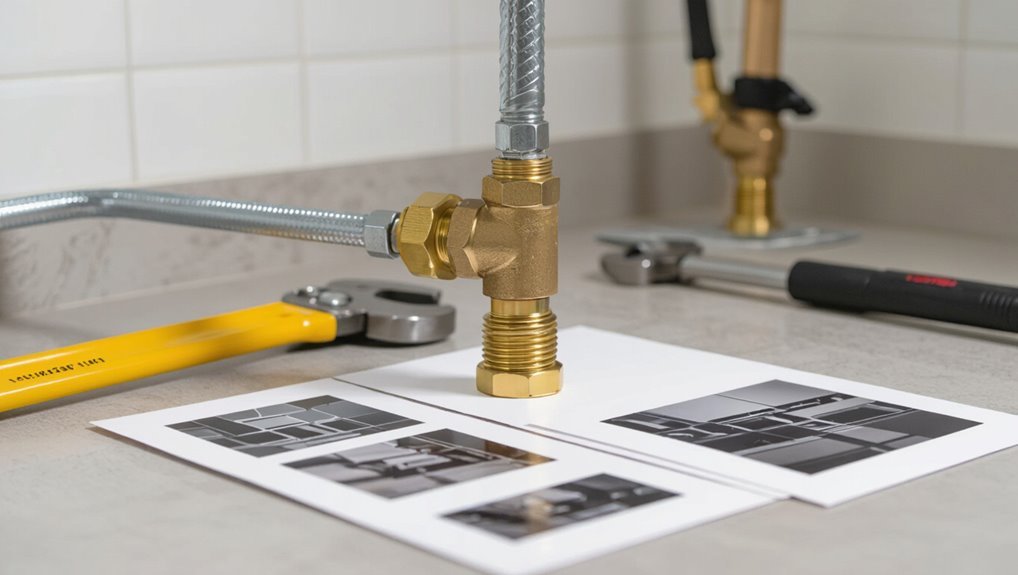
Why document the process with photographs?
Photographs provide objective evidence for inspectors and future reference.
Recommended shots: overall site context, close-ups of existing fittings before work, stepwise images during disassembly and capping, final installed cap with visible markings, nearby shutoff valve position, and any pressure test results or labels.
Timestamped, well-lit images stored securely support compliance and claims.
Diagrams to show common cap types and installation positions

Photographs establish a record of what was done, and complementary diagrams clarify choices and placements that photos alone may not convey.
Diagrams should depict common cap types—threaded plug, flanged cap, compression cap—and indicate orientation, inlet/outlet labeling, material, torque specs, and sealing method.
Include scale, typical clearances, and a legend. Simple exploded views help inspectors and contractors verify correct installation.
Conclusion
After a meticulous walk-through of precautions, permits, and proper fittings, the homeowner can now triumphantly cap the gas line—because nothing says “DIY confidence” like handling flammable gas with a wrench. Ironically, the safest course often involves calling professionals, securing inspections, and documenting every step—hardly as heroic as fighting dragons, but considerably more sensible. In the end, caution, code compliance, and clear records are the real trophies of a job done right.