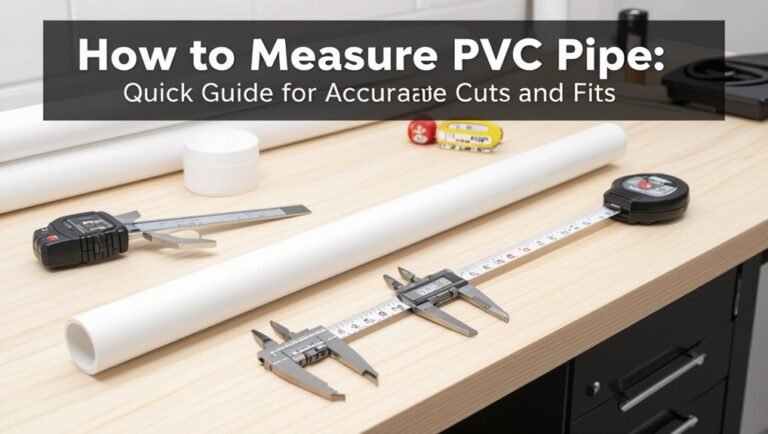
How to Measure CPVC Pipe Size: Quick Steps to Get Accurate Inside & Outside Diameters
To accurately measure the size of CPVC pipe, follow these straightforward steps: First, measure the outside diameter (OD) using calipers or a tape measure. Take the measurement at two points, 90° apart, and use the largest consistent value. Next, if you can access the inside diameter (ID), measure across the bore. If not, subtract twice the wall thickness from the OD, or use an inside caliper or telescoping gauge. Finally, verify your measurements against manufacturer charts and schedule markings to ensure the correct fit for your fittings. For further assistance, refer to our step-by-step tools, tips, and troubleshooting guide.
Quick answer How to measure CPVC pipe size accurately
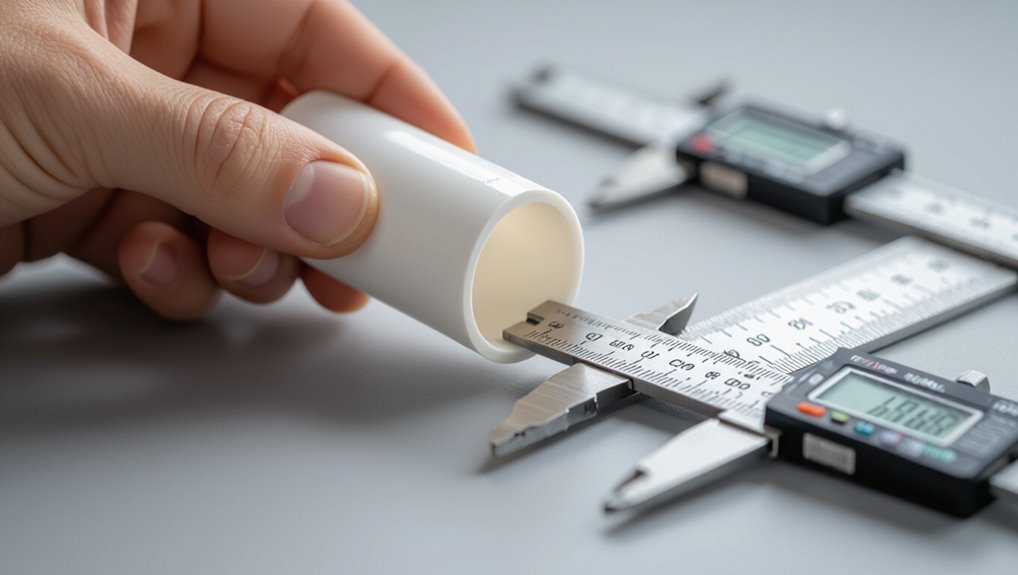
A quick method notes that the inside diameter (ID) is measured across the hollow center while the outside diameter (OD) is measured across the pipe’s exterior.
Essential tools include a caliper or tape measure and a pipe sizing chart for matching nominal sizes.
The following section provides exact steps and tool tips for accurate readings.
One-sentence method for inside diameter (ID) and outside diameter (OD)
Measuring CPVC pipe size is done simply by using calipers or a ruler to record the outside diameter (OD) across the pipe’s widest point and the inside diameter (ID) across the hollow center.
For a one-sentence method, note OD, subtract twice the wall thickness to get ID, or directly measure the bore; this explains how to measure CPVC pipe size quickly and accurately.
Tools you need immediately
Several simple tools are essential for quickly and accurately determining CPVC pipe size: a caliper (digital preferred), a steel ruler or tape measure, a pipe wall gauge or set of drill bits for reference, and a marker for noting measurements.
Additional useful items include a deburring tool to expose true ID, caliper spare batteries, a notebook for recorded sizes, and gloves to keep surfaces clean.
Why measuring CPVC size correctly matters
Accurate CPVC sizing is essential for applications such as potable water lines, HVAC systems, and industrial process piping where flow rates and pressure ratings are critical.
Incorrect measurements can lead to leaks, fittings mismatch, and compromised joint integrity.
Mis-sized pipe may also violate plumbing codes and necessitate costly repairs or replacements.
Common applications that require precise sizing
Many plumbing, HVAC, and industrial systems depend on correct CPVC dimensions to confirm leak-free joints, proper flow rates, and compatibility with fittings and valves.
Applications include potable water distribution, hot-water recirculation, chemical process lines, fire suppression pre-piping, and corrosion-resistant HVAC coil drain lines.
Accurate sizing guarantees correct pressure drop calculations, reliable thermal performance, and seamless integration with pressure regulators, meters, and isolation valves.
Consequences of wrong pipe sizing (leaks, fittings mismatch, code issues)
Undersizing or oversizing CPVC can lead to immediate and costly problems: leaks from improperly seated joints, incompatible fittings that prevent secure connections, and systems that fail to meet building or safety codes.
Incorrect sizing reduces flow efficiency, raises pressure drop, and accelerates wear.
Repairs, rework, permit delays, and liability exposure increase, making accurate measurement essential for reliable, code-compliant plumbing installations.
CPVC sizing basics and terminology
The section defines key CPVC sizing terms, distinguishing nominal size from actual inner and outer diameters and explaining how schedule and wall thickness relate to pressure ratings.
It also compares CPVC dimensions and fittings to those of copper, PVC, and PEX to highlight compatibility and measurement differences.
Clear definitions will help readers choose and measure the correct pipe for their pressure and installation requirements.
Nominal size vs. actual ID and OD
Although nominal pipe size is commonly used in specifications and fittings, it does not correspond directly to a CPVC pipe’s actual inside diameter (ID) or outside diameter (OD); nominal size is a labeling convention that helps match fittings and schedules rather than a precise measurement.
Actual ID and OD vary by nominal size and manufacturing standards, so users measure OD and compute ID from wall thickness for accurate sizing.
Schedule, wall thickness, and pressure ratings explained
Clarity about schedule, wall thickness, and pressure rating is essential for selecting CPVC pipe that meets system demands.
Schedule denotes standardized wall thickness per nominal size; higher schedule means thicker walls and smaller ID.
Wall thickness directly affects pressure capacity and temperature performance.
Pressure ratings (PSI) are assigned at specific temperatures; installers must match schedule and rating to application conditions to guarantee safety and longevity.
How CPVC sizes differ from copper, PVC, and PEX
When comparing CPVC to copper, PVC, and PEX, installers must note that nominal sizes are shared but internal diameters, wall thicknesses, and fittings differ.
So a 1/2-inch label does not guarantee identical flow or connection methods across materials.
CPVC uses Schedule or CTS standards; copper uses Type L/M and K; PVC follows Schedule classifications; PEX is measured by outside diameter.
Adapt fittings and pressure expectations accordingly.
Tools and materials required
Essential measuring tools for CPVC include calipers, tape measures, pipe gauges, and straight rulers to record outer and nominal dimensions.
Basic accessories and safety items such as a marker, cleaning cloth, and gloves help guarantee accurate, clean measurements.
For threaded fittings or tighter tolerances, professional instruments like thread gauges and micrometers are recommended.
Measuring tools (caliper, tape, pipe gauge, ruler)
Gather the right measuring tools before taking any dimensions: a caliper for precise outside diameter readings, a flexible tape or ruler for length and circumference, and a pipe gauge or template for quick nominal-size checks.
The caliper provides digital or vernier accuracy; the tape measures runs and circumference; a rigid ruler helps short sections; a gauge speeds identification across common CPVC sizes.
Accessories and safety items (marker, cleaning cloth, gloves)
After sizing tools have been prepared, a small set of accessories and safety items completes the kit for accurate, safe CPVC work.
A fine-tip permanent marker marks measurement points clearly. A lint-free cleaning cloth removes debris and primer residue to guarantee proper fits.
Nitrile or work gloves protect hands from cuts and solvents while maintaining dexterity for precise measuring and handling.
When to use professional tools (thread gauges, micrometers)
Use professional measuring tools when accuracy affects fit, sealing, or threaded connections.
A thread gauge verifies pitch and engagement for fittings; micrometers measure outside diameters to 0.001 inch, ensuring proper couplings.
Calipers check wall thickness and ID where tolerances matter.
Use these tools for repairs, custom assemblies, or when specifications demand certified measurements; record results for verification.
Step-by-step method to measure outside diameter (OD)
Before measuring the outside diameter (OD), the pipe is cleaned and marked at the measurement point to guarantee accuracy.
A caliper is used for the most precise OD reading, while a tape measure or ruler provides a practical alternative when a caliper is unavailable.
Measurements are recorded and rounded to the nearest common nominal size for selecting compatible fittings.
Prepare the pipe (cleaning and marking)
Gather the section of CPVC to be measured and remove any debris, adhesive residue, or paint from its exterior so the outside diameter is exposed and visible.
Wipe with a clean cloth and, if needed, use a mild solvent compatible with CPVC. Allow to dry, then mark two opposite reference points with a fine permanent marker or masking tape for consistent measurement alignment around the circumference.
How to measure OD with a caliper
Measure the outside diameter (OD) of the CPVC pipe by placing a caliper across the pipe’s marked reference points, ensuring the jaws contact the pipe at exact opposite sides.
Close the jaws gently until they touch without compressing. Read the digital display or vernier scale.
Repeat at two points 90° apart to confirm roundness. Record the largest consistent reading as the OD.
How to measure OD with a tape or ruler when caliper not available
Use a flexible tape or a rigid ruler to determine the outside diameter (OD) of a CPVC pipe when a caliper is unavailable.
Wrap tape around pipe for circumference, mark overlap, then divide circumference by pi (3.1416) to get OD.
Or measure straight across pipe’s widest external points with a ruler, ensuring view is perpendicular to avoid parallax and read to nearest millimeter.
Recording and rounding measurements for matching fittings
Record the outside diameter (OD) precisely, then convert and round the value to the dimension standards used for CPVC fittings.
Note the measured OD in inches or millimeters, convert units if needed, and round to the nearest standard nominal size used by manufacturers.
Record both raw and rounded values, date, measurement tool, and any irregularities for accurate fitting selection.
Step-by-step method to measure inside diameter (ID)
To measure the CPVC pipe inside diameter (ID), an inside caliper or a small ruler placed across the bore provides a direct reading for accessible ends.
For deeper or recessed pipes, a telescoping gauge or probe transferred to a micrometer yields an accurate measurement.
If direct access is impossible, the ID can be estimated by subtracting twice the wall thickness from the outside diameter (OD).
Measure ID using an inside caliper or small ruler
Measuring the CPVC pipe’s inside diameter (ID) begins by choosing an inside caliper or a small ruler that fits comfortably into the bore; the tool should contact opposite inner walls without angling.
Insert the caliper or ruler gently, guarantee it sits perpendicular to the pipe axis, expand or align until both sides touch, withdraw carefully, and read the measurement at the tool’s scale for the accurate ID.
Using a telescoping gauge or probe for deep pipes
When the pipe’s bore is too deep for a simple caliper or ruler, a telescoping gauge or probe provides an accurate means to capture the inside diameter.
Insert the collapsed gauge, expand until it contacts both walls, then lock. Withdraw carefully and measure the gauge span with an outside micrometer or caliper.
For probes, read digital display or transfer to a caliper; repeat for consistency.
Estimating ID from OD and wall thickness when direct measurement impossible
If direct access to the bore is blocked, the inside diameter can be reliably estimated by subtracting twice the wall thickness from the outside diameter.
Measure OD with calipers, determine wall thickness from pipe schedule, marking, or sample cuts.
Calculate ID = OD − 2×wall.
Verify by cross-referencing manufacturer specs or using a bore gauge on an accessible section when possible.
Determining pipe schedule and wall thickness
The reader should inspect the pipe for printed markings or color bands that indicate its schedule and pressure rating.
If markings are absent, wall thickness can be measured directly with calipers or calculated by subtracting the measured ID from the OD and halving the result to infer the schedule.
A reference table matching nominal size, OD, ID, and typical wall thickness helps confirm the schedule and select the correct fittings.
Visual indicators and printed markings to check schedule
Pipes often carry printed markings and subtle visual cues that identify their schedule and wall thickness, enabling quick verification without tools.
Manufacturers imprint size, SDR or schedule numbers, pressure rating, and standards (ASTM/NSF) along the length.
Color bands, wall-to-diameter proportions, and consistent text spacing assist identification.
Inspect markings for fading; cross-reference codes with manufacturer charts to confirm nominal dimensions and compatible fittings.
Measuring wall thickness directly and calculating schedule
Accurate measurement of CPVC wall thickness provides the most reliable basis for determining a pipe’s schedule.
Using calipers, measure wall thickness at several points to average out irregularities.
Combine that thickness with the measured outside diameter to calculate the internal diameter.
Compare calculated dimensions with manufacturer or standard definitions to infer the pipe schedule, noting any deviations for verification.
Reference table mapping nominal size, OD, ID, and typical wall thickness
Having measured wall thickness and outside diameter, a reference table becomes the practical tool for matching those dimensions to a nominal CPVC size and schedule. The table below lists common nominal sizes, outside and inside diameters, and typical wall thickness for quick cross-referencing. Use measured OD and wall to identify the nominal size and corresponding schedule for fittings and pressure ratings.
| Nominal / OD | ID / Wall |
|---|---|
| 1/2″ / 0.840″ | 0.588 / 0.126 |
| 3/4″ / 1.050″ | 0.813 / 0.119 |
| 1″ / 1.315″ | 1.029 / 0.143 |
| 1-1/4″ /1.660″ | 1.360 / 0.150 |
Converting measurements to nominal pipe size
The next step is converting measured outside or inside diameters to the standard nominal CPVC sizes by matching OD/ID to published size tables.
Manufacturers’ charts and plumbing code tables provide the exact OD, ID, and wall thickness for each nominal size, so the measured value can be matched to the correct designation.
Quick lookup examples for common sizes (½”, ¾”, 1″, 1¼”) illustrate typical ODs and IDs for fast identification.
How to match OD/ID to standard nominal CPVC sizes
How does one turn a measured outside or inside diameter into the nominal CPVC size shown on fittings and packaging?
The process compares the measured OD or ID to standard nominal sizes and their associated wall thicknesses. Measure accurately, note whether measurement is OD or ID, then select the nominal size whose published OD/ID and schedule match the measurement within tolerance.
Confirm before purchasing.
Using manufacturer charts and code tables
When a measured outside or inside diameter is available, manufacturers’ charts and plumbing code tables provide the authoritative conversion to nominal CPVC sizes by listing standard ODs, IDs, and wall thicknesses for each nominal designation and schedule.
Users compare measured values to table entries, accounting for measurement tolerance and schedule (wall thickness).
Manufacturers’ notes clarify fittings compatibility, allowable variances, and material-specific dimensions.
Quick lookup examples for common sizes (½”, ¾”, 1″, 1¼”)
Having established that measured diameters should be matched to manufacturer charts and code tables, quick lookup examples for common CPVC sizes simplify conversion by showing typical OD, ID, and wall thickness values for ½”, ¾”, 1″, and 1¼” nominal pipe.
Typical values:
½” OD 0.840″, ID ~0.624″, wall 0.108″;
¾” OD 1.050″, ID ~0.824″, wall 0.113″;
1″ OD 1.315″, ID ~1.029″, wall 0.143″;
1¼” OD 1.660″, ID ~1.360″, wall 0.150″.
Choosing the right fittings and couplings
Selecting fittings requires attention to compatibility between solvent-weld, threaded, and compression types to guarantee a proper seal and material match.
Accurate pipe measurements determine which fittings will fit securely and influence assembly steps such as cutting, chamfering, or threading.
When purchasing, choose fittings labeled for the measured nominal size and material, and verify inside/outside diameter specs to avoid mismatches.
Solvent-weld vs. threaded vs. compression fittings compatibility
Compare the three common connection types—solvent-weld, threaded, and compression—by function and compatibility to determine the correct fitting for CPVC systems.
Solvent-weld creates permanent joints via chemical fusion, ideal for pressure lines.
Threaded fittings offer disassembly but need compatible CPVC or reinforced adapters to prevent stress.
Compression fittings allow mechanical seals for repairs or alterations but require proper ferrules and pressure ratings.
How measurement affects fitting selection and assembly
Measure twice to confirm the correct fit: accurate CPVC pipe dimensions determine which fittings and couplings will seal properly, align reliably, and meet pressure ratings.
Precise OD and ID guide selection between solvent-weld, threaded, and compression types, ascertain gasket or socket depth compatibility, and prevent stress from misalignment.
Correct measurements reduce leaks, simplify assembly, and extend service life by matching tolerances and pressure classes.
Tips for buying fittings based on measured sizes
With accurate pipe dimensions in hand, buyers can match fittings to both size and system requirements to avoid costly mismatches.
Inspect material compatibility, pressure rating, and connection type before purchase. Verify inside/outside diameters against manufacturer charts. Consider spares for repairs.
- Confirm socket vs. threaded fit
- Match pressure and temperature ratings
- Choose compatible CPVC compound and adhesive
Common measurement problems and how to fix them
Common measurement issues include warped or deformed pipe ends, surface coatings such as paint or liners, and obstructions from debris that alter caliper or tape readings.
Additional challenges arise when pipes are capped, buried, or already installed, requiring indirect or adapted measurement techniques.
The following section outlines practical fixes and tools to guarantee accurate sizing despite these obstacles.
Warped or deformed pipe ends
Warped or deformed CPVC pipe ends can distort diameter readings and thwart accurate fitting selection; recognizing and correcting these imperfections is essential before taking measurements.
Inspect ends for ovality, flaring, crush marks, or heat deformation. Trim damaged sections squarely with a fine-tooth saw, deburr, and recheck with calipers.
If deformation extends beyond a short section, replace the pipe segment to guarantee reliable sizing.
Paint, debris, or liner interfering with measurements
Inspect surfaces for paint, adhesive residue, mineral buildup, or liner fragments that can mask the true pipe dimensions and yield false caliper or tape readings.
Remove contaminants with a soft scraper, mild solvent, or fine abrasive pad, then wipe clean and dry.
Re-measure exposed, bare pipe at multiple points to confirm consistent outside diameter and verify inside diameter after clearing obstructions.
Measuring capped, buried, or installed pipes
After cleaning and confirming bare pipe dimensions, measuring capped, buried, or otherwise installed CPVC requires different tactics because access and visible reference points are limited.
Use accessible fittings, exposed ends, or fixture connections to infer diameter. Employ depth gauges, inspection cameras, and calipers on exposed portions.
For buried runs, probe to expose a short section. Record measurements and verify with manufacturer markings or system documentation.
Practical tips to improve accuracy
The following section offers concise, practical advice to boost measurement accuracy in challenging conditions.
It covers techniques for measuring pipes under pressure or in confined spaces, how to adjust for temperature-related expansion or contraction, and simple documentation practices for project records and inspections.
Clear procedures and consistent recording reduce rework and support reliable verification.
Best practices for measuring under pressure or in tight spaces
Measure carefully when access is limited or lines are pressurized, since small errors compound into fitting problems and leaks.
Use calipers with thin jaws, flexible tape for curves, and mirror or inspection camera for hidden joints.
Stabilize the pipe to avoid movement, mark reference points, and take multiple readings.
Record both inside and outside measurements and verify against fittings before cutting or connecting.
How temperature affects CPVC dimensions and compensation methods
When working in confined spaces or on pressurized lines, temperature differences between the measured CPVC and the fittings can alter diameters and length enough to affect fit and seal.
CPVC expands with heat and contracts when cold; measure at or near service temperature when possible.
Apply thermal expansion coefficients to adjust dimensions, allow installation gaps, and use calibrated tools tolerant of slight dimensional shifts.
Documenting measurements for projects and inspections
Record measurements systematically to guarantee repeatability and accountability across installation and inspection workflows.
Notes should include date, tool, temperature, and measurement point; use standard units and templates.
Photographic evidence and labelled diagrams enhance verification. Maintain versioned logs accessible to stakeholders.
- Use calibrated tools and log calibration dates.
- Timestamp photos and sketches with scale.
- Store entries in a searchable project file.
Quick troubleshooting scenarios
When the measured inner diameter is too small for the desired fitting, the inspector notes possible burrs, scale, or an incorrect measurement and lists remedies such as reaming, selecting a smaller fitting, or using a reducing coupling.
If the outer diameter does not match any standard, the inspector outlines steps to verify caliper placement, check for nonstandard or metric tubing, and compare against manufacturer charts.
For replacement sections, the inspector specifies measuring for splice length, accounting for socket depths, and confirming connection-piece dimensions before cutting.
Pipe ID too small for fitting remedies
Several common fixes exist for a CPVC pipe whose inner diameter measures too small for a fitting, and choosing the right remedy depends on the degree of mismatch and the pipe’s condition.
Options include light internal reaming with a deburring tool, gentle sanding with appropriate grit, using a thin-walled coupling or adapter, verifying measurement accuracy, or replacing a deformed section.
Confirm clean, square cuts before assembly.
OD doesn’t match any standard size steps to identify
If internal reaming or replacement fails to resolve a mismatch, the next check is an OD that does not correspond to standard CPVC sizes.
Verify measurement accuracy with calipers at multiple points; note ovality or damage.
Compare to manufacturer charts and consider non-CPVC materials, imperial versus metric confusion, or custom extrusions.
Document findings and consult supplier for identification or compatible connection options.
Replacing sections: measuring for splice and transition pieces
Measure the cut length and mating diameters precisely before removing the damaged section to guarantee splice and junction pieces fit without stress.
The technician records outside and nominal inside diameters, wall thickness, and solvent-cement socket depths. Match fittings to schedule and glue/heat-fuse requirements.
Allow clearance for sealing rings and insulation. Verify alignment, test for leaks, and trim if necessary for a snug, stress-free joint.
Recommended measurement checklist before purchase or repair
Before ordering parts or starting repairs, a concise checklist guarantees correct CPVC sizing and compatibility.
Recommended items to record include:
- Outside diameter and wall thickness (minimum required measurements)
- Nominal pipe size and service temperature
- Pressure rating and any code-required markings for high-pressure or compliance installations
Minimum required measurements to record
A short, focused checklist helps guarantee all critical dimensions are recorded prior to purchase or repair: nominal pipe size, outside diameter (OD), wall thickness (or schedule), exact fitting type (elbow, tee, coupler) and its dimensions, socket depth for solvent-weld joints, length of run between fittings, and any adapter thread specifications.
Additionally, record material grade, operating temperature range, and any discoloration or damage that might affect fit or performance.
Optional checks for high-pressure or code-compliant installations
For installations subject to higher pressures or strict code requirements, additional verifications beyond the basic checklist are recommended to secure safety and compliance.
Inspect pressure rating markings, verify wall thickness against schedule, confirm material certification and manufacturer specifications, measure SDR where applicable, check joint types and solvent-weld quality, ascertain proper support spacing, and document test pressure and inspection dates before purchase or repair.
Useful resources and reference charts
The article points readers to industry standard tables and manufacturer guides for accurate nominal-to-actual size conversions and pressure ratings.
It also identifies sources for measurement tools and calibration services, including specialty suppliers and certified labs.
These references help guarantee measurements and repairs meet code and warranty requirements.
Industry standard tables and manufacturer guides
Industry-standard tables and manufacturer guides condense critical CPVC dimensions, pressure ratings, and SDR/NPS designations into quick-reference charts that technicians and specifiers rely on to match fittings, calculate flow, and verify compatibility. Concise charts, revision notes, and material specifications enable accurate selection and compliance. Refer to validated manufacturer tables for wall thickness, OD/ID, and maximum working pressure.
| Item | Data | Purpose |
|---|---|---|
| Wall thickness | 0.128″–0.500″ | Strength |
| OD/ID | 0.840″–4.500″ | Sizing |
| Pressure rating | 200–600 psi | Safety |
Where to find measurement tools and calibration services
Locate calibrated calipers, micrometers, and pipe gauges through specialized suppliers, professional tool distributors, or online industrial marketplaces that list CPVC-specific measurement kits and datasheets.
Trusted sources include manufacturer technical support and ISO-accredited calibration labs for traceable verification.
Reference printable diameter charts and part-number crosswalks to match fittings.
- Manufacturer tool kits
- Accredited calibration services
- Online datasheet repositories
Conclusion
After all the careful calipers, charts, and pretended confidence, the CPVC pipe finally reveals its size—because pipes, unlike opinions, obey measurements. The reader is reminded that a millimeter saved is a fitting won, and that knowing OD and ID beats guessing with a wrench. With a tape, a caliper, and a smidge of patience, even the most mysterious plumbing puzzle reduces to basic geometry—provably less dramatic than a leak, infinitely more satisfying.