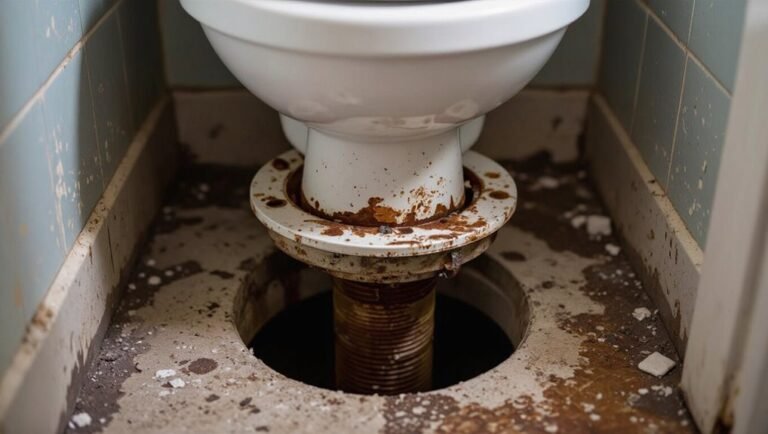
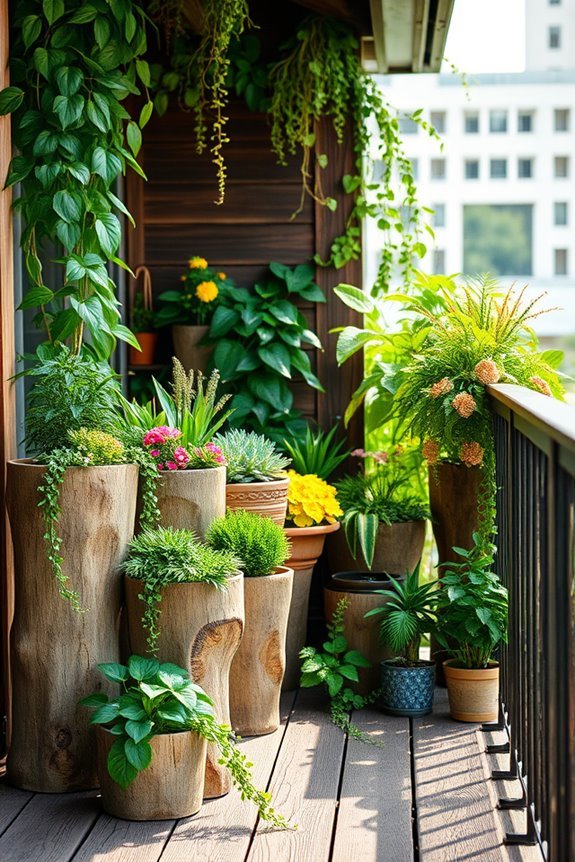
How to Hide Drain Pipes Outside: 12 Stylish, Affordable Solutions
If you’re looking to hide outdoor drain pipes stylishly and affordably, there are several effective solutions that not only enhance your home’s curb appeal but also protect your plumbing. Options such as planters, trellises, lattice screens, or faux-rock covers offer quick and removable fixes. For semi-permanent solutions, consider custom box covers, decking skirting, or built-in planters. If you’re aiming for durability, cladding, stone veneer, or re-routing the pipes can provide complete concealment. Remember to ensure easy maintenance access and adhere to local codes. Read on for detailed options, costs, and step-by-step guidance.
Stylish, Affordable Ways to Conceal Outdoor Drain Pipes
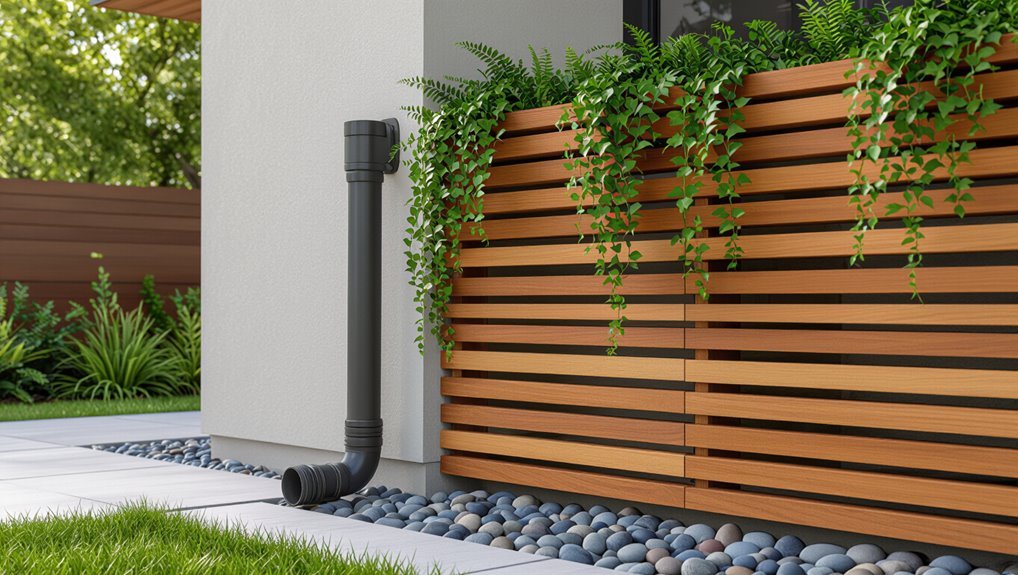
Homeowners often hide outdoor drain pipes to improve curb appeal, protect plumbing from damage, and reduce tripping hazards.
Practical concealment solutions should be balanced with safety, local code compliance, and easy access for inspection or repairs.
This section will briefly outline common motivations and the key legal and maintenance considerations to consider.
Common reasons to hide drain pipes outside
Several practical and aesthetic motivations drive the decision to conceal outdoor drain pipes: improving curb appeal, protecting plumbing from weather and UV damage, reducing noise, preventing tampering or animal interference, and complying with local design codes or neighborhood standards.
Homeowners seek how to hide drain pipes outside to blend features with landscaping, increase property value, deter damage, and create cohesive exterior aesthetics without costly remodeling.
Quick overview of safety, legal and maintenance considerations
A brief checklist of safety, legal, and maintenance considerations helps guarantee that concealing outdoor drain pipes is both attractive and compliant.
Verify local codes, easements, and access requirements before obscuring pipes. Maintain clear access for inspection, cleaning, and repairs.
Use fire-resistant, weatherproof materials; avoid trapping moisture or pests.
Document modifications for future owners and schedule routine checks to prevent blockages and deterioration.
Assessing your outdoor drain pipe situation
First, the type and material of the drain — PVC, metal, or cast iron — should be identified to guide suitable concealment methods.
Next, measurements of location, diameter and slope plus the positions of access points and cleanouts must be recorded.
Finally, applicable local codes and any landlord or HOA rules should be reviewed before proceeding.
Identifying pipe types and materials (PVC, metal, cast iron)
Recognizing the material of outdoor drain pipes is essential for choosing appropriate concealment and maintenance methods.
PVC appears smooth, lightweight, and plastic-like, often white or gray.
Metal pipes show metallic sheen and may be aluminum or galvanized steel.
Cast iron is heavy, dark, and prone to rust and flaking.
Each material dictates compatible fasteners, paints, and covering strategies to prevent damage.
Measuring pipe location, size, and slope
Before any concealment work begins, measure the pipe’s exact position, diameter, and fall to guarantee covers and rerouting won’t interfere with function.
Note horizontal and vertical distances from walls, ground level, and nearby fixtures. Use a tape measure and level or laser inclinometer to record slope in degrees or mm/m.
Record fittings, bends, and exposed lengths for accurate cover sizing and planning.
Checking access points and cleanouts
Inspect the run for access points and cleanouts to determine maintenance requirements and concealment constraints.
Note locations, sizes, and signage of cleanouts, vents, and inspection caps.
Verify accessibility clearances and whether covers are removable without tools.
Plan concealment around these spots to allow unobstructed access for rodding or camera inspection, using removable panels or discrete landscaping that won’t impede routine servicing.
Determining local code and landlord or HOA rules
When evaluating where and how to conceal outdoor drain pipes, the property’s regulatory context must be checked: local plumbing and building codes, municipal ordinances, and any landlord or HOA rules can dictate allowable materials, setbacks, required access, and visibility of vents and cleanouts.
Research permits, approved concealment methods, and required inspections. Obtain written approvals where needed; noncompliance risks fines, removal orders, or lease violations.
Budgeting and material choices for concealment
A comparison of low-cost, mid-range, and premium concealment options helps determine which approach fits the project scope and schedule.
Material choices—such as composites, treated wood, metal, and faux stone—should be evaluated for durability and weather resistance in the local climate.
A concise tools-and-supplies checklist completes the planning phase for DIY implementation.
Low-cost vs. mid-range vs. premium solutions
Several practical tiers of concealment exist—low-cost, mid-range, and premium—each balancing upfront expense, durability, and aesthetic payoff.
Low-cost options focus on quick, removable covers and paintable panels.
Mid-range choices add custom-fit housings, better fasteners, and coordinated finishes.
Premium solutions emphasize integrated landscaping, bespoke enclosures, long-lasting fixtures, and professional installation for seamless, durable results.
Weather-resistant materials to consider (composites, treated wood, metal, faux stone)
Moving from cost tiers to the actual materials that will be used, the choice of weather-resistant options—composites, treated wood, metal, and faux stone—sets the long-term performance, maintenance needs, and final price point for pipe concealment.
Composites resist rot and require little upkeep; treated wood balances cost and appearance; metals offer durability and modern looks; faux stone provides aesthetic heft with lighter installation demands.
Tools and supplies checklist for DIY projects
For any DIY pipe-concealment project, a concise tools-and-supplies checklist clarifies budget priorities and material choices before work begins.
Essential items include measuring tape, level, saw, drill, screws, exterior adhesive, sealant, brackets, weatherproof paint, and protective gear.
Optional materials: lattice, composite panels, faux-stone cladding, gravel, planting supplies.
Estimate quantities and costs, prioritize durable, low-maintenance options to control long-term expenses.
Fast, temporary, and removable concealment options
Quick, temporary solutions can mask external drain pipes with minimal tools and no permanent changes.
Consider rapid options such as:
- Decorative planters and tall pots
- Trellises with climbing plants or lattice screens and freestanding slats
- Outdoor fabric wraps and camo sleeves
Each approach is removable and suited for short-term concealment while evaluating longer-term choices.
Decorative planters and tall pots
Several styles of decorative planters and tall pots offer a fast, temporary, and removable way to conceal exterior drain pipes while adding visual interest to a yard or patio.
Lightweight fiberglass, resin, or terracotta containers mask pipes without permanent attachment.
Strategically placed pots filled with ornamental grasses, succulents, or seasonal blooms create height and texture, allow easy access for maintenance, and can be repositioned as needed.
Trellises with climbing plants
Install a freestanding trellis to quickly disguise an outdoor drain pipe while keeping the solution removable and maintenance-friendly.
Choose lightweight, weatherproof materials and position the trellis a few inches from the wall to allow airflow.
Train fast-growing climbers—morning glory, clematis, or jasmine—for rapid coverage.
Anchoring is simple; remove anytime without damage. Regular pruning prevents interference with pipe access.
Lattice screens and freestanding slats
When space or permanence is a concern, lattice screens and freestanding slats offer a straightforward, removable way to hide exterior drain pipes without altering the wall.
Prefabricated panels, lightweight timber slats, or PVC grids create quick visual barriers. They allow airflow, access for maintenance, and can be painted or stained to match surroundings, providing an affordable, noninvasive concealment solution.
Outdoor fabric wraps and camo sleeves
Wraps of outdoor fabric and neoprene camo sleeves provide a quick, temporary way to conceal exterior drain pipes without tools or wall modifications.
They slide on or fasten with Velcro, zip ties, or snaps, masking color and texture. Options resist UV and moisture; patterns blend with siding or foliage.
Easy removal for maintenance makes them ideal for renters or seasonal aesthetic updates.
Built, semi-permanent concealments that blend with landscape
Built, semi-permanent solutions can hide drain pipes while becoming part of the yard’s design.
Consider these practical options:
- Raised planting beds around pipes
- Custom box covers and access panels
- Faux rock or resin pipe covers (plus decorative rain chains and diverters)
Each approach balances accessibility with aesthetics and can be tailored to materials, budget, and maintenance needs.
Raised planting beds around pipes
A raised planting bed provides a practical, attractive way to conceal exterior drain pipes while integrating them into the surrounding landscape.
Constructed from rot-resistant timber, stone, or modular blocks, beds surround pipes without obstructing access. Gravel base and simple removable panels guarantee drainage and maintenance.
Choose shallow-rooted perennials or ornamental grasses to soften appearance and coordinate with existing plantings for cohesive, low-maintenance screening.
Custom box covers and access panels
Following raised beds, homeowners can choose custom box covers and access panels for a more structured, semi-permanent solution that blends with hardscape and plantings.
These enclosures, built from wood, metal, or composite, conceal pipes while allowing service access via removable panels or hinged doors.
Finished to match siding, stone, or decking, they provide durable, discreet integration without resorting to temporary screening.
Faux rock or resin pipe covers
Weathered stone or molded boulder-like covers offer a semi-permanent way to hide exposed drain pipes while blending with garden beds and rockwork.
Durable resin options resist moisture and UV, mimic textures convincingly, and are hollow for pipe access. Installation typically requires a stable base and occasional repositioning.
Sizes and finishes suit varied landscapes, providing discreet concealment without permanent alteration to hardscapes or plumbing.
Decorative rain chains and diverters
Where faux rock covers offer camouflaged bulk, decorative rain chains and diverters provide an intentional, built solution that manages roof runoff while enhancing aesthetics.
Installed along gutters or at downspout termini, they guide water visibly into beds, barrels, or dry streambeds. Materials range from copper cups to braided links; placement complements plantings and stonework, blending function with landscape and simplifying maintenance.
Integrated architectural solutions for long-term concealment
The text considers integrated architectural approaches that conceal drain runs while remaining functional and durable. Options include routing pipes through small garden walls, incorporating them into decking or porch skirting, or hiding runs behind built-in planters and benches.
Each solution is evaluated for maintenance access, weather resistance, and visual integration.
Concealing pipes within small garden walls
Integrating drain pipes into small garden walls requires careful planning to preserve both function and aesthetic. Designers typically route conduits within the wall cavity or behind removable panels, using compact downspouts and access points for maintenance while matching wall materials to conceal seams and vents.
Careful grading, breathable backfill, and corrosion-resistant fittings prevent moisture issues. Discreet inspection hatches guarantee serviceability without visual disruption.
Incorporating pipes into decking or porch skirting
Concealment of exterior drain pipes within decking or porch skirting demands a balance of accessibility, ventilation, and structural integrity so systems remain serviceable without compromising appearance.
Integrating removable service panels, ventilated cavities, and routed channels preserves airflow and prevents rot. Materials should resist moisture; fastenings must allow replacement.
Position pipes to follow joists and skirt framing, minimizing visible joins while meeting local codes and maintenance needs.
Designing built-in planters or benches to hide runs
Situate built-in planters or benches to follow pipe runs, using their depth and cavities to hide plumbing while preserving access for maintenance.
Design modular panels or removable tops for inspection. Use weather-resistant materials and internal channels to route pipes neatly.
Coordinate drainage and vents to prevent pooling. Match exterior finishes to surroundings so concealment appears deliberate, durable, and low-maintenance.
Creative aesthetic approaches
The section examines creative aesthetic approaches for disguising exterior drain pipes, including vertical gardens and green walls that integrate plumbing into living facades.
It also considers painting and finishing techniques to blend pipes with their surroundings, strategic lighting to either distract from or showcase them, and themed coverings—industrial, rustic, or modern—to turn utilitarian elements into design features.
Practical examples and brief guidance follow to help select the best option for a given exterior.
Using vertical gardens and green walls
A vertical garden or green wall transforms exposed drain pipes into an intentional design element by layering plants and structural support to obscure tubing while allowing access for maintenance.
Lightweight frames, modular pockets, or trellises guide climbers and hanging pots, masking pipes without sealing them.
Choose resilient species, provide irrigation and anchoring, and plan removable panels or spacing for inspections and repairs to preserve function and aesthetics.
Painting and finishing pipes to match surroundings
After using plants and structures to soften the look of exterior drainwork, painting and finish techniques offer a complementary route for blending pipes into their setting or turning them into intentional accents.
Neutral tones, textured sprays, and color-matched primers minimize visibility.
Contrasting palettes, metallic finishes, or stenciling create deliberate focal points.
Proper surface preparation and weatherproof coatings guarantee longevity and reduced maintenance.
Using lighting to distract or highlight intentionally
How can lighting be used to either draw attention away from exterior drain pipes or turn them into deliberate design elements?
Subtle uplighting softens visibility, casting shadows that blend pipes into façades.
Concealed LED strips create clean lines, converting pipes into illuminated accents.
Warm tones minimize contrast; cool tones emphasize structure.
Timers and motion sensors balance aesthetics with energy efficiency, ensuring purposeful, low‑maintenance enhancement.
Themed coverings (industrial, rustic, modern)
Moving from lighting strategies that either conceal or celebrate drain pipes, themed coverings offer another way to integrate functional plumbing into an exterior design scheme.
Industrial wraps use metal cladding, exposed fasteners, and dark finishes; rustic treatments employ reclaimed wood, weathered textures, and muted stains; modern covers favor clean lines, composite panels, and monochrome palettes.
Each approach balances concealment with intentional style.
Step-by-step DIY: Building a removable wooden screen
A concise materials-and-tools list is provided to prepare for constructing a removable wooden screen.
Clear instructions cover measuring and cutting panels, assembly and finishing, and methods for securing the screen against wind while allowing easy removal for maintenance.
The section emphasizes accuracy in cuts and simple fastenings to balance durability with accessibility.
Materials and tools list
Materials and tools are listed below to guarantee the removable wooden screen can be built safely and accurately; quantities assume a single standard exterior drain pipe (adjust as needed).
Pine or cedar planks, 1×4 and 1×2 lumber; outdoor screws and stainless steel hinges; exterior wood glue; outdoor primer and paint or stain; sandpaper (120, 220); measuring tape, carpenter’s square, level, circular saw, drill, screwdriver, clamps, safety glasses, and gloves.
Measuring and cutting panels
Measure twice and mark once: begin by recording the exact height and width of the pipe area plus any required clearance for airflow and access.
Transfer measurements to panels, allowing for frame thickness and gap tolerances. Use a straightedge and pencil for precise cut lines.
Employ a circular saw or jigsaw with appropriate blade, clamp panels securely, and sand cut edges for a snug, clean fit.
Assembly and finishing
Begin by laying out the cut panels and frame components on a flat, level surface to confirm fit and orientation before fastening; this prevents misalignment and reveals any adjustments needed for gaps or uneven ground.
Assemble frames with weatherproof screws, glue joints sparingly, and predrill to prevent splitting.
Sand edges, apply exterior primer, then finish with two coats of outdoor paint or stain and allow proper curing before reinstalling.
Securing for wind and easy access for maintenance
Secure the screen to resist gusts while remaining removable for routine upkeep by installing concealed fasteners and a simple latch system.
Position carriage bolts with sleeve anchors into masonry or use ground spikes for soil.
Attach flush hinges for swing-out panels or quick-release pins for drop-down sections.
Seal hardware against corrosion.
Label access points and test removal repeatedly to guarantee safe, tool-light maintenance.
Step-by-step DIY: Installing a faux rock pipe cover
Selecting a faux rock that matches the pipe diameter and exterior style guarantees a convincing cover.
Proper placement and secure anchoring prevent shifting while allowing occasional access.
Edges should be blended with soil and plants to hide seams and stabilize the surround.
Choosing the right size and style
Measure the pipe and surrounding clearance to determine the appropriate faux rock dimensions and mounting style.
The chosen cover should clear fittings and allow easy access for maintenance while matching scale with nearby landscaping and architecture.
Select textures and colors that mimic local stone; consider lightweight materials for ease of handling and weather-resistant finishes for longevity.
Proportion and subtlety guarantee a natural appearance.
Placement and anchoring methods
With the appropriate size and style chosen, attention turns to positioning the faux rock so it both conceals the pipe and remains accessible for future service.
Center the cover over the outlet, align openings with pipe and slope for drainage.
Anchor using ground spikes or masonry screws into a compacted base.
Verify stability, leaving removable fasteners for easy maintenance access.
Blending edges with soil and plants
Once positioned and secured, the edges of the faux rock should be gradually integrated into the surrounding soil and planting to create a seamless appearance.
Small amounts of topsoil are packed against the base, tamped gently.
Low-growing groundcovers, ornamental grasses, and moss fill gaps and soften contours.
Mulch matches nearby beds, and occasional trimming maintains the natural look while allowing access for maintenance.
Maintenance, access, and troubleshooting
Routine maintenance and clear access points are essential so cleanouts and repairs can be reached without dismantling covers.
Covers and concealments should be designed and inspected to prevent trapped moisture and pest harborage.
Regular seasonal checks—clearing debris, confirming seals, and testing drainage—help avoid blockages and prolong system life.
Ensuring access to cleanouts and repairs
Plan access points before concealing outdoor drain pipes so cleanouts and repair areas remain reachable without dismantling cladding or landscaping.
Locate cleanouts at grade or behind removable panels, mark positions on as-built plans, and use discreet access doors or removable siding sections.
Guarantee clearance for tools and replacement parts, and choose coverings that allow quick removal to minimize repair time and labor costs.
Avoiding moisture and pest traps
After locating cleanouts and removable panels, attention should turn to preventing concealed pockets where water and pests can collect.
Install breathable, insect‑resistant venting behind covers, slope framing away from pipes, and seal gaps with durable, exterior‑grade caulk.
Use mesh screens at outlets and removable access plates for inspection.
Regularly check seals and drainage paths to detect and remedy trapped moisture or entry points promptly.
Seasonal upkeep tips
When seasons change, a concise quarterly checklist helps preserve pipe performance and maintain accessible inspection points: inspect joints for leaks, clear debris from covers and trenches, test water flow, tighten brackets, and remove vegetation.
Record issues and dates. Keep access panels unobstructed.
Winterize exposed runs, apply touch-up sealant, and schedule professional inspection for persistent problems or complex repairs to prevent costly damage.
Common mistakes and how to avoid them
Common errors when hiding outdoor drain pipes include blocking vents or cleanouts, which can impede system function and complicate repairs.
Using non-breathable materials in moisture-prone areas can trap dampness and promote corrosion or mold.
Improper covers or rerouting that create code violations or alter drainage slopes can lead to backups and costly corrections.
Blocking vents or cleanouts
Several homeowners mistakenly block exterior vents or cleanouts during pipe-hiding projects, creating serious ventilation and access issues. Doing so can trap sewer gases, impede system drainage, and prevent required maintenance.
Professionals recommend maintaining clear, labeled access panels, leaving manufacturer-specified clearance, and routing decorative screens or boxes with removable sections.
Regular inspections confirm unobstructed flow and code compliance, avoiding costly repairs and health risks.
Using non-breathable materials near moisture-prone areas
Choose breathable materials around exterior drain lines to prevent trapped moisture and the resulting mold, rot, or corrosion.
Using impermeable cladding, sealants, or paint in damp zones often conceals leaks and accelerates decay.
Opt for ventilated screens, gap-mounted siding, and moisture-resistant, breathable finishes.
Regular inspections and ensuring airflow behind concealments avoid hidden damage while maintaining aesthetics and longevity.
Creating code violations or drainage problems
While breathable materials and proper ventilation reduce hidden moisture risks, improper concealment or rerouting of exterior drain lines can create building-code violations and functional drainage failures.
Inspectors may cite obstructed access, insufficient slope, or illegal connections to storm or sanitary systems. To avoid problems, follow local codes, maintain required clearances, preserve inspection points, and use approved fittings and documented permits before altering drainage paths.
Cost comparison and decision guide
A brief cost comparison helps weigh estimated costs, durability, and the pros and cons of each concealment option before choosing a solution. The table below summarizes typical price ranges and durability notes alongside key advantages and drawbacks for common approaches. This concise guide aids clear decision-making based on budget and long-term performance.
| Solution | Notes |
|---|---|
| Painted/boxed pipe | Low cost; moderate durability; pros: cheapest, quick; cons: less protective |
| Cladding/covering | Medium cost; good durability; pros: attractive, protective; cons: higher labor |
| Landscaping/screening | Low–medium cost; variable durability; pros: natural look; cons: maintenance |
| Re-routing/burying | High cost; high durability; pros: hidden long-term; cons: disruptive, expensive |
Estimated costs, durability, pros and cons by solution
When planning how to hide outdoor drain pipes, homeowners should weigh upfront installation costs, long‑term durability, and the specific advantages and drawbacks of each approach.
These factors determine whether a solution is economical, maintenance‑friendly, and visually effective.
Vinyl covers: low cost, moderate lifespan, easy install, limited aesthetics.
Wood screening: moderate cost, weather‑sensitive, customizable.
Stone cladding: high cost, durable, permanent.
Green walls: variable cost, upkeep, attractive.
Examples and inspiration
The article presents quick case studies showing how compact yards have concealed drain pipes with planters, trellises, and slim storage units.
Each example highlights material choices, space constraints, and maintenance considerations.
Before-and-after concepts illustrate the visual and functional improvements achieved.
Quick case studies of successful hides for small yards
Small-yard case studies demonstrate practical, attractive ways to conceal exterior drain pipes without sacrificing space or function.
One example shows a slim lattice screen supporting vertical herbs while hiding a downspout.
Another uses a narrow storage bench with internal channeling for pipes.
A third integrates pipes into a raised planter edge, maintaining access via removable panels and preserving circulation and maintenance simplicity.
Before-and-after concept ideas
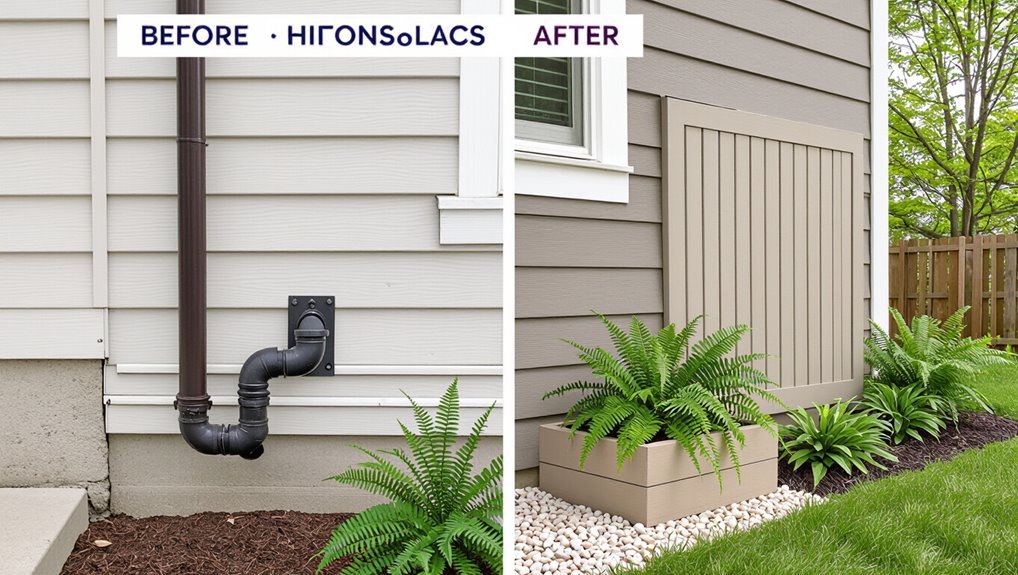
Moving from compact installations to visual storytelling, before-and-after concept ideas illustrate how hiding drain pipes can transform a yard’s appearance and function.
Photographic sequences highlight solutions: planting beds, decorative screens, painted gutters, and stone veneer. Captions note materials, costs, and installation time.
Viewers gain realistic expectations and actionable inspiration, selecting styles that match scale, budget, and maintenance needs for cohesive outdoor improvements.
Conclusion
Choosing the right concealment can transform an eyesore into a subtle feature, but one final truth lingers: neglect the access and problems will return. Thoughtful planning, durable materials and a simple maintenance plan keep pipes hidden and functional. Whether a quick screen or a planted wall, each choice carries risk—manage it now, or face costly, exposed repairs later. The best solution quietly protects—and waits to reveal itself when needed.