How to Set a Cast Iron Tub: Step-by-Step Installation & Leveling Guide
To properly set a cast iron tub, start by assessing the subfloor and drain alignment, then prepare a mortar bed or adjustable supports. Position the tub so its flange aligns with the finished wall, ensuring it’s level from front to back, side to side, and diagonally. Use shims or rubber feet at low points and incrementally tighten supports. Secure the flanges to the studs, connect the drain and water lines, and test for leaks. Finally, apply backer and mildew-resistant caulk for a finished look. Follow the detailed leveling tips and troubleshooting steps for a successful installation.
Overview of Cast Iron Tub Installation
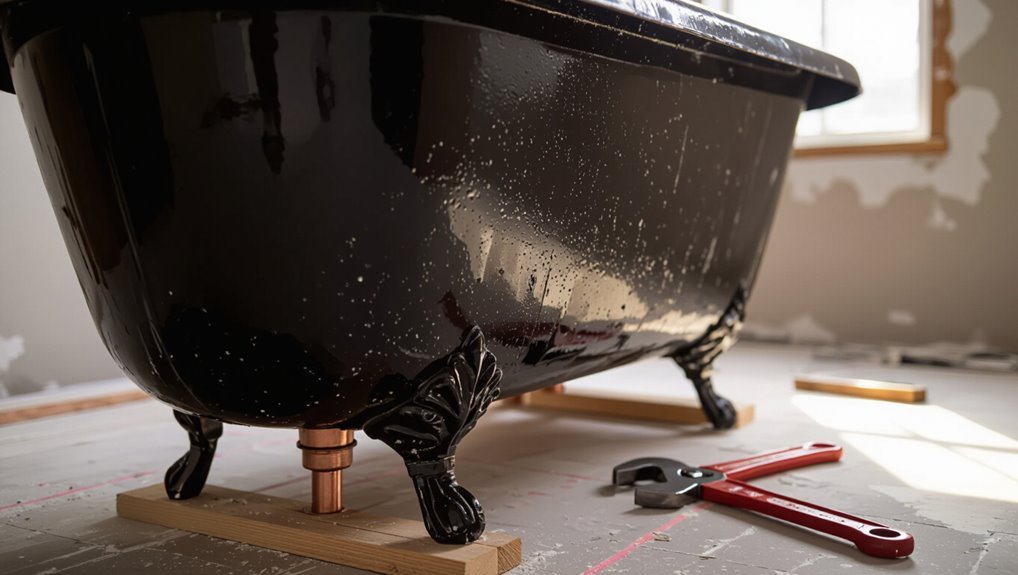
The overview contrasts when a cast iron tub should be replaced entirely versus when it can be reinstalled after repair.
It also lists the essential tools, materials, and leveling techniques required for a secure fit.
Finally, it summarizes key safety precautions and site-prep steps to protect workers and the surrounding structure.
When to Replace vs. Reinstall a Cast Iron Tub
When should a homeowner opt to replace rather than reinstall a cast iron tub? The decision hinges on structural integrity, extensive corrosion, irreparable cracks, or outdated dimensions incompatible with current layouts.
Reinstallation suits tubs in good condition needing repositioning or refinishing.
Consider long-term cost, plumbing updates, and safety; replacement is preferable when repairs exceed reasonable expense or compromise performance.
Tools and Materials Needed for Installation and Leveling
Several essential tools and materials are required to install and level a cast iron tub correctly. A concise kit streamlines the job and guarantees accurate placement.
Typical items include:
- Level, tape measure, and mason’s line.
- Tub shims, adjustable feet, and mortar mix.
- Plumbing wrenches, flange kit, and drain assembly.
- Caulk, backing strips, and protective pads.
Safety Precautions and Jobsite Preparation
Begin by evaluating the workspace for hazards and access constraints to confirm safe, efficient handling of the heavy cast iron tub.
Remove obstacles, secure flooring, and ensure adequate lighting and ventilation.
Verify structural support and clear pathways for movers and equipment.
Provide personal protective equipment, establish lift plans, and position fire extinguishers and first-aid supplies.
Communicate roles and emergency procedures before work begins.
Pre-Installation Assessment
Before beginning installation, the installer measures the bathroom to confirm tub dimensions and verify the drain lines align with the planned location.
The subfloor and surrounding framing are inspected for adequate strength and any reinforcement needs are identified.
Wall surrounds and access panels are checked to guarantee proper fit, waterproofing, and future serviceability.
Measuring the Bathroom Space and Drain Location
When evaluating the space for a cast iron tub, the installer measures the room dimensions, doorways, and clearances against the tub’s footprint and swing path to guarantee it can be delivered and positioned without obstruction.
Next, precise drain center measurements are taken relative to walls and fixtures, noting floor slope, access panels, and existing plumbing offsets to plan drain connection and final tub placement.
Inspecting Subfloor Strength and Framing Requirements
Inspecting the subfloor and framing determines whether the structure can safely support a cast iron tub’s concentrated weight, accounting for water and occupant loads.
The inspector verifies joist size, spacing, span, and direction; checks for rot, delamination, or movement; and confirms subfloor thickness and attachment.
Recommendations may include sistering joists, adding blocking or a plywood/OSB topper, and ensuring solid bearing at walls and drain locations.
Checking Wall Surrounds and Access Panels
Having confirmed the floor and framing can bear the tub, attention shifts to the surrounding walls and access provisions to guarantee a proper fit and serviceability.
Verify wall studs, backing, and finished surfaces align with tub flange and surround. Confirm clearances for faucets and trim, locate or plan access panels for drain, trap and overflow.
Note moisture barriers and tile substrates for compatible installation.
Preparing the Tub and Plumbing
The old tub is removed and the rough-in area is thoroughly cleaned to provide a solid, level foundation.
The drain and overflow assembly are adjusted, sealed, and tested for proper alignment and watertightness.
The tub is then temporarily positioned in place to verify fit and clearances before final setting.
Removing Old Tub and Cleaning Rough-In
Begin by cutting power to nearby electrical circuits and shutting off the home’s water supply before removing the old tub; this prevents accidents and limits water damage during demolition.
Remove fixtures, disconnect plumbing, and unfasten tub mounting. Carefully lift and extract the tub with proper support.
Clear debris, scrape mortar or adhesive, inspect subfloor and wall studs, and clean the rough-in area for precise new tub alignment.
Adjusting and Testing Drain and Overflow Assembly
With the rough-in cleared and the subfloor and studs inspected, attention shifts to the tub’s drain and overflow assembly to guarantee watertight operation before final installation.
Assemble and hand-tighten gasketed fittings, align overflow plate depth, and confirm drain flange seating.
Pressure-test with water and a temporary plug, inspect for leaks, adjust seals or replace damaged gaskets, then dry and document results.
Temporarily Positioning Tub to Verify Fit
How should the tub sit in the alcove and align with the rough-in before final anchoring?
The tub is set temporarily into the alcove, centered and pushed fully against studs, with drain and overflow aligned to rough-in.
Spacers or shims support level points without compressing packing.
Inspect clearances, confirm wall flange contact, verify tile reveal, and test drain connection fit before permanent fastening.
Setting the Tub Base
The section surveys common support options—full mortar bed, rubber feet or adjustable supports, and wooden blocking—and how each affects stability and weight distribution.
It outlines proper mortar mixing ratios, placement technique, and curing considerations for a cast iron tub.
It also summarizes steps for installing rubber feet or adjustable supports and when each is appropriate.
Options for Tub Support: Mortar Bed vs. Rubber Feet vs. Blocking
Several common methods exist for supporting a cast iron tub—each with distinct trade-offs in stability, longevity, and ease of installation.
Mortar beds provide firm, long-lasting support and excellent vibration dampening but require curing and skill.
Rubber feet simplify placement and isolate noise yet may compress over time.
Blocking (framing) offers adjustable, accessible support but depends on precise carpentry and secure anchoring.
How to Mix and Apply a Mortar Bed for Cast Iron Tubs
Begin by preparing a properly mixed mortar bed of sand and Portland cement to provide uniform bearing and long-term support under the tub’s base.
Spread and screed to a consistent thickness, tamp lightly, and keep the surface slightly moistened before setting the tub.
Guarantee full contact and check level during placement.
- Mix ratio
- Consistency
- Thickness
- Curing time
Installing Rubber Feet or Adjustable Supports
Once the mortar bed is set and leveled, attention shifts to installing rubber feet or adjustable supports beneath the cast iron tub to guarantee stable, long-term bearing and to allow fine leveling.
Install supports at manufacturer-recommended points, verify height with a level, and tighten locking nuts.
Protect finishes with pads, confirm even load distribution, and recheck level after final adjustments before securing the tub.
Positioning and Leveling the Tub
The installer checks tub placement to guarantee proper clearance from walls and surrounding finishes before committing to the set.
A straightedge or carpenter’s level is used across multiple points while shims are added under the flange or feet to achieve a true, stable level.
Finally, the drain outlet is aligned with the floor waste and the trap primer is adjusted to maintain correct flow and clearance.
Correct Tub Placement Relative to Walls and Surrounds
Several precise checks guarantee a cast iron tub sits correctly in relation to surrounding walls and finishes: measure clearances from flank walls, verify the tub flange aligns with tile or surround planes, and confirm the finished wall surface will meet the tub apron evenly.
The installer checks wall plumb, gap uniformity, and access for caulking. Allow for tile thickness, trim, and any required expansion or service clearances.
Step-by-Step Leveling Procedure Using a Carpenter’s Level and Shims
With clear wall and flange alignments confirmed, attention shifts to accurately leveling the tub.
- Place a carpenter’s level along tub rim front-to-back; note high/low points.
- Check left-to-right and both diagonals for twist.
- Insert shims beneath feet or support pads at low points; tighten supports incrementally.
- Recheck level after each adjustment until the tub sits true and evenly supported.
Aligning Drain with Floor Waste and Adjusting Trap Primer
Before finalizing the tub’s position, confirm the drain opening aligns precisely with the floor waste and that the trap primer connection can be adjusted without strain.
Rotate and slide the tub slightly to seat the flange. Verify vertical alignment with a plumb line and test fit the drain assembly.
Adjust shims or blocking so primer tubing reaches comfortably, maintaining access for future service.
Securing the Tub to Structure
Next, attention turns to fastening the tub to the surrounding structure by securing flanges to wall studs with clips or screws.
Any gap between the tub and wall should be filled with backer rod and sealed to prevent moisture intrusion.
Finally, the installer verifies overall stability and even weight distribution to guarantee long-term support.
Attaching Flanges to Wall Studs and Using Clips or Screws
Secure the tub by fastening its flange to the wall studs using appropriately placed clips or corrosion-resistant screws.
Install clips at manufacturer-recommended intervals, aligning flange holes with stud centers. Pre-drill to prevent cast iron stress, use washers for load distribution, and tighten snugly without over-torquing.
Verify each clip or screw secures flush against the flange and that the tub remains level before final fasteners are set.
Filling Gaps Between Tub and Wall with Backer Rod and Sealant
With the flange fastened to the studs and checked for level, attention turns to sealing the gap between the tub and the finishing wall to protect the structure and finish.
Install compressible backer rod sized to the gap depth, compressing slightly.
Tool a bead of high-quality silicone or polyurethane sealant over the rod, smoothing for a continuous seal.
Wipe excess and allow full cure.
Verifying Structural Stability and Weight Distribution
At this stage, the installer verifies that the tub sits firmly and that its weight will be properly supported by the framing and floor underlayment.
The installer checks joist spacing, subfloor integrity, and any required reinforcement or blocking.
Weight paths are confirmed to transfer to structural members.
Attachment points are fastened to blocking; shims are adjusted.
Final inspection confirms no flexing or uneven load distribution.
Connecting Plumbing and Testing
The plumber installs the final drain assembly, trap, and water supply connections to the set tub.
Once connected, water and leak testing are performed on both the drain and supply lines before any final sealing or trim is applied.
Minor adjustments to fittings and alignment are made as needed after testing confirms a watertight system.
Installing Final Drain, Trap, and Water Supply Connections
Begin by securing the final drain assembly, trap, and water supply lines in their designated positions before sealing any remaining gaps.
Tighten connections to manufacturer torque specs, use appropriate thread sealant or PTFE tape, and align trap to waste outlet to maintain proper slope.
Install flexible supply hoses to valves, support lines to avoid strain, and leave access for subsequent testing and adjustment.
Water and Leak Testing Procedures Before Final Sealing
With the drain, trap, and supply lines secured and aligned, attention shifts to verifying water-tight integrity before any final sealing is applied.
The installer fills the tub and pressurizes supply lines, inspects visible joints for drips, and checks trap and drain connections.
Allow a full-cycle soak and monitor for leaks for 15–30 minutes, documenting any seepage for repair prior to sealing.
Making Minor Adjustments After Testing
After testing, the installer makes targeted adjustments to fittings, supports, and alignment to eliminate any remaining seepage or stress points before final connections are tightened.
The installer tightens or re-seats slip joints, repositions cradle shims, and verifies trap orientation. Flexible connectors are checked for twist or strain.
Once dry, a final leak check confirms integrity prior to sealing and trim reinstallation.
Finishing Touches and Wall Surrounds
Attention now turns to final wall treatments and surface protection around the tub flange, including installing tile, cement backer board, or an acrylic surround.
Proper caulking technique is emphasized to create durable, mold-resistant seals between tub and wall.
Any exposed iron edges should be cleaned and either painted with a suitable rust-inhibiting coating or restored to match the surrounding finish.
Setting Tile, Backer Board, or Acrylic Surround Over Tub Flange
Begin by ensuring the tub flange is clean, straight, and properly aligned so the chosen wall finish—tile, cement backer board, or an acrylic surround—will sit flush and watertight.
Fasten backer board to studs above flange, leaving a slight gap at the tub.
For tile, apply waterproof membrane, thinset, and tile to proper height.
Snap and trim acrylic surrounds to fit securely over flange.
Caulking Techniques for Durable, Mold-Resistant Seals
Once the wall finish is secured and edges meet the tub flange, proper caulking seals gaps against water intrusion and mold growth.
Use high-quality, mildew-resistant silicone or polyurethane.
Remove old sealant, clean and dry surfaces, apply consistent bead with a caulk gun, smooth with a wet finger or tool, and allow full cure per manufacturer instructions.
Inspect periodically and reseal when gaps appear.
Painting or Restoring Exposed Iron Edges
Restore exposed cast iron edges with products and techniques that both protect metal and blend the tub into the surrounding finishes.
Clean, de-rust, and prime with a rust-inhibiting primer. Use high-build epoxy or enamel paint matched to the tub or trim.
Feather edges into tile or drywall, allow proper cure, then reinstall trim or caulk for a seamless, durable finish that resists moisture and chips.
Common Problems and How to Fix Them
Common issues that follow installation include a tub that rocks due to uneven support, a drain that remains misaligned, and mortar that cracks or settles over time.
For each problem, clear diagnostic steps and targeted repairs—shimming and re-leveling for an unstable tub, re-measuring and adjusting the drain assembly for alignment, and patching or re-mortaring for base failures—are presented.
The following sections outline simple troubleshooting procedures and repair options for these situations.
Uneven Tub That Rocks After Setting Solutions
If a newly set cast iron tub rocks or feels uneven, it indicates gaps or instability in the bedding that must be diagnosed and corrected before final finish work proceeds.
Inspect supports, check level at multiple points, and identify voids.
Remove finish, adjust or add mortar shims, and re-seat tub on continuous, cured bedding.
Recheck level, tighten anchorage, and allow proper cure before finishing.
Persistent Drain Misalignment Troubleshooting Steps
Diagnose drain misalignment by first confirming the exact offset between the tub’s drain opening and the floor drain or waste line.
Measure horizontally and vertically, then assess trap and flange positions.
Options include adjusting the tub’s position, using an offset or swivel flange, extending or reorienting the waste arm, or installing a slip-joint adapter.
Verify seals and test for leaks before finalizing.
Mortar Cracking or Settling Repair Options
After addressing drain alignment, attention turns to mortar bedding beneath a cast iron tub, since cracking or settling undermines support and causes stress on the shell and plumbing.
Inspect for voids, soft spots, or hairline cracks.
Repair options include patching with non-shrink mortar, full re-bedding, or using adjustable support brackets.
Confirm proper cure, re-level, and verify drain alignment before finishing.
Maintenance Tips to Preserve a Cast Iron Tub
Routine maintenance preserves a cast iron tub’s finish and prevents rust by using nonabrasive cleaners and drying surfaces after use.
Periodic inspections for movement, leaks, and compromised seals help catch framing or drain issues early.
If persistent settling, structural damage, or uneven support is found, a qualified professional should be called for re-leveling or repairs.
Cleaning and Rust Prevention Best Practices
Regular maintenance keeps a cast iron tub both attractive and functional: gentle cleaning, prompt rust treatment, and protective habits prevent enamel damage and prolong service life.
Use nonabrasive cleaners, soft cloths, and baking soda for stains.
Dry surfaces after use, remove mineral deposits with vinegar, and treat exposed metal with rust converter or enamel touch-up.
Avoid harsh chemicals and abrasive pads.
Periodic Checks for Movement, Leaks, and Seal Integrity
Beyond surface care and rust prevention, periodic inspections help catch structural and plumbing issues before they worsen.
Inspect tub feet, surround, and floor for subtle shifts or sags. Check visible drain and overflow fittings for dampness, mineral buildup, or weeping seals.
Test caulking and gasket integrity, re-sealing small failures promptly. Monitor for persistent odors indicating hidden leaks or moisture.
When to Call a Professional for Re-Leveling or Structural Issues
Recognize the signs that require professional attention: persistent rocking, new or worsening gaps between the tub and surrounding floor, repeated sealant failures, visible cracks in the cast iron or enamel, and any plumbing leaks that cannot be isolated or stopped with basic tightening.
A qualified contractor or plumber should assess subfloor damage, framing settlement, drain alignment, and tub support to determine re-leveling, repairs, or replacement needs promptly.
Estimated Time, Cost, and When to Hire a Pro
Although actual timelines vary with site conditions and installer experience, setting a cast iron tub typically takes one to three days for a straightforward replacement—longer if structural repairs, plumbing adjustments, or tile work are required. Typical costs range $500–$3,500; higher for complex work. Hire a pro for structural, drainage, or load-bearing concerns.
| Task | Time | Cost |
|---|---|---|
| Simple install | 1–3 days | $500–$1,200 |
| Re-leveling | 1 day | $200–$800 |
| Structural repair | several days | $1,000+ |
Conclusion
Like a seasoned mason placing the final keystone, the cast iron tub settles into its new home—heavy, proud, and steady. Each shim and level line becomes a quiet promise: enduring comfort, water-smooth mornings, and evenings that echo with calm. Proper prep and patient hands transform raw plumbing and iron into a ritual of daily solace. With vigilance and care, the tub repays effort in decades of gleaming, dependable service.