How to Get Roots Out of a Drain Pipe: DIY Methods, Tools, and When to Call a Pro
To effectively remove tree roots from a drain pipe, homeowners can try several DIY methods such as using a hand auger or a snake with root-cutting blades, clearing accessible traps, applying chemical root killers or enzymes, or renting hydro-jetting equipment. After clearing the roots, it’s essential to inspect for any structural damage. If you encounter persistent issues, repeated clogs, visible root growth, or damaged pipe sections, it’s best to consider a camera inspection and consult a professional for trenchless repair or excavation.
What Causes Tree Roots to Grow Into Drain Pipes
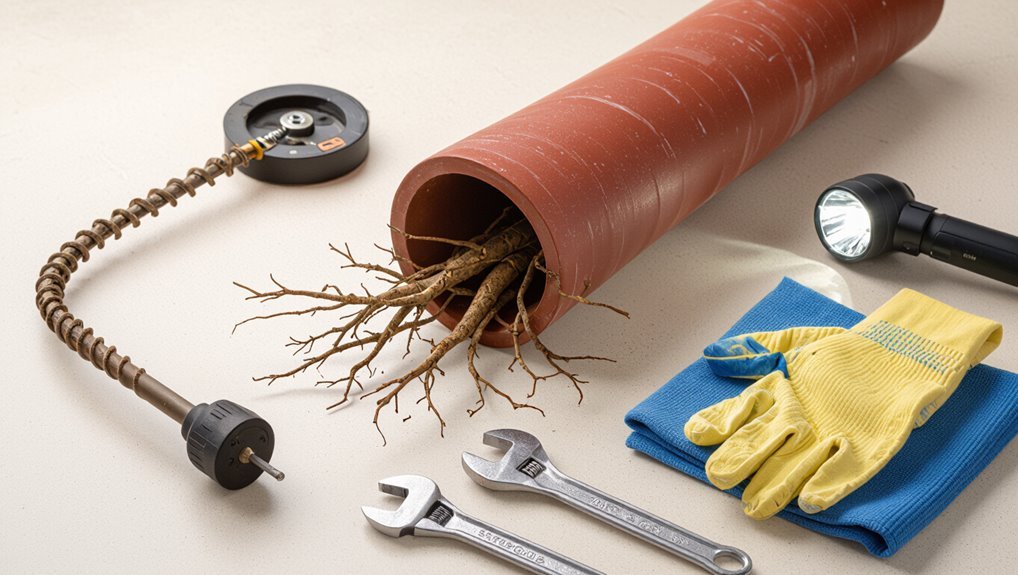
Tree roots are naturally drawn to the moisture and nutrients that escape from cracked or leaky pipes, following scent and moisture gradients in soil.
Older pipe materials like clay, concrete, and poorly joined PVC are especially prone to gaps and fractures that allow root entry.
Early indicators of invasion include slow drains, gurgling fixtures, recurring clogs, and wet spots or sinkholes above the line.
How roots detect water and nutrients
Roots sense water and nutrients through specialized cells and chemical gradients in the soil, guiding growth toward favorable conditions.
Root tips detect moisture, oxygen, and mineral concentrations via hydrotropism and chemotropism, redirecting growth toward leaks or organic-rich areas near lines.
This behavior explains why homeowners seeking how to get roots out of drain pipe often find roots concentrated at joints, cracks, or persistent wet spots.
Common pipe materials and vulnerabilities
Pipes made from clay, cast iron, PVC, and older clay-based segments each present different weaknesses that invite root intrusion.
Cracked or misaligned clay allows roots to enter joints. Corroded cast iron develops holes and rough surfaces that roots exploit.
PVC is resistant but joints and poorly seated fittings can leak. Aging materials, ground movement, and persistent moisture increase vulnerability.
Signs that roots have invaded a drain pipe
How can one tell if subterranean growth has breached a drain line? Observable signs include slow drains, recurrent clogs, gurgling sounds, sewage backups, wet spots or lush vegetation above the sewer route, and unusual root fragments in trap or cleanout.
Persistent problems despite snaking suggest intrusion. Professional camera inspection confirms root penetration and locates breaches for targeted repair or removal.
Quick Assessment: Determine Severity and Risks
The homeowner should note visual signs and odors at fixtures—standing water, slow drains, gurgling, or sewage smell—because these clues indicate root intrusion severity.
Simple flow tests at sinks, tubs, and toilets (timing how quickly water drains and watching for backups) help confirm which lines are affected.
If tests suggest persistent blockage or multiple fixtures are involved, a professional drain camera inspection is warranted to pinpoint location and extent.
Visual and smell indicators at fixtures
When discoloration, slow drainage, or recurrent gurgling occurs at multiple fixtures, these visual and olfactory cues can indicate root intrusion severity and potential health risks; dark stains, persistent foul odors, and backups suggest roots have breached the pipe lining or fully obstructed flow, while intermittent smells or isolated slow drains may point to minor encroachment or trapped debris.
Visible mold, sewage pooling, and continuous odor warrant prompt inspection.
How to perform a basic sink/toilet/drain flow test
Following signs like persistent odors or multiple slow drains, a simple flow test helps gauge whether roots are causing a minor restriction or a serious blockage requiring immediate repair.
Run water in affected fixtures, note fill and drain times, listen for gurgling, and test multiple fixtures simultaneously to see if backups occur.
Record observations, compare to normal flow, and prioritize professional help if sluggishness or backups persist.
When to use a drain camera inspection
Why consider a drain camera inspection now? A camera reveals root intrusion extent, pipe breaks, offsets, and material type, enabling accurate decisions.
Use it when flow tests show recurring clogs, multiple fixtures affected, or prior mechanical clearing failed.
Also consider inspection before heavy clearing to avoid hidden collapse, and when planning repairs or replacements to compare costs versus ongoing maintenance.
Immediate DIY Remedies for Minor Root Intrusion
For minor root intrusion, homeowners can start with mechanical snaking equipped with root-cutting blades and compare a simple hand auger to a powered roto-rooter attachment for effectiveness.
Chemical root killers formulated for sewer lines can be applied per product instructions, taking care to use pipe-safe formulations and correct dosages.
Enzymatic or bacterial treatments are recommended for ongoing maintenance to slow regrowth without damaging the system.
Mechanical snaking with root-cutting blades
Mechanical snaking with root-cutting blades offers a quick, low-cost way to clear minor root intrusions from household drain pipes.
A flexible snake feeds into the line; rotating blades slice roots, restoring flow. Operators should advance slowly, retracting debris and re-feeding as needed.
Suitable for localized obstructions, this method avoids chemical use but may not remove deep, recurrent root systems requiring excavating or professional equipment.
Using an auger versus a roto-rooter attachment
An auger and a roto-rooter attachment both clear roots from pipes but serve different scales of intrusion: a handheld auger is best for short, shallow clogs and tight indoor traps, while a roto-rooter — a powered, rotating cutting head — handles heavier, deeper root growth in longer runs.
The auger is inexpensive and portable; the roto-rooter offers greater cutting force, reach, and durability for persistent roots.
Chemical root killers safe for pipes (types and application)
Homeowners can treat minor root intrusion using commercially formulated chemical root killers designed to kill roots without harming common sewer materials.
Products typically contain copper sulfate or dichlobenil; follow label directions for dosage, application frequency, and safety.
Pour treatments into cleanouts or drains, allow time for uptake, and repeat as recommended.
Use protective gear and avoid overuse to prevent pipe or sewer ecosystem damage.
Enzymatic and bacterial treatments for maintenance
Several effective enzymatic and bacterial formulations are available for routine maintenance to discourage minor root growth and keep pipes clear.
These products introduce microbes or enzymes that break down organic matter, reducing nutrient sources that attract roots.
Applied per label directions, they are safe for most pipes, septic systems, and the environment.
Regular, preventive dosing minimizes recurrence but won’t remove established roots.
Step-by-Step Guide: Removing Roots Manually from Accessible Pipes
A concise checklist of tools and safety gear sets the stage for manual root removal from accessible drain sections.
The procedure begins with shutting off water, clearing the work area, and disassembling traps to expose clogged passages.
Roots are then cut and extracted with hand tools or a reciprocating saw, followed by reassembly and a thorough test of the repair.
Tools and safety gear checklist
Before beginning manual root removal from an accessible drain pipe, gather a compact set of essential tools and personal protective gear to guarantee the task proceeds efficiently and safely.
Recommended items cover cutting, gripping, inspection, and protection. Choose sturdy, corrosion-resistant tools and properly fitting PPE.
- Drain auger or root saw
- Long-handled pliers and tongs
- Inspection flashlight and mirror
- Gloves, eye protection, and knee pads
Shutting off water and preparing the work area
With tools and protective gear assembled, the next step is to shut off the water supply and prepare the work area to prevent contamination and accidental flow.
Close relevant shutoff valves, drain faucets to relieve pressure, and plug nearby fixtures.
Lay waterproof sheeting and absorbent pads, position buckets, and set adequate lighting.
Confirm ventilation and keep a clear path for tools and disposal.
Disassembling traps and cleaning accessible sections
Begin by removing the trap to gain direct access to the clogged section: place a bucket under the trap, loosen the slip nuts with channel-lock pliers, and slide the trap free, keeping gaskets and nuts organized for reassembly.
Inspect accessible pipe with a flashlight, scrape away loose root material with a hand auger or plumber’s snake, flush with water, and reassemble, checking for leaks.
Cutting and extracting roots with hand tools and reciprocating saws
Start by evaluating the exposed pipe and surrounding space to determine which hand tools or a reciprocating saw will fit and reach the root intrusion safely.
Use pruning saws, root knives, or reciprocating blades rated for wet use.
Stabilize the pipe, cut roots gradually, and extract segments with pliers or hooks.
Inspect the opening frequently to avoid further damage or pushing debris deeper.
Reassembling and testing the repair
Reassemble the pipe components in the reverse order of disassembly, ensuring each joint, gasket, and coupling is clean, properly seated, and free of debris before tightening.
Tighten fittings to manufacturer torque or hand-tight plus specified turns.
Restore flow, run water to check for leaks, and observe pressure and drainage.
Reinspect after several cycles; retighten or reseal if minor leaks occur.
Using Powered Tools and Professional-Grade Methods at Home
The section outlines safe operation of powered augers and rotary cutters, emphasizing proper protective gear, correct feed technique, and blade selection to avoid pipe damage.
It summarizes hydro-jetting basics, pressure ranges, and practical homeowner limits for access and safety.
Criteria for renting specialized gear versus calling a licensed plumber are presented to help assess risk, cost, and complexity.
How to use a powered auger/rotor safely
Although powered augers and rotors markedly reduce the time and labor required to clear root-clogged drains, they demand strict attention to safety and technique to prevent injury and pipe damage.
Operators should wear eye, hand, and hearing protection, secure loose clothing, and use two-handed control.
Feed cable slowly, avoid forcing through resistant sections, stop if vibration or unusual noise occurs, and unplug before maintenance.
Hydro-jetting basics and homeowner access considerations
Introduce hydro-jetting as a high-pressure water cleaning method that uses pressurized streams to scour roots, grease, and scale from the inside of drain pipes without mechanical cutting.
Homeowner considerations include access points, pipe material and size, nearby fixtures, and safety risks from kickback and overspray.
Professional-grade units require training; modest residential services can be arranged through licensed plumbers.
When to rent specialized equipment vs. hiring a pro
Weigh options carefully when deciding whether to rent powered root-removal tools or hire a professional: equipment like high-torque augers, compact hydro-jetters, and pipe cameras can cut costs for experienced DIYers but carry risks of property damage, personal injury, and voided warranties if used improperly.
Rent for simple, localized blockages if competent; hire a pro for deep roots, collapsed pipes, unclear diagnostics, or when permits and insurance are required.
Repairing and Replacing Damaged Pipes After Root Removal
After roots are cleared, the pipe should be inspected to assess structural damage, leaks, and remaining intrusions.
Options range from trenchless solutions—such as cured-in-place lining or pipe bursting—to open excavation and full replacement, each with distinct steps, costs, and disruption levels.
Temporary patches can bridge service until a permanent repair is scheduled, but long-term reliability depends on choosing the appropriate permanent method.
Evaluating pipe condition after clearing roots
Once roots have been removed, a thorough evaluation of the pipe’s condition is essential to determine whether repair or full replacement is required.
Inspect for cracks, collapses, offset joints, corrosion, and remaining root stubs via camera. Assess material, age, and slope.
Minor defects suit spot repairs or section replacement; extensive structural damage, persistent infiltration, or multiple failures typically warrant full replacement to prevent recurrence.
Trenchless repair options: pipe lining and pipe bursting
If camera inspection reveals damage that rules out simple spot repairs but full excavation is undesirable, trenchless methods offer less disruptive alternatives for restoring or replacing sewer and drain lines. Pipe lining reinstates flow by installing a resin-saturated sleeve cured in place; pipe bursting fractures and replaces the host pipe with a new one pulled through. Choose based on extent, material, and access.
| Method | Best for | Typical benefit |
|---|---|---|
| Pipe lining | Cracked but intact alignment | Seals leaks, minimal digging |
| Pipe bursting | Collapsed or severely damaged | Full replacement, same trenching minimal |
| Considerations | Access, lateral connections | Cost, lifespan, permits |
Open excavation and full pipe replacement steps
Begin by securing the work area and exposing the damaged run through careful excavation to gain clear access for pipe removal and replacement.
Assess the extent, cut out compromised sections, and remove roots and debris.
Install new pipe with proper slope, bedding, and jointing materials.
Test for leaks, backfill in layers with compaction, restore surface, and document work for warranties and permits.
Temporary fixes vs. permanent solutions
Distinguish between temporary fixes and permanent solutions by matching the repair approach to the pipe condition, site constraints, and long-term goals; temporary methods like chemical root treatments, mechanical cutting, and point repairs can restore function quickly but often require repeated intervention.
Meanwhile, permanent options—such as full pipe replacement, cured-in-place pipe (CIPP) lining, or re-routing—address structural damage and prevent recurrence but demand greater cost and disruption.
Temporary fixes suit budget limits; permanent repairs suit longevity.
Preventing Future Root Intrusion
To reduce the risk of recurrence, professionals recommend selecting root-resistant pipe materials and following best-practice installation techniques.
Landscape choices—such as placing water-seeking species away from lines and installing root barriers—can further discourage root encroachment.
A routine maintenance schedule using mechanical inspection and approved chemical or enzymatic treatments helps detect and address issues before they become severe.
Choosing root-resistant pipe materials and installation tips
Many homeowners can greatly reduce future root intrusion by selecting pipe materials and installation methods specifically designed to resist root entry; durable options like PVC, HDPE, and copper with smooth joints obstruct root growth better than older clay or cast-iron systems.
Proper bedding, slope, and joint sealing further limit opportunities for roots to exploit weaknesses.
Specifying continuous, solvent-welded joints, tracer wire, and accessible cleanouts aids longevity and inspection.
Landscaping strategies to discourage root growth near drains
Implement strategic landscaping to reduce the likelihood of roots reaching drain lines by choosing plant species, placement, and soil practices that limit root spread and moisture attraction.
Select noninvasive, shallow-rooted plants and keep water-hungry species away from sewer lines. Use root barriers and permeable mulch to direct roots and moisture.
Regularly inspect for nearby growth.
- Choose species wisely
- Maintain spacing
- Install root barriers
- Control irrigation
Routine maintenance schedule and products to use
Establishing a consistent maintenance schedule and using targeted products considerably reduce the chance of future root intrusion in drain lines.
Monthly visual inspections, quarterly hydro-jetting or rooter service, and annual camera inspections are recommended.
Apply copper sulfate or foaming root killers per label to inhibit regrowth, avoiding overuse.
Document actions, adjacent planting changes, and respond promptly to slow drains or unusual odors to prevent recurrence.
Safety, Environmental, and Legal Considerations
Proper disposal of removed roots and any chemicals used should follow local regulations to prevent hazards to people and pets.
The environmental effects of chemical root killers—such as impacts on soil, groundwater, and non-target organisms—must be weighed against their effectiveness.
Responsibility and liability should be clarified when roots originate from neighbor trees or municipal systems before corrective actions begin.
Safe handling and disposal of removed roots and chemicals
When roots and chemical agents are removed from a drain, they must be contained, labeled, and transported in accordance with local regulations to prevent contamination and exposure.
Workers should use sealed, puncture‑resistant containers, PPE, and absorbents for spills.
Dispose of biological debris and chemical waste at approved facilities or via hazardous waste collection.
Document chain‑of‑custody and follow municipal bylaws and disposal receipts for compliance.
Environmental impact of chemical root killers
Many chemical root killers pose acute and chronic risks to soil, groundwater, and non‑target organisms because active ingredients like copper sulfate, dichlobenil, or herbicidal formulations can persist, mobilize, or bioaccumulate beyond the designated treatment zone.
Regulatory limits, runoff, and leaching potential determine environmental burden; improper use harms aquatic life, beneficial microbes, and soil health.
Safer mechanical or targeted biological alternatives are recommended.
When neighbor trees or municipal systems are involved
If roots originate from a neighbor’s tree or a municipal line, responsibility, safety, and environmental protection become intertwined with legal and practical constraints.
Property owners should document damage, notify neighbors or authorities, and avoid unilateral excavation or toxic chemicals near shared or public mains.
Permits, utility locates, and professional coordination reduce liability.
Municipal ordinances may dictate remediation and cost allocation.
Signs It’s Time to Call a Professional Plumber or Arborist
Observable red flags during inspection or failed DIY attempts—such as recurring backups, visible root intrusions on a camera, or damaged pipe sections—indicate the need for professional help.
A qualified plumber or arborist will explain available removal methods, expected outcomes, and potential follow-up work like pipe repair or tree management.
When evaluating quotes, the reader should compare scope of work, included warranties, and any guarantees on root regrowth or pipe integrity.
Red flags during inspection or DIY attempts
During an inspection or while attempting DIY removal, certain clear warning signs indicate that professional help is required: persistent backups after multiple snaking attempts, severe pipe deformation or collapse visible in a camera inspection, large or rapidly regrowing root masses, sewage leaks or persistent odors, and signs of nearby tree instability that suggest roots are actively damaging infrastructure.
Additional red flags include repeated clogs despite treatments, visible soil settling, and hairline cracks extending.
What to expect from a professional root removal service
Engaging a professional for root removal typically begins with a diagnostic assessment that pinpoints the extent of intrusion and the condition of the pipe system.
Technicians often use camera inspections, soil and tree evaluations, and flow tests to determine whether targeted cutting, chemical treatments, pipe lining, or full replacement is necessary.
The service includes documented findings, recommended remediation, timelines, safety precautions, and follow‑up testing to confirm restored flow.
How to evaluate quotes and warranties
How should a homeowner compare root-removal quotes and warranties to decide when to call a plumber or an arborist? A detached review of scope, costs, and guarantees guides decisions.
Evaluate included services, liability for pipe damage, warranty duration and exclusions, and follow-up or remediation terms.
Compare bids for transparency, credentials, and emergency response.
- Scope clarity
- Damage liability
- Warranty length/exclusions
- Follow-up terms
Cost Estimates and Timeframes
Typical DIY root removal projects often require basic tools and chemicals and can take a few hours to a day, with costs usually ranging from minimal outlay to a few hundred dollars.
Professional services vary widely—camera inspections, hydro-jetting, or pipe repair can push costs from a few hundred to several thousand dollars depending on scope, access, and regional rates.
Comparing immediate fixes to full repairs over time shows that higher upfront investment in durable solutions often reduces long-term expenses and repeat work.
Typical DIY costs and time required
Cost varies with the chosen method and the severity of root intrusion.
Homeowners typically spend $15–$150 on tools and supplies: hand augers, chemical root killers, replacement blades, or basic plumbing snakes.
Time ranges from one hour for simple snaking to several afternoons for excavation or repeated treatments.
Safety precautions and proper disposal add minor time and occasional extra costs.
Professional service cost ranges and factors that affect price
Several factors determine what a homeowner will pay for professional root removal, with most service calls ranging from about $150 for simple in-line snaking to $1,500 or more for hydro-jetting, camera inspection, and localized pipe repairs—full excavation and replacement can exceed $3,000 on older lines or difficult sites. Technicians quote based on access, pipe material, severity, permits, and emergency timing.
| Service | Typical Range | Time |
|---|---|---|
| Snaking | $150–$350 | 1–2 hr |
| Hydro-jet | $400–$1,500 | 1–3 hr |
| Excavation | $1,500–$5,000+ | 1+ day |
Long-term cost comparison of repair options
Long-term comparisons of repair options center on upfront price, expected lifespan, and the likelihood of recurring work; homeowners should weigh short-term savings against future expenses when choosing a method.
Mechanical root removal is cheap but often recurs within 1–3 years. Chemical treatments require regular reapplication.
Pipe replacement or lining costs more initially but can last 20–50 years, reducing maintenance and long-term total cost.
Real Examples and Short Case Scenarios
Several brief case scenarios illustrate common outcomes: a minor clog cleared quickly with a plumbing snake, a more extensive root invasion that required trenchless pipe repair, and an emergency full replacement after a severe collapse.
Each example highlights the diagnostic signs, chosen method, and typical timeline.
These scenarios set expectations for costs, risks, and likely recovery.
Minor clog resolved with snaking
A quick snake cleared the line when a homeowner discovered slow drainage in a bathroom sink caused by hair and soap buildup near the trap.
The homeowner used a handheld auger, removed debris, flushed hot water, and confirmed normal flow.
Effort required basic tools and ten minutes.
No pipe damage occurred, no chemicals were needed, and professional help was unnecessary.
Root invasion requiring trenchless repair
Encountering roots inside a drain pipe often signals a breach in the sewer line where tree roots exploited cracks or loose joints, forcing homeowners to choose between repeated clearing and trenchless repair.
Case examples: lateral lining restored flow after root intrusion and collapsed bell; cured-in-place pipe avoided extensive digging in a yard with mature oaks; inspection camera confirmed sections requiring full relining.
Emergency replacement after severe collapse
When roots have advanced beyond repairable intrusion and the line has severely collapsed, emergency replacement becomes the only viable option.
Crews excavate, remove crushed sections, and install new pipe using accepted materials and proper grading. Typical cases include mid‑block clay mains split by mature roots or older cast iron that crumbled.
Rapid assessment, temporary bypass pumping, and permits guarantee safe, lasting restoration.
Checklist for Homeowners After Root Removal
After root removal, the homeowner should confirm success with immediate post-repair testing and set a schedule for regular monitoring of flow and inspection.
The checklist should also list ongoing preventative measures such as scheduled chemical treatments, root barriers where appropriate, and routine camera inspections.
Clear reminders for documentation and prompt reporting of any recurrence complete the post-service plan.
Post-repair testing and monitoring steps
A concise checklist helps homeowners confirm that root removal repairs are sound and that the drain functions reliably; it outlines specific tests, monitoring intervals, and signs that require prompt follow-up with a plumber.
- Run water tests: check flow, gurgling, and backup in multiple fixtures.
- Inspect surrounding soil/surface for damp spots.
- Recamera inspection after 1–3 months if concerns persist.
- Log occurrences, dates, and any temporary fixes for plumber review.
Ongoing preventative actions and reminders
With post-repair tests completed and any immediate issues documented, homeowners should shift focus to routine actions that prevent root regrowth and protect the pipe investment.
Create a simple schedule:
- annual camera inspections,
- periodic mechanical or chemical treatments as recommended,
- maintain surface vegetation away from sewer lines,
- repair cracks promptly,
- keep records of service dates and findings, and
- contact a professional at first sign of recurring backups or slow drains.
Conclusion
Tree-root intrusion into drains is common and preventable; about 40% of older sewer failures are root-related, illustrating the scale of the problem and need for vigilance. Homeowners can often manage minor intrusions with snaking, manual extraction, or foam treatments, but persistent or recurring roots signal deeper issues requiring camera inspection, professional hydrojetting, or trenchless repairs. Early detection, regular maintenance, and coordinating with an arborist reduce long-term costs and preserve both pipes and trees.