How to Use a Gas Leak Detector: Step-by-Step Safety Tips and Best Practices
To effectively use a gas leak detector, start by ensuring it is warmed up, zeroed, and calibrated. This ensures accurate readings. Slowly scan areas around fittings, valves, and appliance connections, monitoring the numeric ppm or LEL readings and alarm thresholds. If you detect rising levels, promptly evacuate the area, turn off any ignition sources, ventilate if it’s safe, and contact your gas utility or emergency services. Regularly check the sensors, replace batteries, and schedule professional inspections to minimize false alarms and enhance safety. For more detailed techniques and model recommendations, keep reading.
Why Gas Leak Detection Matters for Home and Workplace Safety
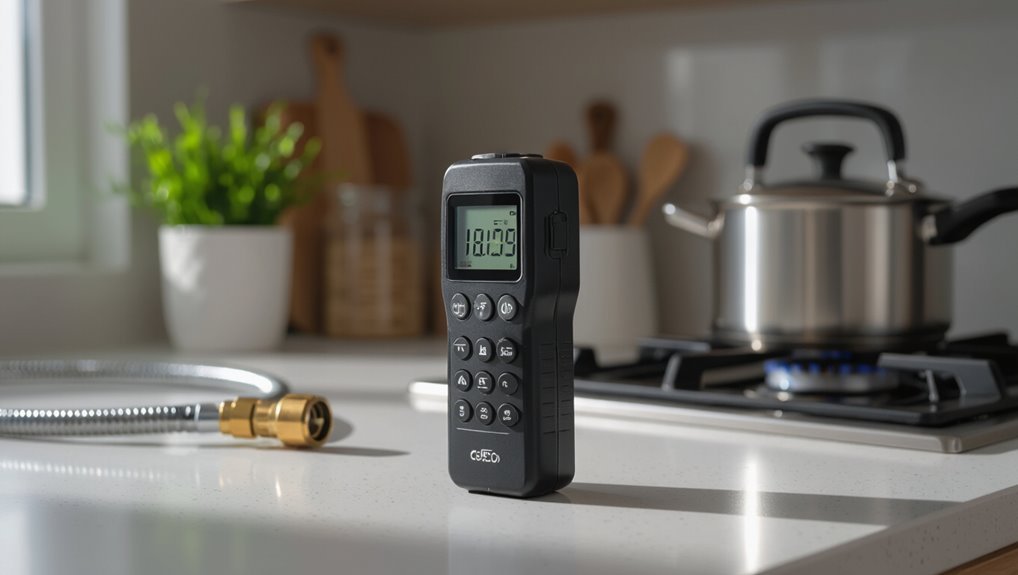
Gas leak detection is essential because common gases like natural gas, propane, methane, and carbon monoxide pose explosion, asphyxiation, and poisoning risks.
Observable signs such as unusual odors, hissing sounds, sudden headaches or nausea, and abnormal appliance behavior can indicate a leak that requires immediate attention.
Failure to detect leaks can lead to severe injury, property damage, and legal or insurance consequences for homeowners and employers.
Common gases to detect and their risks (natural gas, propane, methane, CO)
Because several different gases can leak into homes and workplaces, recognizing which are most common and understanding their risks is essential for safety planning.
Natural gas and methane are highly flammable; propane is heavier than air and pools in low areas.
Carbon monoxide is odorless, toxic, and can be fatal.
Instruction on how to use a gas leak detector helps identify sources and prioritize ventilation, evacuation, and professional repairs.
Signs of a gas leak: odors, sound, physical symptoms, appliance behavior
When a leak occurs, telltale signs often appear before concentrations reach dangerous levels: distinctive rotten-egg or chemical odors from added mercaptans, hissing or whistling near lines or appliances, unexplained headaches, nausea, dizziness, or eye irritation, and erratic appliance behavior such as pilot light outages or burners failing to ignite.
Prompt detection limits exposure, prevents ignition, and guides timely evacuation and professional response.
Legal and insurance implications of undetected gas leaks
Beyond immediate health and safety concerns, undetected leaks carry significant legal and insurance consequences for homeowners and employers.
Liability may arise from negligence, code violations, or failure to maintain equipment, triggering lawsuits or regulatory fines.
Insurers can deny claims if preventive measures were neglected.
Prompt detection, documented inspections, and adherence to codes reduce exposure, support claims, and demonstrate reasonable care.
Choosing the Right Gas Leak Detector
Selecting an appropriate gas leak detector requires comparing sensor technologies—catalytic bead, semiconductor, infrared, and electrochemical—each suited to different gases and environments.
The choice between portable handheld units and fixed installations depends on use case, mobility needs, and monitoring scope. Important specifications to weigh include sensitivity, response time, calibration requirements, and durability, with simpler, user-friendly features recommended for homeowners and more precise, rugged instruments for professionals.
Types of detectors by sensor technology (catalytic bead, semiconductor, infrared, electrochemical)
A range of sensor technologies—catalytic bead, semiconductor, infrared, and electrochemical—underpins most portable and fixed gas leak detectors, each offering distinct strengths and limitations for specific gases and environments.
Catalytic beads detect combustible hydrocarbons but require oxygen.
Semiconductor sensors are low-cost with limited selectivity.
Infrared sensors excel for hydrocarbons and CO2 with long life.
Electrochemical cells provide sensitive, selective toxic gas detection.
Portable handheld vs fixed/installed detectors
Having outlined the sensor technologies available, attention turns to whether a portable handheld unit or a fixed installed system best fits the application.
Portable detectors suit inspections, leak tracing, and temporary use; they offer mobility and rapid response.
Fixed systems provide continuous monitoring, automatic alarms, and integration with safety controls for high-risk or occupied spaces.
Selection depends on duty cycle and coverage needs.
Key specifications to compare
Several technical specifications determine whether a detector will perform reliably in a given environment: target gas range and sensitivity, response time, detection principle, cross-sensitivity, calibration requirements, and environmental tolerances such as temperature, humidity, and pressure.
Compare models by:
- Sensitivity and detection limits versus expected leak concentrations.
- Response time and recovery for transient leaks.
- Calibration interval, maintenance needs, and stated cross‑sensitivities.
Recommended detector features for homeowners vs professionals
Choosing between detectors for home use and professional work requires matching specifications to the user’s skills, exposure risk, and budget.
Home units favor simplicity, audible alerts, battery life, and affordability; professionals need fast response, adjustable sensitivity, data logging, and ruggedness.
Recommended features:
- Home: plug-and-play, low false-alarm rates, clear indicators.
- Pro: calibrated sensor, peak-hold, IP-rated casing.
- Shared: maintenance alerts, replaceable sensor modules.
Preparing to Use a Gas Leak Detector
Before testing, the user should secure the area by ensuring adequate ventilation, turning off potential ignition sources, and having a clear evacuation plan.
They should visually inspect appliances, piping, and connections for obvious signs of damage or corrosion that could indicate leak points.
Finally, the detector’s batteries, calibration, and built‑in self‑tests must be checked to confirm the instrument is operational and accurate.
Safety precautions before testing (ventilation, ignition sources off, evacuation plan)
Guarantee the area is made safe and accessible before operating a gas leak detector.
Verify ventilation by opening windows and activating exhaust fans to disperse gas.
Turn off all ignition sources—pilot lights, electrical switches, gas appliances—and avoid smoking.
Establish and communicate an evacuation plan with clear exits and meeting points.
Use caution approaching confined spaces; evacuate if concentrations are suspected high.
Inspecting the environment and potential leak points (appliances, piping, connections)
One initial task is to visually and physically survey all potential leak points—gas appliances, pipe runs, fittings, valves, and connection joints—so that testing can be focused and efficient.
Note corrosion, loose fittings, odor traces, hissing sounds, and accumulated debris.
Map accessible routes, isolate suspect areas, shut off nearby isolation valves when safe, and mark locations for targeted detector scanning and follow-up repairs.
Checking detector batteries, calibration, and self-test procedures
Several quick checks guarantee the detector will perform reliably: verify fresh batteries or a full charge, confirm calibration date and span accuracy, and run the unit’s built-in self-test sequence.
Inspect battery contacts for corrosion, replace cells per manufacturer guidelines, and log replacement dates.
If self-test fails or calibration is out of range, remove the device from service and arrange professional recalibration or replacement immediately.
Step-by-Step Guide to Using a Handheld Gas Leak Detector
The handheld detector is powered on and allowed to warm up following the manufacturer’s startup procedure before taking a baseline reading and adjusting sensitivity.
The operator then performs slow, systematic scans of indoor spaces, focusing on fittings, valves, joints, and appliance connections while testing suspect areas closely.
Readings and alarm levels are monitored and interpreted to determine leak presence, size, and required response.
Powering up and warm-up: correct startup procedures
Powering the handheld detector begins with confirming battery charge or connection to an appropriate power source, since proper startup is essential for reliable readings.
The operator then switches the unit on, observes indicator lights and self-test routines, and allows the specified warm-up interval.
Only proceed when diagnostics report normal status; avoid using the detector during warm-up or when fault indicators persist.
Baseline reading and sensitivity adjustment
Before beginning a sweep, the operator records a clean-air baseline and sets detector sensitivity so readings reflect real-world leak levels rather than background noise.
The technician holds the sensor in ambient, notes zero or baseline value, then adjusts alarm threshold and gain per manufacturer guidance.
Verification uses a known test gas or calibration gas to confirm response without altering planned inspection patterns.
Slow, systematic scanning technique for indoor spaces
Begin each sweep slowly, moving the detector at a steady pace of about 1–2 inches per second so the sensor can register changes and the operator can interpret trends.
Scan methodically in overlapping vertical and horizontal passes, covering floor level, mid-height, and ceiling areas.
Pause briefly at suspicious spots, note directional trends, and maintain consistent sensor orientation.
Record locations and repeat scans to confirm readings.
How to test fittings, valves, joints, and appliance connections
Inspect fittings, valves, joints, and appliance connections methodically, moving the handheld detector tip along each component to pinpoint leaks.
Pause at threaded connections, soldered joints, hose clamps, and regulator interfaces. Maintain steady, close proximity without touching hot surfaces.
Repeat checks while slightly adjusting angles and pressure. Note persistent responses for targeted repair or professional service; document locations and severity for follow-up.
Interpreting readings and alarm levels
After checking fittings, valves, joints, and connections, the user must learn to interpret the detector’s output to distinguish false positives from real leaks.
Read numeric ppm or LEL values, note audible/visual alarm thresholds, and watch trends rather than single spikes.
Calibrate regularly, account for background gas sources, and follow manufacturer alarm categories (warning, danger) to prioritize responses and evacuations.
Confirming a leak with secondary methods (soapy water test, combustion odor verification)
Once a detector indicates a probable leak, the operator should confirm it with secondary methods such as a soapy water test and controlled combustion-odor verification to avoid acting on false positives.
Apply soapy solution to fittings; bubbles indicate escaping gas.
For combustion-odor verification, cautiously check for characteristic smell without ignition.
Document findings, mark affected areas, ventilate, and initiate repair or emergency response as required.
Using Fixed or Installed Gas Detectors
Guidance on fixed gas detectors covers correct placement for specific gases, including recommended installation heights and distances from appliances and vents.
It also addresses routine maintenance, calibration intervals, and sensor replacement schedules to guarantee reliable operation.
Finally, consideration is given to linking detectors with home alarm systems and automatic gas shutoff controls for coordinated emergency response.
Proper placement guidelines for different gases
Proper placement of fixed gas detectors depends on the physical properties of the target gas—whether it is lighter than air, heavier than air, or tends to form stratified layers—so sensors must be mounted where gas is most likely to accumulate or flow.
Install detectors considering ventilation patterns, enclosed voids, ducts, and likely leak sources; select sensor types compatible with concentration ranges and environmental conditions to guarantee timely detection.
Installation height and proximity to appliances and vents
The installation height and distance of fixed gas detectors relative to appliances and vents should align with the gas’s buoyancy and the room’s airflow patterns to guarantee fastest detection; lighter-than-air gases call for ceiling- or high-wall-mounted sensors near potential leak sources and return vents.
Meanwhile, heavier-than-air gases require low-level placement adjacent to floor drains, appliance connections, and exhaust inlets.
Mount detectors close enough to detect leaks before dispersion, avoiding obstructed airflow.
Regular maintenance, calibration, and sensor replacement schedules
Establishing a routine for maintenance, calibration, and sensor replacement secures fixed gas detectors remain reliable and sensitive throughout their service life.
Owners should follow manufacturer schedules: periodic visual inspections, sensor function checks, and annual or semiannual calibrations.
Replace sensors per specified lifespan or after failed calibrations.
Keep maintenance logs, promptly address faults, and use qualified technicians for calibration and sensor changes to guarantee continued accuracy.
Integrating detectors with home alarm and shutoff systems
After maintenance and calibration routines are in place, fixed gas detectors can be integrated with home alarm panels and automatic shutoff systems to provide coordinated responses to leaks.
Integration enables immediate alerts, activates ventilation or fuel shutoff valves, and notifies monitoring services.
Proper wiring, compatibility checks, and professional installation guarantee reliable interoperation and minimize false trips while complying with local codes and manufacturer’s instructions.
What to Do When a Leak Is Detected
Upon detection of a leak, occupants should evacuate immediately, avoid creating sparks or using electrical devices, and, if safe, ventilate the area.
Emergency services and the gas utility should be contacted right away, with temporary mitigation (such as shutting off the gas supply) performed only by someone trained or directed to do so.
The incident and any actions taken should be documented for safety records and insurance purposes.
Immediate actions for occupants (evacuate, avoid sparks, ventilate)
If a gas leak is detected, occupants should immediately leave the building, moving upwind and away from the structure to a safe distance.
They should instruct others to evacuate without creating sparks from electronic devices, lighters, or switches.
Once outside, they should avoid reentry, keep clear of ignition sources, and, if safe, open windows and doors briefly from outside to ventilate remaining gas before professionals arrive.
When to call emergency services and utility providers
When a gas odor is confirmed or a detector indicates a persistent alarm, occupants should promptly notify emergency services and the gas utility to guarantee a coordinated, professional response.
Emergency dispatch will assess immediate public-safety needs while the utility can isolate supply and dispatch trained technicians.
Provide location, gas type if known, and access details; follow dispatcher instructions, and do not re-enter until cleared by authorities.
Temporary mitigation steps until professionals arrive
After contacting emergency services and the gas company, occupants should take immediate steps to reduce ignition sources and limit gas accumulation while awaiting professionals.
Ventilate by opening doors and windows if safe; evacuate everyone to fresh air upwind; avoid operating electrical devices, open flames, or phones inside the building; shut the gas supply at the meter only if trained; keep bystanders clear.
Documenting the event for safety and insurance purposes
Documenting the leak promptly preserves essential details for safety reviews and insurance claims.
The responder records date, time, detector readings, affected areas, actions taken, and witness names.
Photographs and video of damage, appliances, and meters are captured.
Copies of reports, contractor estimates, and repair invoices are retained.
A concise written chronology is prepared and shared with emergency responders, utility companies, and insurers.
Common Mistakes and How to Avoid Them
Common errors with gas leak detectors include improper use, misinterpreting false positives or negatives, and depending solely on instrument readings without visual or olfactory checks.
Failure to perform regular maintenance, calibration, and battery checks further increases the risk of missing a leak or reacting to a false alarm.
Addressing these issues requires correct operating technique, routine device care, and corroborating detector output with direct observations.
Misusing detectors or misreading false positives/negatives
Misinterpreting readings or operating a gas leak detector incorrectly can turn a lifesaving tool into a source of confusion.
Users may ignore calibration, use wrong sensor modes, or hold the device improperly, causing false negatives or positives. Environmental factors, contamination, low batteries, and expired sensors also skew results.
Regular calibration, proper handling, and following manufacturer diagnostics prevent misreads and guarantee reliable detection.
Overreliance on detectors without visual/olfactory checks
Even with properly calibrated and well-maintained gas detectors, relying solely on instrument readouts can give a false sense of security; simple visual and olfactory checks remain important layers of assessment.
Observers should inspect fittings, listen for hissing, and detect odors where applicable.
Combining sensory observations with detector data improves situational awareness, helps identify intermittent leaks, and prompts timely evacuation or shutdown when readings are ambiguous.
Neglecting maintenance, calibration, and battery checks
Failing to perform regular maintenance, calibration, and battery checks undermines a detector’s reliability and can leave leaks unnoticed.
Users should follow manufacturer schedules for sensor replacement and calibration, record service dates, and use fresh batteries before inspections.
Routine functional tests verify response.
Neglecting these tasks risks false negatives, equipment failure, and delayed hazard detection; proactive upkeep preserves accuracy and safety.
Best Practices for Ongoing Gas Safety
A concise routine inspection checklist helps homeowners verify detectors, check batteries, and inspect gas appliances for signs of leaks.
Landlords and businesses should follow professional inspection and testing intervals recommended by local codes and service providers.
Household members and staff require brief training on detector operation, alarm response, and evacuation procedures.
Routine inspection checklist for homeowners
Homeowners should perform a brief, regular inspection of gas appliances, lines, and vents to catch issues early and maintain safety.
- Check for odors, hissing, corrosion, loose fittings, and damaged hoses.
- Verify proper ventilation, clear flues, and unobstructed vents.
- Test detectors, replace batteries, note unusual appliance behavior, and document findings for prompt repair.
Professional inspection and testing intervals for landlords and businesses
After completing regular homeowner checks, landlords and businesses should adopt a more rigorous inspection and testing schedule to meet higher occupancy risks and regulatory responsibilities.
Professional gas safety engineers must perform annual inspections for residential rentals and more frequent checks for multiunit or high-risk commercial properties.
Document results, schedule remedial repairs immediately, and comply with local codes and certification intervals to maintain legal and occupant safety.
Training household members or staff on detector use and emergency response
Teach household members or staff to recognize detector alerts, respond calmly, and execute a preplanned escape and notification routine.
Routine training includes alarm recognition, immediate evacuation paths, shutting off gas only if safe, calling emergency services from a safe location, and notifying building management.
Regular drills, refresher sessions, clear role assignments, and accessible written instructions reinforce readiness and reduce panic during actual incidents.
Comparing Popular Gas Leak Detector Models and Use Cases
How do different gas leak detectors stack up for specific tasks and environments? A concise comparison highlights sensor type, sensitivity, portability and ideal settings—home, workshop, or industrial. Users weigh features against environment and detection needs.
| Model type | Strength | Typical use |
|---|---|---|
| Semiconductor | Affordable | Home, DIY |
| PID | Highly sensitive | Labs, industrial |
| Infrared | Selective, stable | Gas utilities, long-term monitoring |
HH3: Quick model-match recommendations for budget, DIY enthusiast, and professional users
A concise match of detector types to user needs helps streamline purchases: budget buyers prioritize affordability and basic combustible-gas detection (semiconductor handhelds).
DIY enthusiasts benefit from mid-range models with better sensitivity and portability (digital combustible/dual-sensor units).
Professionals require calibrated, industry-grade devices (PID or infrared instruments) matched to target gases and regulatory standards.
Recommendations: choose battery life, sensor replaceability, response time, and certification level accordingly.
Troubleshooting Detector Performance Issues
The section covers common performance issues such as false alarms and gradual sensor drift, identifying symptoms and likely causes.
It outlines clear steps for recalibration, routine cleaning, and when sensor replacement is required.
Guidance is also provided on end-of-life indicators and criteria for retiring and replacing an old detector.
Addressing false alarms and sensor drift
Monitorers should distinguish between transient false alarms and gradual sensor drift to maintain reliable gas detection.
Transient alarms often follow environmental disturbances or brief contamination and warrant immediate inspection and event logging.
Sensor drift appears as slowly increasing baseline readings; it requires trend monitoring, comparison with reference measurements, and documented thresholds for action.
Clear procedures reduce unnecessary evacuations and preserve detector credibility.
Steps for recalibration, cleaning, and sensor replacement
Begin by verifying detector status through a structured checklist that prioritizes safety, documentation, and reference comparisons.
Calibrate using manufacturer procedures and certified gas cylinders; record pre- and post-calibration readings.
Clean housing and sensor ports with approved, non-corrosive agents.
Replace sensors per manufacturer guidance when calibration fails or sensitivity degrades.
Perform functional checks and log all maintenance for traceability and compliance.
When to retire and replace an old detector
When performance checks, calibration attempts, and sensor replacements no longer restore reliable readings, the detector should be retired and replaced to maintain safety and compliance.
Replace units showing intermittent alarms, sluggish response, sensor drift beyond specified limits, or persistent faults after troubleshooting.
Consider device age relative to manufacturer lifespan, exposure history, and failed self-tests.
Document replacement and update maintenance records promptly.
Safety Resources, Standards, and Further Reading
The article points readers to applicable codes and standards, such as NFPA guidelines and pertinent local regulations, that govern gas detection and response.
It notes where to obtain professional assistance and certified testing services for complex incidents or compliance verification.
Links to manufacturer manuals, authorized calibration services, and other authoritative resources are provided for proper operation and maintenance.
Relevant codes and standards (NFPA, local regulations)
Codes and standards provide the legal and technical framework for gas detection, defining device performance, installation, calibration, and response procedures that operators must follow.
Key references include NFPA 54, NFPA 720, EPA guidelines, and applicable local building and fire codes.
Compliance guarantees safety, legal conformity, inspection readiness, and documentation practices; operators should review updates and adopt mandated testing intervals and recordkeeping.
Where to get professional help and certified testing services
Many homeowners and facility managers rely on certified professionals for gas leak detection, installation, and periodic testing to guarantee instruments meet NFPA, EPA, and local requirements.
Certified HVAC contractors, utility company technicians, and third‑party industrial hygiene firms provide on‑site surveys, leak quantification, and written reports.
Seek providers with relevant certifications, insurance, references, and adherence to local permitting and reporting procedures.
Links to manufacturer manuals and calibration services
When seeking reliable guidance and maintenance, users should consult manufacturer manuals and certified calibration services to guarantee detectors operate within specified sensitivity and safety tolerances.
Manufacturer documentation provides model-specific procedures, while accredited calibration labs confirm accuracy and traceability.
Online links and contact information expedite support and parts ordering.
- Manufacturer manuals and firmware updates
- Accredited calibration services and certificates
- Official support and parts links
Conclusion
Gas leak detection saves lives and property by catching hazards early; could anyone afford to ignore that simple truth? The reader is urged to choose appropriate detectors, follow manufacturer steps, and prioritize ventilation, evacuation, and professional help when alarms sound. Regular testing, calibration, and adherence to standards guarantee reliable performance. With informed use and timely response, gas risks are considerably reduced, fostering safer homes and workplaces for all.