
How to Fix Water Pressure in an Apartment: Quick DIY Checks and Permanent Solutions
To fix low water pressure in your apartment, start by testing various fixtures to determine if the issue is isolated or affects the entire building. Ensure shut-off valves are fully open, check for leaks or corrosion in visible pipes, and clean aerators or showerheads to remove mineral buildup. If possible, measure the water pressure with a gauge; anything under 40 psi is considered low. Additionally, flush your water heater and reset any accessible pressure reducing valves (PRVs). For building-wide problems, report them to your management, and for more complex repairs, contact a licensed plumber. More detailed checks and permanent solutions are discussed below.
What to Do First When Your Apartment Has Low Water Pressure
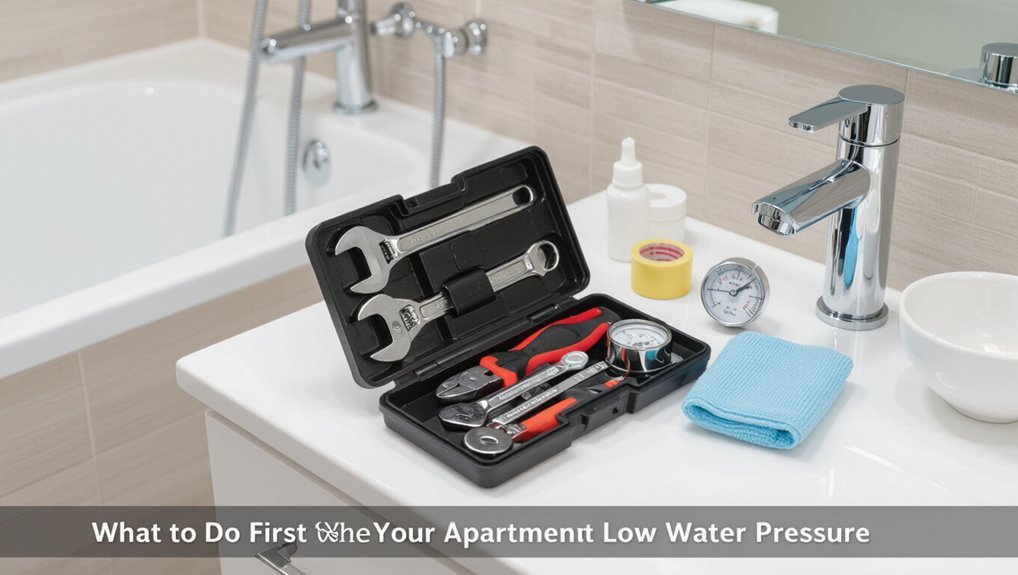
Before any fixes are attempted, basic safety checks—such as turning off electrical devices near leaks and confirming that shut-off valves operate—should be completed.
Next, the scope of the problem should be established by testing multiple fixtures to see if low pressure is isolated or building-wide.
Finally, a quick pressure check with a simple gauge or a pressure-sensing hose adapter will confirm numeric pressure (normal residential range ~40–60 psi) for diagnostic next steps.
Quick safety checks before you start
A few quick safety checks can prevent accidents and hidden damage when addressing low water pressure in an apartment.
Inspect visible pipes for leaks, corrosion, or damp spots.
Turn off valves before disassembly and locate the main shutoff.
Confirm electrical outlets near plumbing are dry.
Wear gloves and eye protection.
Read building rules; notify management if work affects other units.
How to determine if low pressure affects whole apartment or single fixture
With safety checks complete, the next step is determining whether low water pressure is isolated to one fixture or affects the entire apartment.
Test multiple taps and fixtures simultaneously—kitchen, bathroom sink, shower, and toilet. Note if cold and hot differ.
Ask neighbors or building management about shared issues. Consistent low flow everywhere suggests building or supply problems; single-fixture weakness points to local valve, aerator, or pipe issues.
How to measure your water pressure quickly (tools and acceptable ranges)
Measure water pressure quickly using a simple pressure gauge or a faucet-mounted tester to get an objective reading in psi (pounds per square inch) or bar.
Attach to an exterior hose bib or bathroom faucet, open fully, record static and running pressures.
Acceptable residential range: 40–60 psi (2.8–4.1 bar).
Below 40 psi indicates low pressure; above 80 psi risks plumbing damage.
Common Causes of Low Water Pressure in Apartments
Low water pressure in an apartment can stem from issues beyond the unit, such as building-wide supply problems or municipal interruptions, or from building-level actions like a partially closed main shutoff or ongoing maintenance.
Internal causes include corroded or clogged pipes and fixtures, a malfunctioning pressure-reducing valve (PRV), and blockages in aerators, showerheads, or supply lines.
Identifying whether the problem is external, building-wide, or confined to the apartment guides the next diagnostic and repair steps.
Building-wide supply issues and municipal problems
When an entire apartment building experiences weak water flow, the root cause often lies beyond individual units in the form of building-wide supply issues or municipal system problems.
Aging mains, scheduled maintenance, broken pumps, or local pressure-zone adjustments can all reduce pressure for every resident.
Management should confirm utility notifications, inspect risers and booster systems, and coordinate with the water authority for repairs or temporary mitigations.
Main shutoff valve partially closed or building maintenance work
Check the main shutoff valve and inquire about any ongoing building maintenance, since a partially closed valve or active work on risers and pumps is a common, easily overlooked cause of reduced flow in individual units.
Request building management confirmation of valve positions and scheduled work.
Temporary closures, pressure-reducing valve adjustments, or pump testing can explain sudden drops; document timing and request restoration estimates.
Corroded or clogged pipes and fixtures
If building valves and pumps are confirmed to be functioning, attention should turn to the apartment’s own plumbing: corrosion, mineral buildup, and debris can narrow pipes and obstruct fixtures, gradually reducing flow.
Inspected faucets, showerheads, and aerators often reveal scale or sediment; galvanized or older iron pipes may corrode internally.
Cleaning, replacing affected fixtures, or re-piping sections restores capacity and improves pressure.
Faulty pressure-reducing valve (PRV) or regulator
Inspect the apartment’s pressure-reducing valve (PRV) and regulator because a malfunctioning unit can lower or fluctuate water pressure despite otherwise healthy supply lines.
A stuck, worn or improperly adjusted PRV reduces flow to fixtures. Testing with a pressure gauge at an accessible outlet confirms output.
Replacement or professional adjustment restores proper setpoint; homeowners should shut main water before servicing.
Clogged aerators, showerheads, and supply lines
Mineral buildup and debris commonly restrict flow at the point of use: aerators, showerheads, and the short supply lines feeding fixtures can become partially or fully blocked over time, reducing perceived water pressure even when the building supply is adequate.
Routine removal and soaking of aerators or showerheads in vinegar, plus flushing or replacing flexible supply lines, often restores flow; persistent blockage may require valve or plumbing inspection.
Water heater issues affecting hot water pressure
Check the water heater when hot water pressure is low, because problems inside the tank or its fittings often reduce flow only on the hot side.
Inspect the shutoff valve, inlet/outlet connections, and pressure-relief valve for restrictions or partial closure.
Sediment buildup, corroded dip tubes, or a failing internal bypass can restrict hot flow; flushing and targeted repairs often restore proper pressure.
Shared-line usage and time-of-day variability
Frequently, low water pressure in an apartment stems from shared-line usage and time-of-day variability: multiple units drawing water simultaneously during peak hours—morning and evening—can greatly reduce flow at individual fixtures.
Tenants may notice stronger pressure late night. Building plumbing capacity, pipe diameter, and pressure regulator settings determine effect.
Coordinating usage, reporting chronic drops to management, or installing a booster where allowed can help.
Quick DIY Checks You Can Do Right Now
A quick series of simple checks can help pinpoint and often resolve low pressure without calling a plumber.
They should test multiple faucets to see if the issue is isolated, remove and clean aerators or showerheads, and verify under‑sink and main apartment shutoff valves are fully open.
If visible, the pressure‑reducing valve can be inspected or reset, and hot‑water problems can be further investigated by flushing the water heater to remove sediment.
Test multiple faucets to isolate the problem
Testing multiple faucets helps pinpoint whether low water pressure is localized or building-wide.
The occupant should open cold and hot taps in kitchen, bathroom, and any utility sinks, noting flow strength and whether issues affect hot, cold, or both.
Compare results with neighbors if possible. Consistent low flow throughout indicates building or supply issues; isolated problems suggest fixtures or unit plumbing.
Inspect and clean faucet aerators and showerheads
Unscrew aerators and showerheads to check for mineral buildup or debris that restricts flow.
Remove screens and brushes; soak parts in vinegar to dissolve deposits. Rinse, reassemble, test flow; replace damaged components.
If low pressure persists, proceed to other checks.
- Remove aerator
- Clean screen
- Soak in vinegar
- Reassemble and test
Check under-sink shutoff valves and main apartment valve
Check the under-sink shutoff valves and the apartment’s main water valve to confirm they are fully open and functioning; partially closed valves are a common, simple cause of low pressure.
Visually inspect valves for corrosion, leaks, or obvious obstructions. Turn each valve clockwise then counterclockwise gently to verify movement.
If a valve is stuck or leaks, contact maintenance or a plumber for repair or replacement.
Reset or inspect a visible pressure-reducing valve
Locate the apartment’s visible pressure-reducing valve (PRV) — typically found near the main supply line — and visually inspect it for obvious signs of damage, corrosion, or loose fittings before attempting any adjustments.
Confirm system pressure with a gauge, note the current setting, then carefully turn the adjustment screw or nut in small increments to raise or lower pressure.
Recheck for leaks and stability.
Flush your water heater to remove sediment (hot water-specific check)
Flushing the water heater removes accumulated sediment that can reduce hot-water pressure and shorten the tank’s lifespan.
A user turns off power/gas, shuts the cold inlet, attaches a hose to the drain valve, opens a hot faucet and drains until clear.
Repeat annually for peak flow.
Caution: hot water and local codes may require a professional for tankless or complex systems.
Ask neighbors and contact building management checklist
After ruling out sediment buildup in the water heater, the next practical step is to determine whether low pressure is isolated to one unit or affects multiple apartments.
The resident should follow a concise checklist and notify building staff if needed.
- Ask neighbors about their water pressure.
- Note times and fixtures affected.
- Check building notices for plumbing work.
- Contact building management with findings.
Step-by-Step Fixes for Specific Problems
The next section provides concise, practical procedures for common pressure problems, covering aerator and showerhead cleaning/replacement, shutoff and supply stop operation, PRV checks and temporary adjustments, safe flushing of lines and fixtures, and basic supply-line clog clearing.
Each item lists required tools, step-by-step actions, and simple safety notes so a tenant can proceed with confidence. Complex or risky issues are flagged for professional service.
How to clean and replace aerators and showerheads (tools and steps)
Begin by gathering basic tools and replacement parts: an adjustable wrench or pliers with a cloth to protect finishes, a small brush or old toothbrush, vinegar or a commercial descaling solution, and replacement aerators or a new showerhead if needed.
Steps:
- Remove aerator or showerhead carefully.
- Soak parts in vinegar; scrub deposits.
- Replace damaged screens or gaskets.
- Reinstall and test flow.
How to fully open and test shutoff valves and supply stops
Cleaning or replacing aerators and showerheads often reveals whether low flow is caused by fixtures or by upstream controls.
If flow remains weak after those steps, attention turns to shutoff valves and supply stops. Locate accessible stops (under sinks, behind toilets), fully open by turning counterclockwise with appropriate wrench or screwdriver, then test flow.
If still reduced, partially close and reopen to clear debris, note leaks, and consider replacement.
How to diagnose and temporarily adjust a PRV (when accessible)
Often overlooked, a pressure-reducing valve (PRV) can be a common cause of low apartment water pressure and, when accessible, can be diagnosed and temporarily adjusted to confirm its role.
Inspect for visible damage and listen for unusual noise.
With a system pressure gauge, slowly turn the adjustment nut clockwise to raise pressure, counterclockwise to lower.
Recheck pressure and restore original setting if needed.
How to flush supply lines and fixtures safely
After confirming the PRV is not the source of reduced flow, attention can shift to flushing supply lines and fixtures to remove sediment, mineral buildup, or trapped air that restricts water movement.
Isolate affected fixtures, close downstream valves, open cold and hot taps fully, and briefly run water to expel debris.
Reattach aerators/screens after cleaning; inspect for leaks and restore valves gradually.
How to clear minor clogs in supply lines without professional help
Start by identifying the affected fixture and shutting off its shutoff valves to limit water while work proceeds.
Disconnect flexible supply lines and inspect for debris, replace worn washers.
Use a small brush, pipe cleaner, or compressed air to dislodge buildup.
Reassemble with thread sealant, slowly reopen valves, and test for flow and leaks.
If resistance persists, stop and consult a plumber.
When to Call Building Management or a Professional Plumber
If low water pressure affects multiple units or coincides with notices from the utility, it likely indicates a building-wide or municipal problem that tenants should report promptly.
Issues tied to common areas, main lines, or fixtures covered by the lease or local housing codes require building management or HOA intervention.
Any repair involving main shutoffs, concealed piping, gas-water connections, or code-regulated installations should be handled by a licensed plumber.
Signs that the issue is building-wide or municipal
When multiple units report low flow or no hot water at the same time, or water pressure drops in stairwells and common-area faucets, the problem likely stems from the building’s supply, risers, or municipal service rather than an individual apartment’s fixtures;
persistent pressure loss during specific times of day, visible work on nearby mains, or notices from the utility company further indicate a broader issue that warrants contacting building management or the water provider before arranging a private plumber.
Tenants should compare neighbors’ experiences, check building notices, and report collective symptoms so management can coordinate inspection, pressure testing, or contact the utility.
Problems that require landlord/HOA intervention (legal and lease considerations)
Signs that a pressure issue affects more than a single unit should prompt consideration of responsibilities and legal obligations before arranging repairs.
Tenants should notify landlords/HOAs in writing when common systems, shared risers, or multiple complaints indicate building responsibility.
Lease terms, local habitability laws, and notice procedures determine who pays and arranges repairs.
Document communication and avoid unilateral fixes that may breach lease or warranty rules.
Plumbing repairs that need a licensed professional
Call a licensed plumber or building management for pressure problems that involve complex systems, safety risks, or potential code violations.
They assess hidden leaks, main line issues, or building-wide pressure regulators. Recommended actions include:
- Diagnosing main supply or riser failures.
- Replacing pressure-reducing valves.
- Repairing gas- or water-related safety hazards.
- Ensuring work meets local plumbing codes and permits.
Permanent Upgrades and Long-Term Solutions
The discussion shifts to permanent upgrades and long-term fixes that address root causes of low pressure rather than temporary workarounds.
Options include replacing a faulty pressure-reducing valve or installing a booster pump (with trade-offs in cost, maintenance, and noise), replacing corroded galvanized pipes and fittings, or adding point-of-use boosters or pressure-balanced fixtures.
Decisions should also weigh filtration versus treatment solutions when sediment or scale is reducing flow.
Replacing a faulty PRV or installing a booster pump (pros, cons, cost range)
Consider replacing a malfunctioning pressure-reducing valve (PRV) or installing a booster pump when short-term fixes fail and consistent low pressure persists; each option changes system behavior, costs, and maintenance requirements differently.
PRV: simple, lower cost, minimal maintenance
Pump: stronger, higher cost, needs power and service
| Option | Pros | Cons |
|---|---|---|
| PRV | Affordable | Limited boost |
| Pump | Powerful | Expensive |
Replacing old galvanized pipes or corroded fittings
Replace corroded galvanized pipes and worn fittings when recurring low pressure, discoloration, leaks, or frequent repairs indicate systemic deterioration; doing so restores full flow capacity, reduces failure risk, and provides a durable foundation for other upgrades like PRVs or boosters.
A professional assessment identifies sections to replace, selects appropriate materials (copper, PEX, CPVC), and guarantees code-compliant joints, isolation valves, and minimal disruption.
Installing point-of-use pressure boosters or pressure-balanced fixtures
Install point-of-use pressure boosters or switch to pressure-balanced fixtures to address localized low flow without overhauling building-wide plumbing.
Boosters (under-sink or inline) raise flow at specific outlets, require electrical or pump selection, and may need a pressure relief or check valve.
Pressure-balanced valves stabilize shower temperature and reduce flow variance.
Both options are cost-effective, targeted, and reversible upgrades.
Water filtration vs. treatment for sediment-related pressure loss
When sediment buildup progressively reduces flow across multiple fixtures, distinguishing between filtration and treatment becomes the key to a durable solution:
Filtration captures particles at entry with sediment or cartridge filters, protecting valves and aerators; treatment addresses source issues—softening, sequestration, or micron-scale media to alter chemistry and prevent ongoing deposits.
Choose based on particle size, water source, maintenance capacity, and long-term cost.
Costs, Permits, and Who Pays in an Apartment Building
Typical cost ranges for common fixes and upgrades are summarized to help weigh budget options from simple aerator replacements to pump installation.
Major changes may require permits and building approval, including documentation of code compliance and contractor licensing.
Lease terms and local landlord-tenant rules determine who pays for repairs versus upgrades, so responsibility should be confirmed before work begins.
Typical cost ranges for common fixes and upgrades
Costs for common water-pressure fixes and upgrades in an apartment vary widely depending on scope, building access, and whether work affects shared plumbing. Typical ranges: DIY diverters or aerators $5–$50; new fixtures $100–$400; pressure regulator replacement $200–$800; partial repipe $800–$2,500; whole-unit upgrades $2,500–$8,000.
| Fix | Cost low | Cost high |
|---|---|---|
| Aerator | $5 | $50 |
| Fixture | $100 | $400 |
| Regulator | $200 | $800 |
| Partial repipe | $800 | $2,500 |
| Unit upgrade | $2,500 | $8,000 |
Permitting and building approval for major changes
After outlining typical price bands for fixtures, regulators, and repiping, attention turns to the approvals and financial responsibility that govern larger plumbing work in multi-unit buildings.
Major alterations often require municipal permits, code inspections, and condominium or co-op board sign-off. Costs may be shared per governing documents; contractors typically itemize permit fees.
Early verification of rules prevents delays and unexpected assessments.
Lease and landlord responsibility guidelines
When plumbing issues arise in an apartment building, responsibility for repairs and permits depends on the lease terms, local housing codes, and the building’s ownership structure.
Landlords generally handle repairs to maintain habitability while tenants are responsible for damage they cause.
Lease clauses, municipal statutes, and condo or co-op rules determine cost allocation, required permits, and timelines.
Documented communication and receipts protect both parties.
Preventive Maintenance and Simple Habits to Maintain Good Pressure
A basic preventive routine helps sustain good apartment water pressure through simple, regular actions.
This includes scheduling fixture cleanings, flushing the water heater annually, and monitoring pressure to catch early warning signs.
Tenants should also document recurring problems and report them clearly to building management.
Regular fixture cleaning schedule
Establishing a regular fixture cleaning schedule prevents buildup that restricts flow and causes gradual pressure loss.
Fixtures, aerators, and showerheads should be inspected and cleaned on a routine. A concise checklist helps maintain consistent pressure.
- Monthly visual inspection
- Remove and soak aerators
- Scrub showerhead nozzles
- Record dates and results
When and how to flush your water heater annually
Because sediment gradually accumulates in most water heaters and reduces efficiency and flow over time, it should be flushed once a year to preserve pressure and extend the unit’s life.
Turn off power/gas, shut the cold inlet, attach a hose to the drain valve, open a hot tap, drain until clear, close valve, refill, restore power/gas, and check for leaks.
Monitoring pressure and noticing early warning signs
While routine checks and timely repairs address many problems, monitoring water pressure and spotting early warning signs lets residents prevent most service interruptions and costly damage.
Residents should note drops, surges, sputtering faucets, discolored water, or unusual noises.
Regularly record PSI readings with a gauge, inspect visible pipes and fixtures for leaks or corrosion, and act promptly on persistent deviations to avoid bigger failures.
Communicating recurring issues to building management effectively
Report recurring water-pressure problems to building management clearly and promptly to guarantee they are documented and addressed before they escalate.
Tenants should record dates, times, affected fixtures, and any patterns, plus photos or short videos.
Include prior DIY steps taken.
Submit concise written requests via the building’s preferred channel and follow up if no response.
Maintain copies of all correspondence for accountability and escalation.
Troubleshooting Scenarios and Solutions
The section outlines clear diagnostic steps for specific problems: low hot but normal cold pressure, low pressure at a single fixture, intermittent drops, and sudden declines after maintenance.
It explains how to perform stepwise checks, targeted fixes like aerator or valve work, and how to record timing and conditions to identify patterns.
It also lists immediate actions to take after maintenance to restore service or isolate the fault.
Low hot water pressure but normal cold stepwise diagnosis
Begin by confirming the symptom set: cold water exhibits normal pressure throughout the apartment while hot water is weak at multiple fixtures or only at specific outlets.
Check heater output and temperature; inspect supply valves and mixing valves for partial closure or failure.
Flush the water heater for sediment, test pressure at heater outlet, examine any inline anti-scald devices, then escalate to landlord or plumber if issue persists.
Low pressure in only one fixture targeted fixes
Diagnose single-fixture low pressure by isolating local components and testing systematically:
check the faucet aerator and showerhead for mineral buildup,
inspect the cartridge or valve stem for debris or wear,
verify supply shutoff valves under the sink are fully open,
and confirm flexible supply lines are not kinked or partially collapsed.
Replace clogged aerators,
clean or swap cartridges,
tighten connections,
and change damaged supply lines to restore flow.
Intermittent low pressure how to track and document incidents
After checking fixtures and supply components for a persistent low-pressure issue, attention should shift to intermittent drops that occur sporadically.
Log each incident with date, time, duration, affected fixtures, and concurrent water usage (appliances, neighbors).
Note weather, building work, and valve positions.
Use a pressure gauge or flow meter when possible.
Share records with building management or a plumber for pattern analysis.
Sudden pressure drop after maintenance immediate actions
When water pressure falls suddenly following maintenance, the occupant should immediately check whether valves were fully reopened and whether visible supply lines or fixtures show signs of recent work or disturbance.
Next, inspect shutoff and isolation valves, bleed air from faucets, and confirm building-wide notices about system work.
If pressure remains low, document observations, contact maintenance or the plumber, and avoid using appliances until resolved.
Tools, Parts, and Resources to Keep Handy
A compact kit of wrenches, pliers, pipe tape, and a basin wrench equips a resident to handle most pressure-related repairs.
Stocking common replacement parts—pressure-reducing valves, washers, cartridges, and O-rings—along with guidance on size and material choices prevents mismatches.
A digital pressure gauge, a few trusted apps for local water reports and plumbing diagrams, and manufacturer installation guides complete the resource list.
Essential tools for DIY pressure fixes
Tools and a small stock of common replacement parts form the backbone of any effective DIY water pressure repair kit.
Essential, compact items enable fast diagnosis and fixes without landlord delays.
- Adjustable wrench, pliers, basin wrench
- Screwdrivers (flat and Phillips), tape measure
- Pressure gauge and Teflon tape
- Bucket, cloths, flashlight for access and cleanup
Common replacement parts and how to choose them
Common replacement parts for apartment water-pressure issues focus on small, modular components—washers, cartridges, aerators, pressure-reducing valves (PRVs), and flexible supply lines—that are inexpensive, widely available, and easy to swap without major plumbing work.
Selection tips: match size, pressure rating, material, and connection type.
- Measure fittings
- Check PSI ratings
- Prefer stainless/brass
- Match thread type
Useful apps, pressure gauges, and manufacturer guides
After matching fittings and selecting appropriate replacement parts, attention shifts to the resources that help verify and maintain correct pressure: smartphone apps for leak detection and flow measurement, handheld pressure gauges, and manufacturer installation and troubleshooting guides.
Technicians and DIYers use apps to log trends, calibrated gauges to confirm psi at fixtures, and manufacturer literature for torque, filter specs, warranty terms, and diagnostic flow charts.
Summary Checklist: Fast Fixes vs. Permanent Solutions
A concise checklist separates immediate renter actions from long-term owner responsibilities.
Renters get a short list of fast fixes—checking aerators, valves, and basic clogs—while owners receive steps for permanent solutions like pressure regulators, pipe upgrades, and professional assessment.
This contrast helps assign responsibility and prioritize next steps.
Quick action checklist for renters
Ten quick checks separate temporary fixes from needed repairs when a renter faces low water pressure.
Inspect aerators and showerheads for debris; test multiple taps to localize the issue; confirm building-wide outages; shut and slowly reopen faucet valves.
Contact management if problem persists.
- Clean aerators
- Test other fixtures
- Verify building supply
- Cycle faucet valves
Long-term solution checklist for landlords and owners
When quick checks—cleaning aerators, testing multiple fixtures, confirming building supply, and cycling valves—do not restore pressure, landlords and owners should shift focus to long-term remedies that address underlying systems and liability.
- Hire licensed plumber for diagnostics and pressure regulator inspection.
- Inspect and replace corroded or undersized piping.
- Upgrade pressure-reducing valves and building risers.
- Document repairs, permits, and maintenance schedule.
Conclusion
When the faucet barely dribbles and the shower whispers instead of roaring, the next move matters. Readers are left with quick checks to try now and clearer fixes to pursue later, but an unseen turn remains: ignoring pressure problems risks hidden damage and soaring costs. Acting—whether tightening a valve, replacing a cartridge, or calling management—unlocks relief. The final choice teeters between brief convenience and lasting assurance; the prudent will not wait to discover which it becomes.
