How to Clean Poop From a Shower Drain Quickly and Safely: Step-By-Step Fixes
To quickly and safely clean poop from a shower drain, start by wearing disposable gloves, a mask, and eye protection. Ensure the area is well-ventilated and keep pets and children away. Remove the drain cover and use disposable towels or tongs to extract any visible solids. Seal the waste in a plastic bag and flush the drain with hot water. If the clog persists, use a plunger or drain snake. Finally, disinfect all surfaces and tools with a bleach solution. If odors or blockages continue, it’s best to contact a plumber for further assistance.
Quick summary: How to clean poop from a shower drain safely and fast
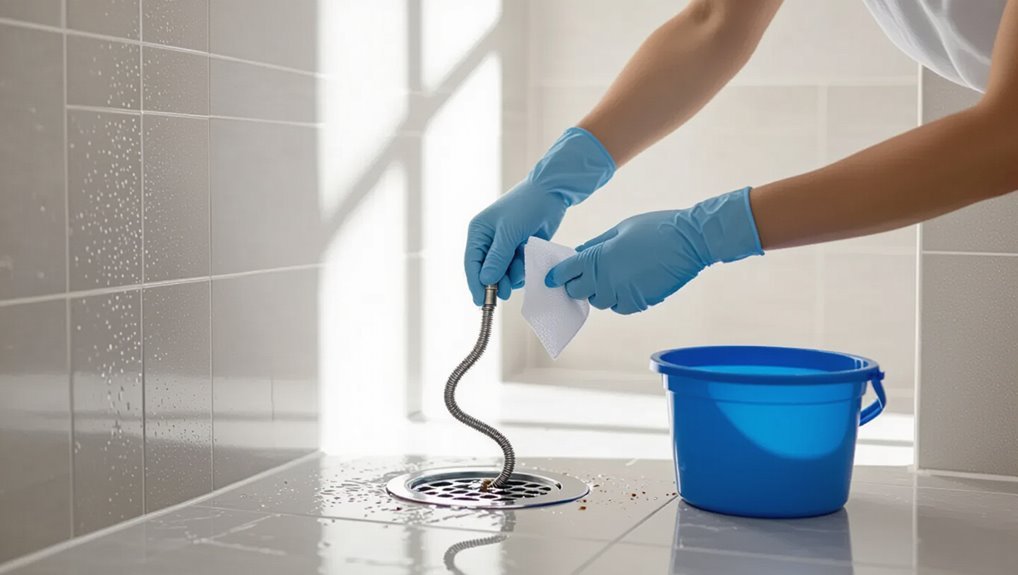
Before any work begins, the person should put on gloves, a mask, and eye protection and guarantee the area is well-ventilated to reduce exposure to pathogens.
For a fast, effective cleanup under 15 minutes, remove the drain cover, use disposable tools or paper towels to extract solids, flush with hot water, and disinfect the drain with a bleach solution or household disinfectant.
Waste and used supplies should be sealed in a plastic bag and disposed of immediately, followed by thorough handwashing.
Immediate safety precautions before you begin
When dealing with fecal matter in a shower drain, wear disposable gloves and a mask, open a window or run exhaust ventilation, and remove pets and children from the area to minimize exposure to pathogens and odors.
The person should also gather disinfectant, sturdy trash bags, and paper towels, avoid direct skin contact, wash hands thoroughly afterward, and avoid splashing while learning how to clean poop from shower drain.
Fastest effective method in under 15 minutes
Start by donning disposable gloves and a mask, then quickly gather a stiff plastic bag, paper towels, a zip-tie or twist-tie, a disinfectant spray or bleach solution, and a disposable scoop (or a plastic cup).
Remove visible waste with the scoop into the bag, secure hair trap, spray disinfectant, wipe surfaces, double-bag and seal, dispose, and ventilate for five minutes.
Clean tools.
What you’ll need: Tools, supplies, and protective gear
The following list outlines the practical items needed to remove fecal matter from a shower drain efficiently and safely.
It includes essential tools for clearing blockages, recommended disinfectants and cleaning agents, and required personal protective equipment.
Proper selection of supplies and hygiene items helps minimize contamination and speeds recovery of a sanitary drain.
Essential tools for quick drain cleaning
A compact kit of the right tools and protective gear makes quick drain cleaning safer and more effective.
Essentials include items for clearing blockages, retrieving debris, and personal protection to limit exposure.
- Drain snake or flexible auger for flexible blockage removal.
- Disposable gloves, splash goggles, and mask for protection.
- Small flashlight, pliers, and a bucket for retrieval and cleanup.
Safe cleaning supplies and disinfectants to use
Gather appropriate cleaning agents, tools, and personal protective equipment before touching the drain to minimize infection risk and chemical exposure.
Use effective, bathroom-safe disinfectants and odor neutralizers; choose enzymatic cleaners for organic matter and diluted bleach for hard-surface disinfection.
Include drain-safe deodorizers and a mild degreaser if needed.
- Enzymatic cleaner
- Diluted bleach solution
- Mild degreaser
Personal protective equipment and hygiene items
After assembling enzymatic cleaners, diluted bleach, and a mild degreaser, attention turns to protective gear and hygiene items that reduce infection and chemical exposure when handling contaminated drains.
Recommended items prioritize barrier protection, respiratory safety, and post-cleaning decontamination.
- Nitrile gloves, disposable apron, waterproof shoe covers
- N95 or P100 respirator, safety goggles
- Antibacterial soap, hand sanitizer, disposable wipes
Assessing the situation: How to determine severity and cause
The person should first look for signs that the clog is confined to the shower—standing water, slow drainage limited to that fixture, or visible debris near the grate.
Persistent backups in multiple drains, strong sewage odor, or signs of contamination suggest a deeper plumbing issue.
If cleaning attempts fail, odors persist, or there is risk of contamination, a professional plumber should be called.
Signs the blockage is only in the shower drain vs. deeper in plumbing
A few simple observations can indicate whether the blockage is confined to the shower drain or lies farther down the plumbing system.
If only the shower backs up, water drains slowly from adjacent fixtures and gurgling is absent, the clog is likely local.
Widespread slow drainage, toilets or sinks affected, or gurgling suggests a deeper mainline or venting issue requiring more extensive intervention.
When odor or contamination indicates a larger problem
When persistent sewage odor, visible contaminants, or repeated backups occur despite basic drain clearing, they point to a problem beyond a simple trap clog.
These signs suggest compromised venting, broken sewer lines, or contaminated sewer connections.
Assess frequency, spread of odor, presence of wastewater elsewhere, and any slow drains throughout the home to narrow cause and prioritize further inspection or testing.
When to stop and call a professional
How can one tell whether a DIY fix suffices or a professional is required?
Persistent backups, recurring foul odors after cleaning, visible sewage, or multiple affected drains indicate systemic issues.
If plumbing access is limited, tools or confidence are lacking, or health risks (mold, biohazard) are present, stop and call a licensed plumber or remediation specialist for diagnosis and safe repair.
Step-by-step methods to remove poop from a shower drain
The article outlines four practical approaches for clearing fecal matter from a shower drain:
- Manual removal for immediate, low-tech results;
- The plunger technique for a quick, safe seal-and-pull action;
- A drain snake or auger when blockages are more stubborn.
If those mechanical methods are ineffective, enzyme-based cleaners or targeted, drain-safe chemicals can help break down organic material.
Each option includes brief step-by-step guidance and safety notes to match severity and available tools.
Method 1 Manual removal (fast, low-tech)
Before handling a shower drain blockage, one should prepare the area and don appropriate PPE such as gloves and eye protection.
The drain cover is then removed carefully so solids can be accessed and extracted with gloved hands or tongs.
Collected waste should be sealed in a disposable bag and discarded per local sanitation guidelines.
Preparing the area and putting on PPE
Begin by clearing the shower area of personal items and loose debris to create an unobstructed workspace.
Next, open windows or run ventilation to reduce odors.
Don disposable gloves, a fluid-resistant apron, and closed-toe shoes.
Use safety goggles and a mask if splashing is possible.
Place absorbent towels around the drain and have a sealed waste bag and disinfectant within reach.
Removing the drain cover safely
Carefully lift the drain cover using a flathead screwdriver or drain key, applying steady upward pressure to avoid chipping tile or bending the grate.
Work slowly, checking for hidden screws or clips. Set removed hardware on a disposable paper towel.
Inspect the opening with a flashlight for visible obstructions. If resistance persists, stop and switch to a tool designed for plumbing access to prevent damage.
Using gloved hands or tongs to extract solids
With nitrile or heavy-duty rubber gloves in place and a pair of long-handled tongs at hand, the remover reaches into the drain opening to grasp and lift out solid material in one steady motion.
They inspect the trap area visually, repeat as needed, and use a flashlight for better view.
Any residual debris is loosened gently with the tongs before final retrieval.
Disposing of waste properly
Dispose of removed fecal matter immediately to prevent odors and contamination: place solids into a sturdy, sealable plastic bag using the gloved hand or tongs, expel excess air, and fasten the bag securely.
Double-bag if necessary, then discard in an outdoor trash bin.
Sanitize tools and surfaces with a disinfectant, dispose of gloves, and wash hands thoroughly with soap and warm water.
Method 2 Plunger technique (quick and safe)
The plunger technique focuses on selecting a suitable plunger and positioning it to form a firm seal over the shower drain.
Controlled, rhythmic plunges with attention to timing help dislodge blockages without splashing or damaging fixtures.
After removal, remaining residue should be cleared and the drain flow tested to confirm the clog is fully gone.
Choosing the right plunger and positioning
Select a plunger designed for flat surfaces—a flange or cup plunger with a wide, flexible rubber rim—because its seal and suction work best on shower floors and drain openings.
The user should inspect rubber for cracks, choose a handle length that allows steady pressure, and position the cup centered over the drain.
Create a firm, even seal before applying force.
Proper plunging strokes and timing
Begin with controlled, forceful strokes that compress and release the seal to create a strong, pulsing suction rather than long, slow pushes.
Maintain a steady rhythm of about 15–20 strokes per minute in 30–60 second bursts.
Pause briefly between bursts to check progress and adjust seal.
Repeat until debris loosens, avoiding excessive force that could damage fixtures.
Clearing residue and testing the flow
After successful plunging, inspect the drain area and surrounding tile for visible residue. Then run lukewarm water to observe flow and detect lingering blockages or slow drainage.
If residue appears, don disposable gloves and remove solids with paper towels. Dispose in a sealed bag. Rinse with water, repeat plunging if needed, and finish with a brief disinfectant flush to restore hygiene and confirm clear flow.
Method 3 Drain snake or auger (for more stubborn blockages)
For tougher clogs, a drain snake or auger is recommended, with the tool size chosen to match the drain diameter and length of blockage.
The snake is fed into the pipe, rotated to catch material, and withdrawn slowly to extract debris.
Afterward, both the cable and the drain should be thoroughly cleaned and disinfected to prevent odors and contamination.
Selecting the appropriate snake size
Choosing the correct snake size is essential: a 1/4-inch (6 mm) cable suits most shower drains and light clogs, while a 3/8- to 1/2-inch (9–13 mm) auger is better for deeper or more compacted blockages.
Pick a smaller, more flexible snake for tight curves and a stiffer, larger one for longer reaches and tougher obstructions.
Consider pipe diameter, bend severity, and clog density.
Feeding, rotating, and extracting material
Insert the snake slowly into the drain until resistance is felt, then feed, rotate, and withdraw in controlled cycles to break up and retrieve the blockage.
Maintain steady tension, advancing a few inches at a time. Rotate clockwise and counterclockwise to snag material, pause to pull debris, and repeat until passage clears.
Avoid forcing the cable to prevent damage.
Cleaning the snake and the drain afterward
After the blockage has been worked free and removed, attention should turn to cleaning the snake and the drain to prevent odors, contamination, and future clogs.
Wearing gloves and eye protection, wipe solids from the cable into a disposable bag, then disinfect with a bleach solution or enzyme cleaner.
Flush the drain with hot water and run the snake briefly to verify no residue remains. Dispose of waste properly.
Method 4 Enzyme cleaners and safe chemicals (when manual methods fail)
When manual removal and snaking fail, the next option is to compare enzyme-based cleaners with harsher chemical formulations based on effectiveness and pipe compatibility.
Instructions should cover correct application, recommended dwell times, and safety precautions such as ventilation and protective gloves.
After treatment, the drain must be thoroughly rinsed and, if necessary, neutralized to protect plumbing and downstream fixtures.
Choosing enzyme-based vs. chemical cleaners
If manual removal and plunging fail, selecting between enzyme-based cleaners and chemical formulations becomes the next consideration; enzyme cleaners use biological agents to break down organic matter gradually and are safer for pipes and septic systems.
On the other hand, chemical cleaners act faster but can be corrosive and hazardous to skin, lungs, and plumbing.
Choose enzymes for gentler, septic-safe treatment; choose chemicals only when speed outweighs risks.
Proper application, dwell time, and safety measures
Select and apply enzyme cleaners or chemical drain products with attention to proper dosing, contact time, and protective measures to guarantee effectiveness and safety.
Follow label instructions for quantity and temperature, allow recommended dwell time to let enzymes digest organic matter or chemicals act, ventilate the area, wear gloves and eye protection, keep children and pets away, and avoid mixing products to prevent hazardous reactions.
Rinsing and neutralizing after treatment
After the enzymatic or chemical treatment has finished its prescribed dwell time, the drain and surrounding surfaces should be thoroughly rinsed and neutralized to remove residues and any lingering odors.
Use copious warm water to flush the drain, then apply a mild vinegar solution or a manufacturer-recommended neutralizer to balance pH.
Rinse again, ventilate the area, and dispose of contaminated rinse water per local guidelines.
Deep-cleaning and disinfection after removal
After physical removal, attention turns to thorough disinfection using proven agents at appropriate concentrations to kill pathogens without damaging surfaces.
The text will outline step-by-step sanitizing of the drain, surrounding tiles, and tools, followed by safe rinsing and drying procedures.
Finally, recommended deodorizing methods and preventive tips to stop lingering smells will be covered.
Effective disinfectants and correct concentrations
Choose disinfectants proven to inactivate enteric pathogens commonly present in fecal contamination—household bleach (sodium hypochlorite), hydrogen peroxide solutions, and EPA-registered disinfectants labeled for norovirus or enteric bacteria are appropriate options.
- Bleach: 1:10 dilution (0.5% sodium hypochlorite) for hard, nonporous surfaces.
- Hydrogen peroxide: 0.5–3% formulations per label.
- EPA products: follow label contact times and concentrations.
How to sanitize the drain, surrounding tiles, and tools step-by-step
With appropriate disinfectants selected and mixed to label instructions, the worker should proceed to deep-clean the drain, surrounding tiles, and any tools used during removal.
Scrub grout and tile with a stiff brush and disinfectant, flush the drain with hot water, soak metal tools in disinfectant solution, rinse and air-dry all surfaces, and dispose of single-use materials in sealed bags.
Use gloves throughout.
Deodorizing and preventing lingering smells
Several targeted steps can neutralize and prevent lingering odors after disinfection: ventilate the area, rinse thoroughly with hot water, apply an enzymatic drain deodorizer or a mild bleach solution per label directions, and run the water for several minutes to push treatments through the trap.
Follow with weekly enzymatic treatments, occasional baking soda plus vinegar flushes, and replace or clean the drain screen.
Monitor for recurring smells and inspect the trap for buildup.
Troubleshooting common problems during cleaning
If the drain remains slow after solids are removed, the text will outline further steps to locate and clear residual clogs or mineral buildup.
It will note signs of sewage backup—strong sewage odors, multiple clogged fixtures, or gurgling—and explain when to stop and call a professional.
Guidance will also cover handling fragile or stuck drain covers without causing damage.
Persistent slow drain after clearing solids
Consider remaining clogs beyond visible solids when a shower drain continues to run slowly after removing obvious debris.
Hair, soap scum, and mineral buildup deeper in the trap or pipe can restrict flow.
Recommend using a drain snake, enzyme cleaner, or a vinegar‑and‑baking‑soda soak.
If sluggishness persists, inspect the P‑trap or call a plumber to avoid pipe damage or recurring blockages.
Sewage backup indicators and emergency response
When slow drainage persists despite removing visible clogs, there is a risk that the problem may be more serious—such as a partial sewer line blockage causing wastewater to back up into the shower.
Signs include multiple fixtures draining poorly, sewage odors, gurgling sounds, and unexplained standing water.
Stop using plumbing, isolate contaminated areas, ventilate, don protective gear, and contact a licensed plumber or utility emergency service immediately.
Dealing with fragile or stuck drain covers
Ease into the task cautiously: many shower drain covers are brittle from age, mineral buildup, or plastic fatigue and can crack or chip if forced.
Use penetrating lubricant, warm vinegar soak, or gentle tapping to loosen stuck screws or clips. If removal risks damage, cut power tools and opt for a flexible snake or small brush through slots; replace the cover promptly after cleaning.
Prevention strategies to avoid future incidents
Preventive measures can greatly reduce the chance of repeat incidents by promoting proper toilet use and consistent bathroom habits.
Simple additions like drain guards and removable covers catch solids before they enter plumbing.
A regular maintenance schedule for drains and pipes helps detect and address issues early.
Proper toilet use and bathroom habits to minimize accidents
Adopt clear bathroom routines to reduce the likelihood of accidents that lead to shower drain contamination.
Encourage regular toilet use, supervise young children, and establish post-meal timing.
Keep toilet lids closed when not in use and guarantee proper wiping and disposal habits.
Promptly address constipation or mobility issues with medical advice.
Maintain good lighting and non-slip mats to prevent falls and unintentional soiling.
Installing drain guards and removable covers
When fitted correctly, drain guards and removable covers provide a simple, effective barrier that stops solid waste and large debris from entering the shower plumbing. They also make cleanup faster by keeping messes on the surface where they can be removed without tools.
Selection should match drain size and material; installation must allow water flow while capturing solids.
- Measure drain diameter
- Choose durable, washable material
- Secure but removable fit
Regular maintenance schedule for drains and pipes
Establish a regular maintenance schedule that inspects and clears shower drains and accessible pipes at consistent intervals—monthly for high-use bathrooms, quarterly for others—to reduce clogs and detect early signs of damage.
Record inspections, note slow drainage, odors, or leaks, and perform preventive cleaning with enzyme cleaners or mechanical removal.
Schedule professional plumbing checks annually and after persistent issues to prevent recurrence and costly repairs.
When to hire a plumber and what to expect
If the blockage persists after basic cleaning or there are recurring backups, a plumber may be needed and will typically provide cost and time estimates upfront.
Homeowners should ask about the proposed method, guarantees, and any additional fees before work begins.
Clearing space, protecting nearby items, and noting problem details will help the service visit proceed efficiently.
Cost and time estimates for professional drain cleaning
Several factors determine whether a professional drain cleaning is warranted and what it will cost and how long it will take. Typical residential jobs range $75–$300 and 30–90 minutes; complex blockages or camera inspections increase both. Emergency calls cost more.
| Service | Typical Cost | Typical Time |
|---|---|---|
| Basic snaking | $75–$150 | 30–45 min |
| Camera inspection | $150–$300 | 45–90 min |
Questions to ask a plumber before they start
When should a homeowner quiz a plumber before work begins? A homeowner should ask about licensing, insurance, estimated cost and time, specific methods for removing organic blockages, potential risks to pipes and finishes, warranty or guarantee, disposal of waste, and required permits.
Clear expectations on communication, payment terms, and post-service cleanup uphold informed hiring decisions and avoid surprises.
Preparing your bathroom for a service visit
After confirming credentials, costs, and methods with the plumber, homeowners should prepare the bathroom to streamline the visit and reduce risk.
Clear access to the drain, remove bath mats and toiletries, and secure pets. Provide adequate lighting and ventilation.
Note any recurring issues and relevant plumbing history.
Expect an inspection, possible snaking or camera use, and a brief cleanup after repair.
Quick checklist: Tools, steps, and safety reminders for emergency cleanup
A concise checklist helps guarantee an efficient, safe emergency cleanup: gather gloves, a disposable mask, eye protection, sturdy trash bags, paper towels or disposable rags, a plastic scraper or disposable scoop, a drain snake or coat hanger, disinfectant (bleach solution or EPA-approved cleaner), and a bucket.
The responder follows PPE, isolates the area, removes solids, disinfects, and ventilates.
- Contain and remove
- Disinfect thoroughly
- Dispose safely
Conclusion
A faint, sterile breeze lifts the steam, revealing a drain reclaimed from its brief, messy rebellion. Gloves and tools sit like quiet sentinels beside a tiled shore, while suds and disinfectant bead and vanish, erasing traces. The bathroom exhales, surfaces gleam, and a simple routine—prompt removal, careful protection, thorough disinfection—keeps future surprises at bay. With calm, methodical steps, order returns and the small chaos becomes a solved, closed chapter.