
How to Identify PEX-A vs PEX: Easy Tests to Tell the Difference
To easily identify PEX-A from other PEX types, start with a quick visual and tactile inspection. Look for factory markings indicating “PEX‑A” or relevant ASTM codes, note the use of expansion-style fittings, and assess flexibility. Test bend recovery and heat memory, and examine wall uniformity in a clean cut cross-section. Avoid any destructive or unsafe tests; whenever possible, confirm findings with manufacturer data. Continue reading for practical at-home tests, professional methods, and a concise checklist to ensure accurate identification.
What Type of Article This Is and the Short Answer
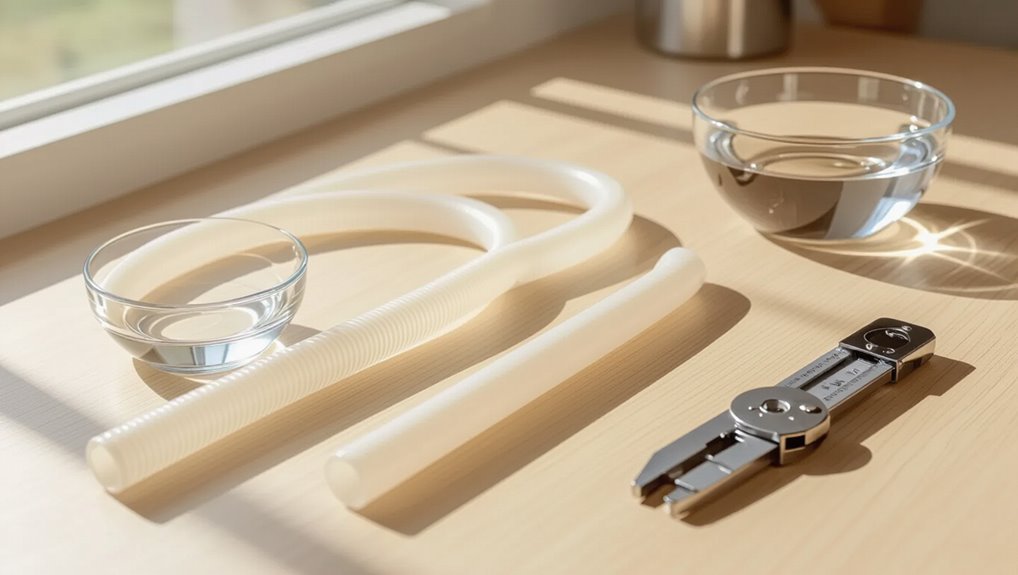
This practical guide provides a concise identification summary comparing PEX-A with other PEX types and highlights simple tests to distinguish them.
It is written for plumbers, inspectors, and DIYers who need quick, reliable identification to guarantee proper fittings and longevity.
The short answer: use the described tests when material verification affects installation compatibility, warranty, or safety.
Quick identification summary: PEX-A vs other PEX types
A concise reference guide, this article quickly distinguishes PEX-A from other PEX types by focusing on manufacturing method, flexibility, and common markings:
It explains how to identify PEX-A vs PEX using melt-formed crosslinking, greater elasticity, and smoother surface with stamped codes.
Tests include bend recovery, visible stamping (PEX-A or EN ISO), and heat-fusing behavior; results summarized for fast, practical identification.
Who should use these tests and why they matter
Although homeowners, plumbers, and inspectors may all encounter PEX tubing, the tests described here are primarily designed for tradespeople and property evaluators who need rapid, reliable identification on site.
These users benefit from quick differentiation to guarantee code compliance, confirm material suitability, prevent warranty voids, and assess repair or replacement strategies.
Accuracy reduces liability and costly mistakes.
PEX Basics Relevant to Identification
PEX denotes cross-linked polyethylene used for plumbing and radiant heating, produced in three common types: PEX-A, PEX-B, and PEX-C.
PEX-A is typically preferred for flexibility and freeze-resistance in residential plumbing and radiant-floor systems, while PEX-B and PEX-C are often used where cost and stiffness are acceptable.
Identification often relies on printed markings and manufacturer codes on the tubing, which indicate type, production method, and standards compliance.
What PEX means and common PEX types (PEX-A, PEX-B, PEX-C)
Cross-linked polyethylene is a type of plastic tubing created by chemically altering polyethylene molecules to improve strength, flexibility, and heat resistance for plumbing and radiant heating.
PEX denotes this cross-linked form.
Common manufacturing methods yield PEX-A (peroxide, most crosslinking), PEX-B (silane, intermediate), and PEX-C (radiation, least uniform).
These distinctions affect material properties and identification features.
Typical uses for PEX-A versus other PEX types
Among the cross-linked polyethylene varieties, PEX-A is most often chosen for applications that demand maximum flexibility, cold-temperature performance, and reliable fittings—such as long continuous runs, complex manifolds, and systems using expansion-style fittings—while PEX-B and PEX-C are commonly used where slightly lower flexibility and cost efficiency are acceptable, like straight runs with crimp or clamp fittings and some radiant heating installations.
PEX-A suits retrofit work, tight bends, and freeze-prone locations; PEX-B/PEX-C favor budget-conscious new builds, simpler layouts, and certain slab or embedded heating where stiffness is less limiting.
Common markings and manufacturing codes to look for
When identifying tubing, installers and inspectors rely on exterior markings and manufacturing codes to verify material type, size, pressure rating, and compliance with standards.
Common marks include “PEX-A” or “PEX” plus ASTM/CSA standards (e.g., ASTM F876/F877, CSA B137.5), nominal diameter, SDR or pressure class, production date codes, manufacturer name or logo, and batch numbers for traceability.
Physical Inspection Tests You Can Do Without Tools
A quick hands-on inspection can reveal key differences between PEX-A and other types by noting color bands, stamped markings, and the types of fittings used.
Flexibility and memory are assessed by bending a short length by hand and observing how readily it returns to shape.
Surface feel—slickness from manufacturing lubricants or a drier finish—provides an additional, immediately detectable clue.
Visual cues: color, markings, and fitting types
Several straightforward visual cues help distinguish PEX-A from other PEX types without tools: color coding (commonly red for hot and blue for cold), printing or stamped markings along the pipe indicating manufacturer, ASTM/CSA standards, or “PEX-A/PEX-B/PEX-C”.
Additionally, the presence of specific fitting styles such as expansion-ring connections often paired with PEX-A versus crimp or clamp fittings more typical of PEX-B/C is a key differentiator.
Inspect markings, joints, and fitting profiles.
Flexibility and memory test by hand
Handle a short length of pipe and observe how it responds:
PEX-A typically bends easily and springs back toward its original shape, while PEX-B and PEX-C feel stiffer and retain bends longer.
Note how much force is required to flex the tube and how quickly it recovers.
Repeat with several samples along the run to confirm consistent memory and flexibility traits.
Feel and surface finish differences (lubricant/oil presence)
The same hand inspection used to judge springback can be extended to assess surface feel and finish: run fingers along the pipe to detect any slickness, oily residue, or waxy film.
PEX-A often retains processing lubricants and feels slightly slicker; PEX-B/C are usually drier, matte, or powdery.
Note localized residues from storage or handling; clean samples before concluding.
Simple At-Home Tools and Tests
A few simple at-home tests can help distinguish PEX-A from other types.
Measuring bend radius with a ruler or tape, observing whether the pipe compresses and expands when warmed with safe, warm water, and inspecting fittings for expansion-style joints versus crimp or clamp fittings are practical checks.
Safety precautions should be noted when applying heat or handling fittings.
Bend radius test with a ruler or tape measure
Many homeowners can check PEX type by measuring the tube’s minimum bend radius with a ruler or tape measure. This simple test compares the pipe’s bend to the manufacturer’s specified radius to indicate flexibility differences between PEX-A and other types.
Measure gently without forcing a bend, record the radius where the tube naturally sits, then compare to specs: smaller natural radii usually indicate more flexible PEX-A.
Compression and expansion check by warming (warm water) safety notes
Homeowners’ simple warm-water tests can reveal PEX compression and expansion behavior, but safety must be prioritized: use only warm (not boiling) water, wear heat-resistant gloves or hold pipes with a towel, and avoid confined spaces where heated piping could contact flammable materials.
Guarantee good ventilation, keep children and pets away, limit exposure time, and inspect for softening or discoloration that indicates overheating or material degradation.
Fitting type verification: expansion fittings vs crimp/clamp fittings
After confirming temperature-related behavior and ruling out overheating, the next practical check is identifying whether the system uses expansion-style fittings or crimp/clamp connections; each type requires different tools and repair approaches.
Inspect visible joints: expansion fittings show smooth, bulged tubing seated over a fitting, often with plastic rings; crimp/clamp fittings have metal rings or copper crimps compressing the PEX.
Use calipers or a visual magnifier.
Workshop or Professional Tests
For workshop-level identification, technicians often measure heat expansion with calibrated tools to quantify material memory and dimensional change.
They may examine a clean cross-section made with a sharp cutter or pipe slicer to observe wall structure and layer consistency.
Chemical solvent tests and any manufacturer-recommended checks provide confirmatory evidence for resin type and production method.
Heat expansion measurement with calibrated tools
Measure heat-induced expansion using calibrated gauges and controlled heating to distinguish PEX-A from other PEX types based on its greater radial and longitudinal expansion.
Technicians record baseline dimensions, apply uniform thermal cycles, and measure dimensional changes with micrometers or laser calipers.
Data compared against manufacturer tolerances and known PEX-A expansion profiles confirms material type.
Maintain consistent temperature, fixture, and measurement intervals for reliability.
Cross-section inspection using a sharp cutter or pipe slicer
Slice a clean section through the pipe wall with a sharp cutter or dedicated pipe slicer to reveal the internal structure for inspection.
Examine layer homogeneity, wall uniformity, and any visible memory lines or fusion marks.
PEX-A typically shows smooth, uniform cross-sections from peroxide annealing; other PEX variants may display irregularities or distinct layer boundaries.
Document findings and photograph for records.
Chemical solvent test and manufacturer-recommended checks
Conduct a controlled chemical solvent test and consult manufacturer-recommended checks to confirm PEX type when visual and mechanical inspections are inconclusive.
In a lab or workshop, apply a small solvent sample to a cut edge to observe swelling, tackiness, or dissolution patterns; PEX-A typically resists moderate solvents differently than PEX-B/C.
Cross-reference batch codes, markings, and tech sheets or contact the manufacturer for definitive identification.
How to Read Labels, Stamps, and Barcodes
Labels, stamps, and barcodes often carry the quickest clues to a pipe’s specification and material.
Common marking standards (EN, ASTM, CSA), manufacturer codes and batch numbers can identify whether a tube is PEX-A and trace its production.
Scanning barcodes or QR codes frequently links directly to product data sheets and certification details.
Decoding common marking standards (EN, ASTM, CSA)
When inspecting PEX piping, the stamped markings and printed codes convey standardized information about material type, certification, pressure-temperature ratings, and designated application.
Common standards include EN (European norms), ASTM (American Society for Testing and Materials), and CSA (Canadian Standards Association). Each code prefix or number references specific test criteria and allowed uses; cross-referencing guides or standards tables confirms compliance and suitability for potable water, heating, or industrial use.
Manufacturer codes and batch numbers that indicate PEX-A
Although the visible markings on PEX piping often prioritize standards and pressure ratings, manufacturer codes and batch numbers provide the clearest clues for identifying PEX-A production.
These codes encode formulation, extrusion method, and manufacturing run information. Technicians should learn common manufacturer prefixes, short alphanumeric identifiers, and barcode patterns that distinguish peroxide-crosslinked (PEX-A) lines from PEX-B or PEX-C.
Inspect serial blocks for “PA”/“XA” or vendor-specific codes.
Using barcodes/QR codes to look up product data sheets
Scan the barcode or QR code on the pipe jacket to retrieve the manufacturer’s product data sheet and batch-specific details.
The linked sheet often lists polymer type, crosslinking method, pressure ratings, and standards compliance, enabling confirmation of PEX-A versus other PEX types.
If scanning fails, note printed codes and contact the manufacturer for verification.
- Scan code for data sheet
- Verify polymer/crosslink method
- Contact manufacturer with batch code
Comparison Table: PEX-A vs PEX-B vs PEX-C
A concise comparison table highlights key performance differences between PEX-A, PEX-B, and PEX-C, showing flexibility, burst resistance, and temperature tolerance at a glance.
The table also summarizes visual and tactile cues—such as surface texture, color consistency, and pliability—to aid rapid identification.
Readers are directed to use these side-by-side indicators when evaluating pipe type for specific applications.
Performance differences at a glance
Performance characteristics of PEX-A, PEX-B, and PEX-C are summarized here to highlight key differences in flexibility, memory retention, temperature and pressure ratings, and long-term durability. The table below contrasts typical traits for quick comparison.
| Trait | PEX-A | PEX-B |
|---|---|---|
| Flexibility | High | Medium |
| Memory/Durability | Best | Good |
Visual and tactile differences summarized
Color, surface texture, and flexibility provide the clearest visual and tactile cues for distinguishing PEX-A, PEX-B, and PEX-C. Observers note color coding, smoothness, and springiness: PEX-A is often softer and translucent, PEX-B firmer with matte finish, PEX-C intermediate. Use tactile feel plus visible markings for confirmation.
| Feature | Common trait |
|---|---|
| PEX-A | Soft, smooth |
| PEX-B | Firm, matte |
Situations That Make Identification Crucial
Accurate identification of PEX-A versus other types becomes essential when sourcing repair fittings or replacement sections to guarantee compatibility.
It also affects warranty validity and compliance with local plumbing codes that may specify acceptable materials.
For systems exposed to high temperatures or used in radiant-floor heating, selecting the correct PEX type is critical for long-term performance and safety.
Repairs and replacement parts compatibility
Several common repair scenarios make correctly identifying PEX-A versus other PEX types essential: matching fittings and expansion tools, sourcing compatible repair couplers, and determining whether existing manifolds or crimp rings will function with replacement sections.
Correct identification prevents leaks, failed seals, and tool incompatibility. It guides selection of expansion vs. clamp/crimp systems, appropriate O-ring materials, and guarantees replacement tubing dimensions and wall ratings match original system requirements.
Warranty and code compliance checks
Confirming whether tubing is PEX-A or another PEX type is critical when validating warranty coverage and meeting building-code requirements.
Manufacturers often limit warranties to specific PEX types and installation methods; inspectors and contractors must match materials to code listings.
Accurate identification prevents denied claims, failed inspections, and required rework.
Documentation, labeling, and simple tests support compliance and protect liability.
High-temperature or radiant-floor heating applications
When systems operate at sustained elevated temperatures, distinguishing PEX-A from other PEX types becomes essential because each formulation differs in thermal performance, expansion characteristics, and long-term stability under heat.
For radiant-floor or high-temperature hydronic loops, identifying PEX-A guarantees lower creep, superior flexibility for bending manifolds, and reduced joint stress.
Selection affects lifespan, maintenance frequency, and compliance with system design limits.
Common Misidentification Errors and How to Avoid Them
Common misidentification errors include assuming color or fittings indicate whether a pipe is PEX-A or another type, which can lead to incorrect repairs.
Unsafe testing methods—such as excessive heat or improper cutting—risk damaging the tubing and voiding warranties.
When uncertainty remains, a licensed plumber or certified testing lab should be consulted to confirm material type and recommend safe procedures.
Mistaking color or fittings for material type
Although color and fitting style often appear to indicate PEX type, relying on them alone leads to frequent misidentification. Manufacturers use similar hues and compatible fittings across PEX-A, PEX-B, and PEX-C, and retrofit or mixed systems can combine parts that disguise the underlying material.
Visual cues should be verified with compression, freeze, or crush tests and by checking manufacturer markings rather than assumptions.
Unsafe testing practices to avoid
Avoid performing unverified destructive tests or improvising methods that risk damage or personal injury.
Operators should not melt, burn, or chemically alter tubing to force identification.
Avoid cutting pressurized lines, using unsuitable tools, or relying on anecdotal home remedies.
Mislabeling from poor sampling or contaminated fittings must be avoided.
Use safe, noninvasive inspections and documented, repeatable procedures instead.
When to call a plumber or testing lab
When should a professional be engaged for PEX identification? A plumber or certified lab is recommended when fittings obscure markings, odors suggest contamination, or visual and compression tests conflict.
Professionals offer accurate material analysis, moisture and chemical testing, and documented results for warranties or codes.
Avoid DIY certainty in ambiguous cases; expert assessment prevents costly mistakes, liability, and improper repairs.
Quick Decision Guide: Which Test to Use When
A concise flowchart outlines simple, step-by-step tests homeowners can perform to distinguish PEX-A from other PEX types using visual cues and basic thermal or flex checks.
A separated set of procedural steps guides contractors and inspectors through more definitive on-site methods, including advanced bending, manufacturer markings, and, when necessary, lab-grade testing.
This clear division helps each audience choose the appropriate test quickly and reliably.
Flowchart-style steps for homeowners
Homeowners can use a simple decision flow to choose the most appropriate PEX test based on observable clues and available tools:
- Inspect markings and fittings first; if labeled PEX-A or with expansion fittings, stop and record type.
- If unclear, perform a visual wall-thickness and flexibility check; greater flexibility suggests PEX-A.
- When uncertainty remains, use a heat or melt test only if comfortable; otherwise consult a professional.
Steps for contractors and inspectors
Begin by prioritizing non-destructive methods: contractors and inspectors should first check visible markings and fittings, consult installation records, and use tactile assessment (flexibility and wall thickness) to narrow likely PEX types before proceeding to any invasive or chemical tests.
- Measure diameter and wall thickness; compare to manufacturer specs.
- Inspect fittings: expansion vs crimping indicates PEX-A or others.
- Perform controlled destructive test (small sample) only if uncertainty remains.
Checklist to Confirm PEX-A Before Installation or Repair
Before proceeding with installation or repair, a concise checklist helps confirm that tubing is PEX-A and suitable for the designed application.
The checklist covers visible markings and material traits, basic tool-based verifications, and review of documentation or labeling to prevent mistakes.
Technicians should use this three-part approach to verify identity quickly and reliably.
- Visual inspection checklist items
- Tool-based verification checklist items
- Documentation and labeling checklist items
Visual inspection checklist items
A concise visual checklist helps confirm PEX-A tubing prior to installation or repair by focusing on measurable, observable features: manufacturer markings, wall flexibility, memory (ability to return to shape after bending), and uniform cross-sectional appearance.
Inspect for continuous manufacturer embossing, clear oxygen-barrier absence/presence indicators, consistent wall thickness, smooth inner surface, and pronounced shape recovery after kinking.
Note color coding and absence of extrusion seams.
Tool-based verification checklist items
Visual inspection narrows probable PEX-A candidates, but tool-based checks provide objective confirmation through measurable responses.
Use a mandrel or bend test gauge to verify elasticity and creep recovery; measure wall thickness with calipers at multiple points; perform a thermal expansion check using controlled heating and length measurement; and use a crosslink density tester or FTIR where available to confirm peroxide-based PEX-A crosslinking signatures.
Documentation and labeling checklist items
Documentation and labeling provide definitive clues that distinguish PEX-A from other PEX types and should be the first verification step in any installation or repair workflow.
Inspect tubing print for “PEX-A,” “A-Grade,” or ASTM F876/F877 markings. Verify manufacturer labels, production codes, oxygen barrier notes, and pressure/temperature ratings.
Cross-check with job documentation, purchase orders, and product data sheets before cutting or connecting.
Conclusion
In the end, identifying PEX-A versus other PEX types is treated like deciphering a secret code that decides the fate of every pipe in the house. With exaggerated confidence, one is told that a quick visual twist, a heat-bend test, or a look for markings will instantly reveal the truth and avert plumbing catastrophe. Practically, following a few simple checks prevents costly guessing—so verify before you cut, or risk inviting a minor flood of dramatic regret.
