How to Replace a Kohler Shower Cartridge: Step-by-Step Guide for DIY Repairs
To replace a Kohler shower cartridge, start by shutting off the water supply and relieving any pressure in the system. If your shower is leaking, sticking, or not regulating temperature properly, it’s time for a replacement. Begin by documenting the valve’s setup, then remove the handle and escutcheon. Clean the valve body, compare the old cartridge with the new one, and ensure proper alignment during installation, using new O-rings. Once reassembled, gradually restore the water and test for leaks and temperature control. For further assistance, refer to troubleshooting tips, model matching advice, and maintenance recommendations.
Overview of Replacing a Kohler Shower Cartridge
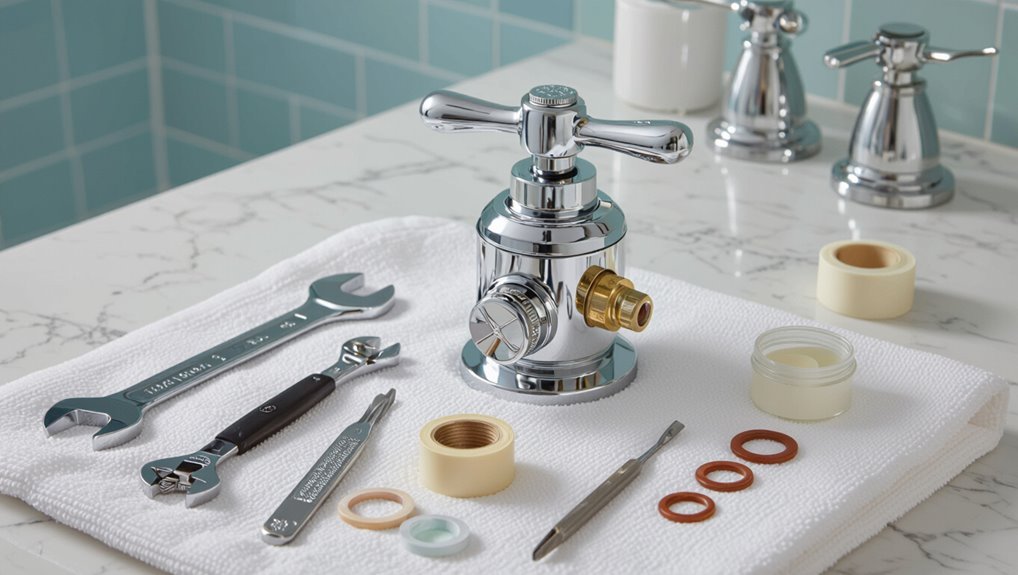
A Kohler shower cartridge controls water flow and temperature, and common failure signs include leaks, difficulty adjusting temperature, or reduced flow.
Identifying the correct cartridge model—by trim, part number, or measurement—is essential for compatibility.
Basic tools and materials typically include an adjustable wrench, screwdrivers, cartridge puller or pliers, plumber’s grease, and a replacement cartridge.
What a Kohler shower cartridge does and common failure signs
Several internal parts work together inside a Kohler shower cartridge to regulate water flow and mix hot and cold supplies; its core role is to control temperature and shutoff within single-handle valves.
Typical failure signs include leaking, reduced pressure, sudden temperature swings, or a stuck handle.
Recognizing these symptoms helps diagnose when to perform maintenance or learn how to replace a Kohler shower cartridge promptly.
Models and compatibility: identifying Kohler cartridge types
Identifying the correct Kohler shower cartridge begins with matching model numbers and valve families, since Kohler uses several cartridge designs—such as the GP/GV series, K-304/K-304-P, and Ceratec—that are not interchangeable.
Confirm stamped numbers on the valve, consult Kohler’s parts diagrams or online lookup, note single- versus dual-handle configurations, and verify dimensions and spline patterns before ordering replacement cartridges.
Tools and materials needed for the replacement
Once the correct cartridge model is confirmed, gather the specific tools and replacement parts required for a Kohler shower cartridge swap.
Essential items include replacement cartridge, cartridge puller or pliers, and appropriate O-rings.
Also prepare plumber’s grease, Allen keys, screwdriver, adjustable wrench, and supply shutoff access.
Follow manufacturer torque and lubrication guidance to guarantee a leak-free installation.
- Replacement cartridge and O-rings
- Cartridge puller/pliers
- Basic hand tools
Safety Preparations and Pre-Work Checklist
Before beginning cartridge removal, the water supply should be shut off and residual pressure relieved to prevent leaks and spray.
The work area must be protected and trim carefully removed to avoid surface damage.
The existing valve setup should be documented with notes and reference photos for accurate reassembly.
How to shut off water supply and relieve pressure
Shut off the water at the correct source and relieve residual pressure to prevent leaks or injury during cartridge replacement.
Locate the shower shutoff, home main, or localized isolation valve and close it fully.
Open the shower handle and a nearby faucet to drain lines.
Verify no flow and check under the sink or access panel for residual moisture before proceeding with disassembly.
Protecting the shower area and removing trim without damage
Protect the surrounding area and gather tools to minimize damage and speed the job: lay down a waterproof drop cloth or towels on the tub or shower floor, cover nearby fixtures with painter’s tape or plastic, and place a padded work mat to catch dropped parts.
Use non-marring tools, protect finished surfaces with soft cloth, remove escutcheon and handle carefully, label fasteners, and store trim on the padded mat.
Documenting existing setup and taking reference photos
Why document the existing setup? Before disassembly, photograph the trim, handle orientation, escutcheon placement, visible fasteners and any sealant.
Note cartridge model markings, water supply positions and rotation limits. Record measurements and part numbers.
These references simplify reassembly, guarantee correct replacement parts and help troubleshoot leaks or alignment issues.
Store images and notes with the project materials.
Step-by-Step Cartridge Replacement Process
The technician begins by removing the handle and escutcheon plate to expose the valve.
Next, the old cartridge is accessed and extracted, with the valve body inspected and mineral deposits cleaned away.
Finally, the replacement cartridge is compared to the old unit, seals checked, and the new Kohler cartridge installed correctly.
Removing the handle and escutcheon plate
Begin by shutting off the water supply and confirming the valve is closed; this prevents accidental spraying when the handle is removed.
Use the appropriate screwdriver or Allen key to remove the handle set screw, then lift off the handle.
Unscrew the escutcheon mounting screws and gently pry the escutcheon plate away from the wall, avoiding damage to tile or caulking.
Accessing and extracting the old cartridge
Loosen and remove the retaining clip or bonnet nut that secures the cartridge, then withdraw any surrounding seals or sleeves to expose the cartridge body.
Use pliers or a cartridge puller, gripping the cartridge stem firmly and pulling straight out to avoid damage.
Inspect removal for broken fragments; retrieve any trapped pieces.
Keep parts organized for accurate reassembly and note cartridge orientation.
Inspecting valve body and cleaning mineral deposits
Inspect the valve body carefully for debris, mineral buildup, corrosion, and cracks before installing the new cartridge.
Remove loose sediment with a soft brush and pick tools, avoiding gouging metal.
Apply vinegar or a mild descaler to dissolve calcium deposits; rinse thoroughly and dry.
Inspect O-ring seats and mating surfaces for damage.
Confirm passageways are clear and corrosion-free prior to cartridge insertion.
Comparing old cartridge to replacement and checking seals
Compare the removed cartridge side-by-side with the replacement to verify model number, dimensions, and the orientation of ports and retaining features; mismatches in length, inlet alignment, or groove placement can prevent proper sealing or operation.
Inspect O-rings, rubber seals, and backup washers for cracks, deformation, or hardening.
Replace any worn seals and guarantee lubrication with silicone grease rated for potable water before installation.
Installing the new Kohler cartridge correctly
Begin by positioning the replacement cartridge at the valve body, aligning its outlets and retention features to the corresponding ports and grooves; guarantee the cartridge seats fully without forcing.
Verify O-rings and seals remain aligned. Engage any retaining clip or nut, torque to manufacturer specifications.
Cycle the cartridge gently to confirm smooth movement and correct alignment before proceeding to trim reassembly and water restoration.
Reassembling trim, handle, and restoring water supply
With the cartridge seated, secured, and cycled to confirm smooth operation, reassembly of the trim and handle can proceed.
Replace the escutcheon plate, aligning screw holes and seating any gaskets.
Reinstall the handle adapter, tighten retaining screws, and attach the decorative handle and set screw.
Restore the water supply by reopening the shutoff valves slowly, checking for normal flow at the shower head.
Testing for leaks, proper operation, and temperature control
After restoring water and reattaching the trim, the technician performs a systematic check for leaks, verifies handle movement and flow, and confirms temperature regulation across the control range.
The technician inspects joints and escutcheon for drips, cycles the valve through hot and cold extremes, observes steady pressure, and guarantees thermostatic responsiveness.
Any anomalies prompt tightening, reseating, or cartridge replacement.
Troubleshooting Common Problems During Replacement
Common obstacles during cartridge replacement often include a stuck cartridge or a corroded retaining clip, which require specific extraction tools or penetrating oil and clip replacement.
If leaks appear after installation, the source should be diagnosed by checking seat alignment, O-rings, and cartridge seating before retesting water pressure.
Handle misalignment or limited range of motion is typically resolved by verifying cartridge orientation, adjusting the splined stem position, or replacing worn trim components.
Stuck cartridge or corroded retaining clip solutions
When a Kohler cartridge refuses to budge or its retaining clip has seized from corrosion, the replacement process stalls and requires targeted remedies; apply penetrating oil around the cartridge, allow soak time, and gently work with a strap wrench or pliers using steady, even force.
If the clip is corroded, cut and remove it with aviation snips, then clean the bore and inspect for damage before installing a new cartridge.
Leaks after installation: diagnosing source
Once the cartridge and retaining clip are freed and replaced, any persistent water on the valve trim or surrounding wall signals a separate problem that must be located.
Check for leaks by isolating sources and testing under pressure:
- Inspect shower arm, escutcheon seals, and plumber’s tape for external leaks.
- Test inlet/outlet supply connections behind the trim for loose fittings.
- Observe valve body for cracks or worn O-rings requiring replacement.
Handle alignment or limited range of motion fixes
Check the handle’s alignment and travel immediately if the replaced cartridge feels stiff, binds before reaching full range, or sits off-center on the stem.
Verify cartridge orientation, confirm retaining clip and bonnet nut are seated correctly, and inspect stem splines and handle spline fit.
Adjust handle position, trim escutcheon or stop limits if needed, and retighten components; test smooth full-range operation.
When to Repair vs Replace the Entire Valve
If the valve body shows corrosion, cracks, persistent leaks, or signs of failed plumbing connections, a professional assessment is recommended.
A cartridge swap is typically faster and less expensive, while full valve replacement involves higher parts and labor costs plus more complex plumbing work.
Weighing visible damage and the homeowner’s comfort with extensive plumbing helps determine whether to repair or replace.
Signs the valve body or plumbing needs professional attention
When persistent leaks, corrosion, or visible cracks appear around the valve body—or when the shower produces only weak or inconsistent flow despite a functioning cartridge—these are clear indicators that the problem extends beyond the cartridge and requires professional attention.
Likewise, recurring mineral buildup inside the valve, damaged mounting hardware, or evidence of water damage in the surrounding wall or floor suggest the entire valve assembly or connected plumbing may need repair or replacement rather than a simple cartridge swap.
Evidence of misaligned or seized stems, deteriorated seals inaccessible without valve removal, or multiple simultaneous fixture issues also warrant calling a licensed plumber to assess internal damage, hidden leaks, or compromised supply lines.
Cost and complexity comparison: cartridge swap vs valve replacement
Although replacing a cartridge is often quicker and less expensive, comparing the two options requires weighing parts and labor costs, time, and the scope of underlying damage; a cartridge swap typically takes under an hour with modest parts cost, while full valve replacement can require several hours, higher parts expense, potential drywall repair, and licensed-plumber rates.
| Cartridge Swap | Valve Replacement |
|---|---|
| Low parts cost, short time | Higher parts cost, longer time |
| DIY feasible | Often requires plumber |
Tips to Ensure Long-Term Performance
The section outlines a practical maintenance schedule and simple cleaning steps to keep a Kohler cartridge functioning well.
It compares OEM and reputable aftermarket cartridges, noting warranty differences and long-term reliability.
It also covers ways to prevent mineral buildup and other measures that extend cartridge life.
Recommended maintenance schedule and cleaning tips
To keep a Kohler shower cartridge functioning reliably, establish a simple maintenance routine: inspect annually, clean mineral buildup every three to six months depending on water hardness, and replace worn seals or the cartridge at first sign of leaks or reduced flow.
Use mild vinegar soaks for deposits, soft brushes for crevices, lubricate O-rings with plumber’s grease, and document dates to track service intervals.
Choosing OEM vs aftermarket cartridges and warranties
Why choose an original Kohler cartridge over an aftermarket alternative?
OEM parts match specifications, materials, and tolerances, reducing leak and performance risks.
Warranties from Kohler often cover defects and installation issues; aftermarket warranties vary in scope and duration.
For longevity and peace of mind, professionals often recommend OEM cartridges when compatibility, consistent quality, and clear warranty coverage matter most.
Preventing future mineral buildup and extending cartridge life
After deciding on an OEM Kohler cartridge for its fit and warranty benefits, attention should shift to practices that minimize mineral buildup and prolong cartridge life.
Recommend installing a whole-house or point-of-use water softener or scale inhibitor, flushing lines after repairs, using strainers to catch debris, scheduling periodic vinegar-soak maintenance, and monitoring water pressure to prevent premature wear and leaks.
Quick Parts and Model Reference Guide
A concise list of common Kohler cartridge part numbers alongside their compatible models helps streamline replacement.
The guide also explains how to read model numbers from trim plates and owner manuals to confirm fit.
Technicians and homeowners are advised to match both cartridge codes and visible model markings before ordering parts.
Common Kohler cartridge part numbers and compatible models
This section lists common Kohler cartridge part numbers and the faucet or shower models they fit, providing a quick reference for identifying the correct replacement cartridge.
Common matches include popular series and model families to streamline parts selection.
- K-11591 — Forte, Bancroft, and Stance single-handle faucets
- K-11785 — Rite-Temp and MasterShower valve assemblies
- K-9720 — Traditional single-handle shower and tub valves
How to read model numbers from trim plates and manuals
How can a homeowner quickly decode the model information stamped on a trim plate or listed in a manual?
The guide advises locating stamped codes (e.g., K‑xxxx), noting finish and series, and comparing serial/model numbers against Kohler’s Quick Parts and Model Reference Guide.
Cross-reference diagrams to confirm cartridge type, trim compatibility, and revision dates before ordering replacement parts to guarantee proper fit.
Tools and Parts Shopping Checklist
Before beginning the replacement, the reader should purchase the exact cartridge model plus matching O-rings and the retaining clip to avoid interruptions.
Recommended tools include a cartridge puller or strap wrench and long-nose pliers for stubborn fittings.
Optional specialty items—brass-handle screwdrivers, penetrating lubricant, and a basin wrench—can make difficult removals easier.
Exact parts to buy before starting (cartridge, O-rings, retaining clip)
Gather the precise replacement parts and verify compatibility with the specific Kohler model number stamped on the valve body or trim plate before beginning work.
Purchase OEM or exact-match aftermarket components to guarantee fit and function. Include all seals; avoid reused O-rings.
- Cartridge (match model number)
- O-rings and seals kit (full set)
- Retaining clip or snap ring (specific size)
Recommended tools for difficult removals and optional specialty tools
Equip the workspace with a mix of common hand tools and a few specialty implements to handle seized cartridges, corroded retaining clips, and tight access points.
Recommended items include:
- adjustable wrench
- slip-joint pliers
- flat and Phillips screwdrivers
- cartridge puller
- strap wrench
- penetrating oil
- pick set
- retention-clip pliers
- hex key set
- brass or nylon drift punches.
Optional: heat gun, mini reciprocating saw.
Additional Resources and When to Call a Professional
The article points readers to Kohler’s official guides and reputable video tutorials for step‑by‑step help and model-specific details.
It also outlines clear signs—persistent leaks, corroded parts, or complex valve assemblies—that indicate a licensed plumber should be called.
Expectations for professional service, such as diagnosis, parts replacement, and labor estimates, are summarized so homeowners know what to expect.
Video tutorials and manufacturer resources for Kohler cartridges
Where can a homeowner find clear, reliable guidance for replacing a Kohler shower cartridge?
Video tutorials and official Kohler resources offer stepwise visuals, parts diagrams, and model-specific tips.
Recommended sources include:
- Kohler’s official support videos and PDF manuals.
- Manufacturer-certified dealer or repair channel walkthroughs.
- Reputable DIY channels demonstrating identical Kohler cartridge models and tools.
Signs it’s time to hire a licensed plumber and what to expect
Confidence in tackling a repair should yield to caution when leaks persist, water pressure problems continue after a cartridge replacement, or visible corrosion and damaged valve bodies are present.
A licensed plumber assesses hidden leaks, replaces valves, handles soldering or pipe repairs, and guarantees code compliance.
Expect diagnosis fees, a clear estimate, permit handling if needed, and professional assurances on workmanship.
Conclusion
When the new Kohler cartridge slides into place and the handles whisper back to life, the bathroom briefly feels transformed. Yet beneath the calm, a faint question lingers: will that steady stream hold through the seasons, or will a stubborn drip return to test patience and skill? The careful DIYer closes tools for now, aware that vigilance, proper parts, and a trained eye can turn this small victory into lasting confidence—until the next challenge calls.