How to Fix Water Heater Problems Fast: A Step-by-Step DIY Repair Guide
To quickly fix water heater problems, start by turning off the power or gas supply and shutting off the cold-water inlet. Release any built-up pressure and check for leaks. Identify the issue based on common symptoms: if there’s no hot water, inspect circuit breakers, heating elements, the pilot light, and the thermocouple; if the output is low, consider sediment buildup, thermostat settings, or tank size; for strange noises, flushing the tank may help; and visible corrosion may indicate a need to replace the anode rod. Use basic tools for repairs and follow all safety guidelines. For detailed steps, diagrams, and part replacement instructions, continue reading.
What to Do Immediately When Your Water Heater Fails
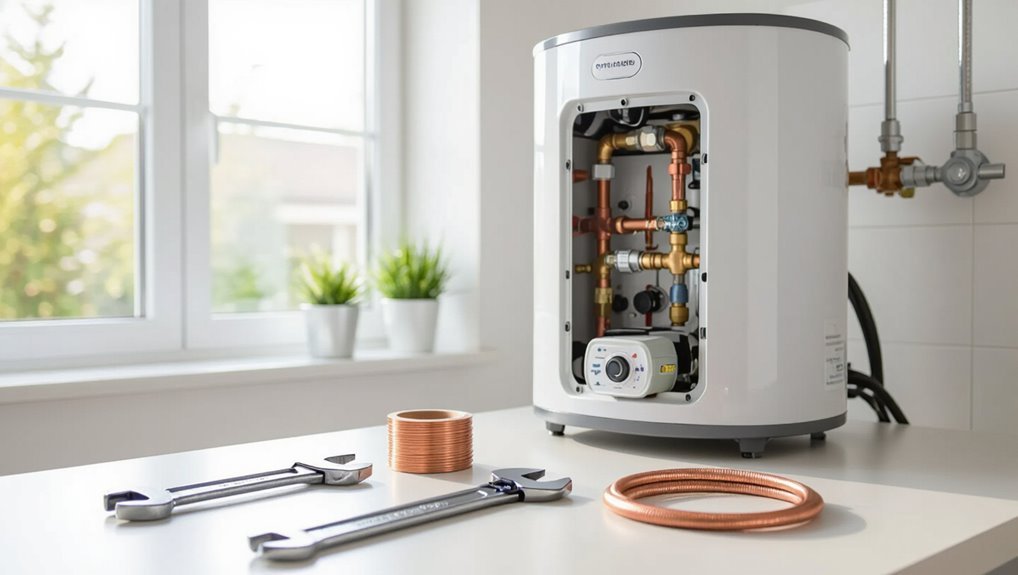
When a water heater fails, the first priority is safety: cut power to the unit and shut off the water supply to prevent electrocution and flooding.
Next, the homeowner can perform a few quick checks in under ten minutes—inspect for visible leaks, feel the tank for hot spots, and verify the circuit breaker or gas valve position.
If there is significant leaking, persistent no heat, or signs of a gas leak, an emergency plumber should be called immediately.
Safety first shutting off power and water
Cut the risks immediately by cutting power and water to the unit: turn off the circuit breaker or unplug an electric heater, switch off the gas supply for a gas model, and close the cold-water shutoff valve feeding the tank.
Then confirm no power or flow, vent pressure carefully, and tag controls.
For those learning how to fix water heater issues, this prevents injury and limits damage before further inspection.
Quick checks you can do in under 10 minutes
What should be checked first after confirming the unit is powered down and the water supply is shut?
Inspect visible leaks around valves, fittings, and the tank base.
Check the pressure relief valve for discharge signs.
Verify pilot light or electronic igniter status on gas models.
Confirm thermostat settings and look for obvious corrosion or loose electrical connections on electric units before proceeding with deeper diagnostics.
When to call an emergency plumber
How should a homeowner respond if a water heater suddenly fails and creates a safety or property risk?
The homeowner should shut off power and water if safe, evacuate if there’s gas smell, and isolate the area.
Call an emergency plumber immediately for leaks, flooding, gas odors, electrical faults, or suspected tank rupture.
Document damage and follow dispatcher instructions until help arrives.
Common Water Heater Problems and How to Diagnose Them
Common water heater troubles can usually be identified by a few clear symptoms and simple checks.
Key issues to inspect include:
- No hot water
- Not enough hot water
- Water too hot or temperature fluctuations
- Strange noises or leaks
A systematic check of pilot/burner, thermostat settings, sediment buildup, and visible leaks helps pinpoint the cause.
No hot water
Many households encounter a sudden lack of hot water, a problem that can stem from several distinct causes such as a failed heating element, a tripped pilot or ignition system, a faulty thermostat, or an interrupted power or gas supply.
Diagnosis involves checking circuit breakers, pilot lights/ignition, thermostat settings, and heating elements or burners; repair or replace the faulty component and verify fuel or electrical continuity.
Not enough hot water
Insufficient hot water is a frequent complaint that can result from undersized tanks, excessive demand, sediment buildup, faulty thermostats, or failing heating elements or burners.
Diagnose by checking tank capacity versus household usage, inspecting sediment via flushing, testing thermostats and elements with a multimeter, and verifying burner operation on gas units.
Remedies include tank replacement, staggered usage, flushing, thermostats or element replacement, and burner service.
Water is too hot or fluctuating temperatures
When water temperature swings between scalding hot and lukewarm or runs consistently hotter than expected, the issue often traces to thermostat settings, a faulty thermostat, sediment insulation, or short-cycling in the heating element or burner.
Diagnose by checking and adjusting the thermostat, testing thermostats/elements with a multimeter, flushing sediment, and inspecting for frequent on/off cycles; replace defective parts and recheck temperatures.
Strange noises (popping, rumbling, banging)
Detecting popping, rumbling, or banging from a water heater signals internal issues that warrant prompt diagnosis.
Sediment buildup on the tank bottom causes steam bubbles that pop and rumble; flushing the tank often resolves this.
Expansion noises can indicate thermal stress or loose components; inspect and tighten fittings, the heating element, and baffles.
Persistent or severe sounds may require professional assessment or element replacement.
Leaks and pooling water
Leaks and pooled water around a water heater indicate a breach in the system that requires immediate attention to prevent property damage and further deterioration.
Inspect fittings, inlet/outlet connections, pressure relief valve, drain valve and tank base.
Isolate power and water, drain to identify source.
Tighten loose fittings, replace failing valves or corroded components.
If tank itself leaks, replace the heater.
Discolored or foul-smelling hot water
Troubles with pooling or visible drips can be followed by less obvious signs of water heater failure: discolored or foul-smelling hot water often indicates internal corrosion, bacterial growth, or contamination of the tank and supply lines.
Diagnosis requires sampling, checking the anode rod, inspecting sacrificial anode depletion, flushing the tank, and disinfecting with a controlled chlorination or professional treatment to remove biofilm or rust.
Pilot light issues (gas water heaters)
Pilot light problems in gas water heaters commonly present as a burner that won’t stay lit, a weak flame, or repeated outages, which directly prevent the appliance from producing hot water.
Diagnosis involves checking gas supply, thermocouple function, pilot orifice cleanliness, and proper venting.
Safe relighting, testing thermocouple continuity, or replacing a faulty thermocouple often restores operation; call a pro for persistent leaks.
Tripped circuit breaker or blown fuse (electric heaters)
How did the water heater lose power: a tripped circuit breaker or a blown fuse is often the reason electric models stop producing hot water.
Inspect the breaker panel for tripped switches or blown fuses, reset or replace as appropriate, and test continuity with a multimeter.
If breakers trip repeatedly, suspect a faulty element, shorted wiring, or overloaded circuit and call a qualified electrician.
High pressure or relief valve discharge
After checking electrical issues, attention should turn to pressure-related problems: the temperature and pressure relief (T&P) valve is designed to open when internal pressure or temperature exceeds safe limits, and its discharge indicates the heater is relieving unsafe conditions.
Persistent discharge suggests excessive pressure, faulty valve, thermal runaway, or a closed downstream valve.
Inspect, test, replace the T&P valve, and check expansion tank and pressure regulator.
Tools and Materials You’ll Need for DIY Water Heater Repairs
A brief inventory of tools and parts helps guarantee a repair goes smoothly. Recommended items include:
- Basic hand tools and safety gear
- Replacement parts: thermostat, heating element, anode rod, T&P valve
- When to rent specialized equipment
- Materials like plumber’s tape, replacement fittings, and sealants
The following section outlines which items are essential versus situational.
Basic hand tools and safety gear
Routine repairs to a water heater require a small, reliable set of hand tools and basic safety gear to work efficiently and reduce risk.
Essential tools include adjustable and pipe wrenches, pliers, screwdrivers (flat and Phillips), a multimeter, tubing cutter, and a socket set.
Safety gear: safety glasses, work gloves, a respirator for dust/odors, and insulated tools for electrical work.
Replacement parts commonly required (thermostat, heating element, anode rod, T&P valve)
Several common replacement parts are needed for typical water heater repairs: thermostats, heating elements, anode rods, and temperature-and-pressure (T&P) relief valves.
Each addresses specific failures—thermostats regulate temperature, elements heat water, anode rods prevent tank corrosion, and T&P valves relieve excess pressure.
Select compatible parts by model and fuel type, verify specifications, and keep replacement hardware and gaskets on hand.
When to rent specialized equipment
Rent specialized equipment when a task exceeds basic hand-tool capability or poses safety risks that consumer tools can’t mitigate.
Rental advice: obtain steam-rated wrenches for commercial boilers, pump-out pumps for sediment removal, and electrical test gear with proper CAT ratings.
Use pressure-rated hoses, tank lifts, and confined-space ventilators when access or weight is problematic.
Rent only from reputable suppliers and verify calibration and safety certificates.
Step-by-Step Repair Procedures
The following procedures outline concise, sequential steps for common water heater faults: restoring hot water on electric and gas units, increasing insufficient hot water capacity, silencing noisy tanks, and addressing leaks and corrosion.
Each set of steps focuses on diagnosis, safe isolation of the unit, and targeted corrective actions. Readers should follow safety precautions and consult a professional when a repair exceeds basic skills or involves gas, electrical, or major plumbing work.
Fixing no hot water on an electric water heater
The section begins by confirming electrical supply and performing a circuit breaker or reset check to rule out simple power faults.
It then outlines procedures for testing and replacing faulty heating elements, including element removal and continuity checks.
Finally, it covers thermostat replacement and troubleshooting of dual-element systems to isolate which component is failing.
Verifying power and resetting the breaker
Before opening panels or testing components, confirm that the water heater is receiving electrical power at the breaker panel.
Visually inspect the breaker for tripped position; switch it fully off, then back on to reset.
Check nearby GFCI and auxiliary disconnects.
If the breaker trips immediately or won’t reset, leave it off and consult a licensed electrician—do not proceed with internal repairs.
Testing and replacing heating elements
Begin by isolating power and draining a small amount of water to reduce pressure.
Use a multimeter to test each element for continuity and ground fault.
Remove access panels and element covers; test between terminals and to element body.
Faulty elements show no continuity or short to ground.
Replace defective elements with correct size and gasket, torque to spec, refill, restore power, and test for heat.
Replacing thermostats and dual-element troubleshooting
When an electric water heater produces no hot water despite functional heating elements, attention shifts to thermostats and the interaction between upper and lower elements in dual-element systems.
Diagnose thermostats with a multimeter and replace failed units.
Verify upper thermostat enables lower element by checking continuity and high-limit switches.
After replacement, restore power, purge air, and confirm sequential element operation and proper temperature recovery.
Fixing no hot water on a gas water heater
When a gas water heater produces no hot water, the first checks are the pilot light and the ignition system to confirm proper firing.
Next, the thermocouple should be inspected and cleaned or replaced if it fails to sense the pilot flame.
Finally, the gas supply line and burner assembly need examination for obstructions, corrosion, or improper flame characteristics.
Checking pilot light and ignition system
If the gas water heater produces no hot water, a malfunctioning pilot light or ignition assembly is often the cause and should be inspected first.
Verify pilot presence, smell for gas, and confirm the gas valve is on.
For electronic igniters, check wiring, batteries, and visible damage.
Clean debris from access panel and retest ignition following manufacturer restart procedures carefully.
Cleaning or replacing the thermocouple
Inspect the thermocouple for corrosion, soot, or loose connections before replacing it.
If dirty, power off gas and gently clean the tip with fine sandpaper or emery cloth; remove debris.
Test continuity with a multimeter or confirm pilot stability after reinstallation.
If pitting or damage appears, replace with the correct length and thread type, tighten fittings, then relight pilot per manufacturer instructions.
Inspecting the gas supply and burner assembly
Begin by confirming that the gas supply and burner assembly are the most likely causes of a no-heat condition, since faults here prevent flame ignition or proper combustion.
Then shut off gas, remove access panel, visually inspect burner for debris, corrosion, or misalignment.
Check pilot or ignition spark, test gas valve pressure, and clean or replace clogged burners.
Restore gas and verify proper flame.
Restoring insufficient hot water capacity
To restore insufficient hot water capacity, the technician first verifies and adjusts the thermostat to a safe, efficient temperature.
Next, the tank is flushed to remove sediment that reduces effective volume and heating efficiency.
If the problem persists, the failing dip tube is inspected and replaced to guarantee cold inlet water reaches the bottom of the tank.
Adjusting thermostat settings safely
Carefully lowering or raising the water heater thermostat can restore hot water capacity when temperatures are set incorrectly or have drifted over time.
Power should be cut first. Use a calibrated thermometer and adjust in small increments (2–5°F). Wait between changes for accurate readings.
Re-secure panels and restore power. Note maximum safe temperatures to prevent scalding and follow manufacturer specifications.
Flushing sediment from the tank
After adjusting thermostat settings and confirming safe temperature limits, attention turns to sediment buildup, a common cause of reduced hot water capacity and noisy operation.
The technician drains power or gas, attaches a hose to the drain valve, opens a hot water faucet, and flushes until clear.
Repeat partial refills and drains to dislodge deposits.
Close valves, restore power, and check for leaks.
Replacing a failing dip tube
Begin by confirming that the dip tube—responsible for directing incoming cold water to the tank bottom—is fractured, deteriorated, or missing, since a failed dip tube commonly causes rapid loss of hot water despite normal burner or element operation.
Shut off water and power, drain below the dip tube, remove and match a replacement, install securely, refill, purge air, restore power, and verify restored hot water capacity.
Repairing noisy water heaters
A technician begins by distinguishing sediment-related rumbling from thermal expansion or loose piping by listening at the tank and testing water flow.
If sediment is suspected, a controlled flush and descaling are performed following safety steps; if noise stems from expansion or vibration, insulating or securing the pipes is evaluated.
The following steps outline diagnosis, safe flushing/descaling, and when simple mechanical fixes suffice.
Diagnosing sediment buildup vs. expansion noise
When a water heater emits intermittent popping or a steady ticking, distinguishing sediment-related sounds from thermal expansion is essential for accurate diagnosis and safe repair.
Sediment noise typically occurs during heating cycles, lower volume, and shifts with water usage; expansion clicks align with temperature changes, pipe routing, or metal contact.
Inspect access points, insulation, and pipe clearances before proceeding with corrective steps.
Flushing and descaling procedures
To flush and descale a noisy water heater, the technician first isolates power and water supply. Then, they drain the tank to remove loose sediment before applying a descaling solution or using mechanical agitation to dislodge adhered mineral buildup.
This systematic approach reduces future popping and restores heating efficiency while minimizing the risk of damage or scalding. After soaking, the technician thoroughly flushes, reinspects the anode and elements, refills, and restores power.
When insulating or securing piping solves noise
Inspecting and isolating the piping identifies many common sources of water heater noise: loose straps, uninsulated thermal expansion, and vibrations transmitted from piping rubbing against framing.
Technicians secure lines with proper straps, add foam or rubber insulation at contact points, and install expansion loops or sleeves to absorb movement.
Verifying tight fastenings and padding eliminates rattles and reduces heat loss, restoring quiet operation.
Stopping leaks and addressing corrosion
The section begins by identifying whether a leak originates from the tank itself or from external fittings and valves.
It then outlines steps for tightening or replacing faulty valves and fittings to stop common leaks.
Finally, it covers inspection and replacement of the anode rod and how to assess remaining tank life expectancy based on corrosion.
Locating the leak source (tank vs. fittings)
Where is the water actually coming from—around fittings or through the tank itself?
Inspect visually and feel for wetness while the heater is dry and off.
Trace drips to their highest point: fittings leak at joints, valves, or connections; tank leaks show corrosion, rust stains, or seepage from the tank body or seams.
Note drip pattern and location for proper diagnosis.
Tightening or replacing valves and fittings
Begin by shutting off power (electricity or gas) and the cold-water supply. Then drain enough water to stop flow past the leaking fitting.
Inspect valves and fittings for corrosion, cracks, or loose connections. Tighten connections with appropriate wrenches; replace damaged compression fittings, ball valves, or flexible connectors.
Use proper thread sealant or tape, restore supply, check for leaks, and restore power once confirmed.
Replacing the anode rod and assessing tank life expectancy
After addressing leaky fittings and restoring tight connections, attention moves to corrosion inside the tank by inspecting and replacing the anode rod and evaluating the remaining service life.
A corroded anode rod accelerates tank deterioration; remove, compare to replacement criteria, and install a new sacrificial rod.
Inspect interior via drain, note thinning or rust, and estimate replacement or full-tank retirement based on condition.
Fixing water discoloration and odor issues
To address water discoloration and odors, the technician begins with tank flushing and sanitizing to remove sediment and kill bacteria.
If staining or persistent smells continue, inspection and replacement of the anode rod are recommended to restore corrosion protection and reduce bacterial growth.
Follow-up testing confirms water clarity and acceptable odor levels before returning the heater to regular service.
Flushing and sanitizing the tank
Flushing and sanitizing the water heater tank removes accumulated sediment and bacteria that cause discoloration and unpleasant odors.
The technician drains the tank via the drain valve, flushes until clear, then isolates and refills. A bleach or non-chlorine sanitizer solution is circulated per manufacturer guidelines, allowed to contact interior surfaces, then flushed thoroughly.
Equipment is inspected and fittings tightened before restoring service.
Replacing anode rods and addressing bacterial growth
Inspecting and replacing a corroded anode rod is a primary step in eliminating rotten-egg odors and rusty discoloration caused by bacterial activity and metal corrosion in the tank.
Technicians recommend replacing weakened sacrificial anodes, then sanitizing with a diluted bleach flush and thoroughly rinsing.
If odors persist, test for sulfate-reducing bacteria; periodic chlorination or professional evaluation may be required to restore water quality.
Resetting tripped breakers and addressing electrical faults
The procedure begins with safely testing thermostats and heating elements using a multimeter to confirm whether components are receiving power and functioning within specified resistance ranges.
If readings are abnormal or inconsistent, the technician should inspect visible wiring for loose connections, burns, or corrosion and verify that the breaker is not tripped or overloaded.
Complex wiring faults, persistent breaker trips, or any uncertainty about live electrical work should prompt hiring a licensed electrician.
Safely testing thermostats and elements with a multimeter
Begin by disconnecting power at the breaker and confirming the water heater is de-energized before any testing; a locked-out breaker and a tested absence of voltage prevent fatal shocks.
Use a multimeter to measure continuity on thermostats and elements, compare resistance to manufacturer specs, and check for short-to-ground.
Replace faulty components and re-test before restoring power; observe safe practices throughout.
Identifying wiring problems and when to hire an electrician
When a water heater repeatedly trips breakers or shows intermittent power, tracing wiring faults and knowing when to call a licensed electrician become critical for safety and lasting repair.
Inspect visible connections for loose, corroded, or burnt wires; test continuity and voltage only if qualified.
If grounding is compromised, wiring is damaged, or breakers trip after resets, hire a licensed electrician to diagnose and repair.
Repairing Temperature & Pressure (T&P) relief valve issues
The next section covers diagnosing and repairing Temperature & Pressure (T&P) relief valve problems with clear, step-by-step guidance.
It explains how to test valve operation, when and how to replace a faulty T&P valve, and the requirements for proper discharge piping.
Safety precautions and code-compliant installation tips are included to guarantee reliable operation.
Testing valve operation
To verify a T&P relief valve is functioning, inspect and operate it methodically to confirm it opens, seals, and drains properly without leaks or sticking.
Lift the test lever briefly to observe immediate flow, allow it to snap closed, then check for continued dripping.
Note response time, any sputtering, corrosion, or mineral buildup.
Record findings and decide on service or replacement.
Replacing the T&P valve and ensuring proper discharge piping
Begin by shutting off power and water to the heater.
Drain enough water below the T&P valve level, then remove the old valve with a wrench.
Install a correctly rated replacement, using plumber’s tape on threads and tightening to manufacturer torque.
Fit a full-length, downward-facing discharge pipe that terminates within 6 inches of the floor and is same diameter as the valve outlet.
Test for leaks.
When Repairs Won’t Fix It: Signs You Need a Replacement
When a water heater shows advanced age, visible corrosion, or a leaking tank, replacement is often the only reliable option.
Repeated breakdowns with rising repair costs signal that continued fixes are uneconomical.
Reduced efficiency, insufficient hot water capacity, or noncompliance with current codes also justify installing a new unit.
Age and corrosion indicators
Although routine repairs can extend service life, persistent age-related wear and visible corrosion are clear signals that a water heater has outlived its practical lifespan.
Rust flakes in hot water, corroded connections, pitted tank walls, leaking seams, and a date stamp older than 10–15 years indicate imminent failure.
Replacement is safer and more cost-effective than continuing repairs on a compromised unit.
Frequent breakdowns and escalating repair costs
Repeat repairs and rising invoices are strong indicators that a water heater has moved beyond economical salvage. A unit that requires frequent service calls or accumulates multiple distinct failures (burner/element issues, thermostat faults, valve replacements) will likely continue to consume time and money.
Owners should track incident frequency and total repair expense. When cumulative costs approach replacement price, replacement becomes the prudent option.
Efficiency, capacity, and code-based replacement reasons
Many homeowners find that even a mechanically sound water heater can warrant replacement due to declining efficiency, insufficient capacity, or failure to meet current safety and building codes.
Reduced energy efficiency raises utility bills; a too-small tank fails growing household demand; outdated units may lack required seismic straps, pressure-relief valves, or insulation.
Replacement restores performance, compliance, and long-term savings.
Comparison of Repair vs Replace Options
A concise comparison of repair versus replacement helps clarify cost, time, longevity, and safety tradeoffs when addressing water heater problems. The table below summarizes key differences to guide decision-making. A homeowner should weigh immediate expenses and downtime against expected lifespan and potential safety risks before choosing a path.
| Factor | Repair | Replace |
|---|---|---|
| Cost | Lower short-term expense | Higher upfront, lower long-term risk |
| Time | Quicker if parts available | Longer installation and setup time |
| Longevity & Safety | Extends life but may retain risks | New unit offers longer life and safety improvements |
Cost, time, longevity, and safety tradeoffs
When evaluating whether to repair or replace a malfunctioning water heater, homeowners must weigh upfront cost, downtime, expected remaining service life, and safety risks to determine the most practical choice.
Repair often costs less and is quicker but may offer limited longevity and lingering hazards.
Replacement raises immediate expense and installation time yet restores full efficiency, warranty coverage, and longer-term safety.
Cost Estimates and Timeframes for Common Repairs
The section presents concise cost and time benchmarks for common water heater repairs to aid decision-making.
- Thermostat replacement — DIY: low cost, ~30–60 minutes.
- Anode rod replacement — DIY/pro: moderate cost, 1–2 hours.
- Heating element replacement — pro recommended: higher cost, 1–3 hours.
- Tank leak repair/replacement — often pro only: highest cost, several hours to half a day.
Estimates contrast typical DIY expenses with professional service rates and include labor-time ranges for each repair type.
Typical DIY repair costs vs professional service
Many common water heater repairs can be attempted by a competent homeowner for substantially lower material costs and shorter turnaround times than hiring a professional.
However, complexity, safety risks, and warranty implications often make paid service the wiser choice.
Typical DIY expenses (parts, tools) range $20–$200; professional visits commonly run $150–$800 including parts.
For high-risk or warranty-covered units, prioritize licensed service.
Labor time estimates for each repair type
Estimate labor time per repair type to set realistic expectations for scheduling and comparing DIY versus professional service.
Flushing a tank: 30–60 minutes.
Replacing a sacrificial anode: 45–90 minutes.
Thermostat or heating element replacement: 1–2 hours.
Pressure relief valve swap: 30–60 minutes.
Minor leak repair: 1–2 hours.
Tank replacement or complex gas work: 4–8 hours, longer if permits or inspections are required.
Preventive Maintenance to Avoid Future Breakdowns
Preventive maintenance reduces unexpected failures and extends a water heater’s service life.
Recommended actions include:
- Annual flushing and inspection checklist
- How to test the anode rod and when to replace it
- Water quality considerations and softeners
- Safe thermostat settings and energy-saving tips
A regular schedule for these tasks and prompt replacement of worn parts can prevent costly breakdowns.
Annual flushing and inspection checklist
An annual flushing and inspection checklist guarantees a water heater is cleared of sediment, verified for safe operation, and tuned to extend service life while reducing the risk of unexpected failures.
Inspect pressure relief valve, drain and flush tank, check for leaks and corrosion, verify thermostat settings and wiring, examine burner or heating element condition, confirm proper venting and insulation, and document findings for follow-up.
How to test the anode rod and when to replace it
One straightforward test for the water heater’s sacrificial anode rod assesses its remaining metal and indicates when replacement is necessary.
Remove power, relieve pressure, loosen the anode and extract it.
Visually inspect for heavy corrosion, exposed core, or less than half-inch thickness. Replace if consumed over 50% or if fragments remain.
Record date and use same material type.
Water quality considerations and softeners
Water quality directly affects a water heater’s lifespan and performance; hard water with high mineral content accelerates scale buildup on heating elements and inside tanks, reducing efficiency and promoting corrosion.
Regular testing for hardness, pH, and sediment informs maintenance.
Installing a water softener or sediment filter reduces deposits, extends element and tank life, and lowers service frequency; choose capacity to match household usage.
Safe thermostat settings and energy-saving tips
Minerals and sediments that shorten a heater’s life also increase energy use, so proper thermostat settings and efficient habits both preserve equipment and reduce bills.
Set thermostats to 120°F for safety and efficiency; lower for vacant periods. Insulate tanks and pipes, fix leaks promptly, and schedule annual maintenance.
Use timed controls or demand heaters for reduced standby losses and controlled consumption.
Troubleshooting Flowcharts and Quick Decision Guides
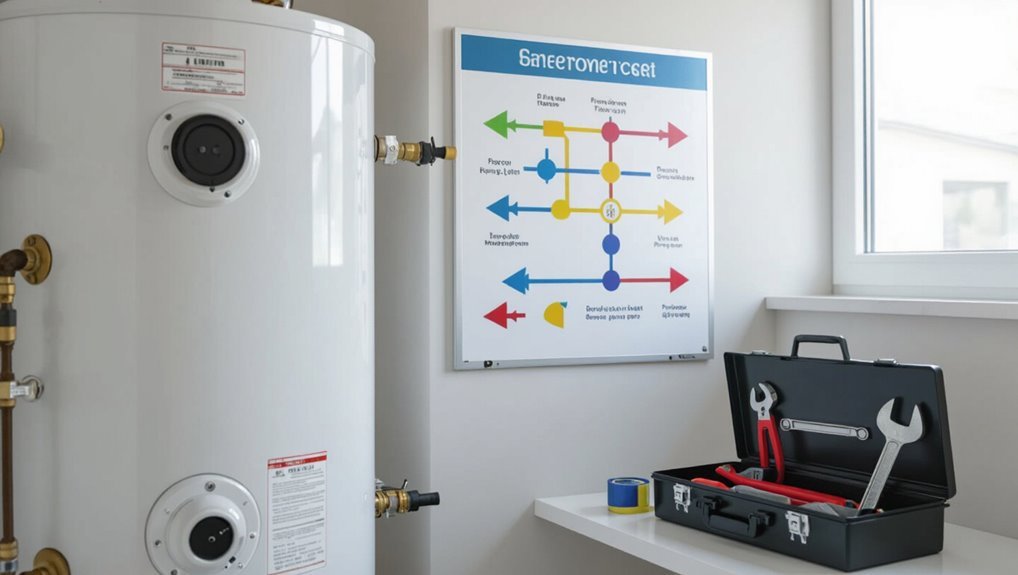
The article presents concise troubleshooting flowcharts for common failures to speed diagnosis.
One flowchart addresses no-hot-water scenarios, guiding through checks of power, pilot, thermostat, and heating elements.
A second flowchart covers leaks and pressure problems, directing users to inspect valves, pressure relief, piping, and tank integrity.
Flowchart for no-hot-water scenarios
Begin by isolating the problem with a clear, step-by-step flowchart that guides a user from quick safety checks to targeted diagnostics for common no-hot-water causes.
The chart proceeds: verify power/gas supply, check thermostat and pilot/igniter, inspect heating elements or burner, test for sediment or dip tube failure, determine tank vs. supply issue, then recommend repair, part replacement, or professional service.
Flowchart for leaks and pressure problems
Map out a concise flowchart that directs users from immediate safety steps to focused diagnostics for leaks and pressure issues in water heaters.
Begin with shutoff and power isolation.
Then inspect obvious external leaks, T&P valve discharge, and drain valve.
If pressure is suspected, check expansion tank and pressure relief settings.
Guide to repair:
- Tighten/replace fittings
- Drain and bleed system
- Consult professional if internal tank leak or persistent overpressure.
Safety Precautions and Legal/Code Considerations
Before attempting repairs, attention must be paid to gas safety, proper ventilation, and the risk of carbon monoxide exposure.
Electrical hazards and adherence to local wiring and installation codes must also be observed.
Finally, homeowners should know when permits are required and when an insured professional is legally necessary.
Gas safety, ventilation, and carbon monoxide risks
Inspecting gas appliances and ventilation is essential when diagnosing water heater issues because improper combustion or blocked flues can produce dangerous carbon monoxide (CO) levels.
The technician should verify burner flame quality, flue draft, and vent termination clearance.
Guarantee adequate combustion air, check for gas leaks, and recommend immediate shutoff and professional service if CO presence, corrosion, or abnormal odors are detected.
Electrical safety and local code compliance
After addressing combustion and ventilation hazards, attention must shift to electrical safety and adherence to local codes when working on water heaters.
Power should be disconnected at the breaker, and lockout/tagout applied.
Inspect wiring, grounding, and bonding; replace damaged components with code-compliant parts.
Verify circuit capacity and GFCI/ARC protection where required.
Document work and follow manufacturer and municipal regulations to guarantee safety.
Permits and when an insured pro is required
When work on a water heater alters plumbing, gas, electrical systems, or structural elements, local regulations frequently require permits and inspections to confirm safety and code compliance.
Homeowners should verify permit needs with authorities; major modifications, gas hookups, or replacement installations typically mandate licensed, insured professionals.
Using insured contractors protects against liability, guarantees code adherence, and preserves warranty and resale documentation.
Recommended Parts, Brands, and Warranties
Reliable replacement parts, trusted brands, and clear warranty steps are essential for long-term water heater performance.
Consider these quick points to guide choices and paperwork:
- OEM vs. aftermarket compatibility;
- corrosion-resistant materials;
- reading warranty scope and exclusions;
- procedures for transferring and registering coverage.
Technicians and homeowners should confirm part numbers and document transactions to preserve warranty rights.
Reliable replacement parts and what to look for
A dependable water heater restoration depends as much on the quality of replacement parts as on proper installation; selecting components from reputable brands with clear specifications and solid warranties minimizes future failures and service calls.
Prioritize OEM or certified aftermarket thermostats, heating elements, anode rods, valves, and T&P assemblies; check material compatibility, amp/BTU ratings, corrosion resistance, and availability of replacement parts for easier future servicing.
Warranty tips and transferring warranty information
After selecting quality parts and verifying specifications, attention should turn to warranties and how to preserve coverage through ownership changes.
Owners should register products promptly, keep receipts and installation records, and follow maintenance schedules required by manufacturers.
For transfers, verify transferability, obtain written confirmation, and submit necessary forms.
Clear documentation and adherence to terms prevent claim denials and protect long-term investment.
Final Checklist Before Declaring the Job Complete
Before signing off, the technician runs a concise final checklist to verify system integrity and occupant safety.
- Leak test
- Temperature verification
- Final safety checks
- Document repairs and schedule follow-up maintenance
This confirms the heater functions correctly and that records and next steps are in place.
Leak test, temperature verification, and final safety checks
Begin by performing a systematic leak test.
Then verify thermostat settings and water temperature, and finish with a final safety review of pressure relief, venting, and electrical or gas connections.
Inspect fittings, valves, and drain pan for moisture.
Confirm outlet temperature matches thermostat and adjust if necessary.
Test the TPR valve operation, guarantee proper vent draft, and verify electrical wiring or gas connections are secure and leak-free.
Documenting repairs and scheduling follow-up maintenance
Record all repairs, component replacements, and test results in a clear, concise service log that includes dates, part numbers, serial numbers, technician name, and any deviations from standard procedure.
Note warranty details, recommended next-service interval, and any observed anomalies.
Provide the owner with a copy, schedule follow-up inspections or maintenance, and set reminders to verify system performance and address emerging issues before failures occur.
Conclusion
To sum up, the guide arms the reader with concise, practical steps to diagnose and repair common water heater problems, moving from immediate safety actions to detailed repair procedures and when to replace the unit. With clear troubleshooting flowcharts, tool lists, and code reminders, even a cautious DIYer can tackle most issues without wasting time. The advice, as indispensable as a life raft in a storm, emphasizes safety, proper parts, and final checks before declaring the job complete.