How to Drain a Vacuum Breaker: Step-by-Step Guide for Homeowners
To drain a vacuum breaker and prevent freeze damage, follow these steps: first, shut off the water supply and relieve any pressure in the system. Open the test cocks or drain valves to let the water escape. Next, loosen the cap or vent to release any trapped water. After draining, inspect the unit for debris or damaged seals and flush it out if necessary. Reassemble the unit carefully, ensuring proper torque, and then slowly restore pressure to check for leaks. Below, you’ll find specific steps for different types of vacuum breakers and troubleshooting tips.
Can You Drain a Vacuum Breaker and Why It Matters
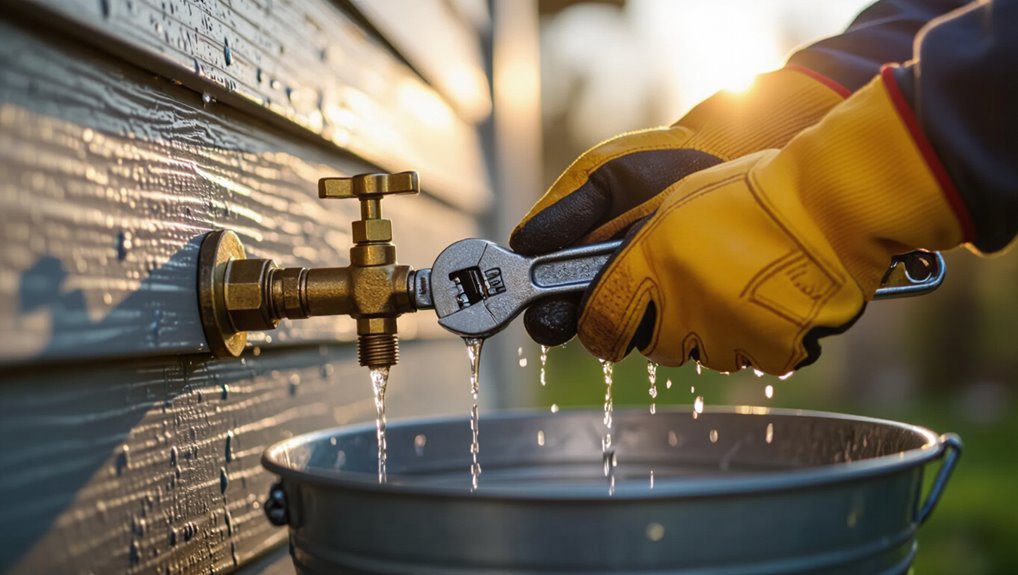
A vacuum breaker can be drained when exposed to freezing temperatures or when maintenance requires removal of trapped water; otherwise routine operation typically does not require draining.
Homeowners should drain the device before winterizing outdoor plumbing or if a leak indicates internal water retention.
If conditions are mild and the unit is functioning without leaks, draining is unnecessary.
Direct, concise answer to the homeowner’s question
Homeowners can and should drain a vacuum breaker when winterizing plumbing or doing repairs, because trapped water can freeze, expand, and damage the device or connected piping.
A concise answer: yes — the vacuum breaker can be drained.
For basic maintenance, learning how to drain vacuum breaker prevents freeze damage, preserves valve operation, and reduces leak risk; follow manufacturer steps and shut off supply first.
When draining is necessary vs. when it’s not
Although many vacuum breakers can and should be drained before freezing weather or repairs, not every situation demands it: draining is necessary when the device or its connected piping holds standing water that could freeze, when the breaker is exposed outdoors or in an unheated space, or when local winterizing protocols call for it;
conversely, draining is unnecessary if the breaker and adjacent lines are insulated, located inside a heated structure, or designed as frost-proof models rated by the manufacturer for year‑round exposure.
Drain when risk exists; skip when protection suffices.
What Is a Vacuum Breaker and How It Works
A vacuum breaker is a backflow-prevention device used to stop contaminated water from flowing backward into a clean supply; common types include atmospheric, anti-siphon, and integrated backflow preventers.
Its key components—valves, vents, and seals—open or close to admit air or block flow, equalizing pressure and preventing siphon-induced backflow.
These devices are typically found on outdoor hose bibs, irrigation systems, and certain fixtures in residential plumbing.
Definition and common types (atmospheric, anti-siphon, backflow preventer)
Vacuum breakers are mechanical devices designed to prevent backflow by admitting air into a plumbing system when negative pressure (a vacuum) would otherwise draw contaminated water backward.
They vary by application and installation. Common types include:
- Atmospheric vacuum breakers for simple fixtures.
- Anti-siphon vacuum breakers built into hose bibs.
- Reduced-pressure backflow preventers for high-risk systems.
- Double check assemblies for moderate risk.
Key components and how they prevent backflow
Several essential components work together in a vacuum breaker to detect negative pressure and open an air path that stops backflow.
A spring-loaded valve seat seals under normal pressure; a movable piston or poppet senses pressure drop; an air inlet and check port admit air when needed; seals and housings prevent leaks.
Together they guarantee one-way flow and rapid atmospheric venting.
Typical locations in residential plumbing systems
Common points where vacuum breakers are installed include outdoor hose bibs, irrigation systems, and fixtures with threaded spouts such as utility sinks and laundry tubs.
They also appear on supply lines for boilers, outdoor faucets, and garden irrigation manifolds.
Placement focuses on potential cross-connection risks and elevations where backflow might occur.
Properly located devices protect potable water and comply with local codes.
Safety Precautions and Tools Required
Before beginning work on a vacuum breaker, the technician should shut off water supplies, depressurize the line, and don appropriate personal protective equipment.
A concise checklist of tools and materials—wrenches, buckets, rags, replacement seals, and thread tape—should be prepared and verified.
If corrosion, complex piping, or uncertainty about system isolation is encountered, the task should be referred to a licensed professional.
Safety steps before starting (shutoffs, depressurize, PPE)
Begin by isolating the water supply and relieving system pressure to create a safe work environment: shut off the upstream valve feeding the vacuum breaker, open a downstream faucet or the breaker’s test port to drain residual water, and fully depressurize any connected lines.
Wear eye protection and gloves, guarantee good lighting, clear the area, and verify no electrical hazards exist before proceeding.
Tools and materials checklist
What tools and protective gear are required to drain a vacuum breaker safely and efficiently? The homeowner should gather basic tools and PPE before starting. Essential items include:
- Adjustable wrench and pliers
- Screwdrivers and hex keys
- Bucket, rags, and small brush
- Safety glasses, gloves, and work boots
Confirm materials match valve specifications and keep a flashlight nearby.
When to call a professional
Having gathered the listed tools and protective gear, the homeowner should recognize situations that warrant professional help.
Call a licensed plumber if corrosion, seized components, unclear valve configurations, or persistent leaks appear.
Also seek professional service for backflow incidents, unsafe pressure anomalies, or when local codes require certified testing.
When confidence or competence is lacking, hiring an expert prevents damage and guarantees compliant repairs.
Step-by-Step Guide to Draining a Vacuum Breaker
The procedure begins with locating the vacuum breaker and confirming its type to determine the correct draining method.
Next, the operator shuts off the water supply, relieves system pressure, and opens the test cocks or drain valves appropriate to that model.
Finally, the cap or cover is removed or loosened for internal drainage, followed by flushing, inspection, and removal of debris or mineral buildup.
Step 1 Locate the vacuum breaker and identify type
A visual inspection begins by locating the vacuum breaker on the plumbing line—typically near outdoor spigots, irrigation systems, or at the backflow assembly—and confirming its model and connection style (atmospheric, pressure-type, or hose-bib).
Note markings, inlet/outlet orientation, and threaded or union fittings. Photograph the unit and record valve locations, mounting, and any visible damage to verify correct draining procedures and parts identification.
Step 2 Shut off water supply and relieve system pressure
Shut off the upstream supply valve to isolate the section containing the vacuum breaker.
Then open a downstream faucet or bleed valve to vent trapped pressure; this prevents water flow while allowing residual pressure to escape so the unit can be drained safely.
Confirm isolation by checking no flow at adjacent fixtures, wear eye protection, and wait until pressure gauges or fittings show zero before proceeding.
Step 3 Open test cocks or drain valves (detailed actions for common types)
Begin by locating the vacuum breaker’s test cocks or built-in drain valve and prepare the appropriate tool—typically a small flat screwdriver or a 1/4-turn wrench—so the drain points can be opened smoothly.
Turn slow counterclockwise for screw-type cocks; use quarter-turn wrench for ball-style drains.
Collect discharged water, watch for steady flow, then close any auxiliary bleed ports once flow subsides.
Step 4 Remove or loosen cap/cover for internal drainage
Loosen the vacuum breaker’s cap or cover to access internal passages and allow trapped water to drain.
Using the correct wrench or screwdriver, turn counterclockwise slowly to avoid stripping threads. Hold a rag beneath to catch drips.
If seized, apply penetrating oil and wait before attempting again. Once free, lift the cap carefully and tilt slightly to promote complete drainage.
Step 5 Flush, inspect, and clear debris or mineral buildup
With the cap lifted and excess water captured, the next step is to flush the unit, inspect internal passages, and remove any debris or mineral buildup.
Run clean water through ports until clear, use a soft brush or plastic pick to dislodge sediments, and inspect seals, diaphragms, and check valves for deposits.
Rinse thoroughly and guarantee passages drain freely before proceeding.
Step 6 Reassemble, close drains, and restore water supply
Reassemble the vacuum breaker by reversing the disassembly steps: seat diaphragms and seals correctly, replace any caps or covers, and secure fasteners to the manufacturer’s torque or hand-tightening specifications.
Close all service drains and test ports used for draining.
Slowly restore supply valves to pressurize the unit while monitoring fittings.
Remove tools and debris, and note any parts replaced for records or future maintenance.
Step 7 Test for leaks and proper operation
Begin by pressurizing the system slowly and observing all joints, seals, and fittings for signs of leakage or improper seating.
Operate the vacuum breaker through several cycles, confirming the check valve seats and the relief port functions.
Monitor pressure for stability and recheck connections after a short run.
Address any leaks immediately, tighten or replace components, then retest until dry and stable.
Variations: Draining Different Types of Vacuum Breakers
Different vacuum breaker designs require distinct draining techniques and attention to common pitfalls.
Atmospheric vacuum breakers often need simple manual draining and careful reassembly to avoid misalignment, while anti-siphon valves integrated into irrigation systems may require system-specific shutoff and winterization steps.
Backflow preventers with internal check valves demand pressure isolation and cautious bleeding to protect the checks and seals.
Atmospheric vacuum breakers specific steps and pitfalls
When draining an atmospheric vacuum breaker, the technician should first verify that the upstream water supply is fully shut off and the downstream system pressure has been relieved to prevent backflow or spray.
Then open the relief port or test cock to allow trapped water to escape while supporting any loose components to avoid damage.
Inspect seals, remove sediment, test closure, and reassemble carefully, noting brittle parts and alignment.
Anti-siphon valves built into irrigation systems
Many irrigation systems incorporate anti-siphon valves—self-contained vacuum breakers that prevent backflow into the potable supply—so technicians must recognize their design variations and specific draining procedures.
Identification, isolation of zone valves, and relieving internal pressure are essential. Some models have removable caps or drain ports; others require manual cycling.
Always follow manufacturer steps: depressurize, open drains, reassemble, and test for leaks before restoring normal operation.
Backflow preventers with internal check valves
Because backflow preventers with internal check valves combine pressure-sensitive mechanisms and compact housings, draining them requires attention to their specific internal layouts and access points. Inspect service caps, depressurize inlet, open drain ports, and remove trapped water carefully. Use gentle pressure and avoid disassembling sealed components. Follow manufacturer diagrams and test for leaks before restoring service.
| Component | Action |
|---|---|
| Service cap | Inspect |
| Drain port | Open |
| Check valve | Depressurize |
| Housing | Avoid disassembly |
Common Problems and Troubleshooting
Common issues include a vacuum breaker that refuses to drain, which can stem from blockages, faulty valves, or improper installation and requires targeted fixes.
Post-reassembly leaks are common and are best approached with a concise diagnostic checklist covering seals, torque, and alignment.
Stuck or corroded components should be removed and replaced using safe methods and appropriate tools to avoid damage.
Vacuum breaker won’t drain causes and fixes
Identify likely causes quickly to isolate why a vacuum breaker fails to drain and apply the appropriate fix.
Common causes include debris-clogged ports, stuck or corroded seals, misaligned internal components, frozen water, or blocked vent paths.
Diagnose by inspecting and cleaning ports, replacing damaged seals or springs, realigning parts, and thawing frozen sections.
Test operation after each corrective step.
Leaks after reassembly diagnostic checklist
After addressing drainage failures, reassembly introduces its own set of leak risks that must be checked systematically.
Inspect all seals and O-rings for correct seating and damage. Verify torque on fittings; avoid overtightening.
Confirm orientation of internal components and gasket placement.
Pressurize slowly, observing joints, test under normal and elevated pressure, and tighten or reseat any source of seepage.
Stuck or corroded components safe removal and replacement
When components seize from mineral buildup or corrosion, careful, methodical removal prevents further damage to the vacuum breaker and nearby plumbing.
Apply penetrating oil, allow dwell time, and use properly sized wrenches with steady, controlled force.
If parts remain immobile, heat nearby metal briefly or cut and replace corroded sections.
Always install compatible replacement parts, new seals, and test for leaks before reassembly.
Mistakes to Avoid When Draining a Vacuum Breaker
Typical errors when draining a vacuum breaker include forcing stuck components with the wrong tools, which can cause damage or leaks.
Not relieving system pressure before opening the device risks sudden ejection of water or parts.
Reinstalling components incorrectly or skipping functional tests can leave the assembly unsafe or noncompliant.
Forcing parts or using incorrect tools
Apply steady, correct tools rather than brute force or improvised implements to avoid damaging a vacuum breaker’s delicate components.
Forcing valves, prying seals, or using wrong-size wrenches can strip threads, warp housings, or break plastic parts.
Use manufacturer-recommended tools, gentle leverage, and patience.
If a part resists, stop and consult documentation or a professional to prevent costly, irreversible damage.
Failing to relieve pressure before opening
Always depressurize the system before loosening any fittings or removing the vacuum breaker cover.
Failure to relieve pressure can cause sudden sprays, component damage, or personal injury.
Gradually open upstream shutoffs and bleed trapped pressure using designated vents or test cocks.
Verify zero pressure with a gauge or hand check before disassembly.
Proceed only when the system is confirmed safe and stable.
Reinstalling incorrectly or skipping functional tests
Reinstalling a vacuum breaker improperly or skipping post-drain functional tests can undo all careful work and create hidden failure points.
The homeowner should guarantee correct orientation, tightened fittings, and intact seals.
After reassembly, brief pressure and leak tests confirm correct operation; also cycle the unit to verify internal components move freely.
Neglecting these steps risks leaks, backflow, or sudden failure under pressure.
Maintenance Tips and Best Practices
A clear maintenance routine helps extend a vacuum breaker’s service life by scheduling seasonal draining and winterization at appropriate intervals.
Regular cleaning, targeted lubrication, and measures to prevent corrosion keep components operating reliably.
Guidance on inspecting wear and failure signs clarifies when replacement is more cost-effective than repair.
Seasonal draining schedule and winterization advice
Two seasonal drainings—late autumn before freezing temperatures and early spring after sustained thaw—are recommended to protect a vacuum breaker from freeze damage and corrosion.
Homeowners should schedule autumn draining after final outdoor water use and spring draining once temperatures consistently remain above freezing.
Inspect drainage points for blockages, confirm valves fully open during draining, and document dates for future maintenance planning.
Cleaning, lubrication, and corrosion prevention
Maintain regular cleaning, lubrication, and corrosion prevention to guarantee a vacuum breaker functions reliably and lasts longer.
Components should be inspected, debris removed, and seals lightly lubricated with compatible silicone grease. Use corrosion-inhibiting spray on metal parts and replace corroded fasteners promptly.
- Inspect annually
- Clean ports and seats
- Lubricate moving parts
- Apply corrosion inhibitor
When to replace vs. repair
When should a vacuum breaker be repaired rather than replaced depends on the extent of damage, age of the unit, and availability of parts.
Minor leaks, worn seals, or removable cartridges often justify repair.
Severe corrosion, warped components, persistent malfunctions, or obsolete models warrant replacement.
Consider cost, downtime, and warranty; if repair approaches or exceeds replacement expense, replacement is usually the prudent choice.
Cost, Time, and When to Hire a Pro
A homeowner can usually drain a vacuum breaker in 15–45 minutes using basic tools, while parts like replacement seals typically cost $5–25.
If professional service is needed, expect a plumber’s visit to run $75–200 depending on region and complexity.
Persistent leaks, corrosion, or unclear shutoff access are signs that a licensed plumber should be called.
Typical time investment for DIY draining
Time is the main practical constraint for a DIY vacuum breaker drain: most homeowners can complete the procedure in 30–90 minutes, with costs limited to basic tools and replacement seals if needed.
Preparation and brief troubleshooting add time; inexperienced individuals may approach the upper range. Allow extra minutes for drying, leak checks, and cleanup.
Complex access or corroded parts can extend the job considerably.
Estimated costs for parts and service
Typical out-of-pocket expenses for draining a vacuum breaker range from under $20 for basic replacement seals and small tools to $150–$300 if professional service or new valve assemblies are required.
Parts like O-rings, springs, and cartridges typically cost $5–$50. Rental tools or specialty fittings add $10–$40.
Labor-only service calls often start around $75–$150, depending on region and complexity.
Signs it’s time to call a licensed plumber
Recognize persistent leaks, inability to fully depressurize the breaker, or repeated failures after DIY attempts as clear indicators that a licensed plumber should be called.
These issues often signal internal damage, incorrect installation, or system-wide problems beyond basic seal or spring replacement.
A pro can assess safety, diagnose hidden faults, advise on replacement versus repair, provide warranty-backed work, and complete jobs faster, minimizing water damage and costly repeat visits.
Conclusion
Properly draining a vacuum breaker protects plumbing and prevents freeze damage. Following safety precautions, using the right tools, and adhering to the step-by-step process reduces risk and guarantees the device functions correctly. Homeowners should recognize variations between atmospheric, pressure-type, and hose-bib vacuum breakers and adjust procedures accordingly. Common troubleshooting and maintenance tips help extend lifespan; however, if complications, persistent leaks, or uncertainty arise, hiring a licensed plumber is the safest, most time-effective option.