How to Replace a Thermostat on a Hot Water Heater: Step-by-Step DIY Guide
To replace a thermostat on your hot water heater, start by diagnosing the issue and ensuring the power and water supply are turned off. Remove the access panels to access the thermostat. Carefully document the wiring before disconnecting the old thermostat, then install the new one with a matching gasket and reattach the terminals. After restoring the insulation and refilling the tank if necessary, test the voltage and water temperature while checking for leaks. Always follow safety guidelines and local regulations; if you’re unsure, it’s best to consult a licensed technician.
What Replacing a Hot Water Heater Thermostat Involves
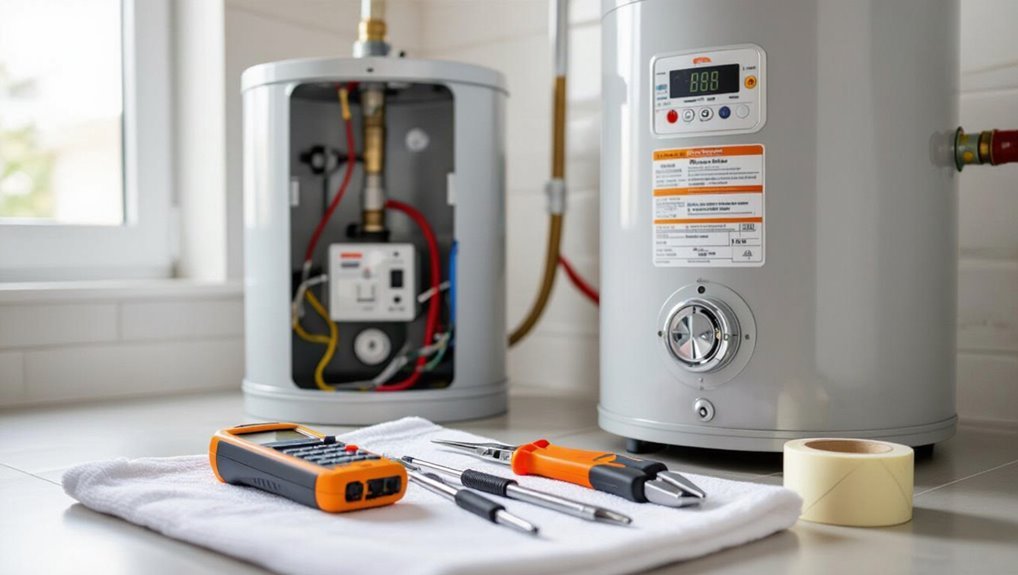
The procedure begins with diagnosing the unit to confirm a faulty thermostat.
Then it moves through power shutoff, thermostat removal and replacement, wiring reconnection, and final testing.
Simple replacements with clear wiring and no tank damage can be handled by a competent DIYer following safety steps.
If diagnosis is uncertain, wiring is complex, or the tank shows corrosion or leaks, a licensed professional should be contacted.
Quick overview of the process from diagnosis to testing
Begin by isolating the water heater from power and water sources. Then methodically move through diagnosis, component removal, replacement, and testing.
The overview outlines steps for how to replace a thermostat on a hot water heater: confirm failure, access panels, document wiring, remove and swap the thermostat, restore connections, refill and power the tank, then verify temperature and leak-free operation before finalizing.
When DIY is appropriate vs. when to call a professional
When is a homeowner suited to replace a hot water heater thermostat, and when should a licensed technician be called in?
A homeowner may DIY if comfortable with electrical safety, following manufacturer instructions, and troubleshooting simple temperature issues.
Call a licensed technician for complex wiring, gas connections, unreliable thermostats, persistent leaks, suspected element failure, code compliance, or lack of confidence to avoid hazards and guarantee proper diagnostics and repairs.
Tools, Materials, and Safety Equipment Needed
A clear checklist of hand and power tools sets the stage for a safe, efficient thermostat replacement.
Relevant replacement parts and compatibility—covering common thermostat types and model matches—must be confirmed before work begins.
Appropriate safety gear and strict electrical precautions are essential to prevent injury and equipment damage.
Tools checklist
Several specific tools, materials, and safety items are required to replace a hot water heater thermostat safely and efficiently.
The checklist guarantees proper removal, testing, and safe work practices.
Essential items include:
- Insulated screwdrivers and nut drivers
- Multimeter for voltage and continuity checks
- Replacement thermostat and gasket (matched model)
- Safety gloves, goggles, and lockout/tagout supplies
Replacement parts and compatibility (thermostat types and models)
Many serviced water heaters accept a limited range of thermostat styles, so matching type and model is critical for proper operation and safety.
Verify voltage (120V/240V), element compatibility, single- versus dual-element thermostats, and mounting/shaft configurations.
Use manufacturer part numbers or OEM replacements when possible.
Check temperature range and sensor type.
Keep replacement screws, gaskets, and terminal crimps matched to original specifications.
Safety gear and electrical precautions
After confirming the correct thermostat type and gathering matching replacement parts, attention turns to safety gear and electrical precautions required for the job.
The technician dons insulated gloves, safety glasses, and nonconductive footwear. Power is shut off at the breaker and verified with a voltage tester.
Lockout-tagout measures and a dry, well-lit workspace minimize shock and trip hazards before work begins.
How to Diagnose a Faulty Thermostat
A faulty thermostat often reveals itself through common symptoms such as inconsistent water temperature, no heat, or the heater running continuously.
Initial checks should verify power to the unit, inspect the circuit breaker, and test heating elements to rule out other causes.
A multimeter is then used to confirm thermostat failure by measuring continuity and voltage according to the manufacturer’s specifications.
Common symptoms of thermostat failure
Troubleshooting a hot water heater often begins by recognizing clear signs that a thermostat is failing.
Common symptoms include inconsistent water temperature, water that’s too hot or too cold, rapid temperature fluctuations, and frequent short cycling.
Other indicators are unusually high energy bills and burner or element wear from overworking.
Intermittent hot water delivery can also signal thermostat malfunction.
Preliminary checks: power, circuit breaker, and element testing
Recognizing symptoms narrows the focus to targeted testing: the next step is to verify basic power delivery and assess heating elements before assuming thermostat failure.
Inspect the breaker for tripped or loose connections, confirm the heater is receiving correct voltage at the junction, and visually check elements for burns, breaks, or corrosion.
Document findings to guide further multimeter diagnostics.
Confirming thermostat failure with a multimeter
Begin by disconnecting power and confirming the heater is isolated before using a multimeter to test the thermostat’s electrical continuity and switching function.
Remove thermostat access panel, expose terminals, and set the multimeter to ohms or continuity.
With thermostat at room temperature and then warmed gently, verify contacts open/close per specifications.
Replace if readings stay open, shorted, or inconsistent.
Preparing the Water Heater for Thermostat Replacement
Before any work begins, the power to the water heater should be shut off and a lockout/tagout procedure implemented to prevent accidental re-energization.
If required, the tank should be cooled or partially drained to reduce temperature and pressure hazards.
Finally, the installer should remove the access panel and any protective covers to expose the thermostat and thermal cutoffs.
Power shutdown and lockout/tagout steps
Shut off all electrical power to the water heater at the breaker panel and verify the circuit is dead with a non-contact voltage tester before proceeding.
Apply lockout/tagout devices to the breaker, attach a conspicuous tag with name, date, and reason, and keep keys or removal authority controlled.
Inform household members of the shutdown and confirm no one will restore power during the repair.
Draining or lowering tank temperature/pressure if required
If the thermostat replacement requires access to components near the element or pressure-relief valve, the tank should be drained partially or cooled to reduce pressure and scald risk.
The technician opens a nearby drain valve to relieve several gallons into a bucket or hose, isolates cold-water inlet, and allows temperature to drop.
Confirm pressure at relief valve is normal before proceeding.
Accessing the thermostat panel and protective covers
To access the thermostat, the technician removes the outer access panel and any insulating cover to expose the control assembly, taking care to note screw locations and the orientation of the insulation.
Next, protective shields and foam are gently peeled back, fasteners stored separately, and wiring positions photographed.
Panel edges and mounting studs are inspected for corrosion or damage before proceeding to thermostat disconnect and replacement.
Step-by-Step Thermostat Replacement Procedure
The replacement procedure follows a clear sequence of actions to guarantee safety and proper function.
First, access panels, insulation, and the safety switch are removed. Wiring is photographed and labeled, and the old thermostat is disconnected and taken out.
Finally, the new thermostat is mounted, wiring is reconnected correctly, and insulation and panels are restored.
Step 1 Remove access panel, insulation, and safety switch
Begin by cutting power at the breaker and confirming the water heater is de-energized before proceeding to remove the access panel, foam insulation, and high-limit safety switch cover.
Using a screwdriver, detach the panel fasteners, peel back insulation carefully, and set aside.
Expose the thermostat area and verify the safety switch remains intact; do not disturb wiring or components beyond the switch.
Step 2 Photograph and label wiring for reconnection
Before disconnecting anything, take clear, well-lit photos of the thermostat wiring from multiple angles and label each wire with matching tags or numbered tape so reconnection is unambiguous.
Record terminal labels, wire colors, and their positions in a notebook. Note any corrosion or loose connections.
Keep photos and tags accessible during the job to guarantee accurate, efficient reassembly.
Step 3 Disconnect wiring and remove the old thermostat
Disconnect power at the breaker and verify dead circuits with a non-contact voltage tester before touching any wires.
The technician loosens terminal screws and carefully disconnects each labeled lead, placing wires aside to prevent contact.
After confirming all connections are free, the old thermostat is unmounted by removing retaining screws or clips, then gently extracted from the tank cavity for inspection and disposal.
Step 4 Install the new thermostat and secure mounting
The technician fits the replacement thermostat into the tank cavity, aligning its gasket and mounting holes with the access opening to guarantee a watertight seal and correct orientation relative to the element.
Fasteners are hand-started, then tightened evenly to compress the gasket without distortion.
Mounting brackets are secured, trim plate replaced, and exposed surfaces checked for proper seating and clearance before proceeding.
Step 5 Reconnect wiring correctly and restore insulation
Reconnect the wiring by matching each conductor to its original terminal and securing tight, corrosion-free connections.
Verify ground continuity and confirm wire nuts or terminal screws are fully tightened.
Neatly bundle excess wire to prevent strain.
Replace any removed insulation and heater access panel, fitting insulation snugly around components to maintain thermal efficiency and protect wiring while preserving clear access for future service.
Step 6 Restore power and initial system testing
Restore power only after confirming all wiring is secure, insulation and access panels are properly reinstalled, and tools and debris have been cleared from the work area.
Re-energize the circuit breaker and observe the heater for normal startup sounds and indicator lights.
Allow the unit to heat, then verify water temperature at a tap.
Check for leaks and recheck wiring connections if performance is abnormal.
Post-Installation Checks and Testing
After installing the new thermostat, the technician verifies the set temperature and confirms the water heats to the expected level.
Electrical connections and breakers are rechecked to guarantee secure wiring and that no protective devices have tripped.
The unit is observed for leaks, unusual noises, or uneven heating during the initial run period.
Verifying correct temperature settings and operation
Begin by powering the water heater and allowing it to reach steady-state temperature before checking settings and functions.
Verify thermostat dial matches desired temperature, typically 120°F (49°C).
Measure hot water at a tap with a thermometer, compare to setting, and adjust incrementally if needed.
Confirm stable cycling: heater should maintain temperature without rapid short cycles or overheating.
Document final setting.
Rechecking electrical connections and ensuring no tripped breakers
Confirm all wiring and circuit status before leaving the job site to guarantee safe, reliable operation.
After restoring power, inspect terminal screws, wire insulation, and grounding connections for tightness and correct placement.
Verify the breaker feeding the heater remains in the ON position and reset any tripped breakers.
Document findings and notify the homeowner if any abnormalities or signs of electrical stress are observed.
Monitoring for leaks, unusual noises, or inconsistent heating
Inspect the heater and surrounding area closely for any signs of leaks, unusual noises, or inconsistent water temperature immediately following re-energizing and startup.
Observe fittings, valves, and the tank base for moisture.
Listen for banging, hissing, or humming indicating element or sediment issues.
Verify thermostatic response by testing hot-water taps at intervals.
Address anomalies promptly to prevent damage or safety hazards.
Compatibility, Thermostat Types, and Choosing the Right Replacement
Choosing the correct replacement thermostat requires understanding several compatibility factors.
The article compares single- versus double-element heaters, contrasts mechanical and electronic thermostat designs, and highlights sizing, voltage, and manufacturer cross-reference considerations.
These points guide selection to guarantee proper fit, safe operation, and reliable temperature control.
Single vs. double element thermostats
Although both single- and double-element thermostats regulate water temperature, they differ in wiring, capacity, and compatibility with tank configurations. Single-element units control one heating element (typically used in smaller or single-element tanks), while double-element thermostats manage two elements and require coordinated high/low settings for larger tanks.
Replacement selection should match element count, voltage, amperage, mounting style, and terminal layout for safe, reliable operation.
Mechanical vs. electronic thermostats
When deciding between mechanical and electronic thermostats for a hot water heater, compatibility with the existing elements, voltage, mounting style, and control features should guide the choice.
Mechanical units offer simplicity, robustness, and straightforward adjustments; electronic models provide finer temperature control, programmable settings, and diagnostic displays.
Selection hinges on desired features, reliability expectations, and ease of installation while matching the heater’s physical and electrical configuration.
Sizing, voltage, and manufacturer cross-reference tips
Because proper sizing and voltage matching guarantee safe, efficient operation, selecting a replacement thermostat for a hot water heater requires careful verification of the unit’s amperage, voltage, and mounting style against the original component.
Cross-reference OEM part numbers, note single- or dual-element designs, and confirm control range compatibility.
- Match voltage and amperage
- Verify mounting/type
- Use manufacturer cross-reference
- Prefer OEM or approved equivalents
Troubleshooting Common Problems After Replacement
After replacing the thermostat, the technician verifies basic diagnostics when the heater still fails to produce hot water, including continuity checks, element inspection, and correct wiring.
If water is too hot or temperatures read inaccurately, the inspector examines calibration, setpoint adjustments, and possible faulty sensor or thermostat internals.
For electrical issues such as tripped breakers or suspected shorts, isolation procedures focus on circuit testing, breaker inspection, and removing suspect components before restoring power.
Heater still not heating diagnostic steps
Troubleshooting begins with a systematic check of power, controls, and safety devices to quickly isolate why the heater fails to produce hot water.
Next, verify breaker position, inspect element continuity with a multimeter, confirm thermostat wiring and setpoints, and test high-limit cutoff and reset.
Check for tripped fuses, corroded connections, or blown elements; replace faulty parts and re-test for restoration of heating.
Overheating or inaccurate temperature calibration and settings
Inspect the thermostat and associated controls first when the water temperature is higher or lower than expected after replacement.
Verify setpoint accuracy, guarantee temperature dial alignment, and confirm sensor or probe seating.
Calibrate according to manufacturer instructions if adjustable.
Replace faulty thermostats or probes showing drift.
Check for trapped air in the tank and confirm correct jumper or dual-thermostat coordination.
Tripped breakers or short circuits electrical fault isolation
Begin by isolating the electrical fault to prevent further trips or damage: check the circuit breaker panel for tripped breakers, reset any that have tripped, and note whether they immediately trip again.
If a breaker trips again, disconnect power, inspect wiring connections at the thermostat and element for loose, damaged, or shorted conductors, and replace faulty components or consult a licensed electrician.
Safety Risks, Code Considerations, and When to Hire a Professional
Replacing a hot water heater thermostat carries electrical shock and scalding risks that require strict precautions.
Local codes and manufacturer warranties can be affected by DIY work, so compliance should be checked before starting.
If wiring is unclear, temperature control fails, leaks appear, or the unit is under warranty, a licensed technician should be contacted.
Electrical and scalding hazards to be aware of
Because a water heater combines high electrical voltage and scalding temperatures, anyone working on its thermostat must respect both shock and burn risks.
Turn off power at the breaker, verify with a multimeter, and drain or cool the tank before touching elements.
Wear insulated gloves and eye protection.
If unsure about wiring, corrosion, or complex faults, hire a licensed electrician or plumber.
Local code and warranty implications
Although a homeowner may feel confident performing routine maintenance, replacing a water heater thermostat can have legal and financial ramifications tied to local building codes and the manufacturer’s warranty.
Local regulations may require permits or licensed electricians; noncompliance risks fines and failed inspections.
Unauthorized component changes or improper installation can void warranties and liability coverage, so verify codes and warranty terms and consider professional service when requirements exceed homeowner scope.
Signs you should stop and call a licensed technician
After checking local codes and warranty limits, homeowners should recognize specific signs that mean work must stop and a licensed technician should be called.
Indications include gas odors, visible leaks, corroded tank or wiring, tripped breakers that reset repeatedly, unclear wiring or inaccessible components, high-pressure relief valve discharge, or any uncertainty about code compliance.
Prioritize safety and liability avoidance.
Maintenance Tips to Extend Thermostat and Heater Life
Regular inspections and simple upkeep—such as checking for leaks, flushing sediment, and testing thermostat operation—help prevent premature failure.
When replacing a thermostat, consider changing heating elements at the same time if they show wear or if performance has declined.
Using energy-saving settings and keeping the thermostat at the recommended temperature can reduce wear and lower operating costs.
Routine inspection schedule and simple upkeep
A simple inspection schedule—monthly visual checks and biannual functional tests—helps catch early signs of thermostat or heater failure before they escalate.
Regular upkeep preserves performance and safety. Recommended tasks include:
- Check for leaks, corrosion, and secure wiring
- Test temperature accuracy and reset functions
- Flush sediment annually to reduce stress
- Verify pressure relief valve operation and drainage pathways
When to replace elements along with the thermostat
Consider replacing related heating elements when changing a thermostat if signs of wear, inconsistent temperatures, or anode depletion are present; coordinating replacements minimizes future failures and labor costs.
Inspect element corrosion, sediment buildup, and electrical continuity. Replace elements showing pitting, high resistance, or frequent tripping.
Matching element ratings and using new gaskets prevents leaks. Document repairs and test operation after reassembly.
Energy-saving settings and best temperature practices
When aiming to reduce energy use and prolong component life, setting the water heater thermostat to an appropriate temperature is critical: 120°F (49°C) balances safety, energy savings, and reduced wear on heating elements and tank linings, while lower settings further cut standby losses but may increase recovery cycles.
Periodic setbacks, insulation blankets, and timely element maintenance optimize efficiency; avoid overheating to prevent scale and premature failure.
Cost Estimates and Time Requirements
Typical thermostat replacement parts range from budget models around $15–$40 to higher-end units near $75–$120.
Professional labor can add $100–$250 depending on service rates and complexity.
A competent DIYer can often complete the swap in 30–90 minutes with basic tools, whereas a professional appointment may require a 1–3 hour window including travel and diagnostics.
These estimates help readers weigh parts-plus-labor costs against time savings and assurance of correct installation.
Typical part costs and labor comparison
A few common replacement thermostats for residential electric hot water heaters range from $15 to $60 for the part alone, with longer-life or brand-specific units climbing toward $100; temperature sensors, mounting gaskets, and replacement elements add $10–$150 depending on type. Typical labor estimates vary by region and installer; DIY parts-only savings are notable.
| Item | Part Cost | Typical Labor |
|---|---|---|
| Basic thermostat | $15–$60 | $80–$150 |
| Premium thermostat | $60–$100 | $100–$200 |
| Element/sensor | $10–$150 | $90–$250 |
Expected time for DIY replacement vs. professional service
Most DIYers can complete a straightforward thermostat replacement on an electric hot water heater in about 1 to 2 hours.
A novice may take 2 to 4 hours including prep and testing.
A licensed technician typically finishes the same job in 30 to 90 minutes with guaranteed work and proper tools.
Emergency calls or complex issues increase professional time and cost.
Helpful Resources and Reference Materials
The reader is directed to consult the water heater’s manual and wiring diagrams to confirm terminal labeling and installation specifics.
Manufacturer websites and online parts lookup tools are recommended for model-specific replacement guides and compatible components.
For safety, referenced electrical codes and industry standards should be reviewed before beginning any work.
How to read your water heater’s manual and wiring diagrams
Why consult the water heater manual and wiring diagrams before beginning work? The manual lists model-specific specifications, safety warnings, and correct thermostat ratings.
Wiring diagrams show color codes, terminal labels, and circuit paths to avoid miswiring. Read legends, note grounding and junctions, and match diagram symbols to physical components.
Preserve the manual for reference during reassembly and testing.
Online parts lookup and model-specific guides
When model numbers or serial tags are confirmed, online parts lookup tools and manufacturer-specific guides become the fastest route to finding exact thermostat replacements, compatible wiring harnesses, and any required gasket or insulation kits.
They streamline ordering, cross-reference OEM part numbers, and provide model-specific installation notes.
- OEM parts catalogs
- Authorized dealer search
- Model-specific PDF manuals
- Community forum threads
Recommended safety standards and electrical references
Consult established safety standards and reputable electrical references before attempting any thermostat replacement on a hot water heater; doing so guarantees compliance with local codes, reduces risk of electric shock or fire, and clarifies grounding, bonding, and disconnect requirements.
Refer to NEC/NFPA codes, manufacturer manuals, UL listings, and local utility guidelines.
Use wiring diagrams, torque specs, PPE guidance, and, when unsure, consult a licensed electrician.
Conclusion
After following the sensible, caution-laden steps, the reader stands triumphant before a water heater now obeying temperature commands—because nothing says domestic mastery like wrestling exposed wiring and hot metal on a weekend. Ironically, the once-mysterious thermostat surrendered to a few careful turns and a new part, transforming a costly service call into a DIY anecdote. The heater will likely behave—until next winter’s dramatic, ill-timed failure that guarantees future heroics (or a plumber’s bill).