How to Move Sink Plumbing: Step-by-Step Guide for DIYers and Pros
Moving sink plumbing requires careful planning to reroute supply lines, relocate the drain and P-trap, and ensure proper venting and slope. While minor adjustments can be managed by skilled DIYers using PEX or PVC, significant relocations generally necessitate hiring a licensed plumber and obtaining necessary permits. To successfully complete this project, follow these key steps: isolate the water supply, measure and prepare the new plumbing layout, assemble and test all connections, and finish any repairs. For detailed instructions, materials needed, diagrams, and troubleshooting tips, continue reading.
Can You Move Sink Plumbing Yourself?
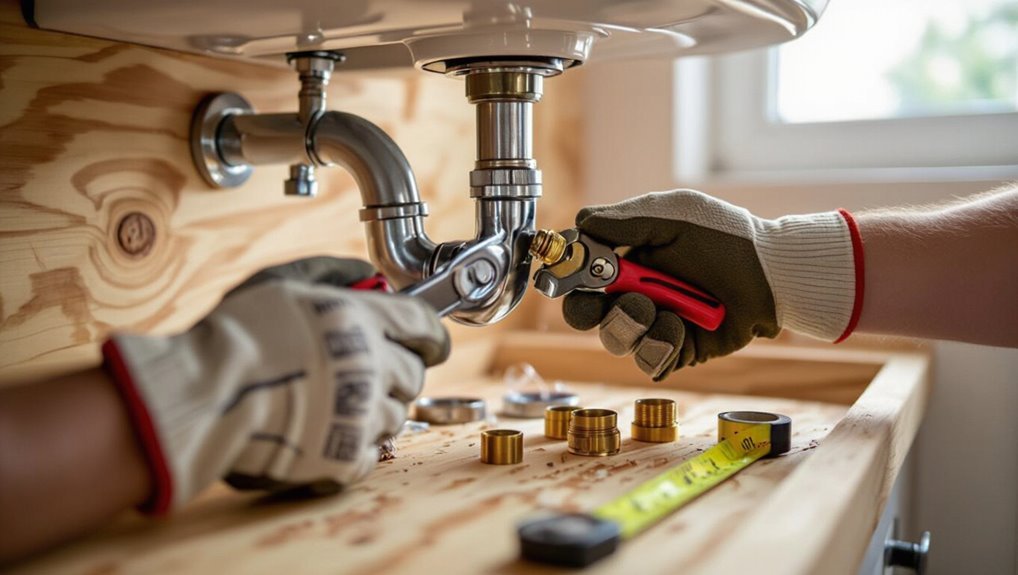
Moving sink plumbing typically involves rerouting supply lines and the drain, adjusting fittings, and ensuring proper venting and slope for drainage.
A homeowner with basic plumbing skills and the right tools can handle minor relocations within the same wall or cabinet, but larger moves that require cutting into studs, relocating vents, or altering drain pitch usually call for a licensed plumber.
Cost, local codes, and the risk of leaks or water damage should guide the decision to DIY or hire a pro.
Short summary of what’s involved
Evaluating whether one can move sink plumbing oneself starts with understanding the scope: relocating a sink often requires rerouting water supply lines, adjusting or extending drain and vent piping, and ensuring connections meet local codes and slope requirements.
The summary: plan layout, shut off water, disconnect fixtures, modify or extend supply and drain, test for leaks and proper venting, and restore finishes—basic how to move sink plumbing steps.
When to DIY vs hire a pro
After outlining the basic steps—planning, shutting off water, rerouting supply and drain lines, testing, and restoring finishes—the decision to DIY or call a professional depends on scope, local code requirements, and the homeowner’s skill set.
Simple relocations within existing walls and accessible connections suit experienced DIYers.
Complex moves involving structural work, sewer changes, permits, or gas lines warrant licensed plumbers to guarantee safety, compliance, and warranty protection.
Basic Understanding What Moving Sink Plumbing Entails
Moving sink plumbing requires identifying the key components—supply lines, drain, vent, and P-trap—and how they connect.
Different sink types (single bowl, double bowl, farmhouse) affect routing and space needs.
Local codes and permit requirements determine what work can be done and whether a professional is required.
Key components involved (supply lines, drain, vent, P-trap)
A basic sink relocation requires understanding four primary plumbing elements: the cold and hot supply lines, the drain assembly including the P-trap, and the vent system that prevents siphoning and allows proper drainage.
Supply lines feed water under pressure; shutoffs permit isolation.
The drain carries wastewater to the soil stack; the P-trap retains a water seal.
The vent equalizes pressure and prevents odors.
Common types of sink installations (single bowl, double bowl, farmhouse)
Sink installations vary primarily by bowl configuration and mounting style, each affecting how plumbing must be routed and modified.
Single-bowl sinks require a single drain and supply riser, simplifying relocation.
Double-bowl setups may need dual drains, a crossover or shared tailpiece, and careful P-trap alignment.
Farmhouse (apron-front) sinks often demand cabinet modifications and longer trap/vent runs due to recessed mounting and deeper basins.
Local code and permit considerations
Because relocating plumbing affects a home’s water, waste, and structural systems, compliance with local codes and permits is essential.
The homeowner should verify requirements, obtain permits, and schedule inspections; licensed trades may be mandated.
Considerations include:
- Permit application process
- Fixture placement and venting rules
- Trap and drain sizing
- Water supply pressure and backflow prevention
- Inspections and final approval
Tools, Materials, and Prep You’ll Need
The next section lists the essential tools and the typical materials and fittings used for PVC, ABS, copper, and PEX installations.
It also covers required safety gear, site-prep steps, and how to measure and map the sink’s new location.
Readers will be guided through selecting appropriate parts and preparing the workspace before any cutting or connections begin.
Essential tools
A concise set of tools and materials is required before relocating sink plumbing to guarantee efficiency and prevent mistakes.
The list focuses on essential hand and measuring tools, cutting and sealing implements, and safety equipment to execute accurate runs and secure joints.
- Adjustable wrench and basin wrench
- Pipe cutter or hacksaw
- Plumber’s tape and joint compound
- Tape measure and level
- Work gloves and safety glasses
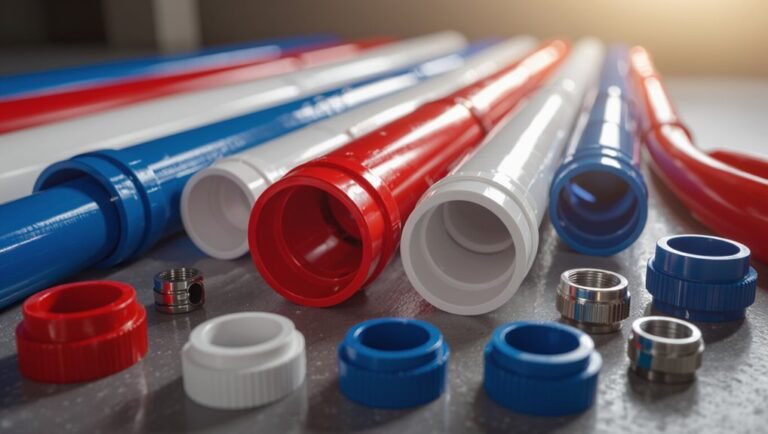
Typical materials and fittings by pipe type (PVC, ABS, copper, PEX)
Having the right tools on hand sets up the work; now attention turns to the specific materials and fittings used for different pipe types. Common choices: solvent-weld PVC/ABS with elbows, tees, traps; copper with soldered fittings or compression; PEX with crimp or push-fit fittings. Match fittings to code and application.
| Pipe Type | Typical Fittings |
|---|---|
| PVC | Solvent-weld elbows, traps |
| ABS | Solvent-weld tees, adapters |
| Copper | Solder, compression elbows |
| PEX | Crimp, clamp, push-fit connectors |
Safety gear and site prep
Personal protective equipment and a cleared workspace are essential before any sink plumbing work begins.
The practitioner should prepare tools, isolate water and power, protect finishes, and guarantee ventilation.
Recommended items:
- Safety glasses
- Nitrile or work gloves
- Knee pads or mat
- Drop cloths and tape
- Bucket and towels
Measuring and mapping the new sink location
Several precise measurements and a clear layout plan are required before relocating a sink: determine cabinet openings, counter cutouts, drain and supply line positions, and clearances for fixtures and trap access.
Measure wall studs, floor joists, and pipe run distances. Mark centerlines, appliance setbacks, and vent locations.
Verify level and slope requirements. Record dimensions on a scaled sketch for installer reference and permit submittal.
Step-by-Step Guide to Moving Sink Plumbing
The process begins with shutting off the water and preparing a clear, dry workspace before any fixtures are touched.
Next, the existing sink is removed and plumbing disconnected so the new rough-in position for drain and vent alignment can be assessed and planned.
Finally, supply lines are rerouted or extended (using appropriate copper or PEX techniques) and the drain and P-trap are moved or extended with correct slope, trap arm length, and materials.
Step 1 Shut off water and prepare workspace
Shut off the water supply to the sink and clear the surrounding area before beginning any plumbing work.
The workspace should be safe, dry, and well-lit. Verify shutoff by testing faucet. Gather tools and protective gear. Use a bucket to catch residual water.
- Locate hot and cold shutoff valves
- Turn valves fully clockwise
- Test faucet for no flow
- Lay down drop cloth
- Wear gloves and goggles
Step 2 Remove existing sink and disconnect plumbing
Begin by removing any remaining items from the sink area and placing a bucket beneath the drain to catch residual water.
Disconnect supply lines at shutoff valves, loosening compression nuts or flex hose connections.
Detach P-trap and trap adapter, draining into the bucket.
Remove mounting clips or clips’ screws, lift out sink, and inspect cutout and surrounding cabinetry for damage before proceeding.
Step 3 Assess and plan new rough-in position (drain and vent alignment)
Before moving forward, measure and document the current drain and vent locations, cabinet layout, and nearby studs to determine feasible new rough-in positions.
Evaluate slope requirements, minimum distances to venting, and local code setbacks.
Sketch the proposed route, noting obstructing framing or utilities.
Confirm access for P-trap, cleanout placement, and that the new location maintains proper fall and venting per code.
Step 4 Reroute or extend supply lines (copper vs PEX methods)
Move or extend the hot and cold lines using the method best suited to the situation and local code—copper for rigid, soldered runs where heat and physical protection are needed; PEX for flexible, faster installations with fewer joints.
Work cleanly, support lines, and test for leaks.
Consider:
- Proper fittings and valves
- Accessible shutoffs
- Secure clamps and spacing
- Insulation where exposed
- Pressure testing before finishing
Step 5 Move or extend the drain and P-trap (slope, trap arm length, materials)
When repositioning a sink, the drain and P-trap must be extended or rerouted to maintain proper slope, trap arm length, and compliant materials; incorrect alignment can cause slow drainage, siphoning, or code violations.
Measure fall at 1/4″ per foot (minimum 1/8″), keep trap arm within local code limits, use compatible pipe (PVC/ABS/metal), secure joints with proper fittings, and test for leaks and flow.
Step 6 Modify or add venting if required (air admittance valve vs. re-vent)
Assess venting needs next: relocating a sink can change drain backing and trap seal performance, so determine whether the existing venting still provides adequate air flow or if an additional vent or an air admittance valve (AAV) is required.
- Check local code for AAV allowance
- Measure trap arm length vs. vent distance
- Prefer re-venting when accessible
- Use AAVs where code and access permit
- Confirm vent terminations are unobstructed
Step 7 Connect new fittings and test for leaks (water and drain test)
Begin by fitting the new connections—water supply lines, shutoffs, trap, and drain—hand-tight then secure with the appropriate wrench or soldering method, following manufacturer torque and soldering practices.
Then perform systematic tests for leaks and proper drainage.
- Open shutoffs slowly
- Inspect solder joints and compression fittings
- Run water hot and cold
- Fill sink, then release to observe drain
- Check under-sink for dampness
Step 8 Install sink, faucet, and finalize connections
With the supply lines, shutoffs, and drain verified leak-free, the installer sets the sink into its countertop opening and secures the faucet and remaining connections.
They tighten mounting hardware, attach water supply hoses to shutoffs, and connect the trap and tailpiece.
After cycling water and checking for drips, aerator and accessories are installed.
Final adjustments guarantee proper alignment and smooth operation.
Step 9 Patch, drywall, and finish trim work
Once plumbing and fixtures are confirmed watertight, the area around the new sink location is prepared for restoration by repairing holes, smoothing surfaces, and reattaching trim.
Damaged drywall is cut back, patched, and taped; joint compound is applied and sanded flush.
Prime painted areas, reinstall baseboards and cabinet trim, and seal joints with caulk.
Verify alignment and finish for a professional look.
Variations and Special Cases
Different scenarios require different approaches: relocating plumbing within the same cabinet is simpler than running new lines to a different cabinet, and moving a sink to an island or peninsula may involve routing supply and drain through the floor rather than the wall.
Relocating a sink between rooms—such as kitchen to laundry or moving a bathroom—often requires longer runs and possible reconfiguration of venting and traps.
Concrete slab and slab-floor installations present additional constraints and typically need core drilling or surface-mounted alternatives.
Moving plumbing within the same cabinet vs different cabinet
When relocating sink plumbing within the same cabinet versus into an adjacent cabinet, the scope of work, required fittings, and potential need to reconfigure framing differ greatly.
Relocation inside the same cabinet typically involves shorter drain and water lines and minimal framing changes.
Moving to a different cabinet may require longer runs, additional elbows, rerouting vents, access panels, and possible cabinet or subfloor modifications.
Moving sink to island or peninsula (floor vs wall routing)
Relocating a sink to an island or peninsula introduces distinct routing choices—floor runs through the subfloor and joists, or wall runs through a knee space or false wall—and each option brings specific structural, venting, and service-access implications.
Floor routing often requires chasing joists, stub-ups, and island access panels; wall routing needs sufficient cavity depth, concealed vents or air admittance valves, and removable panels for maintenance.
Moving sink from one room to another (kitchen to laundry, bathroom relocations)
After considering island and peninsula routing choices, attention shifts to moving a sink between rooms—such as from a kitchen to a laundry area or relocating a bathroom fixture—which presents distinct variations and special cases.
Factors include new venting paths, extended drain slopes, supply line routing, local code for fixture trap placement, and accessibility for appliances.
Planning minimizes wall penetrations and coordinates electrical and appliance clearances.
Concrete slab and slab-floor considerations
Because slab construction limits below-floor access, moving a sink in slab-on-grade or concrete-floor buildings demands different strategies and trade-offs than framed floors.
Options include core-drilling to run new drains and supply lines, rerouting via exposed walls or soffits, or installing above-floor waste systems.
Consider slab cutting, permits, concrete repair, insulation, slope requirements and potential need for a licensed plumber for code-compliant, long-term solutions.
Common Mistakes and How to Avoid Them
Common errors when moving sink plumbing include improper drain slope that causes clogs, trap arms that are too long or mislocated, and inadequate venting.
Using incompatible materials or fittings and ignoring local codes and permit requirements further increase the risk of leaks, sanitation issues, and failed inspections.
The following section reviews these mistakes and practical steps to prevent them.
Improper drain slope and resulting clogs
Many sinks suffer from slow drainage or frequent clogs when the drain line lacks the proper slope; too flat a run allows solids and grease to collect, while too steep a run can cause water to outrun solids and lead to buildup downstream.
Install a consistent 1/4-inch per foot slope, check with a level, avoid sagging pipes, and periodically flush with hot water to prevent deposits.
Too-long trap arm or incorrect trap placement
After addressing proper drain slope, attention must turn to the trap arm and the trap’s placement, since errors here can negate correct pitch and create drainage or venting problems.
A trap arm that is too long can hold water and promote clogging; misaligned or poorly supported traps stress fittings and leak.
Keep trap arm length within code limits, maintain straight runs, and use proper supports and compact trap assemblies.
Failing to vent properly
If a drain system lacks proper venting, traps can siphon dry or slow to clear, causing sewer gas odors and recurrent clogs.
Install vents per code, maintain air admittance valves where allowed, and keep vent lines unobstructed.
Verify vent placement relative to trap arm length to prevent siphoning.
When relocating sinks, plan vent extensions or reroutes to preserve trap seal integrity and reliable drainage.
Using incompatible materials or fittings
Choose compatible materials and fittings deliberately to prevent leaks, corrosion, and code violations when shifting sink plumbing.
Mismatched metals, improper pipe types, and wrong-size connectors cause failures. Verify chemical compatibility, pressure ratings, and thread standards.
Use approved junction fittings or dielectric unions where dissimilar metals meet. Confirm manufacturer recommendations and local-approved materials to guarantee durable, watertight, code-compliant connections.
Ignoring local codes and permits
While homeowners may view permit processes and local plumbing codes as bureaucratic hurdles, disregarding them can lead to failed inspections, costly rework, fines, or voided insurance coverage when moving sink plumbing.
Professionals recommend verifying local requirements, obtaining necessary permits, and scheduling inspections.
Compliance guarantees safety, proper venting and trap installation, and legal protection; skipping this step risks remediation expenses and potential liability.
Troubleshooting Guide
The troubleshooting guide outlines how to identify and fix common issues that arise after moving sink plumbing.
It covers repairing leaks at joints and fittings, clearing slow drains and air-locks, and diagnosing low water pressure following rerouting.
Guidance is also provided on when problems can be handled DIY and when to call a professional plumber.
Fixing leaks at joints and fittings
Inspecting joints and fittings for leaks begins with shutting off water, drying the area, and observing each connection under slight pressure to pinpoint seepage or drips.
Then the technician assesses materials and fixes accordingly:
- Tighten fittings with appropriate wrench
- Replace damaged washers or O-rings
- Reapply plumber’s tape on threaded joints
- Cut and recut soldered joints if necessary
- Use compression fittings for reliable seals
Addressing slow drains and air-locks
Several common causes produce slow sink drains or air-locks, and diagnosing them quickly prevents more extensive blockages.
Inspect trap and tailpiece for debris, clean P-trap, and run water while monitoring flow.
Check venting for obstructions and guarantee vent pipes remain above trap level.
Use a hand auger for localized clogs; avoid harsh chemicals that can damage seals and plastic piping.
Dealing with low water pressure after rerouting
After addressing slow drains and vents, attention should turn to low water pressure that can follow rerouting.
Inspect supply lines for kinks, undersized piping, or partially closed valves.
Check aerators and cartridge for debris.
Verify new pipe runs minimize long, narrow sections and unnecessary fittings.
Measure pressure at the faucet; consider increasing pipe diameter or correcting restrictive connections to restore adequate flow.
When to call a plumber
When problems persist beyond basic checks or involve damage, a professional should be contacted promptly; calling a plumber is advisable for leaks that cannot be contained, persistent low pressure after supply-line troubleshooting, guttered or tripped shutoff valves, visible pipe corrosion, sewer odors or backups, water around electrical components, or unfamiliar noises and vibration in the system.
- uncontrolled leaks
- continued low pressure
- stuck or damaged shutoffs
- sewer smell or backups
- noisy, vibrating pipes
Best Practices, Tips, and Time Estimates
The section outlines practical planning tips to reduce future issues, such as routing, venting, and access considerations.
It provides a concise checklist of inspections and tests to complete before closing walls or installing cabinets.
Typical time and cost ranges for DIY versus professional work are summarized to help set realistic expectations.
Planning tips to minimize future problems
Although moving sink plumbing can seem straightforward, careful planning prevents common mistakes that lead to leaks, poor drainage, or code violations.
Key planning tips include evaluating pipe slope, local code, and fixture placement. Consider future access and materials. Budget time for testing.
- Verify venting and trap placement
- Use proper slope (1/4″ per foot)
- Choose durable materials
- Plan access panels
- Schedule pressure tests
Checklist before finishing walls and cabinets
After confirming venting, trap placement, and proper slope, a concise checklist should be followed before closing walls and installing cabinets to prevent rework and hidden failures.
Inspect and test all joints, verify shutoff access, confirm secure hanger support, label supply/drain locations, and photograph final layout for records.
- Pressure-test drains
- Operate shutoffs
- Check vent continuity
- Verify clearances
- Record measurements
Typical time and cost estimates for DIY vs pro
Compare DIY and professional sink-plumbing projects by estimating time, labor, materials, and risk-adjusted costs to make realistic decisions.
DIY typically requires 4–12 hours for experienced homeowners; materials cost $50–300. Permits and mistakes raise risk.
Pros complete jobs in 2–6 hours with labor $150–600 plus materials. Warranties and code compliance reduce contingency.
Choose based on skill, schedule, and acceptable risk.
Materials and Cost Comparison
A clear comparison of materials and costs helps determine the best approach for moving a sink.
The discussion covers typical price ranges by pipe type and project complexity, and weighs the pros and cons of copper, PEX, and PVC for durability, ease of installation, and cost.
These factors guide selection based on budget, skill level, and long-term performance.
Cost breakdown by pipe type and complexity
When evaluating sink relocation, material choice and installation complexity drive most of the cost differences; copper, PEX, and PVC each carry distinct price points, labor requirements, and long-term considerations. Costs rise with wall/ceiling access, fixture count, and code-required upgrades. Typical ranges depend on labor skill and routing.
| Factor | Typical impact |
|---|---|
| Material cost | Low–high |
| Labor time | Short–long |
| Access difficulty | Minor–major |
| Code upgrades | Possible–certain |
Pros and cons of copper vs PEX vs PVC for sink moves
Although each material can serve a sink relocation, copper, PEX, and PVC present distinct trade-offs in cost, durability, installation complexity, and code considerations. Copper: durable, costly, soldering skills required. PEX: flexible, affordable, easy DIY, limited UV exposure. PVC: cheap for drains, brittle in cold, not for hot water in many codes.
| Material | Strength | Best use |
|---|---|---|
| Copper | High | Long-term supply |
| PEX | Medium | Renovations |
| PVC | Low | Drain lines |
Safety, Permits, and Code Compliance
The section outlines common code requirements for sink plumbing, including trap placement, venting, and minimum drain slopes.
It explains when permits are typically required, how to obtain them from local building departments, and the consequences of proceeding without approval.
It also highlights electrical and gas safety considerations when relocating a sink, such as maintaining safe clearances and coordinating licensed trades.
Common code requirements for sink plumbing
Safety, permits, and code compliance form the foundation of any sink-plumbing project, ensuring installations protect occupants and meet legal standards.
Common requirements include proper trap sizing and venting, minimum drainage slopes, approved materials and fittings, backflow prevention, accessible shutoffs, and secure mounting.
Electrical clearances near water and adherence to local fixture heights and waste connections are also routinely enforced by codes.
When permits are required and how to get them
After outlining code basics like trap sizing, venting, and backflow prevention, attention shifts to when municipal permits are required and the steps to obtain them.
Permit necessity depends on scope: fixture moves, structural changes, or concealed work typically require permits.
Process: application, plans, fees, inspections, final approval.
- Check local jurisdiction
- Prepare diagrams
- Submit application
- Pay fees
- Schedule inspections
Electrical and gas considerations near sink moves
Consideration of nearby electrical and gas systems is essential when relocating a sink, because improper clearances, routing, or connections can create shock, fire, or carbon monoxide hazards and may trigger permit requirements.
Inspect for wiring, outlets, switches, and gas lines near new fixtures; maintain code clearances, shut off power/gas before work, and consult licensed electricians or plumbers for relocations or modifications requiring permits and inspections.
Helpful Visuals, Templates, and Checklists
The article presents typical rough-in diagrams for common sink relocation scenarios to clarify pipe and vent layouts.
A concise, step-by-step printable checklist outlines required tasks, safety checks, and permit steps to follow during the move.
A measurement template for new sink placement guarantees proper clearances and alignment before cutting or reconfiguring plumbing.
Typical rough-in diagrams for common scenarios
When planning sink installations for varied rooms and layouts, clear rough‑in diagrams provide precise measurements, component locations, and orientation notes that reduce onsite guesswork and rework.
Typical diagrams cover single‑basin and double‑basin kitchen sinks, vanity sinks, wall‑hung lavatories, and laundry tubs. Each shows hot/cold supply centers, drain location, trap arm slope, mounting heights, and clearance zones for cabinets and appliances.
Step-by-step printable checklist
After reviewing typical rough‑in diagrams, a concise step‑by‑step printable checklist helps installers and DIYers move sink plumbing with fewer errors and faster setups.
A single-page checklist streamlines tasks, tracks materials, and confirms safety and code steps before final testing.
- Verify shutoff and drain closures
- Measure and mark new routing
- Assemble and dry-fit fittings
- Secure pipes and test for leaks
- Finalize insulation and labeling
Measurement template for new sink placement
Several clear templates guide exact placement by combining critical measurements—centerline distance from adjacent walls, cabinet setbacks, countertop overhangs, and appliance clearances—into a single scaled drawing that can be traced or photocopied onto the work surface.
The template shows sink center, faucet and drain locations, cabinet cutouts, and obstruction zones. It includes scale, reference dimensions, and notes for plumbing rough‑in and verification before cutting.
Conclusion
Like a gardener repositioning a sapling to let roots find new soil, moving sink plumbing reorients a system to serve changing needs. The careful transplant—planning, steady hands, and respect for hidden veins—determines whether the fixture will thrive. Whether novice or seasoned craftsman, treating pipes like living connections—patiently, methodically, and with proper permits—ensures the flow returns, steady and sound, in its new place.