
How to Fix a Burst Water Pipe in the Wall: a Step-By-Step Emergency Repair Guide
If you have a burst water pipe in your wall, the immediate actions you need to take are to shut off the water supply and cut power to the affected area. Next, contain any leaks using towels, buckets, or a wet vacuum. Locate the break by checking for stains or listening for sounds. For a temporary fix, apply a clamp, epoxy, or wrap around the damaged section. To make a permanent repair, open an access panel to expose the pipe, replace the damaged section with compatible fittings, and pressure-test the repair. Follow this guide for detailed procedures, necessary tools, and safety precautions.
Emergency steps to take immediately when a water pipe bursts inside a wall
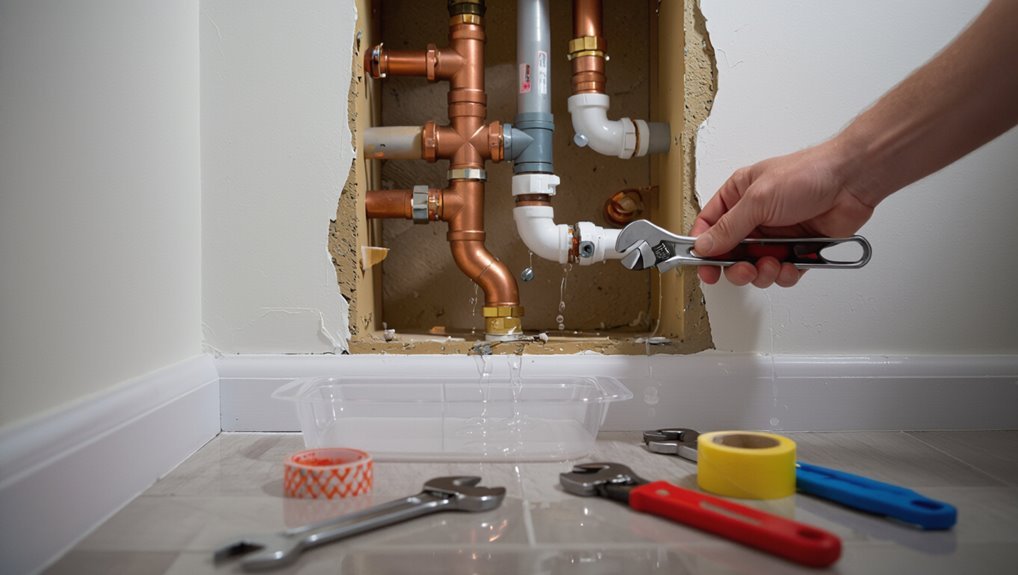
When a pipe bursts inside a wall, the first actions are to stop the water at the nearest shutoff—use a local valve if available, otherwise close the main supply—and to cut power to affected areas to reduce electrical risk.
Contain escaping water with towels, buckets, and temporary barriers while arranging for professional repair.
Evacuate if flooding threatens safety or electrical systems and call emergency services or a licensed plumber immediately.
How to turn off the water supply quickly (main shutoff vs. local shutoff)
At the first sign of a burst pipe inside a wall—gushing water, saturated drywall, or a sudden drop in water pressure—the quickest priority is to stop the flow by closing the nearest shutoff, then the home’s main supply if needed.
The guide explains how to fix a burst water pipe in the wall by locating local shutoffs (under sinks, toilets) and the main valve at the meter.
How to cut power safely to prevent electrical hazards
Immediately cut power to affected areas to eliminate the risk of electric shock from water contacting wiring, outlets, or appliances; this means switching off circuit breakers for rooms with leaks or, if unsure which circuits are involved, shutting off the home’s main electrical breaker. Then notify occupants, avoid standing water near electrified devices, and call a qualified electrician before restoring power.
| Action | When | Who |
|---|---|---|
| Flip breakers | Immediately | Occupant |
| Main off | If unsure | Occupant |
| Call electrician | Before restore | Professional |
How to limit water damage while waiting for help (containment and towels)
After power has been secured to reduce shock risk, attention should shift to stopping water spread and protecting belongings. The occupant should place buckets or pans beneath visible leaks, use towels or absorbent cloths to catch drips, and move furniture, rugs, and electronics away from wet areas.
Elevate wet items on blocks, wring and replace saturated towels frequently, and mop pooled water to minimize seepage and mold growth.
When to evacuate the area and call emergency services or a professional plumber
When a pipe bursts inside a wall and water cannot be controlled with towels and buckets, occupants should evacuate the affected rooms and call emergency services or a licensed plumber without delay.
Signs that warrant immediate evacuation include rising water levels, electrical outlets or appliances becoming wet, visible structural sagging, strong odors of gas, or any loss of power.
After evacuating, shut main water and gas valves if safe, warn neighbors, and await professionals.
Fast damage assessment: locating the leak and estimating severity
A quick assessment focuses on signs that the burst is in a wall versus the ceiling or floor, and on identifying the likely pipe type and material (copper, PEX, PVC) to anticipate repair methods.
Practitioners can often pinpoint the leak without major demolition by listening for running water, using a moisture meter, or scanning with an infrared camera.
Priority is given to leaks that threaten structural elements (load-bearing walls) or create immediate mold risk, which require urgent intervention.
Signs the burst pipe is inside a wall vs. ceiling or floor
How can one tell whether a burst pipe is hidden inside a wall, ceiling, or floor?
Inspect water source location, dripping patterns, and stains: vertical streaks or puddles below fixtures suggest ceiling or upper-floor leaks; wet baseboards, bubbling paint, or localized wall stains indicate wall pipes; localized floor swelling, soft spots, or moisture beneath flooring point to floor-level piping.
Listen for running water and check adjacent rooms.
How to identify the probable pipe type and material (copper, PEX, PVC)
Which material is involved can dramatically change repair options and urgency.
Inspect visible runs, fittings and exposed sections: copper is rigid, metallic, often soldered joints; PEX is flexible, plastic, usually colored (red/blue/white) with crimped or clamp fittings; PVC/PVC used for drain or cold supply is rigid white or gray with solvent-welded joints.
Note age, corrosion, and fittings to estimate severity.
Methods to pinpoint leak location without major demolition (listening, moisture meter, infrared)
Begin by systematically narrowing the search area using noninvasive tools and simple sensory checks.
Listen for running water through drywall with a stethoscope or wooden stick, moving from the nearest fixture outward.
Scan surfaces with an infrared camera to spot cool wet zones.
Verify with a moisture meter to quantify dampness and depth.
Mark highest readings for targeted access and repair.
When the leak requires immediate structural concern (load-bearing walls, mold risk)
When a burst pipe threatens a load-bearing wall or has allowed moisture to persist long enough for mold growth, rapid assessment focuses on two priorities: locating the primary leak source and judging structural and biological risk.
Inspect framing for sagging, cracked plaster, or displaced trim; probe damp studs and insulation; prioritize cutting access to confirm joist/plate damage.
If mold or structural compromise is evident, stop work and call a structural engineer and remediation specialists.
Temporary emergency repair options to stop or slow the leak
The section outlines practical temporary repairs to stop or slow a burst pipe, covering step-by-step use of compression and repair clamps and the preparation and curing times for epoxy or pipe putty.
It also compares wrap-and-seal options (rubber patches, hose-repair tape, silicone tape) and quick fittings like SharkBite and other push-fit connectors for accessible breaks.
Guidance is provided on selecting the appropriate temporary fix based on pipe material and how readily the damaged area can be accessed.
Using compression and pipe repair clamps step-by-step
Clamp a leaking section of pipe promptly to slow or stop water flow until a permanent repair can be made.
The guide recommends:
- shut water,
- dry area,
- select correct clamp size or compression sleeve,
- position over leak,
- tighten evenly to compress gasket,
- check for continued drips.
Reopen water slowly, inspect for seepage, retighten if needed, and arrange permanent replacement promptly.
Applying epoxy putty or pipe repair putty: preparation and curing times
Apply epoxy or pipe repair putty immediately as a temporary stopgap to seal small cracks, pinhole leaks, or slow drips until a permanent fix can be made.
Clean and dry the area, sand lightly, and cut putty per instructions. Knead to uniform color, press firmly over the defect, smoothing edges.
Observe manufacturer curing times (typically 5–60 minutes surface, full cure hours) before restoring pressure.
Wrap-and-seal solutions (rubber, hose repair tape, silicone tape) and limits
Wrap-and-seal products provide quick, portable barriers to slow or stop leaks on copper, PVC, or rubber lines until a permanent repair is possible.
Rubber patches, hose-repair clamps, self-fusing silicone tape, and vulcanizing wraps can temporarily contain drips or small bursts. They require clean, dry surfaces, proper overlap, and low pressure; they are not reliable for large ruptures or long-term use and must be replaced by a permanent repair.
SharkBite fittings and push-fit connectors for quick on-access repairs
For rapid, on-access stops to leaks, SharkBite and other push-fit fittings offer a tool-free way to join or cap copper, PEX, and CPVC lines without soldering or special equipment.
They seat over cleaned, deburred pipe ends, creating an immediate seal. Suitable for temporary emergency repairs, they withstand normal household pressure but should be followed by permanent repairs and inspected for proper seating and leak-free operation.
How to choose the right temporary fix based on pipe material and access
When selecting a temporary repair, the decision should hinge on pipe material, the leak’s size and location, and how much access is available; copper, PEX, and CPVC each respond differently to clamps, epoxy putty, compression sleeves, or push-fit caps.
Small pinholes suit epoxy or rubberized tape; larger splits need clamp-plus-sleeve or a SharkBite cap.
Confirm shutoff, test pressure, and schedule a permanent repair.
Safe access: how to expose the burst section of pipe in a wall
The author explains how to locate and mark the ideal cutting area in drywall or plaster to reach the burst pipe with minimal damage.
They list required tools and protective gear, outline controlled opening steps to avoid further harm, and note methods for shielding nearby finishes and utilities.
Readers are encouraged to follow these precautions before attempting repairs or calling a professional.
Choosing where to cut the drywall or plaster to reach the pipe
Although locating the burst pipe is guided by visible water stains and sound, precise cutting depends on confirming the pipe’s position behind the wall and leaving enough clearance to work and repair. Mark a rectangular access panel centered on the damaged section, avoid studs and wiring, and cut minimally to allow joint repair and replacement.
| Purpose | Avoid | Clearance |
|---|---|---|
| Access pipe | Studs/wiring | 2–4 in |
| Repair room | Insulation | 3–6 in |
| Future access | Fixtures | 2–3 in |
Tools and protective gear needed for safe access
Gather appropriate tools and protective gear before cutting into a wall to expose a burst pipe, prioritizing safety and efficiency.
Required items include a studfinder, utility knife, drywall saw, voltage detector, flashlight, and adjustable wrench.
Protective gear: safety glasses, dust mask or respirator, work gloves, ear protection, and knee pads.
A drop cloth and garbage bag help contain debris and reduce contamination.
Steps for controlled opening and minimizing damage
Begin by locating the burst section precisely and planning a minimal cut path to expose it while avoiding studs, wiring, and insulation.
Use a stud finder and probing tool, mark cut lines, and score drywall before cutting. Remove only necessary material, keep debris contained, and support surrounding wall edges.
Illuminate the cavity, confirm pipe position, and proceed slowly to prevent enlarging damage.
How to protect surrounding finishes and utilities while working
Several targeted precautions preserve adjacent finishes and utilities when exposing a burst pipe in a wall. Remove trim, cover flooring with waterproof sheeting, shut power to nearby circuits, and use dust barriers. Cut access minimally, locate studs and hidden services, and support loose plaster.
| Action | Purpose |
|---|---|
| Remove trim | Protect edges |
| Cover floor | Contain water |
| Shut power | Prevent shock |
| Dust barrier | Limit contamination |
| Scan wall | Locate services |
Permanent repair methods and step-by-step procedures
The article outlines practical permanent repair options tailored to common pipe materials, including cutting and soldering copper, crimping or push-fit techniques for PEX, and primer-and-cement solvent welding for PVC/CPVC.
It compares patching a local section versus replacing an entire run, listing factors that influence the decision such as pipe age, accessibility, and extent of corrosion.
Finally, it describes systematic testing procedures to verify pressure integrity and confirm the repair is leak-free.
Replacing a damaged section with copper: cutting, fitting, soldering basics
Cut a straight section of the damaged pipe back to sound metal, then prepare and fit matching copper tubing and fittings for a soldered connection; this permanent repair requires clean joints, proper flux, correct solder, and controlled heat to guarantee a leak-free seal.
Deburr, clean with emery cloth or brush, apply flux evenly, assemble, heat evenly until solder flows, cool, wipe, and pressure-test before wall closure.
Repairing with PEX: cutting, crimping/clamping, and using push-fit fittings
After preparing a copper replacement, attention may turn to PEX as an alternative permanent repair that often speeds installation and reduces open-flame work.
The technician measures and cuts PEX squarely, deburrs, and inserts fittings. For crimp/clamp systems, rings are positioned then compressed with appropriate tools.
Push-fit fittings require full insertion to the depth stop.
Pressure-test the repair and insulate exposed pipe.
Repairing with PVC/CPVC: primer, cement, and solvent-welded joins
Begin by identifying PVC or CPVC sections that require replacement and confirming system compatibility and pressure ratings. These plastics use solvent welding rather than mechanical compression, so correct materials and technique are essential.
Cut damaged pipe squarely, deburr and dry-fit fittings. Apply primer, then solvent cement per manufacturer timing, assemble with full insertion and a quarter-turn twist.
Hold until set, test under pressure, and insulate.
Replacing an entire run vs. patching a section: decision criteria
Once the damaged PVC/CPVC section has been assessed and solvent-welded repairs considered, the choice between replacing an entire run and patching a section rests on factors of accessibility, extent of deterioration, future reliability, and system layout.
Replace full runs when corrosion, multiple joints, or concealed routing make future access unlikely.
Patch localized breaks where surrounding pipe is sound, ensuring compatible fittings, proper support, and minimal stress.
Testing the permanent repair for leaks and pressure
Pressurize the repaired section gradually and observe for leaks and pressure stability before restoring full service.
Monitor joints, fittings and surrounding drywall for seepage for at least 15–30 minutes.
Use a pressure gauge to confirm system holds expected pressure without drop.
If pressure falls or dampness appears, depressurize, isolate the defect and redo the repair.
Document results and restore insulation and finishes.
When to call a professional plumber and what to expect
A homeowner should call a professional when damage is severe, the piping layout is complex, or initial repairs fail.
They should be ready to provide details about pipe material, location, and prior fixes, and to ask about scope of work, timelines, and cost estimates.
After the visit, expect written documentation, itemized invoices, warranty information, and clear next-step recommendations.
Situations requiring immediate professional intervention (severe damage, complex routing)
Recognize when a burst pipe exceeds DIY limits: extensive flooding, visible structural damage, sewage contamination, or plumbing routed through inaccessible spaces (inside walls, under concrete slabs, or through multi-unit stacks) require immediate professional intervention.
A licensed plumber assesses hazards, isolates supply, documents damage for insurance, and plans invasive repairs—wall removal, slab cutting, or stack coordination—using specialized tools and permits to guarantee code-compliant, durable restoration.
Questions to ask a plumber and information to provide
When should a homeowner call a professional plumber, and what key details should be ready? A homeowner should call when leaks persist, water affects structure, or safety is uncertain.
Provide location, visible damage, water flow status, shutoff actions taken, appliance connections, access constraints, and photos.
Ask about licensing, emergency availability, diagnostic methods, and warranty on repairs.
Typical repair timelines and cost factors
Several factors determine how long pipe repairs take and what they will cost.
Scope (access, damage extent, number of fittings) drives time and labor. Emergency callouts increase hourly rates; parts and materials add fixed costs.
Simple clamp or slip coupling jobs may finish in an hour; wall-replacement or rerouting can take days.
Homeowner should expect an upfront estimate and clear timeline from a licensed plumber.
What to expect after the plumber leaves (documentation, warranties)
After the plumber finishes the visible work and provides a timeline for any follow-up, homeowners should receive clear documentation and information on coverage.
The packet typically includes an invoice, detailed list of repairs, parts used and serial numbers, warranty terms, contact details, and recommended maintenance.
Retain receipts and photos for insurance. Clarify warranty duration, exclusions, and return-visit policies before the technician departs.
Drying and restoring the wall and surrounding areas after repair
After the leak is stopped and plumbing repairs are complete, attention turns to extracting water and thoroughly drying the affected areas using pumps, wet vacs, dehumidifiers, and directed fans.
The assessment should include mold prevention and safe handling of contaminated water, plus inspection of insulation, studs, and any electrical components for compromise.
Once dry and cleared, proceed with drywall repairs, replacement of damaged finishes, and repainting following appropriate drying and priming steps.
Safe water extraction and drying methods (dehumidifiers, fans)
Begin by removing standing water with a wet/dry vacuum or mop to minimize further saturation.
Employ high-capacity dehumidifiers to lower ambient humidity and extract bound moisture from wall cavities.
Position axial fans for cross-ventilation, aiming airflow along surfaces and into voids.
Monitor moisture with meters; continue until readings reach acceptable levels.
Dispose of soaked materials and document drying progress for records.
Mold prevention and handling contaminated water
Several key steps reduce mold risk and address contaminated water when drying and restoring walls: isolate the area and use appropriate PPE; identify contamination level (clean, gray, or black water) to determine required remediation; remove and discard porous materials that cannot be thoroughly cleaned; and guarantee structural cavities are opened and dried to below 15–20% moisture content before reconstruction.
Disinfect nonporous surfaces, monitor humidity, document conditions, and arrange professional remediation for black water.
Inspecting insulation, studs, and electrical components for damage
Inspecting insulation, studs, and electrical components is a critical step in drying and restoring walls after a burst pipe, as unseen moisture, structural weakening, or wiring damage can create safety hazards and compromise repairs.
Professionals or skilled homeowners should remove wet insulation, probe studs for rot or warping, and have a licensed electrician test outlets, switches, and junctions before sealing and finishing the wall.
Steps to repair drywall, paint, and finishes after plumbing repair
After confirming insulation and framing are dry and any electrical issues have been addressed, attention turns to restoring the wall surface.
Cut damaged drywall to neat openings, install new studs or backing if needed, fit and tape new drywall, apply joint compound in thin layers, sand smooth, prime, and paint to match.
Reinstall trim, fixtures, and verify finishes for uniformity.
Tools, materials, and supplies checklist for emergency and permanent repairs
A concise inventory of tools, materials, and supplies helps guarantee an effective response to a burst pipe, whether stopping an immediate leak or completing a permanent repair.
Emergency items like shutoff tools, absorbent towels, buckets, and strong tape control damage until proper parts arrive. For lasting repair, common fittings and replacement pipe materials are needed alongside safety gear and diagnostic tools to verify the fix.
- Essential emergency items: shutoff tools, towels, buckets, heavy-duty tape
- Common repair fittings and replacement pipe materials: couplings, compression fittings, PEX/CPVC/Copper sections
- Safety gear and detection tools: gloves, goggles, moisture meter, IR thermometer, multimeter
Essential emergency items (shutoff tools, towels, buckets, tape)
Gathering a compact set of emergency items guarantees a fast, effective response to a burst pipe. The list prioritizes immediate shutoff, containment, and temporary sealing: shutoff wrench, heavy towels, buckets, and waterproof tape. Quick access reduces damage until a permanent repair is made.
| Item | Purpose |
|---|---|
| Shutoff wrench | Stop water flow |
| Towels | Absorb leaks |
| Buckets | Collect water |
| Waterproof tape | Temporary seal |
Common repair fittings and replacement pipe materials
Once water flow is controlled and leaks contained, attention turns to the fittings and replacement pipe types needed for both temporary fixes and permanent repair.
Common items include rubber pipe repair sleeves, hose clamps, push-fit couplings (SharkBite), copper or PEX replacement sections, compression unions, soldered fittings, and appropriate pipe cutter and deburring tools.
Choose materials matching existing system and local code.
Safety gear and detection tools (moisture meter, IR thermometer, multimeter)
Proper personal protective equipment and reliable detection tools are essential before attempting any emergency or permanent pipe repair.
Gloves, eye protection, and a respirator protect against contaminants.
A moisture meter locates wet framing, an IR thermometer identifies temperature differentials and frozen sections, and a multimeter verifies electrical safety around damp areas.
Compact flashlight and non-contact voltage tester complete the basic diagnostic kit.
Common mistakes to avoid when fixing a burst pipe in a wall
Responders should act quickly to shut off water and avoid improvised electrical work near wet walls, as hesitation or unsafe actions can create serious hazards.
Many temporary repairs fail because they are applied to dirty, pressurized, or improperly prepared surfaces; guidance on correct surface prep and pressure management prevents common failures.
Similarly, poor soldering, gluing, or fitting techniques—incorrect heat, wrong adhesive, or misaligned joints—are frequent causes of continued leakage and must be addressed with proper methods.
Dangers of delaying shutoff or attempting unsafe electrical work
While waiting to shut off the main valve or attempting DIY electrical fixes, occupants risk escalating water damage and creating deadly electrical hazards. Water contacting live wiring can cause shocks, short circuits, or fires, and delays allow pressure and flow to widen the breach and saturate structural elements.
Immediate isolation and professional electrical assessment minimize injury, prevent fire, and reduce repair scope. Never mix water and live circuits.
Why some temporary fixes fail and how to avoid them
Why do temporary fixes so often fail? Common causes include inadequate sealing, using incompatible materials, and insufficient surface preparation.
Quick patches may not withstand pressure, temperature changes, or corrosion. To avoid failure, choose appropriate clamps or rubber wraps, clean and dry the area, relieve pressure before repair, and monitor the repair closely until a permanent replacement is completed by a qualified plumber.
Incorrect soldering, gluing, or fitting techniques that cause leaks
Temporary patches can buy time but they also expose underlying workmanship errors that quickly reveal themselves once pressure returns to the system.
Incorrect soldering, gluing, or poor fittings create pinholes, cold joints, misaligned pipes, and blocked seals.
Contaminated surfaces, improper flux, insufficient cure time, or wrong adhesives lead to leaks.
Proper cleaning, heat control, correct adhesive selection, and testing prevent failures.
Preventive maintenance to reduce risk of future burst pipes
Preventive maintenance focuses on practical steps to lower the chance of future bursts, including winterizing pipes and insulating vulnerable runs inside walls.
Routine inspections and seasonal checks can catch early signs of wear, leaks, or freezing risk before they escalate.
For aging systems, evaluating and upgrading old piping can be more cost-effective than repeated repairs.
Winterizing pipes and insulating vulnerable wall runs
When temperatures drop, winterizing pipes and insulating vulnerable wall runs becomes essential to prevent freezing and subsequent bursts. Sealing gaps, adding insulation, and maintaining steady heat levels in cold zones reduce thermal stress on piping and lower repair risk.
Use foam pipe sleeves, closed-cell spray foam around penetrations, and insulating wall cavities where practical. Shutoff and drain exterior lines; consider heat tape for exposed runs.
Regular inspection tips and seasonal checks
Because small problems often precede major failures, routine inspections and seasonal checks are essential to catch wear, leaks, and weakening joints before they lead to burst pipes.
Inspect visible plumbing, check for damp spots, listen for drips, monitor water pressure, and test shutoff valves.
Schedule checks before winter and after freezes.
Record findings and address minor leaks promptly to prevent escalation.
Upgrading old piping systems: when replacement pays off
If corrosion, frequent leaks, or outdated materials are present throughout a building, replacing sections or the entire piping system can be more cost-effective than repeated repairs. A professional assessment weighs material lifespan, disruption, and long-term savings. Planned replacement reduces emergency risk, improves water quality, and can increase property value.
| Condition | Benefit |
|---|---|
| Corroded pipes | Lower failure risk |
| Lead/galvanized | Health safety |
| Frequent repairs | Cost savings |
| Old layout | Improved flow |
Quick reference: step-by-step emergency repair checklist
A concise emergency checklist guides a rapid, organized response when a pipe bursts to limit damage and prepare for repair.
It outlines immediate actions to stop water flow, short-term containment to reduce loss and hazards, and the steps to shift from temporary fixes to permanent restoration. The sequence emphasizes timeframes and priorities so responders can act quickly and confidently.
- Immediate actions (0 to 15 minutes): shut off water, disconnect power near flooded areas, and protect valuables.
- Short-term fixes and containment (15 to 60 minutes): apply clamps or patches, use buckets and towels, and set up temporary drainage or pumps.
- Shift to permanent repair and restoration (hours to days): arrange professional repair, drain and dry affected spaces, and inspect for structural or mold damage.
Immediate actions (0 to 15 minutes)
Shut off the main water supply immediately and cut power to affected areas to prevent flooding and electrical hazards; then quickly assess visible damage and contain running water with buckets, towels, or a nearby shutoff valve.
Photograph damage for records, move valuables away, ventilate if safe, and notify household members.
Call a professional plumbing service and, if flooding risks persist, contact emergency responders.
Short-term fixes and containment (15 to 60 minutes)
Begin temporary containment by isolating the leak, applying an appropriate emergency repair method, and securing the area to prevent further water spread. Then use clamps, rubber patches, or epoxy tape; collect water with buckets and towels; ventilate to reduce humidity; monitor for changes.
| Action | Purpose |
|---|---|
| Clamp | Stop flow |
| Patch | Seal breach |
| Collect | Limit damage |
| Ventilate | Reduce moisture |
Transition to permanent repair and restoration (hours to days)
Move from temporary containment to permanent repair by evaluating damage, documenting the situation for insurance, and scheduling qualified repairs within hours to days.
Assess hidden moisture, structural impact, and mold risk; photograph conditions and retain receipts.
Engage licensed plumbers and restoration contractors, obtain written estimates, and coordinate permits.
Prioritize drying, antimicrobial treatment, and safe material replacement to restore integrity and prevent recurrence.
Conclusion
Nationwide, burst pipes account for roughly 20% of all household water-damage claims—a stark reminder that rapid, informed action matters. After taking immediate steps to stop the flow, assess damage, and choose a temporary fix, homeowners should carefully expose the damaged section and perform a permanent repair or call a professional. With the right tools, attention to safety, and preventive maintenance, many ruptures can be resolved efficiently, minimizing cost and long-term damage.
