How to Fix Water Damaged Floor: Step-by-Step Repair Guide
To effectively fix a water-damaged floor, start by locating the leak and shutting off utilities. Next, stop the leak and contain the affected area while documenting the damage for insurance purposes. Remove any standing water using pumps or wet/dry vacuums. Increase airflow and dehumidification, and lift wet flooring to dry the subfloors. Be sure to inspect for contamination, mold, and structural damage; repair or replace materials as necessary based on the type of flooring. Always use appropriate personal protective equipment (PPE) and moisture meters, and consult professionals for extensive or contaminated damage. Follow these steps for a thorough repair and consider prevention tips to avoid future issues.
What to do immediately after discovering a water damaged floor
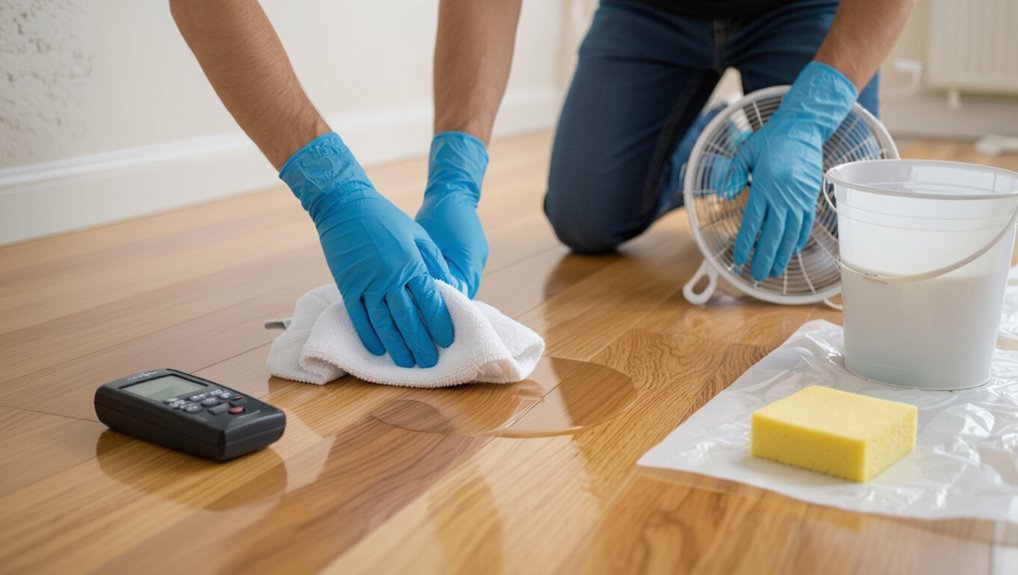
Upon discovering a water damaged floor, assess safety risks and shut off utilities to prevent electrical hazards.
Next, stop the water source, contain the affected area, and remove furniture and valuables to limit further damage.
Finally, document the damage with clear photos and notes for insurance and repair planning.
Assess safety risks and shut off utilities
If standing water or soaked flooring is discovered, the first priority is to evaluate immediate hazards and stop the flow of water.
The inspector checks for electrical risks, gas odors, structural sagging, and contamination. Utilities are shut off at breakers and main valves as necessary.
Document conditions, wear protective gear, and keep occupants clear. These steps are essential when learning how to fix water damaged floor.
Stop the water source and contain the area
Cut off the water at its source and isolate the affected zone immediately to prevent further damage.
The person locates and closes the main valve or appliance supply, then blocks doorways and vents to limit spread.
Use towels, rags, or temporary barriers to contain pooling.
Activate pumps or buckets for visible water and document conditions for insurance; avoid electrical hazards while working.
Remove furniture and valuables safely
After stopping the water and containing the area, attention turns to removing furniture and valuables to prevent further loss.
Assess each item for stability and water exposure, prioritize electronics, documents, and textiles.
Use gloves and lift with proper technique or enlist help for heavy pieces.
Place items on dry, elevated surfaces; ventilate the room and avoid walking on soaked flooring to limit injury and damage.
Document damage for insurance with photos and notes
Immediately document the damage with clear photos and concise notes to support insurance claims and guide repairs.
The observer should photograph overall room, close-ups of warped boards, staining, mold, and affected baseboards from multiple angles with a scale reference.
Record date, time, cause (if known), affected materials, and any immediate actions taken.
Store backups and share promptly with the insurer.
Quickly determine the extent and type of water damage
A quick assessment distinguishes wet surfaces, saturated materials, and standing water to prioritize drying and removal.
The assessor should also classify contamination as clean, gray, or black water and inspect the subfloor, joists, and adjacent rooms for hidden damage.
If structural compromise, persistent moisture, or contaminated water is suspected, a professional water damage assessor should be called.
Identifying wet vs. saturated vs. standing water
How can one tell whether water on a floor is merely wet, fully saturated, or forming standing pools? Observers check surface sheen and feel: wet shows surface moisture, evaporates quickly, and may darken finish.
Saturated materials remain damp beneath, feel cool, and resist quick drying.
Standing water collects visibly in pools, flows to lows, and requires extraction rather than simple blotting or ventilation.
Classifying water contamination levels (clean, gray, black)
Many incidents of floor water damage can be sorted quickly by classifying the contamination as clean, gray, or black water, each indicating potential health risks and required remediation steps.
Clean water is potable and low risk.
Gray water contains household contaminants and needs disinfection.
Black water is highly contaminated (sewage, floodwater) and requires professional removal, containment, and replacement of affected materials.
Inspecting subfloor, joists, and adjacent rooms
Begin by evaluating visible signs of damage beyond the surface flooring: remove trim or a small section of flooring if needed to inspect the subfloor, check joists for warping, rot, or mold staining, and examine adjacent rooms and wall bases for water tracks or soft spots.
Note odors, efflorescence, and fastener corrosion. Probe suspect areas with a screwdriver to detect delamination, sponginess, or structural compromise.
When to call a professional water damage assessor
When should a professional water damage assessor be called? A professional should be summoned when standing water exceeds a few inches, odors persist, mold is visible, multiple rooms or structural elements are affected, or flooding involves sewage or contaminated sources.
They provide moisture mapping, structural assessment, contamination classification, and documentation for insurance, ensuring proper mitigation and preventing unseen long-term damage.
Tools, materials, and protective gear you’ll need
The next section lists the drying and extraction equipment, plus repair and replacement materials specific to hardwood, laminate, tile, and vinyl floors.
It also covers necessary safety gear, mold-prevention supplies, and estimated cost ranges for DIY tools versus professional rental or service options.
Readers will be able to compare what to buy or rent and prioritize items by damage severity and budget.
Essential drying and extraction equipment
Evaluating and addressing water-damaged flooring requires specific drying and extraction equipment to remove standing water, lower humidity, and prevent mold growth.
Essential items include submersible pumps, wet/dry vacuums with high-capacity tanks, air movers, dehumidifiers, and moisture meters.
Accessories: hoses, drain pans, and HEPA air scrubbers.
Personal protective equipment: gloves, N95 or P100 respirators, eye protection, and waterproof boots.
Repair and replacement materials by floor type
Start by identifying the flooring type—hardwood, engineered wood, laminate, vinyl, tile, or carpet—to determine appropriate repair and replacement tools, materials, and PPE.
For hardwood: replacement planks, wood glue, clamps, finish.
Engineered: matching boards, adhesive, moisture barrier.
Laminate: replacement planks, tapping block, pull bar.
Vinyl: sheets/planks, seam sealer, adhesive.
Tile: tiles, thinset, grout, trowel.
Carpet: padding, seam tape, knee kicker.
Safety gear and mold prevention supplies
Several basic items are essential for personal protection and mold prevention when addressing water-damaged flooring: N95 or higher respirators, nitrile gloves, eye protection, and disposable coveralls to reduce exposure to spores and contaminants.
Additional supplies include heavy-duty trash bags, antimicrobial cleaners, HEPA air purifiers or vacuums, moisture meters, dehumidifiers, and labeled sealable containers for removed materials to control spread and contamination.
Estimated cost ranges for DIY vs. professional equipment
A basic cost comparison clarifies what homeowners can expect when choosing between DIY and professional responses to water-damaged flooring:
DIY equipment and materials typically range $150–$800 (shop vac, dehumidifier rental, pry bars, replacement planks, sealant, PPE).
Professional-grade tools and labor push totals $1,200–$6,000+ depending on extent, specialized drying, mold remediation, and warranty coverage.
Consider long-term value versus upfront savings.
Step-by-step: Drying and stabilizing the damaged floor
The next phase focuses on practical steps to remove moisture and stabilize the flooring system. Key actions include stopping surface water, accelerating drying, exposing the subfloor when needed, and tracking moisture until safe for repairs:
- Remove surface water with pumps, wet vacs, and mops.
- Increase airflow and dehumidification using fans and dehumidifiers.
- Lift or remove wet flooring to allow subfloor drying.
- Monitor moisture levels with meters and set clear timelines; consider professional help when drying alone is insufficient.
Remove surface water: pumps, wet vacs, and mops
Begin by removing standing water promptly to limit further damage and mold growth.
Use a submersible pump for deep pools, then a wet vacuum for residual moisture on hard floors and low-pile carpet.
Mop remaining dampness with absorbent towels or string mops, wringing frequently.
Empty and sanitize collection containers.
Monitor water removal progress and repeat until visible surface moisture is gone.
Increase airflow and dehumidification: fans and dehumidifiers
Increase airflow and lower humidity to accelerate drying and prevent mold: position high-capacity air movers to create cross-ventilation and run dehumidifiers continuously to extract moisture from the air and materials.
Monitor temperature and relative humidity with meters, adjust equipment placement to target damp zones, and maintain continuous operation until moisture readings reach acceptable levels for the flooring type.
Regularly empty dehumidifier reservoirs.
Lifting or removing wet flooring to dry subfloor
Carefully lift or remove affected floor coverings to expose and dry the subfloor, prioritizing areas with trapped moisture or visible swelling.
Work systematically from perimeter inward, labeling and storing removed pieces for possible reuse.
Inspect for mold, delamination, and structural damage.
Remove compromised underlayment or adhesive.
Allow direct airflow to exposed sheathing and document locations needing repair or replacement before proceeding.
Monitoring moisture levels with meters and timelines
With the subfloor exposed and damaged materials removed, monitoring moisture becomes the primary guide for drying and stabilization.
Technicians use pin and non‑pin meters to track relative and absolute moisture across subfloor, joists, and remaining finishes. Readings are logged daily, with target levels set per material.
Timelines depend on readings; drying continues until measurements consistently meet manufacturer or industry thresholds.
When drying alone is insufficient
When drying fails to restore acceptable moisture levels or structural integrity, the restoration process shifts to active remediation and selective reconstruction.
The technician assesses damaged areas, removes irreparably warped boards, treats mold or rot, and replaces subfloor sections as needed.
Materials are matched, fastened, and sealed.
Final moisture verification precedes refinishing to guarantee long-term stability and prevent recurrence.
Repairing common floor types after water damage
Different flooring materials require distinct post-water-damage actions.
For hardwood, evaluate it for repair, refinishing, or replacement.
Saturated laminate planks and underlayment need to be replaced.
Vinyl and linoleum may be cleanable or patchable but sometimes need full replacement.
Tile installations often demand thorough drying, possible regrouting, and backerboard replacement.
Carpet and padding decisions hinge on contamination and drying time.
Cleaning is acceptable for minor, clean water, but disposal is recommended for prolonged or contaminated exposure.
Hardwood floors: repair, refinish, or replace decisions
How extensive is the damage and what type of hardwood is affected—questions that determine whether repair, refinishing, or replacement is appropriate.
Assess cupping, warping, staining, and soft spots. Solid planks can often be sanded and refinished if structurally sound; engineered boards may allow surface refinishing fewer times.
Replace boards when mold, severe swelling, or structural compromise exists; document and consult warranty or pros for major loss.
Laminate floors: replacement of planks and underlayment
After evaluating hardwood options, attention shifts to laminate, which responds differently to water because its core and locking system are not designed to tolerate prolonged moisture.
Damaged planks swell, warp, or delaminate; removal of affected boards and replacement with identical profiles is recommended.
Inspect and replace soaked underlayment, guarantee subfloor is dry, and reinstall floating floor with expansion gaps and moisture barrier as required.
Vinyl and linoleum: cleaning, patching, and full replacement
Evaluating vinyl and linoleum begins with determining the extent of water exposure—surface moisture, localized soaking, or prolonged saturation—because each scenario dictates a different response: cleaning and disinfecting for superficial soiling, patching for isolated damage, or full replacement when seams, adhesive, or backing are compromised.
Surface-clean with mild detergent and disinfectant; dry thoroughly.
Patch small tears using matching material and adhesive.
Replace when buckling, persistent odour, or loose adhesive occur.
Tile and grout: drying, regrouting, and replacing backerboard
Assess tile and grout damage by confirming that surface water has been removed and checking for loose tiles, cracked grout, soft spots, or a musty odour that indicate moisture penetration into the substrate.
Dry thoroughly with fans and dehumidifiers.
Remove and regrout damaged joints with appropriate mortar and grout.
Replace waterlogged backerboard, reinstall tile on a sound, level substrate, and seal grout to prevent recurrence.
Carpet and padding: cleaning vs. disposal guidelines
Determine whether carpet and padding can be salvaged by identifying the water source, contamination level, and time since saturation.
Clean water spilled briefly may allow for professional cleaning and rapid drying, while sewage, floodwater, or carpets soaked for more than 48–72 hours usually require removal and disposal due to mold, bacteria, and irreversible damage.
Salvageable carpet requires fast extraction, deodorization, and moisture monitoring; padding often needs replacement.
Subfloor and structural repairs
A thorough inspection of the subfloor identifies soft or swollen panels that require removal and replacement.
The condition of joists, beams, and fasteners should be checked for rot, corrosion, or loosening, with repairs or sistering performed as needed.
Any warped or buckled framing should be addressed to restore level support.
A structural contractor should be engaged when major framing is compromised, loads are affected, or the homeowner lacks the tools or expertise for safe repair.
Inspecting and replacing damaged subfloor panels
Begin by inspecting the subfloor for soft spots, swelling, mold growth, and dark staining that indicate water-saturated or rotted panels.
Measure and mark compromised panel boundaries, remove flooring and fasteners, cut out damaged sections back to solid framing.
Fit replacement plywood or OSB of matching thickness, glue and screw to the framing, seal seams, and allow adhesive to cure before reinstalling finish flooring.
Checking and repairing joists, beams, and fasteners
Inspect joists, beams, and fasteners for sagging, rot, splits, corrosion, or loosened connections, focusing on areas adjacent to the removed subfloor and visible moisture paths.
Probe wood with a screwdriver, note soft or discolored sections, and test fastener integrity.
Remove and replace severely damaged members; sister or reinforce marginal joists.
Use corrosion-resistant hardware and guarantee connections meet load requirements before reinstalling subfloor.
Addressing warped or buckled framing
With joists, beams, and fasteners evaluated and any rotten or weakened members addressed, attention shifts to warped or buckled framing that can undermine a new subfloor.
Inspect for crown, twist, and localized high spots. Plane, sister, or shim framing to restore level and alignment.
Guarantee secure fastening and verify straightness with a long level or laser before installing subfloor panels.
When to engage a structural contractor
When should a structural contractor be called in for subfloor and load-bearing repairs?
A structural contractor is needed when joists, beams, or load-bearing walls show significant rot, movement, or cracking; water damage spans multiple rooms; temporary supports are required; DIY assessment is uncertain; or local code, insurance, or safety concerns demand professional certification.
Prompt engagement prevents further collapse and costly repairs.
Mold prevention and remediation steps
Signs of mold under floors and within wall cavities often include musty odors, visible discoloration, and persistent dampness behind baseboards.
Cleaning with antimicrobial solutions, HEPA vacuuming, and proper containment are key steps to reduce spores before removal.
For large or hazardous infestations, certified mold remediation professionals should be engaged to guarantee safe, code-compliant removal.
Signs of mold growth under floors and in cavities
How can one tell if mold is growing beneath floorboards or inside wall cavities? Indicators include persistent musty odors, visible staining or discoloration along baseboards, warped or buckling floorboards, and unexplained allergic reactions in occupants.
Condensation, chronic moisture spots, and recurring paint or wallpaper blistering also suggest hidden fungal activity.
Professional moisture mapping and infrared scans can confirm concealed growth.
Cleaning, antimicrobial treatments, and HEPA vacuuming
Begin remediation by isolating the affected area and removing loose debris to reduce spore spread.
Then apply targeted cleaning, antimicrobial treatments, and HEPA vacuuming in a coordinated sequence to eliminate existing mold, inhibit regrowth, and minimize airborne contamination.
Surfaces are cleaned with appropriate detergents, antifungal agents applied per label, and final HEPA vacuuming performed.
Moisture control and monitoring follow to guarantee remediation success.
Containment and safe removal practices
Establish a contained work zone using polyethylene sheeting, negative air pressure, and sealed entry points to prevent mold spores from migrating to unaffected areas.
Workers don appropriate PPE, use disposable tools when feasible, and bag and label contaminated materials for removal.
Wet materials are dried or discarded; surfaces are HEPA-vacuumed and wiped with approved cleaners.
Airflow and containment integrity are monitored until clearance sampling confirms safety.
Hiring certified mold remediation professionals
After containment and initial cleanup, engaging a certified mold remediation professional secures thorough assessment and long-term prevention.
They inspect hidden areas, test air and surfaces, and develop a targeted remediation plan.
Certified technicians use containment, HEPA filtration, and proper drying techniques, document progress, and advise on repairs and moisture control.
Hiring secures compliance with standards and reduces recurrence risk.
Finishing touches: restoring appearance and function
Attention turns to restoring both appearance and function after repairs are complete.
Sanding and refinishing are addressed for hardwood or engineered floors, with sealing and careful reinstalling of trim and connectors to guarantee a seamless look.
New materials are matched to existing finishes and a final moisture check is performed before closing up.
Sanding and refinishing hardwood or engineered floors
Begin by evaluating the extent of damage and the type of flooring—solid hardwood or engineered—since sanding depth, finish compatibility, and techniques differ between them; solid hardwood can generally tolerate deeper sanding, while engineered planks allow only light sanding of the wear layer.
Sand progressively with coarse to fine grits. Repair minor gouges with wood filler, clean thoroughly, then apply compatible stain and finish coats per manufacturer instructions.
Sealing and reinstalling trim and transitions
Seal and reinstall trim and connections to protect edges, prevent moisture intrusion, and restore a finished look.
Remove damaged trim, check subfloor and underlayment, and allow surfaces to fully dry.
Cut replacement pieces to fit, fasten with finish nails or adhesive, and fill gaps with paintable silicone or wood filler.
Caulk seams, sand smooth, and paint or stain to match surrounding finishes.
Matching new materials to existing floors
When replacing sections of a water-damaged floor, matching new materials to the existing surface is essential to restore both appearance and performance. Attention to species, grain, thickness, and finished sheen guarantees the repair blends visually and behaves similarly under use.
Color-matching, aging techniques, and edge profiles further harmonize replacements. Fastener type and underlayment compatibility confirm consistent stability and long-term wear.
Final moisture check before closing up
Confirm moisture levels one final time before closing up to prevent trapped dampness from causing mold, finish failure, or warping.
Use a calibrated moisture meter across substrate, underlayment, and new boards, comparing readings to manufacturer specifications.
Allow additional drying if any spot exceeds safe thresholds. Document measurements and locations, then proceed with adhesives, fasteners, and finish only when uniformly dry to guarantee longevity.
Cost estimates, timelines, and insurance considerations
A concise overview of costs, timelines, and insurance helps homeowners plan repairs and set expectations. Typical repair cost ranges by floor type, expected drying and repair timelines, and common insurance coverages with filing tips are summarized below. Reviewing these items early can reduce surprises and speed recovery.
| Topic | Key Metric | Typical Range/Action |
|---|---|---|
| Cost by floor type | Low–high cost | Laminate: $200–$1,200; Hardwood: $500–$5,000 |
| Timelines | Drying & repair duration | Drying 24–72+ hrs; repairs 1–14 days |
| Insurance | Coverage & filing | Water vs. flood differences; document damage, file promptly |
Typical repair cost breakdown by floor type
Repair costs for water-damaged floors vary widely by material, extent of damage, and local labor rates.
Hard surfaces like tile or concrete often incur lower replacement costs but higher moisture mitigation expenses, while hardwood and engineered wood typically require more costly drying, refinishing, or full-board replacement.
Typical ranges:
- vinyl/linoleum $2–5/ft²
- tile $5–12/ft²
- hardwood $8–20+/ft²;
subfloor or mold remediation raises totals.
Expected timelines for drying and repairs
After outlining typical cost ranges by floor type, attention shifts to how long drying and repairs take and what insurers commonly require.
Drying single rooms usually needs 24–72 hours with dehumidifiers; structural drying can extend to 5–10 days.
Repair timelines vary: patching or sanding 1–3 days, full replacement 3–7 days.
Contingencies for mold remediation may add several days.
What insurance commonly covers and how to file a claim
Homeowners’ insurance often covers sudden, accidental water damage—such as from burst pipes or appliance failures—while typically excluding gradual leaks, flooding, and wear-related issues.
Policyholders should review declarations and exclusions to determine if flooring repair, temporary living expenses, and mold remediation are eligible.
Document damage with photos, receipts, and contractor estimates. Contact the insurer promptly, keep records of communications, and follow adjuster instructions to expedite claims.
Signs you should hire a professional instead of DIY
If visible contamination, persistent odors, or signs of structural compromise are present, professional intervention is usually warranted.
Situations that require specialized drying equipment, moisture meters, or hazardous-material handling exceed typical DIY capability.
Homeowners should verify certifications, references, and insurance coverage when selecting a water damage restoration contractor.
Indicators of extensive contamination or structural damage
When visible mold colonies, pervasive sewage odors, or extensive structural sagging are present, the damage likely exceeds what typical DIY methods can safely address.
Indicators include widespread black or fuzzy mold, persistent foul odors after drying, warped or separating subfloor sections, floor bounce or creaks indicating joist compromise, and contaminated insulation or cavities.
These signs warrant licensed remediation and structural assessment.
When equipment rental and expertise are required
Although small spills and localized damp spots can often be handled with basic tools, certain conditions clearly require rented equipment and professional expertise: prolonged standing water, saturated structural elements, visible mold growth beyond a few square feet, sewage contamination, or stains and odors that persist after initial drying indicate scope and hazards beyond typical DIY capability.
Additional signs include structural sagging, electrical involvement, extensive hardwood buckling, and unsuccessful amateur drying attempts.
How to vet water damage restoration contractors
The indicators that signal the need for rented equipment or a specialist also serve as practical criteria for choosing a restoration contractor: homeowners should prioritize firms experienced in handling prolonged standing water, sewage, mold remediation, and structural repairs.
Verify licenses, insurance, IICRC certification, detailed written estimates, references, and documented safety protocols.
Prefer contractors offering moisture readings, post-repair warranties, and transparent disposal practices.
Preventing future water damage
Preventing future water damage focuses on routine care, targeted upgrades, and early detection.
Regular maintenance of plumbing and appliances, along with improved flooring materials and better drainage, reduces exposure to leaks and seepage.
Integrating smart-home sensors and leak detectors provides rapid alerts to stop problems before they escalate.
Regular maintenance tips for plumbing and appliances
Regular inspections and simple upkeep of pipes, fixtures, and household appliances drastically reduce the risk of future water damage.
Homeowners should check hoses, seals, and valves monthly, replace aging flexible lines every 5–7 years, clear drain traps and vents, test shutoff valves annually, and service water heaters and washing machines per manufacturer schedules.
Promptly address leaks and corrosion to prevent escalation.
Improvements to flooring and drainage to reduce risk
Upgrade flooring materials and adjust subfloor and drainage systems to limit long-term water exposure and speed drying after incidents.
Recommend water-resistant finishes, elevated flooring assemblies, and moisture-tolerant underlayment.
Improve slope and add perimeter drains where feasible; install proper gutters, downspouts, and exterior grading to divert runoff.
Guarantee vapor barriers and sealants are correctly applied to reduce infiltration and simplify future repairs.
Smart-home sensors and leak detection systems
Deploying smart-home sensors and leak-detection systems provides early warning of moisture issues that can prevent small failures from becoming major floor damage.
Wireless moisture, temperature, and flow sensors monitor vulnerable areas, sending alerts to phones or hubs. Integrated shutoff valves can stop leaks automatically.
Regular testing, battery checks, and strategic placement near appliances, drains, and basements maximize effectiveness and minimize false alarms.
Common mistakes to avoid during water-damaged floor repairs
When addressing water-damaged floors, common mistakes can worsen structural issues and increase costs if not recognized early.
Key errors to avoid include:
- Waiting too long to dry and repair
- Replacing only surface materials without checking subfloor
- Using inadequate drying methods
- Skipping documentation for insurance claims
Careful assessment and prompt, documented action reduce long-term damage and expense.
Waiting too long to dry and repair
Often, homeowners delay action after water damage, underestimating how quickly moisture can worsen flooring and structural components.
Delay allows mold growth, warping, and fastener corrosion, increasing repair scope and cost. Immediate drying, moisture monitoring, and timely removal of affected materials limit deterioration.
Prompt professional assessment guarantees hidden saturation is detected and addressed before irreversible damage mandates full replacement or structural repairs.
Replacing only surface materials without checking subfloor
Failing to inspect the subfloor after removing damaged surface materials can leave hidden rot, mold, or structural weakness unaddressed.
Repairers who replace only top layers risk persistent odors, recurring warping, and compromised load-bearing capacity.
Always probe, measure moisture content, and remove any soft, discolored, or delaminated subflooring.
Neglecting this step often necessitates costly rework and creates safety hazards.
Using inadequate drying methods
Relying on slow, uneven, or makeshift drying methods leaves moisture trapped in flooring layers and framing, leading to mold growth, staining, and structural decay.
Professionals use controlled airflow, dehumidification, and monitored drying schedules to guarantee complete moisture removal.
Inadequate techniques can necessitate costly replacements, prolong odors, and compromise indoor air quality; document moisture readings and verify dryness before reinstalling finishes.
Skipping documentation for insurance claims
After documenting drying progress and confirming moisture levels, attention must turn to paperwork for insurance claims.
Failing to record timestamps, photos, contractor invoices, and repair estimates can void coverage or delay reimbursement.
Photographic evidence, detailed logs, and copies of communications establish causation and scope.
Maintain organized files and submit required forms promptly to avoid disputes and maximize claim recovery.
Conclusion
In the grand domestic theater of soggy floors, homeowners are gently reminded that heroics with fans and rubber boots seldom outshine common sense. Armed with patience, the right tools, and realistic expectations, one may mend warped boards or soggy tiles without summoning a brass band of contractors. Yet when mold moons for attention or structure sulks, waving the white flag and hiring a pro is the only dignified encore. Curtains.