
How to Replace a Gasket in a Toilet Tank: Step-by-Step Guide for a Leak-Free Flush
To replace a worn toilet tank gasket and stop leaks, follow these straightforward steps: First, turn off the water supply and drain the tank. Next, disconnect the supply line and remove the tank-to-bowl bolts to lift the tank off. Scrape away the old gasket and clean the surfaces thoroughly. Then, fit the new gasket around the flush valve flange. Reposition the tank, install new rubber washers and bolts, and tighten them evenly. Finally, restore the water supply and check for any leaks. For detailed guidance, tips, and troubleshooting, continue reading.
What a Toilet Tank Gasket Is and Why It Matters
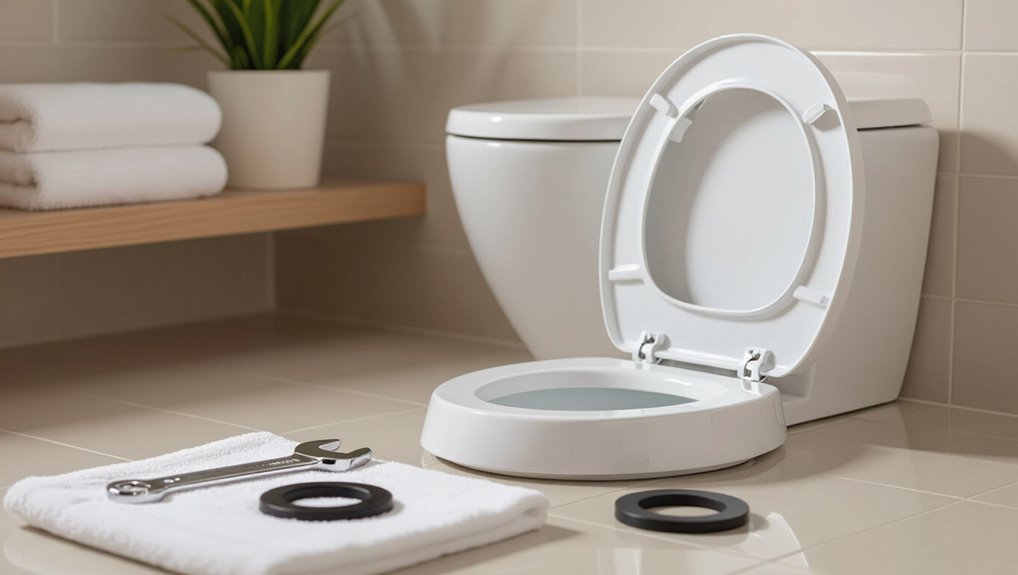
A toilet tank gasket is a rubber or foam seal that prevents leaks at connections such as the tank-to-bowl joint, the flush valve, the fill valve, and around tank bolts.
Common signs it needs replacement include visible leaks, water on the floor, a constantly refilling tank, or discoloration around fittings.
Ignoring a failing gasket can waste water, damage flooring, and raise utility and repair costs.
Function of the tank-to-bowl gasket and other common gaskets (flush valve, fill valve, tank bolt washers)
Understanding begins with recognizing that the tank-to-bowl gasket forms the primary watertight seal between the toilet tank and bowl, preventing leaks at their joint and ensuring proper flush performance.
Other gaskets—flush valve seal, fill valve seal, and tank bolt washers—maintain internal seals, control water flow, and secure the tank.
Clear knowledge aids in deciding when and how to replace gasket in toilet tank.
Signs you need to replace a gasket (visible leaks, water on floor, constantly refilling, discoloration)
Recognize the warning signs that a toilet tank gasket is failing to prevent small problems from becoming larger repairs. Observable indicators include steady drips beneath the tank, pooled water on the floor, and continuous tank refilling after flushing.
Discoloration or mineral buildup around gasket areas and near bolts signals degradation. Early detection prompts timely gasket replacement to restore proper sealing and reliable operation.
Risks of delaying replacement (water waste, damage to flooring, higher bills)
Delaying gasket replacement accelerates water loss and structural damage: a compromised seal allows constant leaks that drive up utility bills, encourage mold and rot in subflooring, and can stain or warp bathroom finishes.
Left unchecked, persistent leakage undermines flooring adhesives and joists, promotes mildew growth, and increases repair costs.
Prompt replacement minimizes waste, prevents costly structural remediation, and restores efficient water usage.
Quick Overview Replace a Toilet Tank Gasket in Minutes (Direct answer)
A gasket replacement involves shutting off the water, draining the tank, removing the old gasket, and installing a new one before restoring water flow.
The task typically takes 15–30 minutes, is low in difficulty for someone with basic DIY skills, and requires only a wrench, screwdriver, sponge, and replacement gasket.
Minimal disassembly and straightforward steps make it a quick fix for common tank leaks.
One-sentence summary of the process
Turn off the water, drain the tank, remove the old gasket, fit the new gasket into place, reassemble the tank, and restore the water—completing the job in minutes with basic tools.
This single-sentence summary captures the essential flow: isolate and empty the system, detach the failing seal, position the replacement gasket correctly, secure components, and refill to verify a watertight seal and proper flushing.
Typical time, difficulty level, and tools required
Expect the job to take about 20–45 minutes for a homeowner with basic DIY experience; difficulty is low to moderate, depending mainly on access to the tank bolts and whether corrosion or mineral buildup complicates removal.
Essential tools and considerations include:
- Adjustable wrench, screwdriver, and pliers
- Replacement gasket and plumber’s putty or silicone
- Towel, bucket, and safety gloves
Tools and Materials You’ll Need
A concise list of tools and materials makes the gasket replacement straightforward: a wrench, screwdriver, sponge, bucket, putty knife, and rag are essential.
Purchase the correct replacement parts—tank-to-bowl gasket, tank bolts with rubber washers, and optionally a sealant—matching the toilet model.
Confirm gasket size and material by measuring the old gasket or checking the manufacturer’s specifications to guarantee a proper fit and durable seal.
Essential tools (wrench, screwdriver, sponge, bucket, putty knife, rag)
For this job, a compact set of dependable tools makes removal and replacement of a toilet tank gasket straightforward: a wrench fits tank bolts and nuts; a flathead screwdriver pries or loosens components; a sponge and bucket catch and remove residual water; a putty knife scrapes old gasket residue; and a clean rag wipes surfaces dry.
Each tool guarantees safe, efficient gasket removal and preparation.
Replacement parts to buy (correct gasket type, tank-to-bowl gasket, tank bolts, rubber washers, optional sealant)
Select replacement parts that match the toilet’s model and dimensions to guarantee a watertight fit and long-lasting repair.
Recommended items include a compatible tank-to-bowl gasket, stainless or brass tank bolts with nuts, and rubber washers.
Consider optional plumber’s sealant for added assurance.
Check compatibility and quality before purchase.
- Tank-to-bowl gasket
- Tank bolts and nuts
- Rubber washers
How to choose the correct gasket size and material
When determining the correct gasket size and material, measure the tank-to-bowl opening diameter and bolt hole spacing, then match those dimensions to the toilet model or manufacturer specifications to guarantee a proper seal.
Select materials based on exposure: rubber for flexibility and cost, neoprene for chemical and temperature resistance, and silicone for longevity.
Confirm thickness and inner lip profile to prevent leaks.
Preparing to Replace the Gasket
Before starting the gasket replacement, the water supply is turned off and the tank is flushed and drained to prevent spills.
The work area is protected with towels or a tarp and gloves and eye protection are used to minimize injury and mess.
The tank and bowl are then inspected for cracks or other damage that could affect the repair.
Shutting off water and draining the tank
Shut off the water supply to the toilet and relieve the tank of all remaining water to prevent spills and make the gasket accessible.
The person then empties the tank by flushing and mopping residual water with a sponge. Close the supply valve fully and disconnect the supply line if needed.
- Flush to drain
- Sponge out remaining water
- Close and verify valve
Protecting the work area and safety precautions
A few simple precautions will protect the bathroom and the person replacing the gasket: lay down absorbent towels or a waterproof drop cloth around the toilet to catch drips, place a shallow bucket nearby for small parts and tools, and remove rugs or other items that could be damaged by water or cleaners.
Wear gloves and eye protection, ventilate the room, and keep cleaners and sharp tools organized and out of reach.
Inspecting tank and bowl for cracks or other damage
Inspect the tank and bowl carefully for hairline cracks, chips, or mineral-etched areas that can undermine a reliable seal or lead to leaks once the gasket is replaced.
Note any damage around bolt holes, flange contact points, and the tank-to-bowl mating surface.
Small cracks may require replacement; pervasive damage mandates replacing the fixture.
Photograph defects for reference and parts matching.
Step-by-Step Gasket Replacement Procedure
The procedure begins with safely removing the tank from the bowl by shutting off and disconnecting the water line and unfastening the tank bolts.
The old gasket and any residue are then removed and mating surfaces cleaned before the new gasket is oriented and seated—optionally with sealant—and the tank is reassembled using new washers and even bolt torque.
Finally, the water supply is reconnected, the tank refilled, and an initial test flush checked for leaks and proper operation.
Removing the tank from the bowl safely (disconnecting water line, unfastening bolts)
Begin by shutting off the water supply at the shutoff valve and flushing the toilet to drain most of the tank; use a sponge or towel to remove remaining water so the tank is light and dry.
Disconnect the supply line at the tank coupling, place a bucket beneath, then unfasten the tank-to-bowl bolts evenly.
Support the tank while loosening bolts, lift straight up, and set it on a padded surface.
Removing the old gasket and cleaning mating surfaces (tips for stubborn residue)
With the tank removed, the technician locates the old rubber gasket around the flush valve and prepares to detach it, noting any breaks, flattening, or hardening that indicate replacement.
The gasket is pried gently with a plastic scraper, residue softened with a mild vinegar solution, and stubborn deposits scraped away.
Surfaces are wiped dry and inspected for nicks or mineral pitting before reassembly.
Installing the new gasket correctly (orientation, seating, applying optional sealant)
Install the new gasket by first confirming correct orientation—flat side outward toward the tank and the raised lip seating into the flush-valve groove—and then press it evenly around the flange to guarantee a uniform, wrinkle-free fit.
If desired, apply a thin bead of plumber’s grease or silicone sealant sparingly to enhance sealing; avoid excess that could squeeze into the passage.
Reassembling the tank to the bowl and tightening bolts to spec (even torque, use of new washers)
Carefully lower the tank onto the bowl so the gasket seats evenly over the flush-valve flange.
Then align the bolt holes and insert new rubber washers and bolts through the tank into the bowl.
Hand-tighten nuts evenly, then use a wrench to alternate turns between sides, applying equal torque until snug.
Do not overtighten; stop when the tank sits level and leaks are prevented.
Reconnecting water supply, refilling, and initial test flush
Turn the water supply valve back on slowly to pressurize the tank while observing the new gasket and mounting bolts for any signs of leaks.
Allow the tank to fill to the normal waterline, watching for steady fill and proper float operation.
Perform one or two test flushes, checking base and tank seams for drips; tighten connections if minor seepage appears.
How to Test for Leaks and Ensure a Proper Seal
After the gasket is replaced, a visual inspection and a paper-towel test around the tank-to-bowl seam provide a quick first check for obvious moisture.
A dye test in the tank and a period of monitoring can reveal slow leaks that aren’t immediately visible.
If leakage continues, the article will note which fittings, bolt seals, or seating surfaces to recheck and when a professional should be called.
Visual inspection and paper-towel test
Begin by performing a close visual inspection of the tank exterior and the bowl-to-tank junction, looking for water stains, mineral deposits, or fresh dampness that indicate active leaking.
Press a dry paper towel along seams, bolts, and gasket edges; hold briefly, then check for moisture.
Repeat after a flush. Document any persistent wetness to confirm gasket replacement efficacy.
Dye test and monitoring for slow leaks
If the paper-towel check found no obvious wet spots or showed only intermittent dampness, a dye test helps detect slow or hidden leaks that visual checks can miss.
Add several drops of food coloring to the tank, wait 15–30 minutes without flushing, then inspect the bowl, floor, and tank base.
Repeat monitoring over 24–48 hours to confirm seal integrity and identify gradual seepage.
What to check if leaking persists after replacement
Confirm whether the leak persists despite a fresh gasket by systematically testing seals and connections: pressurize the tank with a few flushes, inspect all mating surfaces and bolt connections for moisture, run a food-color dye test to catch slow seepage, and check under the tank for any drips while the fixture is idle and under slight agitation.
Also verify flange integrity, tank-to-bowl alignment, bolt torque, and cracked porcelain.
Common Problems and How to Fix Them
Common issues after replacing a tank gasket include persistent leaks despite correct installation, damaged or seized tank bolts, and structural cracks that may make replacement impractical.
The troubleshooting checklist should cover re-seating the gasket, inspecting and replacing corroded or stripped bolts (or using alternative fasteners), and evaluating cracks in the tank or bowl to determine if a full toilet replacement is required.
If the toilet rocks or is unstable after reassembly, proper shimming and bolt alignment are necessary to restore a secure, watertight fit.
Gasket still leaks after installation troubleshooting checklist
Start with a systematic checklist to pinpoint why the new gasket continues to leak, covering installation errors, part compatibility, tank or flush valve damage, and remaining debris or mineral buildup.
Inspect seating, tightness, and alignment; verify gasket type versus flush valve; clean mating surfaces and channels.
If leak persists, test with dye to locate source and re-evaluate for cracked tank or warped flange.
- Check seating and alignment
- Confirm part compatibility
- Clean surfaces and test with dye
Stripped or corroded tank bolts and alternative fixes
When tank bolts become stripped or corroded, they compromise the seal and can cause persistent leaks or make tank removal difficult. Addressing them promptly prevents further damage and simplifies repairs.
Replace bolts with stainless steel or brass kits, use rubber washers and nylon nuts, or install a boltless tank-to-bowl seal (compression gaskets) where compatible.
Tighten evenly and inspect for remaining leaks.
Cracked tank or bowl when to replace the toilet instead
How badly cracked is the porcelain determines whether repair is feasible or replacement is the safer choice. Small hairline cracks in non-structural areas may be sealed temporarily with epoxy or silicone, but visible fractures, leaks at the tank-to-bowl junction, or any crack spreading under load warrant full replacement. Prioritize safety, long-term reliability, and prevention of water damage when deciding.
Toilet rocks or is unstable after reassembly shimming and bolt alignment
Addressing a wobbly toilet after reassembly requires verifying both the flange alignment and the evenness of the base against the floor.
Check flange height, tighten closet bolts evenly, and inspect rubber gasket and mounting hardware.
Use plastic shims where gaps exist, trim flush with a hacksaw, then caulk perimeter if desired.
Recheck stability and bolt torque; replace damaged flanges or bolts.
Cost and Time Estimates
Typical parts for a toilet tank gasket replacement generally cost between $5 and $25. A DIY job often takes 30 minutes to an hour.
Professional service increases the total to $100–$250 depending on call-out and labor, with plumbers completing the work in about 30–60 minutes on site.
Hiring a plumber is recommended when there is significant corrosion, hard-to-reach fittings, persistent leaks, or uncertainty about shutting off the water.
Typical parts cost and labor time for DIY vs. professional service
Several common scenarios outline the parts, costs, and time involved when replacing a toilet tank gasket. Typical DIY parts cost $5–25; labor time 30–90 minutes. Professional service ranges $80–250 with 30–60 minutes onsite plus travel. Complexity, part quality, and leakage extent affect totals.
| Scenario | Parts Cost | Time Estimate |
|---|---|---|
| DIY basic | $5–15 | 30–60 min |
| DIY premium | $15–25 | 45–90 min |
| Professional | $80–250 | 30–60 min |
When hiring a plumber is recommended
Consider hiring a plumber when the gasket issue coincides with persistent leaks, unclear leak sources, corroded or cracked tank components, or when the repair will disrupt other plumbing systems.
In such cases, professionals usually resolve the problem in 30–60 minutes onsite but can increase total cost to $80–250 depending on travel, diagnostic work, and parts needed.
A plumber guarantees correct diagnosis, sources appropriate parts, and provides warranty-backed repairs.
Preventive Maintenance and Tips to Extend Gasket Life
A routine inspection schedule and a few simple maintenance tasks can greatly extend a toilet tank gasket’s service life.
Choosing durable materials—such as high-quality rubber or silicone gaskets—reduces premature failure.
Water quality, including hardness and chlorine levels, also affects lifespan and should inform maintenance and material choices.
Routine inspection schedule and simple maintenance tasks
Routine inspections every three to six months help catch early wear on tank gaskets before leaks develop; simple tasks such as checking for soft or cracked rubber, confirming tight but not overtightened bolts, and wiping away mineral buildup can extend gasket life considerably.
- Inspect gasket surface for cracks or compression.
- Verify bolt and nut tension; adjust gently.
- Clean deposits with vinegar and a soft cloth.
Best materials and gaskets for longevity
Having established simple inspection and upkeep practices, attention turns to selecting materials and gasket types that deliver the longest reliable service.
Durable options include EPDM and silicone for flexibility and chemical resistance; reinforced rubber with fabric offers added strength.
Choose OEM-matched shapes and high-density neoprene for valve seals.
Prefer corrosion-resistant metal components and quality installation to maximize gasket lifespan and prevent premature failure.
How water quality affects gasket lifespan
Because minerals, chlorine, and pH levels directly interact with gasket materials, water quality is a primary determinant of gasket lifespan.
Hard water deposits cause abrasion and deformation; chlorine and acidic or alkaline conditions accelerate degradation and swelling.
Regular flushing, installing a water softener or neutralizer, and using resistant gasket compounds minimize chemical attack, extend service life, and reduce replacement frequency.
Useful Variations and Special Cases
When working on older or non-standard toilets, additional measurements and specialty gaskets may be required to guarantee a proper fit.
One-piece models and units with integrated tanks can have confined access or molded seals that change the removal and installation steps.
It is often practical to replace related seals—such as the fill valve gasket and flapper—to restore full tank reliability while the unit is already disassembled.
Replacing gaskets on older or non-standard toilets
Although older and non-standard toilets share the same basic sealing principles as modern models, their gasket designs, materials, and mounting configurations often differ enough to require special attention.
Identification of original parts, measurement of unusual flange sizes, sourcing compatible rubber, cork, or fiber gaskets, and adapting hardware or using specialty kits prevents leaks.
When uncertain, document dimensions and consult manufacturers or parts suppliers.
One-piece toilets and integrated gasket considerations
One-piece toilets present unique gasket challenges because the tank and bowl form a single molded unit, often integrating seals or using non-replaceable molded flanges that differ from two-piece designs.
Service typically requires identifying manufacturer-specific replacement kits or retrofit gaskets.
If seals are molded in, repair options include specialized sealants, custom gaskets, or tank replacement; confirm model compatibility before ordering parts.
Replacing other related seals at the same time (fill valve, flapper)
Consider replacing the fill valve and flapper while accessing the tank gasket, since worn or mismatched seals often coexist. Replacing them together prevents repeat disassembly and improves long-term reliability.
Inspect all seals for hardening, cracking, or mineral buildup. Replace with compatible, quality parts; verify fit and manufacturer recommendations.
Test for correct operation and leaks before reassembling the tank to the bowl.
Tools, Parts, and Resource Checklist for the Job
A concise checklist helps guarantee the gasket replacement proceeds smoothly and without unexpected trips to the store. The technician prepares tools, spare parts, and reference materials before starting.
Essential items include durable gloves, adjustable wrench, and gasket kit; optional items speed the job. Quick reference links and manufacturer instructions prevent mistakes.
- Adjustable wrench, screwdriver set, pliers
- Gasket kit, replacement bolts, plumber’s tape
- Gloves, rags, manufacturer guide
Conclusion
A single failing toilet tank gasket can waste up to 200 gallons of water per day, underscoring the importance of timely replacement. Following the outlined steps and using proper tools helps restore a leak-free flush and prevents costly water loss. Routine checks and replacing worn gaskets extend fixture life and conserve resources. Small, prompt repairs consequently protect both household budgets and the environment, turning a minor job into meaningful savings.
