How to Bypass Float Switch on Sump Pump Safely: Risks, Alternatives, and Step-by-Step Guide
Bypassing a sump pump float switch is a temporary solution that can lead to significant risks, including flooding, electrical hazards, and potential warranty violations. While it may seem like a quick fix, it’s essential to prioritize safety by using proper isolation techniques, lockout/tagout procedures, and insulated tools. Constant monitoring is crucial, but the risks of dry-run damage and code violations persist. Instead of bypassing, consider safer alternatives such as cleaning or replacing the float, using a manual override relay, adding redundancy, or contacting a professional. For detailed procedures, alternatives, and maintenance tips, continue reading.
Understanding Why Someone Might Bypass a Sump Pump Float Switch
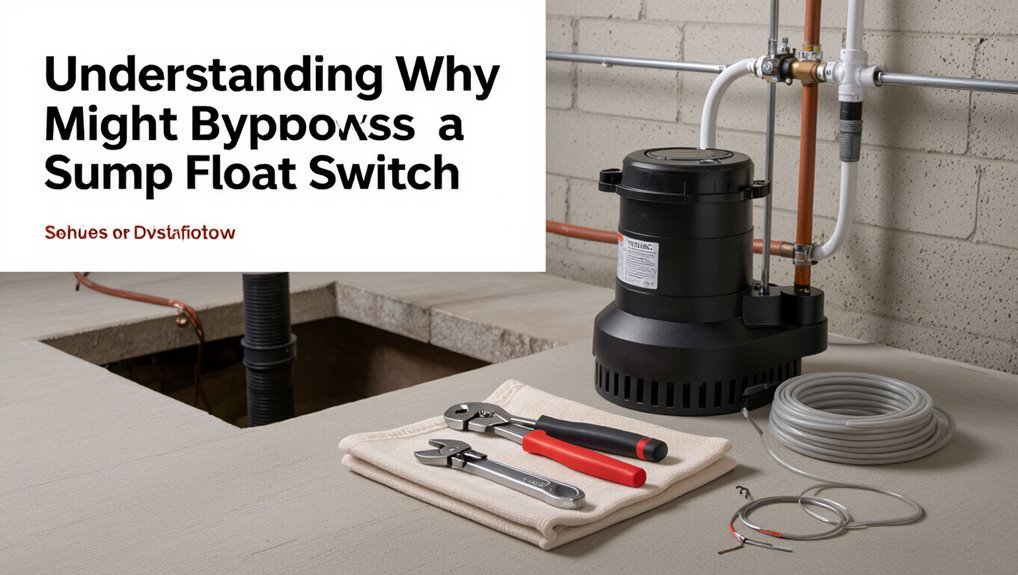
Property owners and technicians sometimes consider bypassing a sump pump float switch when intermittent switch failures, unusually high water events, or the need to test pump operation create immediate pressure to restore function.
It is important to distinguish a temporary bypass used for troubleshooting or emergency drainage from a permanent modification that alters the pump’s designed safety controls.
Such actions carry legal, warranty, and safety implications that should be weighed before proceeding.
Common scenarios that lead to considering a bypass
Homeowners and technicians sometimes consider bypassing a sump pump float switch when recurring failures, urgent flooding risk, or temporary troubleshooting needs demand an immediate response.
Common scenarios include stuck or damaged floats, intermittent electrical faults, imminent storm-driven water rise, malfunctioning control panels, or when testing how to bypass float switch on sump pump during repairs.
Decisions are often driven by time pressure and limited access to immediate replacement parts.
Difference between temporary bypass and permanent modification
When immediate risk or lack of parts prompts a quick workaround, the choice between a temporary bypass and a permanent modification frames the response: a temporary bypass restores pump operation for a limited, controlled period without altering the original system, while a permanent modification changes the pump’s behavior or wiring in a lasting way.
Temporary measures prioritize immediacy and reversibility; permanent changes prioritize long-term functionality and convenience.
Legal, warranty, and safety implications of bypassing
Many homeowners, contractors, and DIYers weigh legal, warranty, and safety implications before bypassing a sump pump float switch because the decision can shift liability, void protections, and create immediate hazards.
Insurers may deny claims after unauthorized modifications; manufacturers often void warranties. Local codes or lease agreements can prohibit alterations.
Additionally, bypassing increases risk of flooding, electrical shock, and legal exposure if damage or injury occurs.
Quick, Direct Answer: Is It Safe to Bypass a Sump Pump Float Switch?
A quick answer: bypassing a sump pump float switch is generally unsafe except in specific, controlled troubleshooting situations and should only be done with proper knowledge and precautions.
It creates risks of flooding, pump damage, electrical hazards, and voided warranties.
Bypassing is never recommended for unattended systems, long-term use, or when the homeowner cannot immediately monitor and restore safe operation.
Short verdict with key safety caveats
Although bypassing a sump pump float switch can temporarily restore operation, it is not considered safe for long-term use; doing so removes a critical automatic control and increases the risk of pump failure, flooding, electrical hazard, and voided warranties.
Short verdict: only tolerated briefly as an emergency measure by a competent person.
Always prioritize restoring proper automatic control, follow electrical safety rules, and document temporary fixes.
When a bypass is never recommended
When automatic control is essential—such as during unattended periods, heavy rain forecasts, or in basements housing irreplaceable items—bypassing the sump pump float switch is never recommended because it eliminates critical fail-safes and markedly raises the risk of unnoticed pump failure, electrical hazard, and catastrophic flooding.
Emergency systems, insurance requirements, multi-level sumps, and situations with vulnerable occupants also prohibit bypassing; professional repair or approved redundancy is advised.
How a Sump Pump Float Switch Works
Float switches come in several types—vertical, tethered, and solid-state electronic—each using a different mechanism to sense water level and signal the pump.
The float’s signal is integrated into the pump’s control circuit or controller to start and stop the motor, and some systems include alarms or backup logic.
Common failure modes include stuck or waterlogged floats, broken tethers or wiring faults, and electronic sensor failures, which typically present as a pump that runs continuously, fails to start, or cycles erratically.
Types of float switches (vertical, tethered, electronic)
A sump pump uses several common float-switch designs—vertical, tethered, and electronic—each offering different actuation methods and installation considerations.
Vertical floats slide on a rod for precise on/off points and compact wells.
Tethered floats swing freely, tolerating debris but requiring clearance.
Electronic sensors use solid-state detection, offer adjustable sensitivity, and eliminate mechanical wear but depend on power and circuitry.
How the float integrates with the pump control system
Having outlined common float designs, the explanation now turns to how those devices interface with the pump’s control system.
The float actuates a switch—mechanical, magnetic, or electronic—that completes or breaks the pump’s power circuit. Signals may feed a relay, controller, or alarm module.
Integration includes mounting, wiring, and debounce or delay features to prevent rapid cycling while ensuring reliable on/off thresholds.
Typical failure modes and diagnostic signs
Detecting common failure modes begins with recognizing how the switch should behave under normal conditions: it must move freely, make reliable electrical contact at set levels, and return to its rest position without delay.
Typical failures include mechanical binding from debris, float punctures causing water ingress, switch contact corrosion or pitting, misaligned linkages, and intermittent wiring or connector faults.
Audible clicks and irregular cycling indicate issues.
Risks and Consequences of Bypassing the Float Switch
Bypassing a sump pump float switch can greatly increase the likelihood of flooding and consequent property damage if the pump runs uncontrolled or fails to activate when needed.
It also raises the chance of pump overheating, dry-running, and motor failure, and creates electrical hazards that may lead to shock or fire.
Additionally, such modifications can void warranties, violate insurance terms, and fail to meet local electrical or building codes.
Flooding and property damage risks
If the float switch is bypassed, the sump pump can run uncontrolled or fail to activate when water rises, greatly increasing the likelihood of basement flooding and associated structural, electrical, and personal property damage.
Floodwater can warp floors, ruin drywall and insulation, corrode appliances, and compromise electrical systems.
Insurance claims, costly repairs, mold growth, and loss of irreplaceable items are common consequences of such failures.
Risk of pump overheating, dry-running, and motor failure
A malfunctioning or intentionally overridden float switch can allow a sump pump to run without adequate water, leading to rapid overheating, increased friction in bearings, and insulation breakdown in the motor windings.
Continuous dry-running accelerates wear, lowers efficiency, and can warp seals and impellers. Resulting motor failure often requires costly replacement and can leave a property unprotected during subsequent high-water events.
Electrical hazards and fire risk
Many homeowners underestimate the electrical hazards and fire risk introduced when a float switch is defeated.
Defeating safeguards can permit pumps to run under unsafe conditions, causing overheating, electrical arcing, and insulation breakdown.
Wet environments amplify short-circuit and ground-fault risk, potentially igniting nearby combustibles.
Faulty or overloaded wiring and neglected thermal protection increase likelihood of electrical fire and property damage.
Impact on warranty, insurance, and code compliance
Beyond the immediate electrical and fire hazards, disabling a sump pump float switch can carry significant legal and financial repercussions.
Manufacturers typically void warranties for unauthorized modifications. Insurance claims for flooding or damage may be denied if tampering is discovered.
Local building codes and permit requirements can be violated, risking fines and liability.
Professional inspection and documented repairs preserve coverage and compliance.
Safe Alternatives to Bypassing the Float Switch
Reasonable alternatives to bypassing a sump pump float switch focus on restoring proper function or adding redundant safeguards.
Options include troubleshooting and repairing the existing float, replacing it with a compatible unit, or installing a secondary safety control or alarm; tethered or electronic backup floats are also viable.
For short-term needs, a protected constant-run float override can be used briefly while a permanent fix is arranged.
Troubleshooting and repairing the existing float switch
Begin by visually inspecting the float switch assembly for obvious damage, obstructions, or misalignment that could prevent proper movement; dirt, corrosion, tangled wiring, or a stuck float are common and often resolvable causes.
Test operation manually, clean contacts, tighten loose connections, and remove debris.
Verify switch continuity with a multimeter and lubricate pivot points.
If intermittent, secure wiring and retest under simulated water level.
Replacing the float switch with a compatible new unit
Replacing a faulty float switch with a compatible new unit restores automatic operation and preserves safety.
A replacement should match voltage, amperage, mounting type, and float style. Power is disconnected before removal; wiring is documented and terminals secured.
Test the new switch through full travel and verify pump activation. Use manufacturer-approved parts and consult specifications to guarantee reliable, code-compliant performance.
Installing a secondary safety control or alarm
Install a secondary safety control or audible alarm to provide backup protection when a primary float switch fails or is disabled.
A secondary control monitors water level independently and triggers pump or alarm before overflow.
Hardwired or wireless alarms, high-water probes, or relay-based cutoff modules offer redundancy.
Choose devices rated for wet environments, follow manufacturer wiring guidelines, and test regularly to guarantee reliable operation.
Using a tethered or electronic backup float switch
Using a tethered or electronic backup float switch provides a reliable, code-compliant alternative to bypassing the primary float.
Tethered switches use a simple weighted float and adjustable cord to trigger the pump at a predetermined level, while electronic (solid-state) sensors detect water via conductivity or ultrasonic measurements and offer compact, no-moving-parts operation.
Both types install alongside the primary float, providing independent activation, adjustable setpoints, and reduced mechanical failure risk.
Adding a protected constant-run float override for temporary use
One practical temporary alternative is a protected constant‑run float override that forces the pump to operate continuously while preserving key safety limits.
It uses a fused, time‑limited relay or GFCI‑protected circuit and a high‑level backup float to prevent overflow.
Installation is temporary, by qualified personnel, documented, and monitored; it reduces risk compared to unprotected manual bypasses but is not a permanent solution.
Tools, Materials, and Preparations Before Any Intervention
Before attempting any modification, the necessary tools and personal protective equipment should be identified and gathered, including insulated hand tools, gloves, eye protection, and a voltage tester.
The power source must be isolated and locked out following standard electrical safety procedures, while the pump and basin should be inspected for damage, debris, and proper float movement to determine serviceability.
If there is any uncertainty about wiring, electrical components, or complex mechanical issues, a licensed electrician or plumber should be contacted.
Required tools and safety equipment
Several essential tools and safety items are needed to perform any intervention on a sump pump float switch: a multimeter for voltage checks, insulated screwdrivers and pliers, wire strippers and connectors, replacement float or bypass components, waterproof electrical tape, and a portable ground-fault circuit interrupter (GFCI) or extension cord with built-in protection.
Also required are protective gloves, safety goggles, nonconductive footwear, a flashlight, and a sturdy bucket.
Electrical isolation and lockout procedures
After gathering tools and personal protective equipment, the next step is to guarantee complete electrical isolation of the sump pump circuit and implement lockout/tagout measures.
Verify circuit breaker OFF, label and lock breaker using approved padlocks and tags.
Test with a non-contact voltage tester and multimeter to confirm zero voltage.
Only proceed when isolation is confirmed and documentation is completed.
How to assess pump and basin condition
A concise visual and tactile inspection of both pump and basin establishes the baseline condition and identifies immediate hazards or failures that must be addressed before any intervention.
Check for corrosion, cracks, debris, sediment buildup, loose fittings, damaged seals, and worn impellers.
Verify float movement, discharge obstruction, and secure mounting.
Note rusted wiring insulation and moisture accumulation for remediation planning.
When to call a licensed electrician or plumber
Certain situations clearly warrant calling a licensed electrician or plumber before attempting any work on a sump pump.
Serious electrical faults, persistent tripping breakers, corroded wiring, or unknown wiring configurations require an electrician.
Recurrent failures, hydraulic issues, cracked basins, or complex plumbing connections call for a plumber.
When flooding risk, insurance concerns, or unfamiliarity with codes exist, engage a professional to guarantee safety and compliance.
Step-by-Step Guide: Temporarily Bypassing a Float Switch (Safety-First Method)
The procedure begins with ensuring the pump is de-energized and isolation is verified before any work proceeds.
Technicians then inspect the float linkage and check switch continuity, implement a controlled temporary override (mechanical or electrical), and continuously monitor pump operation and basin water level.
Finally, the original float switch is restored and the full system is tested for proper function.
Step 1 Turn off power and verify isolation
Before any work begins, power to the sump pump must be switched off at the source and confirmed dead to prevent electrocution or accidental startup.
The technician isolates the circuit at the breaker or dedicated disconnect, locks out and tags out, then uses a non-contact tester and multimeter to verify no voltage at the pump terminals.
Only proceed after confirmation and secure isolation.
Step 2 Inspect float switch linkage and test continuity
Inspect the float mechanism visually and physically to confirm linkage integrity and then check electrical continuity with a multimeter.
Assess for corrosion, bends, or binding; straighten or clean mechanical parts if accessible.
Disconnect wiring at the switch, set the meter to continuity or resistance, actuate the float and observe readings.
Record results and photograph connections for accurate reassembly and troubleshooting.
Step 3 Create a controlled temporary override (mechanical or electrical)
Proceed to establish a controlled temporary override using either a mechanical hold or a purpose-built electrical jumper, ensuring the method chosen minimizes risk and preserves the pump’s automatic protections.
- Secure a mechanical clamp or tether to hold float without obstructing travel, test movement.
- Use an insulated, rated jumper at the switch terminals with inline fuse.
- Label override and set visible reminders to restore original wiring.
Step 4 Monitor pump operation and basin water level continuously
Begin continuous monitoring of the pump and basin immediately after the temporary override is engaged, maintaining vigilant observation of water level, pump cycling, and any unusual noises or vibrations.
Record cycle frequency, run duration, and sensor readings.
Watch for overheating, leaks, or stalls.
Keep a person nearby while bypass is active, and have manual shutoff procedures ready if abnormal behavior or rising water threatens flooding.
Step 5 Restore original float switch and test full system
Return the float switch to its original mounting and wiring configuration, ensuring the pump is powered down before reconnecting any leads or fastening the float to its bracket.
After restoration, restore power and observe a complete automatic cycle: float rise, pump activation, drawdown, and pump stop.
Confirm proper float travel, secure wiring, and absence of leaks or unusual noises before leaving the system unattended.
Step 6 Document the temporary bypass and corrective actions
Document the temporary bypass and all corrective actions in a clear, concise record that includes dates, times, the reason for bypassing, who performed the work, the exact bypass method used, components disconnected or modified, and safety measures implemented.
Retain photographic evidence, serial numbers, and test results.
Note scheduled follow-up, replacement parts ordered, warranty implications, and communication to stakeholders.
File records per maintenance policy for future audits.
Step-by-Step Guide: Replacing a Faulty Float Switch
The procedure begins with identifying the float type and acquiring a compatible replacement.
Power should be turned off before removing the old switch, then the new unit mounted and secured.
Wiring must be reconnected to code, followed by operational and stress tests to confirm function and backup readiness.
Step 1 Identify float type and purchase compatible replacement
Begin by determining the float switch style and mounting method to guarantee a proper replacement: tethered (pendant), vertical float, electronic (solid-state), or diaphragm type, and note whether it mounts to the pump, wall, or sits freely in the basin.
Verify voltage, current rating, and connector type. Check pump compatibility and basin dimensions.
Purchase a certified replacement matching electrical and mechanical specifications.
Step 2 Power down and remove old float switch safely
With a compatible replacement on hand, power to the pump should be isolated and verified before touching the old float switch.
The technician wears insulated gloves, turns off the dedicated circuit breaker, and uses a noncontact voltage tester at the pump wiring. After confirming no power, the float is disconnected from its mount and wiring, labeling leads for replacement and removing corroded fasteners carefully.
Step 3 Install new float switch and secure mounting
Install the replacement float switch by aligning its mount with the pump’s designated bracket and feeding the labeled leads through the same conduit or strain relief used by the original.
Secure screws or clips snugly without over-tightening.
Position the float to allow full travel free of obstructions, clip or tie the cable to prevent snagging, and verify the switch moves smoothly within its planned range.
Step 4 Reconnect wiring to code and test operation
Reconnect the pump wiring to the float switch according to local electrical code and the pump manufacturer’s diagram, ensuring power is off and the correct conductors are matched to each terminal.
Use proper connectors, strain relief, and waterproofing.
Restore power briefly to verify the pump cycles when the float is moved through its range.
De-energize and resecure all covers when tests pass.
Step 5 Run stress tests and verify backups
Before returning the system to regular service, the technician should run a series of controlled stress tests and confirm that all backup safeguards operate as designed.
Simulate high inflow, verify pump cycling, check alarm triggers, and test secondary power sources like battery backups or generator transfer.
Document results, note any abnormal responses, and address faults before declaring the replacement successful and restoring normal operation.
Installing Redundant Safety Systems
The article considers adding redundant safety systems to reduce flood risk when a primary float switch is bypassed.
Recommended measures include a backup pump with automatic switchover, water-level alarms with remote notifications, and a high-level float paired to a fail-safe controller.
These layers provide independent protection and help guarantee timely response if the main system fails.
Installing a backup pump and automatic switchover
Install a backup pump and an automatic switchover system to secure continuous sump operation during primary pump failure or power interruptions.
The secondary pump, often battery- or separate-circuit powered, engages automatically when sensors detect failure or overload.
Properly size pumps, install check valves, test the transfer relay and battery backup regularly, and follow manufacturer wiring and mounting guidelines to guarantee reliable, safe redundancy.
Adding water level alarms and remote alerts
Augmenting a sump setup with water level alarms and remote alerts enhances situational awareness and response time during pump or float failures.
Battery-backed, wired or wireless sensors monitor high-water thresholds and trigger audible alarms.
Integration with SMS, app notifications, or home automation sends remote alerts for immediate action.
Regular testing, reliable power sources, and distinct alarm levels prevent false positives and guarantee timely intervention.
Integrating high-level float and fail-safe controllers
Integrating high-level float switches and dedicated fail-safe controllers creates layered protection against sump pump failure by combining independent detection with automatic emergency responses.
It guarantees redundancy, reduces single-point failure risk, and supports manual override.
Recommended components:
- Independent high-level float with separate wiring and relay.
- Fail-safe controller that triggers backup pump or alarm.
- Periodic testing schedule and documented maintenance log.
Troubleshooting Common Float Switch Problems
Common issues with float switches include floats becoming stuck from debris or basin buildup, electrical wiring faults that cause intermittent operation, and miscalibration of tethered floats leading to incorrect activation points.
Corrosion, cracks, or other physical damage can also compromise switch reliability and typically warrant replacement. Addressing these faults methodically helps determine whether cleaning, adjustment, repair, or replacement is appropriate.
Float stuck due to debris or basin buildup
Debris and mineral buildup in the sump basin can immobilize a float switch, preventing it from rising and triggering the pump. Technicians should inspect the basin for leaves, sediment, or scale and clear any obstructions before attempting further diagnostics.
After cleaning, verify free float movement, remove adhered scale with appropriate cleaners, and replace damaged floats to restore reliable operation.
Wiring faults and intermittent electrical issues
Inspect wiring and electrical connections promptly when a float switch behaves erratically, since loose terminals, frayed wires, corroded connectors, or intermittent power can mimic mechanical failure and cause the pump to cycle unpredictably or not run at all.
Check continuity with a multimeter, secure terminal screws, replace damaged cable, clean corrosion, and verify reliable power and grounding.
Log intermittent patterns for targeted repairs.
Calibration and adjustment issues for tethered floats
Adjust tethered float settings when a pump cycles too frequently or fails to activate at the desired water level, since improper calibration or misaligned linkages often underlie these behaviors.
Inspect float travel, pivot points, and cable routing. Reposition the tether clip and adjust stop length to alter cut-in/cut-out points.
Verify smooth movement without binding. Test multiple cycles at varied water levels to confirm reliable operation.
When corrosion or physical damage requires replacement
If tethered float adjustments and linkage realignment do not restore consistent cut-in/cut-out behavior, corrosion or physical damage to the float switch may be the underlying cause and replacement is warranted.
Inspect for pitting, cracked housings, compromised wiring, or seized pivots.
Replace with a compatible, waterproof float assembly; verify electrical ratings and perform functional tests before reconnecting power to guarantee reliable operation.
Cost, Time, and Materials Comparison
A brief comparison outlines estimated costs for repairing a float switch, bypassing it, or replacing the pump, along with typical time required for each option.
It also notes needed materials and labor, and highlights long-term maintenance implications and risk trade-offs.
This framework helps readers weigh short-term savings against durability and safety.
Estimated costs for repair vs bypass vs replacement
Weighing repair versus bypass versus full replacement requires comparing upfront expenses, labor time, and required materials to determine the most cost-effective and safe choice for a malfunctioning sump pump float switch. Estimated costs vary: simple float replacement is low-cost, bypass is cheap but risky, full replacement is pricier yet durable. Choose based on budget, risk tolerance, and long-term reliability.
| Option | Typical cost range |
|---|---|
| Repair | $50–$150 |
| Bypass | $10–$50 |
| Replace | $200–$800 |
Typical time required for each option
Although often overlooked, time-to-completion is a critical factor when choosing between repairing a float switch, temporarily bypassing it, or installing a new sump pump; each option carries distinct time commitments driven by complexity, required parts, and whether professional service is used.
Repair: 30–90 minutes with basic parts.
Temporary bypass: 10–30 minutes.
Full replacement: 2–4 hours or longer if plumbing/electrical work is needed.
Long-term maintenance considerations
Consider long-term maintenance as a balance of recurring costs, cumulative time investments, and the durability of parts and materials chosen; each approach—repair, bypass, or full replacement—carries distinct downstream implications for service frequency, total lifetime expense, and the likelihood of future failures.
Quantify parts costs, expected service intervals, labor hours, and replacement cycles: repairs minimize upfront spend but require frequent service, bypasses raise risk and inspection needs, replacements increase initial cost yet lower long-term interventions.
Real-World Scenarios and Case Examples
The article presents concise case examples illustrating when a temporary, correctly executed float-switch bypass prevented immediate basement flooding during a power outage.
It contrasts those with incidents where improper bypassing or neglect led to pump failure and extensive water damage.
It concludes with examples of successful upgrades to redundant pump and alarm systems that eliminated the need for hazardous temporary workarounds.
Short-term emergency bypass used correctly
Describing short-term emergency bypasses for sump pumps clarifies how homeowners and professionals can temporarily override a failed float switch to prevent immediate flooding while minimizing risk.
Examples include manually holding a test switch, using a wired temporary float at a safe height, or powering the pump via a GFCI-protected circuit for brief intervals.
Actions are documented, monitored, and followed by prompt professional repair or replacement.
Misuse leading to flooding or pump failure
Documenting several real-world incidents reveals how improper bypasses of sump pump float switches can cause severe damage.
Homeowners who rigged constant-on bypasses experienced motor burnout, burned wiring, and clogged intakes.
Others suffered basement flooding when manual overrides failed during storms.
Insurance claims frequently cited negligence.
These cases underscore that ad hoc bypasses often increase risk rather than provide reliable, temporary protection.
Successful upgrade to redundant systems
Upgrade projects converted at-risk single-point sump systems into layered defenses using dual pumps, separate power supplies, and smart controls.
Case examples describe sequential installations: primary and backup pumps with alternating duty, battery or generator backups, and monitored alarms.
Homeowners reported fewer failures and faster responses during storms.
Maintenance schedules and documented wiring prevented interference with original float switches and guaranteed reliable redundancy.
Safety Checklist Before Restoring Normal Operation
Before returning the system to normal, the technician verifies electrical connections and confirms ground-fault protection is intact.
They observe float and pump performance under load, test alarms and backup systems for proper response, and record all maintenance actions.
Finally, stakeholders are informed of the work and any follow-up recommendations.
Verify electrical connections and ground-fault protection
Inspect the electrical connections and ground-fault protection to guarantee safe restoration of the sump pump to normal operation.
A qualified person should confirm tight, corrosion-free wiring, correct conduit and strain reliefs, and secure outlet connections.
Test the GFCI or circuit breaker for proper tripping and reset behavior.
Document any faults, repair with appropriate parts, and only restore power after verification.
Confirm float and pump operation under load
With electrical connections verified and ground-fault protection confirmed, the next step is to confirm float and pump operation under load to ascertain the system will perform as expected.
Fill the basin to normal high level, observe float travel and engagement, verify pump starts promptly, monitor current draw and discharge flow, watch for cycling or hesitation, and check for leaks or overheating before restoring regular service.
Ensure alarms and backups are functional
Once the primary pump and float have proven reliable under load, attention turns to confirming that alarms and backup systems will activate and sustain operation during a failure.
Test audible and visual alarms, verify battery backup charge and runtime, inspect secondary pump function and switch-over mechanisms, and confirm power-transfer or generator readiness.
Replace faulty components and document test results before restoring normal operation.
Record maintenance and inform stakeholders
After confirming alarms and backups operate reliably, maintenance activities and observations should be documented and communicated to all relevant parties.
Records must include dates, personnel, procedures performed, parts replaced, test results, and any temporary bypass details.
Notify facility managers, safety officers, and insurance contacts of actions and residual risks.
Retain logs for inspections and schedule follow-up maintenance to restore permanent safeguards.
Final Recommendations and Best Practices
The article recommends never bypassing a float switch when wiring is damaged, persistent pump failure occurs, or flooding risk is high, and to contact a licensed professional in those situations.
It emphasizes designing redundancy—dual pumps, backup power, and audible or remote alarms—rather than relying on temporary bypasses.
Routine inspections and seasonal maintenance are advised to verify float operation, check wiring and seals, and test backups before wet seasons.
When to never bypass and seek professional help
When should a homeowner refuse to bypass a sump pump float switch and call a professional instead?
If electrical wiring is unclear, corrosion or damage exists, repeated failures occur, or the pump controls sewage or critical equipment, professional diagnosis is required.
Also seek help when flooding risk is high, insurance implications arise, or local codes may be violated—avoid DIY in complex, hazardous, or uncertain situations.
Prioritizing redundancy and alarms over bypasses
Given situations that warrant professional help, homeowners should shift focus from temporary bypasses to permanent safeguards: redundant pumps, dual float switches, battery- or generator-backed power, and audible/remote alarms.
Prioritizing redundancy and monitored alerts minimizes failure risk, reduces emergency interventions, and preserves property. Investments should target reliable components, professional installation, and alarm systems that notify occupants or services promptly for rapid response.
Routine inspection and seasonal maintenance
Regular quarterly and seasonal inspections keep sump pump systems reliable and reduce emergency failures.
The practitioner should follow concise maintenance tasks and document condition, functionality, and alarms.
Recommended actions:
- Test pump operation, float travel, and check valve integrity.
- Clean sump pit, remove debris, and verify discharge line clearance.
- Inspect backup power, alarm batteries, and schedule professional service annually.
Conclusion
Bypassing a sump pump’s float switch breeds brittle balance: practical people prefer prudent prevention. While some seek speed and simplicity, shortcuts summon serious safety setbacks—scalding, shorting, sewage spill, structural strain. Sensible solutions stress scheduled service, sturdy sensors, secondary systems, and smart switches. Prioritize professional preparation, proper parts, and protective practices. Ultimately, responsible homeowners reduce risk, retain reliable rescue resources, and restore robust, regulated runoff management rather than risky, reactive repairs.