How to Winterize a Home Plumbing System: A Step-by-Step Guide to Prevent Freezing Pipes
Winterizing your home plumbing system is essential to prevent frozen pipes and costly water damage. To effectively winterize, start by insulating exposed pipes, lowering your water heater temperature to 120°F, and shutting off and draining outdoor lines and irrigation systems. Additionally, seal gaps in basements, crawlspaces, and attics, and consider installing heat tape in vulnerable areas. Test leak detectors and shutoff valves regularly. By conducting monthly checks and following a pre-freeze timeline, you can significantly reduce the risk of plumbing issues. This guide will provide detailed steps, costs, and highlight common pitfalls to avoid.
Why Winterize Your Home Plumbing System Now
Frozen pipes can burst, causing water damage, mold growth, and costly emergency repairs.
Homeowners should act before temperatures regularly drop below freezing and when weather forecasts predict sudden cold snaps.
Preventive winterization typically costs a fraction of post-freeze repair bills, making timely action economically sensible.
Risks of frozen pipes and common consequences
Bursting pipes, hidden leaks, and compromised heating systems are common outcomes when a home’s plumbing is exposed to prolonged subfreezing temperatures.
Frozen pipes can split, causing extensive water damage, mold growth, and costly repairs. Loss of water service and ruined appliances are frequent.
Understanding how to winterize a home plumbing system reduces these risks, preserves structural integrity, and prevents emergency expenses.
Seasonal timing and weather triggers for freezing
Because temperatures can plunge below freezing suddenly and persist for days, homeowners should begin winterizing plumbing well before the cold season peaks.
Early action protects against unpredictable cold snaps, late-season frosts, and rapid temperature swings.
Monitoring forecasts, local frost dates, and wind-chill advisories guides timing.
Preparedness reduces emergency repairs, minimizes water damage risk, and preserves home comfort and safety throughout winter.
Cost comparison: prevention vs. repair
Many homeowners find that a modest investment in winterizing—insulating exposed pipes, sealing gaps, and draining outdoor lines—costs a small fraction of the expense and disruption caused by post-freeze repairs.
Typical preventive actions range from inexpensive DIY supplies to professional pipe insulation, generally costing tens to a few hundred dollars, versus repairs, water damage remediation, and higher heating bills that can total thousands.
Quick Checklist: Winterize Plumbing in 10 Minutes (Direct Action Steps)
When temperatures drop, a focused 10-minute checklist lets a homeowner complete the essential steps to protect exposed pipes, drains, and outdoor fixtures from freezing.
Quickly shut off and drain outdoor spigots, open cabinet doors for warm air, and set thermostats no lower than 55°F.
Follow this concise sequence to minimize risk and act before prolonged cold.
- Shut off and drain outdoor spigots
- Open cabinets and run faucets
- Maintain thermostat ≥55°F
Tools and Materials You’ll Need
A concise list of tools and materials helps homeowners prepare for winterizing tasks safely and efficiently.
Essential hand tools, pipe insulation and heat tape, and portable heat sources are covered, along with guidance on product selection.
Clear criteria indicate which situations warrant calling a professional plumber.
Essential tools for homeowners
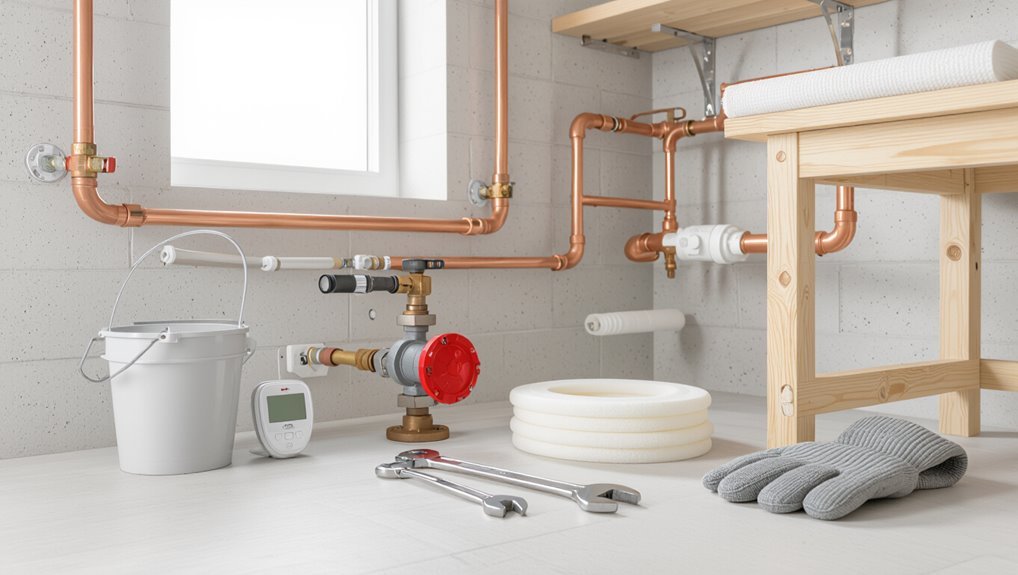
Several basic tools and materials make winterizing a home’s plumbing straightforward and effective. A homeowner benefits from a reliable adjustable wrench, pipe wrench, pliers, screwdriver set, utility knife, and tubing cutter.
Also useful are a portable shop vacuum, bucket, plumber’s tape, pipe caps or plugs, drain snake, and a thermometer. Safety gloves and goggles complete the essential kit for safe, efficient winterizing.
Recommended insulation products and heat sources
Which insulation and heat options best prevent freeze damage depends on pipe location, climate severity, and budget.
Recommended choices include foam pipe sleeves for exposed indoor pipes, fiberglass wrap for irregular shapes, and closed-cell spray foam for gaps.
For cold basements or crawlspaces, use thermostatically controlled heat tape, low-wattage radiant cables, or space heaters with thermostat control, prioritizing UL-listed products and proper installation.
When to call a professional plumber
When basic winterizing steps encounter stubborn leaks, frozen pipes, damaged insulation, or complex shutoff and backflow issues, a licensed plumber should be called to assess and repair the problem safely.
Professionals handle pipe thawing, pressure testing, permanent insulation upgrades, and code‑compliant backflow prevention.
Homeowners should contact a licensed, insured plumber for emergencies, thorough winter prep, or when DIY efforts cannot guarantee reliable, long‑term protection.
Step-by-Step Guide to Winterizing Indoor Plumbing
The following steps outline practical actions to winterize indoor plumbing, from adjusting the water heater temperature and insulating the tank to draining and shutting off interior lines in seasonal homes.
It covers protecting exposed pipes in basements, crawlspaces, and attics using pipe insulation, heat tape, and thermostatic heat cables applied per manufacturer instructions.
The guide also addresses sealing gaps and improving indoor airflow to reduce freeze risk in vulnerable areas.
Lowering the water heater temperature and insulating the tank
Reduce the water heater’s temperature and add insulation around the tank to lower energy use and protect plumbing during freezing conditions.
Set thermostat to 120°F (49°C) to reduce heat loss and scald risk.
Install a fitted insulation blanket, sealing around fittings and vents without covering combustion access or controls.
Check for manufacturer guidelines and maintain periodic inspections to guarantee safe, efficient operation.
Draining and shutting off interior water lines for seasonal homes
After lowering the water heater temperature and adding tank insulation, attention shifts to preparing interior water lines for extended vacancy.
The occupant locates and shuts main and isolation valves, then opens faucets and drain valves to remove standing water.
Appliances receive winterization: drain lines and add antifreeze where required.
Finally, the property is checked for residual moisture and valves secured for the season.
Protecting exposed pipes in basements, crawlspaces, and attics
Because basements, crawlspaces, and attics are often the coldest, exposed pipes in these areas must be insulated, sealed, and monitored to prevent freezing and rupture.
Inspect for drafts, gaps, and moisture; seal openings with caulk or foam.
Elevate pipes off cold surfaces, maintain consistent indoor temperatures, and install access panels for periodic checks.
Document vulnerable runs for winter monitoring.
Using pipe insulation, heat tape, and thermostatic heat cables correctly
A few targeted measures—properly applied pipe insulation, heat tape, and thermostatic heat cables—prevent freeze damage along vulnerable indoor runs by maintaining pipe temperature and reducing heat loss.
Install foam or fiberglass sleeves sized to pipe diameter, secure seams, and keep insulation dry.
Apply manufacturer-recommended heat tape or thermostat-controlled cables to bare pipes, avoiding overlap; use GFCI protection and follow installation instructions precisely.
Sealing gaps and improving indoor airflow to vulnerable areas
Several targeted steps reduce cold air infiltration and promote warmer circulation around vulnerable pipes.
Seal gaps around exterior walls, vents, and utility penetrations with caulk or expanding foam.
Insulate crawlspace hatch and attic access.
Reposition furniture and clear obstructions to encourage airflow to cupboards, basements, and utility rooms.
Install door sweeps and adjust HVAC vents to maintain steady, warm air movement near plumbing.
Step-by-Step Guide to Winterizing Outdoor Plumbing
The section explains how to shut off and drain outdoor hose bibs, irrigation lines, and sprinkler systems to prevent freeze damage.
It compares sprinkler winterization methods—compressed-air blowout versus low-point drainage—and covers protecting aboveground pipes, meters, and fixtures.
Guidance also includes storing hoses and insulating external components for the season.
Shutting off and draining outdoor hose bibs and irrigation systems
Shut off and drain outdoor hose bibs and irrigation lines to prevent freeze damage and costly repairs; this process isolates water sources, evacuates trapped water, and reduces the risk of burst pipes.
Close interior shutoff valves, open bibs to drain, remove hoses, and operate any isolation valves for irrigation zones.
Use drain caps or venting to guarantee complete emptying before temperatures drop.
Winterizing sprinkler systems: blowout vs. low-point drainage
After draining hose bibs and irrigation lines, attention turns to sprinkler systems, where two common winterizing methods exist: compressed-air blowout and low-point drainage.
The blowout uses regulated air to expel water from pipes and heads; it requires proper pressure and experienced operators to avoid damage.
Low-point drainage relies on gravity, zone valves and drain points, suitable for simpler or gravity-fed layouts.
Protecting aboveground external pipes and meters
Inspect aboveground external pipes and meters for exposure and vulnerability before temperatures drop.
Identify uninsulated runs, loose fittings, and meter housings.
Apply foam pipe sleeves, fiberglass wrap, or heat tape rated for outdoor use; secure materials against wind.
Protect meter boxes with removable insulated covers, seal gaps around service entrances, and guarantee drainage away from exposed components to prevent ice buildup and damage.
Storing hoses and insulating external fixtures
Begin by removing and draining all garden hoses and disconnecting any quick‑connect fittings to prevent trapped water from freezing and damaging connections.
Store hoses in a dry, unheated shed or garage coiled on racks or in breathable bags.
Insulate spigots, backflow preventers and exposed valves with foam covers or pipe wrap, securing insulation against wind and moisture to maintain protection.
Protecting Specific Areas and Appliances
Attention to less obvious spaces and individual appliances reduces freeze risk throughout a property.
Basements, crawlspaces, and garages require targeted insulation, vapor control, and protection for any exposed plumbing, while seasonal homes need thorough long-term shutoff and draining procedures.
Specific appliances—washing machines, ice makers, humidifiers, and boiler lines—should be isolated, drained, or otherwise winterized according to manufacturer and site requirements.
Basements and crawlspaces: insulation and vapor control
When temperatures drop, basements and crawlspaces become critical points for heat loss, moisture intrusion, and frozen pipes. Properly applied insulation and vapor control reduce condensation, stabilize indoor temperatures, and protect plumbing fixtures from freeze damage.
Seal gaps, insulate rim joists and exposed pipes, install vapor barriers on soil, guarantee adequate ventilation or conditioned air supply, and monitor humidity to prevent mold and corrosion.
Garages and attached areas with plumbing
Garages and other attached spaces often contain water lines, hose bibs, water heaters, and washing machines that are particularly vulnerable to freezing and condensation.
Insulating exposed pipes, sealing penetrations between the garage and conditioned living areas, and applying weatherproof covers to exterior spigots reduces freeze risk and heat loss.
Drain and winterize washing machines, insulate water heater tanks, install door thresholds, and maintain gentle heat or sealed insulation.
Vacation homes and seasonal properties: long-term shutoff procedures
Because seasonal properties may remain unoccupied for months at a time, a thorough long-term shutoff procedure is essential to prevent freeze damage and leaks.
Shut off main water supply, drain lines and water heaters, open faucets and exterior hose bibs, and remove or bypass pressure regulators as needed.
Shut off and drain irrigation systems, label valves, leave low heat or monitored alarms, and document steps for returning occupants.
Appliances: washing machines, ice makers, humidifiers, and boiler lines
Several key appliances and dedicated boiler lines require targeted winterization to prevent freeze damage and costly repairs.
Drain and disconnect washing machine hoses, shut off ice maker water and empty its line, and flush humidifier water reservoirs.
Insulate exposed boiler feed and return pipes with foam or heat tape, check seals, and verify the boiler’s antifreeze level or circulating pump operation to maintain system protection.
Detecting and Responding to Frozen or Burst Pipes
Signs of a pipe beginning to freeze—such as reduced flow, frost on exposed lines, or unusual noises—should be checked visually and by touch only after ensuring power to nearby heaters is safe.
If a pipe is frozen, gradual thawing with a hair dryer or heat lamp applied from the faucet toward the blockage is recommended, while a burst pipe requires immediate shutoff of the main water supply and containment of leaking water.
The following section outlines safe inspection steps, step-by-step thawing methods, emergency water-damage mitigation, and criteria for when to cut the water entirely.
Early signs of freezing and how to check pipes safely
How can homeowners tell when pipes are beginning to freeze, and what quick checks are safe to perform before conditions worsen?
Indicators include reduced water flow, discolored water, cold pipe surfaces, and frost or condensation on exposed lines.
Safely inspect accessible sections—basement, crawlspace, exterior walls—without applying heat.
Listen for unusual sounds and shut off main valve if leaks or bulging appear, then call a plumber.
How to thaw frozen pipes step-by-step
If a homeowner confirms a frozen section or suspects a burst pipe after the preliminary checks, immediate, measured steps can prevent further damage.
Shut main valve if leakage appears, open affected faucets to relieve pressure, and apply gradual heat: electric hair dryer, heat lamp, or warm towels working toward the frozen area.
Never use open flame.
Monitor for leaks; if thawing fails, contact a plumber.
Emergency steps for a burst pipe and water damage mitigation
Act quickly when a burst pipe is detected: isolate the water supply by closing the main shutoff valve, open nearby faucets to drain remaining water, and turn off electricity to affected areas if flooding approaches electrical outlets or appliances.
Contain spread with towels, buckets, and plastic sheeting; move valuables to dry areas. Photograph damage, ventilate spaces, and contact a licensed plumber and insurance provider promptly for repairs and claims.
When to shut off the main water supply
When should the main water supply be shut off is a critical decision when pipes are suspected of freezing or have burst; immediate shutoff is warranted upon visible leaks, rapidly rising water levels, or when multiple fixtures fail to deliver water.
After shutting off, drain lines by opening faucets and flushing toilets. Document damage, and call a qualified plumber.
Restore service only after repairs and pressure checks.
Maintenance, Monitoring, and Prevention Strategies
A concise winter readiness plan centers on a regular maintenance schedule that inspects insulation, valves, and outdoor fixtures before cold weather arrives.
Integration of smart thermostats, leak detectors, and remote monitoring helps detect anomalies early and reduce emergency repairs.
When temperatures rise, prescribed seasonal tasks—such as restoring water to outdoor lines and testing shutoff valves—ensure a safe, efficient return to normal plumbing operation.
Regular maintenance schedule for winter readiness
Establishing a consistent maintenance schedule secures the plumbing system remains reliable through freezing temperatures and heavy winter use.
Inspections, seasonal servicing, and prompt repairs are scheduled monthly or pre-winter. Documentation tracks tasks, dates, and outcomes to guarantee accountability and budgeting.
Prioritize vulnerable areas and adjust frequency after severe weather or repairs.
- Inspect vulnerable pipes
- Service valves and drains
- Record and review maintenance
Smart thermostats, leak detectors, and remote monitoring options
Although electronic controls require upfront planning, integrating smart thermostats, leak detectors, and remote monitoring sharply reduces freeze and water-damage risk by enabling proactive temperature management, immediate leak alerts, and continuous system visibility.
Homeowners can schedule setbacks, monitor pipe temperatures, receive push or email notifications, and automate shutoff valves.
Choose interoperable devices, verify battery and network reliability, and test systems before cold weather arrives.
Seasonal tasks to reverse winterization in spring
Begin spring by systematically reversing winterization measures to restore normal plumbing operation while preventing damage from late cold snaps and debris.
Reopen shutoff valves, disconnect drain plugs, and slowly re-pressurize systems.
Inspect outdoor faucets, hoses, and irrigation for cracks; flush water heaters and check pressure relief valves.
Test indoor fixtures for leaks, verify sump pump function, and reset thermostats and monitoring devices.
Common Mistakes and How to Avoid Them
Common mistakes during winterization include improper insulation and incorrect heat tape installation that leave pipes exposed or create fire hazards.
Small vulnerabilities such as vents, crawlspace doors, and attic hatches are often overlooked yet can undermine other precautions.
Homeowners should recognize DIY limits and call a professional when leaks, frozen pipes, or complex systems are involved.
Incorrect insulation and heat tape installation errors
Mistakes in insulating pipes and applying heat tape often stem from improper material choice, incorrect sizing, or failure to follow manufacturer instructions. These errors greatly increase the risk of frozen or burst pipes.
Common faults include gaps, compressed insulation, wrong R‑value, overlapped or underpowered heat tape, and lack of proper sealing.
Correctly match materials, follow installation guides, and test power continuity.
Overlooking small vulnerabilities (vents, crawlspace doors, attic hatches)
After addressing insulation and heat‑tape errors, attention must turn to small vulnerabilities—vents, crawlspace doors, and attic hatches—that often undermine winterization efforts.
These openings permit cold drafts and moisture, exposing nearby pipes. Inspect seals, install weatherstripping, close vents when appropriate, and insulate hatch covers.
Document and retest after severe weather to guarantee previously overlooked gaps no longer compromise pipe protection.
DIY limits and signs you need professional help
When a homeowner assesses winterization tasks, it helps to recognize which jobs fall within typical DIY skill and which require a qualified tradesperson: simple actions like sealing gaps, adding insulation, and installing basic heat tape can be handled by most competent DIYers.
Whereas diagnosing hidden freeze risks, rerouting plumbing, repairing compromised sewer lines, or working on gas-fired appliances should be left to licensed professionals.
Signs needing help include persistent leaks, frozen pipes recurring after fixes, mysterious pressure drops, complex pipe layouts, inaccessible crawlspaces, or any electrical or gas connections; timely professional assessment prevents costly failures.
Cost Estimates and DIY vs. Professional Services
Costs for winterizing a home vary widely, from inexpensive materials for DIY fixes to higher fees for professional services, and homeowners should weigh upfront costs against long-term savings. Below is a simple comparison of typical expenses and expected return-on-investment timelines to guide that decision. Reviewing these ranges helps determine when a professional hire is worth the cost versus a do-it-yourself approach.
| Item | Typical Cost Range | ROI Timeline |
|---|---|---|
| Insulation & pipe wrap | $10–$100 | Months to 1 year |
| Professional winterization service | $150–$500+ | 1–3 years (avoided repairs) |
| Emergency freeze repair avoided | $200–$5,000+ | Immediate to long-term savings |
Typical price ranges for materials and common professional services
A range of materials and services are involved in winterizing a home’s plumbing, and understanding typical price points helps homeowners decide whether to tackle tasks themselves or hire a pro.
DIY supplies like pipe insulation, heat tape, and faucet covers: $10–$100.
Professional services—winterization, insulation upgrades, leak repair—typically range $150–$600 depending on scope and travel.
Labor rates vary by region.
ROI timeline: how prevention saves money over time
One clear metric for evaluating winterization is payback period: the time it takes for avoided damage and reduced heating or repair expenses to equal the initial investment in materials and labor.
DIY kit costs often pay back within one season through avoided thaw repairs; professional services extend payback to one–three seasons depending on labor rates.
Long-term savings accrue from fewer emergency repairs and lower insurance claims.
Real-World Examples and Mini Case Studies
The article presents concise real-world examples of successful home winterization, highlighting specific measures that prevented pipe damage and reduced heating costs.
It also reviews common failure cases, identifying small oversights—like inadequate insulation or poorly drained outdoor lines—that led to costly repairs.
These mini case studies extract clear lessons homeowners can apply to improve their own winter-prepared plumbing.
Successful home winterization scenarios
Illustrating practical outcomes, several concise case studies demonstrate how targeted winterization steps prevented costly pipe damage, reduced heating expenses, and minimized emergency repairs in varied home types.
Each example highlights the measures taken, the conditions faced, and the measurable benefits realized so readers can apply similar strategies to their own plumbing systems.
A suburban two-story saved $1,200 in repairs after insulating exposed lines; a cabin avoided freeze during -15°F night by running a looped heat cable.
Lessons learned from common failure cases
Reviewing common failure cases reveals practical lessons that translate directly into better winterization practices.
Case studies show neglected insulation, closed vents, and unattended exterior faucets cause most ruptures.
Swift detection, routine pressure checks, and targeted insulation prevented repeat incidents.
Documentation of failures guided checklist improvements, contractor coordination, and homeowner education, reducing recurrence and repair costs while improving resilience against extreme cold.
Final Seasonal Preparation Timeline and Action Plan
A concise timeline helps prioritize tasks before freezing temperatures arrive.
The plan outlines checklists for 8 weeks, 4 weeks, and 48 hours before the first hard freeze to guarantee critical plumbing steps are completed in order.
The following checklist tiers guide timing and actions.
- 8-week checklist
- 4-week checklist
- 48-hour checklist
8-week, 4-week, and 48-hour pre-winter checklists
Eight weeks before the first hard freeze, the homeowner should begin a concise, timed sequence of inspections and tasks that ramps up at four weeks and culminates with focused checks 48 hours ahead of freezing temperatures.
This phased timeline guarantees critical systems—outdoor faucets, irrigation lines, interior shutoffs, insulation, and heating controls—are addressed in logical order so last-minute urgencies are predictable and manageable.
At eight weeks: inspect piping, clear gutters, service boiler.
At four weeks: drain irrigation, wrap exposed pipes, test alarms.
At 48 hours: shut exterior valves, open cabinet doors, set heating schedule, confirm emergency contacts and supply kit readiness.
Conclusion
As frost edges the windows and gutters don a rim of ice, the homeowner surveys the quiet house like a ship preparing for winter seas. Pipes, once bloodlines of comfort, lie wrapped and reassured; outdoor faucets stand drained and caped against the cold. Each valve turned and insulation tucked becomes a small beacon of preparedness, promising warmth and avoiding the crack of frozen calamity. The season’s hush is met with steady, careful readiness.