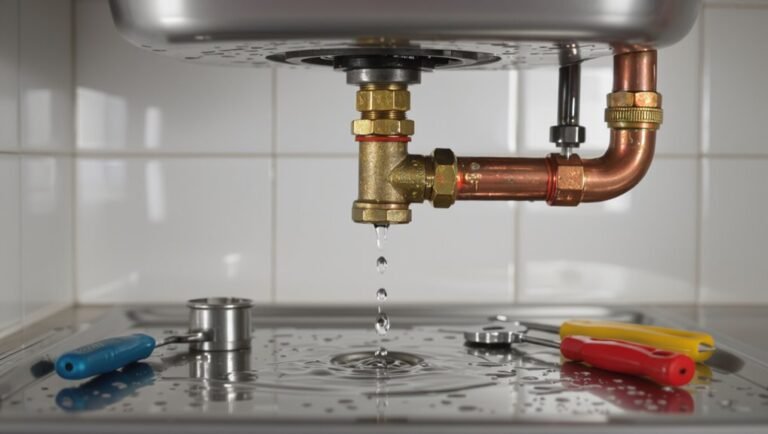
How to Fix a Pinhole in a Radiator Quickly: Step-by-Step Repair Guide
If you discover a pinhole leak in your radiator, you can quickly fix it by following these steps. First, shut off the valve and boiler, then drain the radiator below the leak and relieve any pressure. Isolate the unit, and wear gloves and goggles for safety. Clean and dry the affected area thoroughly. For a quick repair, use metal-filled epoxy or a patch kit: sand the area to bare metal, degrease it, and apply the product according to the instructions. Allow it to cure, then test the repair at low pressure. If the leak is larger or worsening, it’s best to call a qualified technician. For further details on step-by-step repair options and prevention tips, continue reading.
What to do immediately when you discover a pinhole leak in a radiator
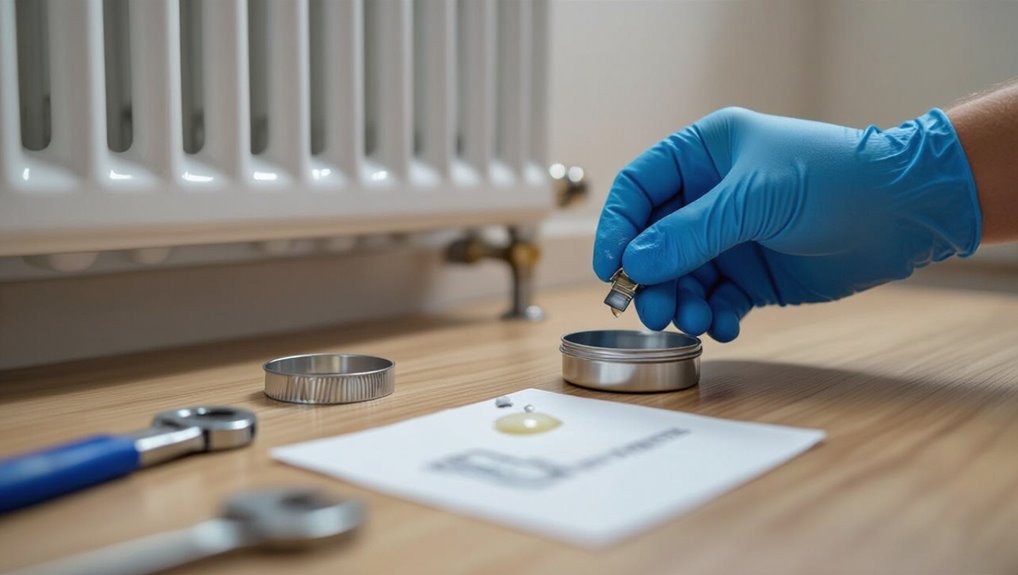
On discovering a pinhole leak, the occupant should immediately shut off the radiator valve and, if safe, the main heating supply to stop flow and reduce pressure.
Short-term containment—using a drip tray, absorbent cloths, or a temporary clamp—can limit water and heat loss until repairs begin.
If leaks worsen, steam or hot-water spray is present, or anyone is at risk, evacuation and an emergency call to a qualified professional are warranted.
How to safely shut down the system and stop the leak right away
Shut off the boiler or furnace immediately and close the radiator valves to isolate the leaking unit; this stops water flow and reduces pressure so repairs can begin safely.
Next, drain the radiator to below the leak level, open bleed valves to relieve trapped pressure, and switch off electrical components.
Document system settings and wear gloves and eye protection while preparing tools for how to fix pinhole in radiator.
Short-term containment options to limit water and heat loss
A towel or small container placed immediately beneath the pinhole can catch leaking water and limit floor damage while other measures are readied.
Then the occupant should act swiftly:
- Apply temporary adhesive tape or pipe repair putty to slow the drip.
- Wrap a rubber patch and hose clamp for pressure relief.
- Use a bowl and towel to monitor loss and keep heat contained.
When to evacuate or call an emergency professional
After applying short-term measures to limit water and heat loss, the occupant should quickly assess the severity of the pinhole and whether immediate evacuation or professional help is required.
Evacuate if flooding, scalding steam, or structural damage risk exists.
Call an emergency plumber for uncontrolled leaks, gas boiler involvement, or visible corrosion spreading.
Otherwise, arrange prompt professional repair and avoid restoring full system pressure.
Quick diagnosis: how to locate and assess the pinhole
A quick visual inspection begins by scanning the radiator type—panel, cast-iron, or column—for fresh wetness, rust spots, or paint blistering around the body and seams.
Differentiation between a pinhole and a leaking valve, joint, or internal corrosion is made by isolating the radiator (shutting valves), drying the area, and watching for the precise point of seepage or spray.
Carry a flashlight, mirror, rags, a small screwdriver or wrench, and a compression tester or pressure gauge to confirm the leak and assess its severity.
Visual inspection steps for common radiator types (panel, cast-iron, column)
Visual inspection begins with shutting off and cooling the system, then drying surfaces to reveal stains and wet spots.
For panel radiators: inspect front and bottom seams, bleed valve area, and mounting brackets.
For cast-iron: check flange faces, section seams, and pipe connections.
For column: examine column joints, bottom headers, and between fins.
Note active drips, crusted deposits, and corrosion patterns for targeted repair.
How to confirm a pinhole vs. a valve, joint, or internal corrosion issue
Begin by isolating sections and observing leak behavior under pressure: note whether water appears as a fine spray or steady drip, if moisture tracks from a seam or fitting, and whether staining follows internal flow paths.
Pinhole leaks usually produce a focused, fine jet or pinpoint seepage on the plate or column face, often surrounded by fresh mineral trails.
Whereas valve or joint failures show pooled wetting at connection points, and internal corrosion problems manifest as multiple weeps, bubbling paint, or sudden leaks after system pressure changes.
Identify the precise origin, compare wetting pattern, and confirm by drying and recharging briefly to watch for recurrence.
Tools and materials to carry for a quick assessment
After isolating and observing the leak, the inspector gathers a compact set of tools and materials for a quick assessment:
- Flashlight, mirror, and inspection camera to reveal hidden spray and tiny holes.
- Paper towel, dye, and spray bottle to confirm active seepage and pinpoint source.
- Adjustable wrench, radiator plug, and temporary sealant for immediate containment and evaluation.
Fast permanent and temporary repair methods step-by-step
The section outlines quick temporary fixes that can stop a leak in under 15 minutes, such as sealants, epoxy putty, and clamp patches.
It then presents fast permanent repair techniques suitable for non-professionals, including brazing alternatives and reinforced soldering methods.
Finally, it explains indicators that a section replacement or professional welding is required and when to seek expert service.
Temporary fixes you can do in under 15 minutes
A brief set of rapid options can stabilize a pinhole long enough to prevent major coolant loss and allow planning for a proper repair.
Consider these quick-actions to address the leak and assess urgency:
- Apply epoxy or radiator putty following quick-prep instructions to seal the hole.
- Use leak-sealing tape or a clamp applied to dry, clean metal for a short-term hold.
- Add a stop-leak compound with attention to manufacturer precautions and system compatibility.
Using epoxy or radiator putty quick application steps
Prepare epoxy or radiator putty to seal small pinhole leaks quickly by cleaning, drying, and applying the compound directly over the defect; when done properly, this method can halt coolant loss within minutes and provide either a durable permanent seal or a reliable temporary stopgap depending on the product chosen.
Mix per instructions, press firmly into the hole, smooth edges, allow full cure time, then refill and pressure-test for leaks.
Using leak-sealing tape or clamps when and how to apply safely
Apply leak-sealing tape or a clamp when quick access and minimal tools are available, choosing the method based on hole size and location: tape works for hairline cracks and weeping seams, while a clamp-and-epoxy or rubber-patch assembly suits slightly larger pinholes.
Clean and dry area, sand lightly, center patch or tape, tighten clamp evenly.
Test under low pressure, monitor for leaks and replace properly soon.
Applying radiator stop-leak compounds pros and precautions
Consider radiator stop‑leak compounds as a quick, often temporary solution for small pinholes and internal weeps when tools or time are limited. They can plug leaks without disassembly and work in minutes.
Drawbacks include clogging heater cores, reduced coolant effectiveness, and limited longevity.
Follow product instructions, use compatible formulas, run engine to circulate, and plan for proper professional repair or radiator replacement as soon as feasible.
Fast permanent repair techniques suitable for non-professionals
The section compares two fast, durable options for non-professionals: soldering or brazing small pinholes in metal radiators, and using professional-grade epoxy or metal-filled resin.
Step-by-step procedures and key safety notes for torch-based repairs are summarized alongside curing and surface-prep requirements for resin repairs.
Readers are reminded which methods suit different radiator materials and when to consult a professional.
Soldering/brazing a small pinhole on metal radiators step-by-step and safety notes
Begin by preparing the radiator and workspace for a soldering or brazing repair: drain and dry the system, clean corrosion and paint from around the pinhole with a wire brush or abrasive cloth, and mask off nearby fittings and surfaces to protect them from heat and flux.
Apply suitable flux, heat evenly with a torch, feed solder or brazing rod to fill the hole, cool slowly, clean residue, pressure-test for leaks, and observe fire safety and ventilation.
Using a professional-grade epoxy or metal-filled resin for lasting repair procedure
Apply a professional-grade epoxy or metal-filled resin when soldering is impractical or when a quick, durable repair is needed without specialized torches.
Clean and dry the area, sand to bare metal, and degrease.
Mix adhesive per manufacturer directions, apply liberally to the pinhole and surrounding metal, shape smoothly, and allow full cure.
Test under low pressure before returning to service.
When a section replacement or professional welding is required
When corrosion, multiple adjacent pinholes, or structural cracking compromises an entire radiator section, replacement of that section or professional welding becomes necessary; these interventions restore integrity where DIY patches cannot reliably hold.
A qualified technician assesses damage, removes the failed section, and either welds a durable repair or installs a matched replacement.
Post-repair pressure testing and leak verification guarantee long-term safety and performance.
Materials, tools, and safety gear checklist for a quick radiator repair
A concise checklist of tools, sealants, and safety gear helps guarantee a quick, effective radiator repair.
It should list essential hand tools and clamps for both temporary and permanent fixes, recommend specific sealants, epoxies, tapes and their suitable use cases, and note required protective equipment.
Safety precautions—cooling the system, relieving pressure, and wearing gloves and eye protection—are emphasized before any work begins.
Essential tools for temporary and permanent fixes
Gathering the right materials and safety gear before attempting a radiator repair reduces risk and speeds the job.
The list below focuses on practical items for temporary and permanent fixes, emphasizing safety, control, and durability.
- Protective gloves, eye protection, and a respirator for fumes.
- Wrenches, pliers, wire brush, and a drain pan.
- Heating source, soldering kit, and clamps for lasting repairs.
Recommended sealants, epoxies, tapes, and clamps with brief use-case notes
Select sealants, epoxies, tapes, and clamps based on the leak size, pressure exposure, and desired permanence:
Curing epoxy putty suits small pinholes and short-line repairs where coolant can be drained and the surface cleaned.
High-temperature silicone or specialty radiator sealants work for minor weeps without full disassembly but are temporary.
Self-fusing silicone or vulcanizing tape provides a quick, pressure-bearing wrap for emergency roadside fixes.
Stainless-steel hose clamps or radiator-specific repair clamps are recommended when replacing or reinforcing sections of hose or attaching patch plates.
- Relief: quick tape for immediate stop.
- Confidence: epoxy for durable patching.
- Prudence: clamps for secure reinforcements.
Safety precautions and protective equipment
After choosing an appropriate sealant, epoxy, tape, or clamp for the repair, attention must turn to safety precautions and personal protective equipment to prevent burns, chemical exposure, and injury.
Wear heat-resistant gloves, safety goggles, long sleeves, and a respirator if using solvents.
Confirm the engine is cool, work in a ventilated area, have a fire extinguisher, absorbent cloths, and a drain pan ready.
Repair workflow by radiator type and system setup
Repair steps must be adjusted to the radiator type and the larger system configuration.
Hot-water central heating radiators require draining and isolating the loop and attention to fittings and pressure testing, while steam systems need careful venting and handling of high-temperature steam and condensate.
Electric panel heaters often cannot be sealed safely and usually require component replacement or full unit swap.
Hot-water central heating radiators specific steps and considerations
Begin by identifying the radiator type and the system layout, since workflow and materials differ for cast-iron, steel-panel, and aluminum radiators as well as for sealed, open-vented, or combi boiler systems.
Drain and isolate the loop, depressurize sealed systems, and collect water.
For each material, choose compatible sealants or soldering methods, clean and prep surfaces, apply repair, pressure-test, then refill and bleed to restore system balance.
Steam radiators special handling and repair differences
For steam radiators, procedures differ markedly from hot-water systems due to higher operating temperatures, reliance on steam and condensate flow, and pressure-control devices.
Consequently, the operator must account for venting behavior, one-pipe versus two-pipe arrangements, and trap condition before attempting a pinhole repair.
Repair workflow emphasizes isolation, cool-down, minimal water use, compatible high-temperature sealants or welding, and verifying vents and traps restore proper steam flow.
Electric radiators/panel heaters when repair is not possible
When an electric radiator or panel heater has a fault that cannot be safely or effectively repaired—such as irreparable element failure, damaged internal wiring, or compromised thermal insulation—the workflow shifts from patching to safe decommissioning and replacement.
Isolate power, confirm circuit shutdown, disconnect per manufacturer guidelines, and drain any residual fluid.
Recycle components properly, document model/specs, and install a compatible replacement following electrical code and safety checks.
Testing and verifying the repair
After completing the repair, the system should be restarted gradually following a checklist to prevent sudden pressure surges.
The radiator and surrounding areas must be monitored closely for 24 to 72 hours for any signs of re-leakage, such as drips, stains, or falling pressure.
A controlled pressure test and the use of leak-detection methods (soapy water, electronic detectors) can confirm the seal before returning the system to normal operation.
Gradual system restart checklist to avoid pressure shocks
Begin by isolating the repaired radiator and preparing to reintroduce system pressure gradually: confirm bleed valves closed, guarantee drain and vent lines are secured, and verify repair material cured.
Open the system fill valve slowly, topping to low pressure. Watch manifold gauges for steady rise, pausing at increments (e.g., 0.5–1 bar) to inspect fittings.
Restore normal flow and record final pressure.
How to monitor for re-leaks and what to watch for in the following 24 to 72 hours
Several checks should be performed over the next 24–72 hours to confirm the repair holds: monitor the repaired radiator visually for drips or wet spots, feel for any dampness around seams and fittings, and inspect nearby floor or wall surfaces for staining or moisture.
Note temperature variations, listen for new hissing or dripping sounds, and recheck fittings and patch integrity periodically; document any recurrence immediately.
Pressure testing and leak detection tips
A brief pressure test helps verify the repair under realistic operating conditions.
The operator pressurizes the cooling system to the vehicle’s specified psi with a hand pump or pressure tester, watches for steady pressure loss, and inspects the repaired area for drips, seepage, or weeping under light heat.
Use dye or soapy water to reveal small leaks; document readings and retest after fixes.
Cost, time, and decision guidance: DIY vs hiring a professional
Typical temporary fixes often cost little and can be completed in under an hour, while professional repairs or replacements usually require a higher fee and several hours to a day.
Immediate professional intervention is advised if leaks are large, recurring, or accompanied by heating system failure, corrosion, or water damage.
When hiring a heating engineer or radiator specialist, priority should be given to qualified, insured technicians with clear estimates, references, and relevant certifications.
Typical costs and time estimates for temporary fixes vs professional repairs
When weighing options for a pinhole repair, homeowners should compare short-term stopgaps that take minutes to apply against professional interventions that require hours and carry higher labor and parts costs. Temporary fixes: materials $5–$50, 10–30 minutes. Professional repair: $150–$600, 1–4 hours, warranty.
| Option | Cost | Time |
|---|---|---|
| Sealant/epoxy | $5–$50 | 10–30 min |
| Patch kit | $10–$75 | 15–45 min |
| Pro service | $150–$600 | 1–4 hrs |
Signs that warrant immediate professional intervention
If the leak produces steady drips, a spreading wet area, sudden pressure loss, or discolored coolant, homeowners should treat it as requiring immediate professional attention; these signs indicate a pinhole that is likely worsening or affecting system integrity and may not respond reliably to DIY stopgaps.
Additionally, rapid heat loss, frequent boiler cycling, or visible corrosion beyond the pinhole justify hiring a professional promptly.
How to choose a qualified heating engineer or radiator specialist
How should a homeowner decide whether to attempt a DIY repair or hire a qualified heating engineer?
Assess severity, skill level, time, and safety—small, accessible pinholes may suit DIY with proper tools; larger leaks, corrosion, or central heating involvement require a pro.
Compare quotes, check Gas Safe or local accreditation, read reviews, verify insurance and guarantees, and weigh repair cost against potential damage and peace of mind.
Preventing future pinholes and extending radiator life
Preventive measures focus on regular maintenance to limit corrosion and the risk of new pinholes.
Proper water treatment, periodic system flushes, and the use of corrosion inhibitors can greatly extend radiator life.
If problems recur despite upkeep, replacement may be more economical than repeated repairs.
Maintenance routines to reduce corrosion and pinhole risk
Regularly scheduled maintenance greatly lowers the chance of corrosion and pinhole formation in radiators by keeping coolant chemistry balanced, deposits removed, and components inspected for early signs of wear.
Recommended routines include visual inspections, pressure checks, and timely part replacement. Follow these steps to protect the system and prolong service life:
- Inspect monthly for leaks and corrosion.
- Monitor pressure and temperature.
- Replace worn hoses and clamps promptly.
Water treatment, system flush, and corrosion inhibitors explained
While often overlooked, proper water treatment and periodic system flushing are essential to control corrosion and mineral buildup that cause pinholes.
Using the correct coolant chemistry and a compatible corrosion inhibitor removes electrochemical gradients and deposits that erode radiator metal.
Regular flushing eliminates contaminants, restoring flow and heat transfer.
Select inhibitors matched to radiator alloy, follow concentration guidelines, and monitor coolant condition to extend service life.
When replacement is more cost-effective than repeated repairs
Evaluate the total cost of recurring pinhole repairs against the price of a new radiator to determine when replacement becomes the prudent choice.
Consider material fatigue, extensive corrosion, repeated leak locations, and downtime expenses.
If repair frequency, cumulative labor, and diminished efficiency approach or exceed replacement cost, opt for a new unit to restore reliability, reduce future maintenance, and extend overall system lifespan.
Common mistakes to avoid when fixing a radiator pinhole
A radiator repairer must recognize the risks of using improper adhesives, overheating the system, or pressurizing it too quickly, as these actions can worsen a leak or cause a sudden failure.
Temporarily masking a pinhole without addressing underlying corrosion or damage can hide a symptom while the problem grows.
Clear, correct repairs and proper pressure and temperature control reduce the chance of a more extensive breakdown.
Risks of improper adhesives, overheating, and pressurizing too quickly
Using the wrong adhesive, overheating the repair area, or pressurizing the system too quickly can turn a simple pinhole fix into a hazardous failure: incompatible sealants may melt, crack, or react with coolant.
Excessive heat can weaken surrounding metal and coatings, and rapid pressurization can dislodge an incompletely cured patch or propagate a crack.
- Toxic fumes and melted sealant.
- Warped or weakened metal.
- Sudden leak expansion.
Why covering up a symptom can lead to bigger failures
Masking a pinhole with a quick patch or temporary sealant can conceal symptoms while leaving the underlying corrosion, stress fractures, or weakened joints unaddressed, increasing the likelihood of a larger failure later.
Ignoring root causes delays proper inspection, allows deterioration to spread, and risks sudden catastrophic leaks under pressure.
Permanent repair requires diagnosis, component replacement or professional assessment to guarantee long-term reliability.
Quick real-world scenarios and recommended actions
The guide presents three concise scenarios with clear recommended actions: a small slow leak found overnight with step-by-step immediate measures, a rapid leak during heating that requires emergency shutdown and containment, and a leak in a hard-to-reach radiator with temporary workarounds and next steps.
Each scenario focuses on safe, time‑sensitive priorities and practical materials likely to be on hand. Readers are encouraged to assess risk, act quickly, and consult a professional when repairs exceed basic temporary fixes.
Small slow leak discovered overnight step-by-step immediate actions
Discovering a small, slow radiator leak overnight calls for calm, immediate steps:
inspect area to confirm source, place a drip tray and absorbent cloths, shut off heating and isolate valve to stop flow, check coolant level in expansion tank, tighten nearby fittings gently, note leak size and time, photograph for records, ventilate room, schedule repair or temporary sealant application, monitor hourly until professional fix.
Rapid leak while heating is on emergency shutdown and containment steps
Act quickly: when a radiator begins to leak rapidly while heating is on, immediate shutdown and containment are essential to prevent water damage and scalding.
Turn off the heating system and isolate the radiator valve. Close nearby room doors, place buckets and absorbent towels beneath the leak, and evacuate occupants from the area.
Notify a qualified technician and avoid touching hot surfaces or electrical equipment.
Leak in a hard-to-reach radiator temporary workaround and next steps
When a radiator leak occurs in a cramped closet, behind furniture, or atop a tall panel, immediate temporary measures can limit damage until a professional can reach the site.
Shut off the valve and boiler, catch drips with a shallow tray, use absorbent towels, and apply a cold-set epoxy or radiator repair tape if reachable.
Arrange professional access and avoid prolonged pressure on the system.
Conclusion
When a pinhole appears, one should act quickly, one should assess calmly, one should choose wisely. The technician isolates the system, the homeowner evaluates options, the repairer selects materials. Temporary fixes halt leaks, permanent repairs restore integrity, and preventive steps extend service life. Risks are minimized by proper safety gear, costs are balanced against expertise, and outcomes improve with timely action. Confidence grows with knowledge, care, and decisive repair.